如何測試 Angular 的 ngModel?
Two-way Binding 的 ngModel非常方便,但因為這是 syntax sugar,該如何測試呢?
Version
Angular 4.3
Requirement
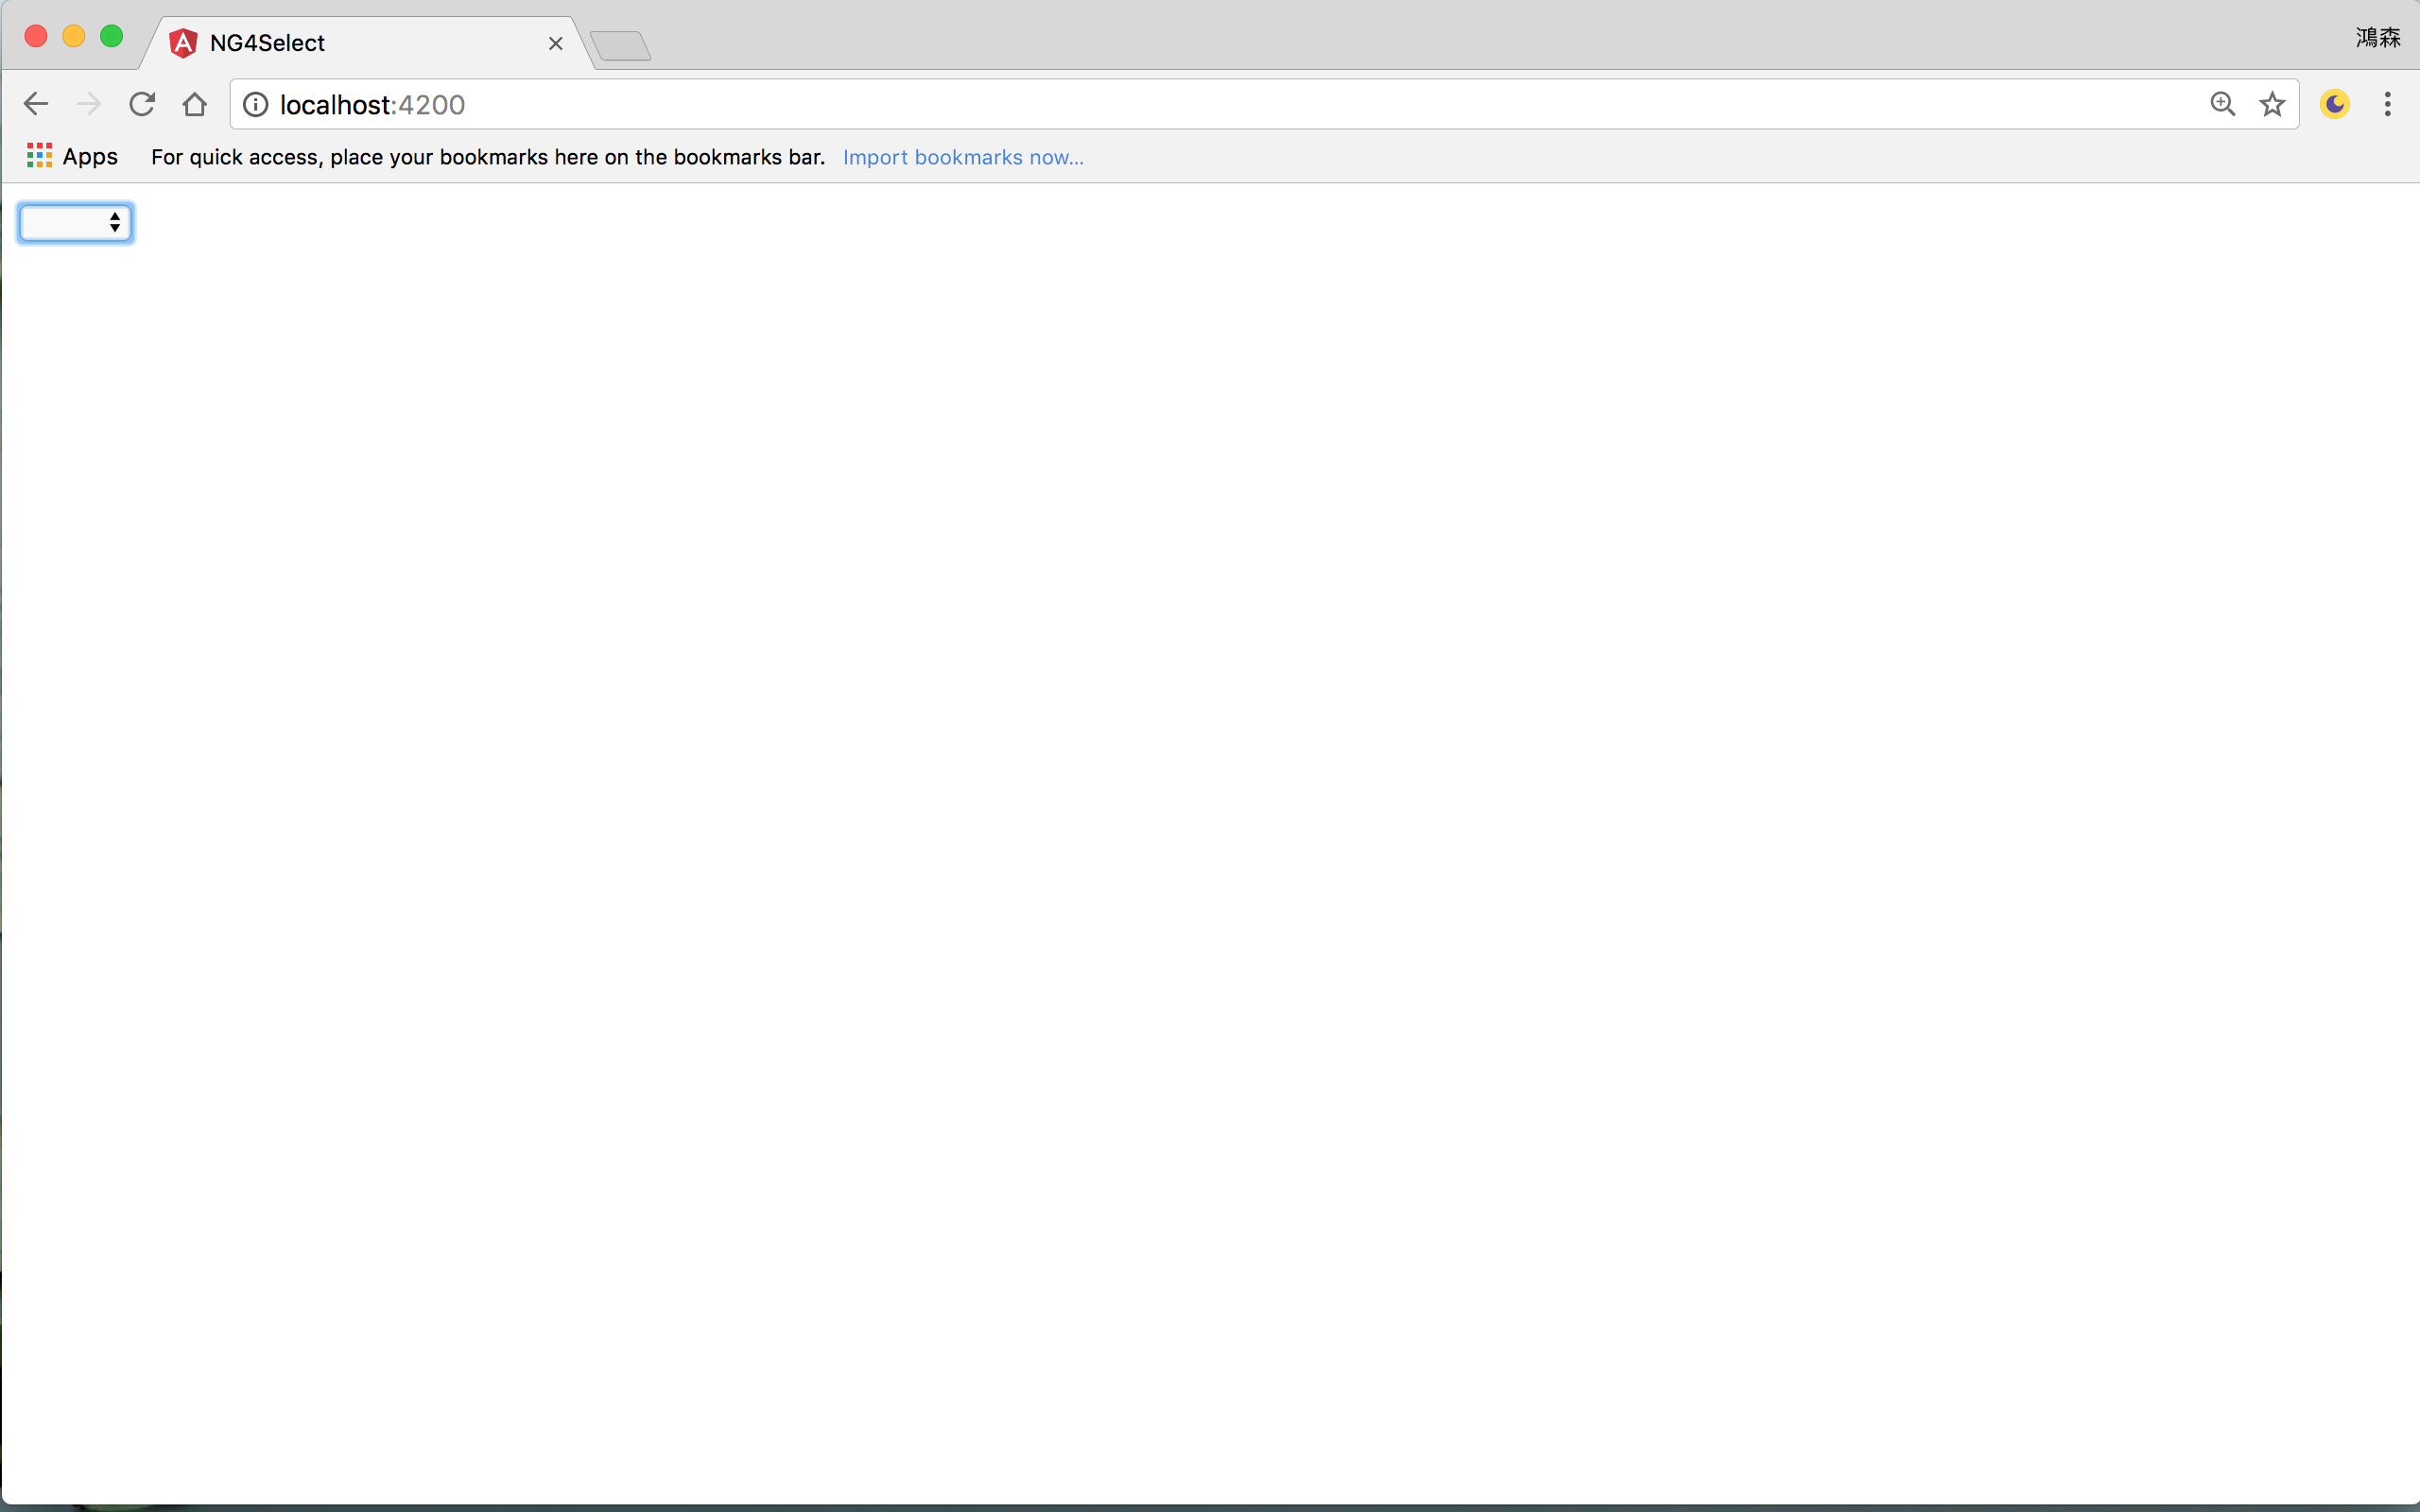
畫面有一個下拉選單。
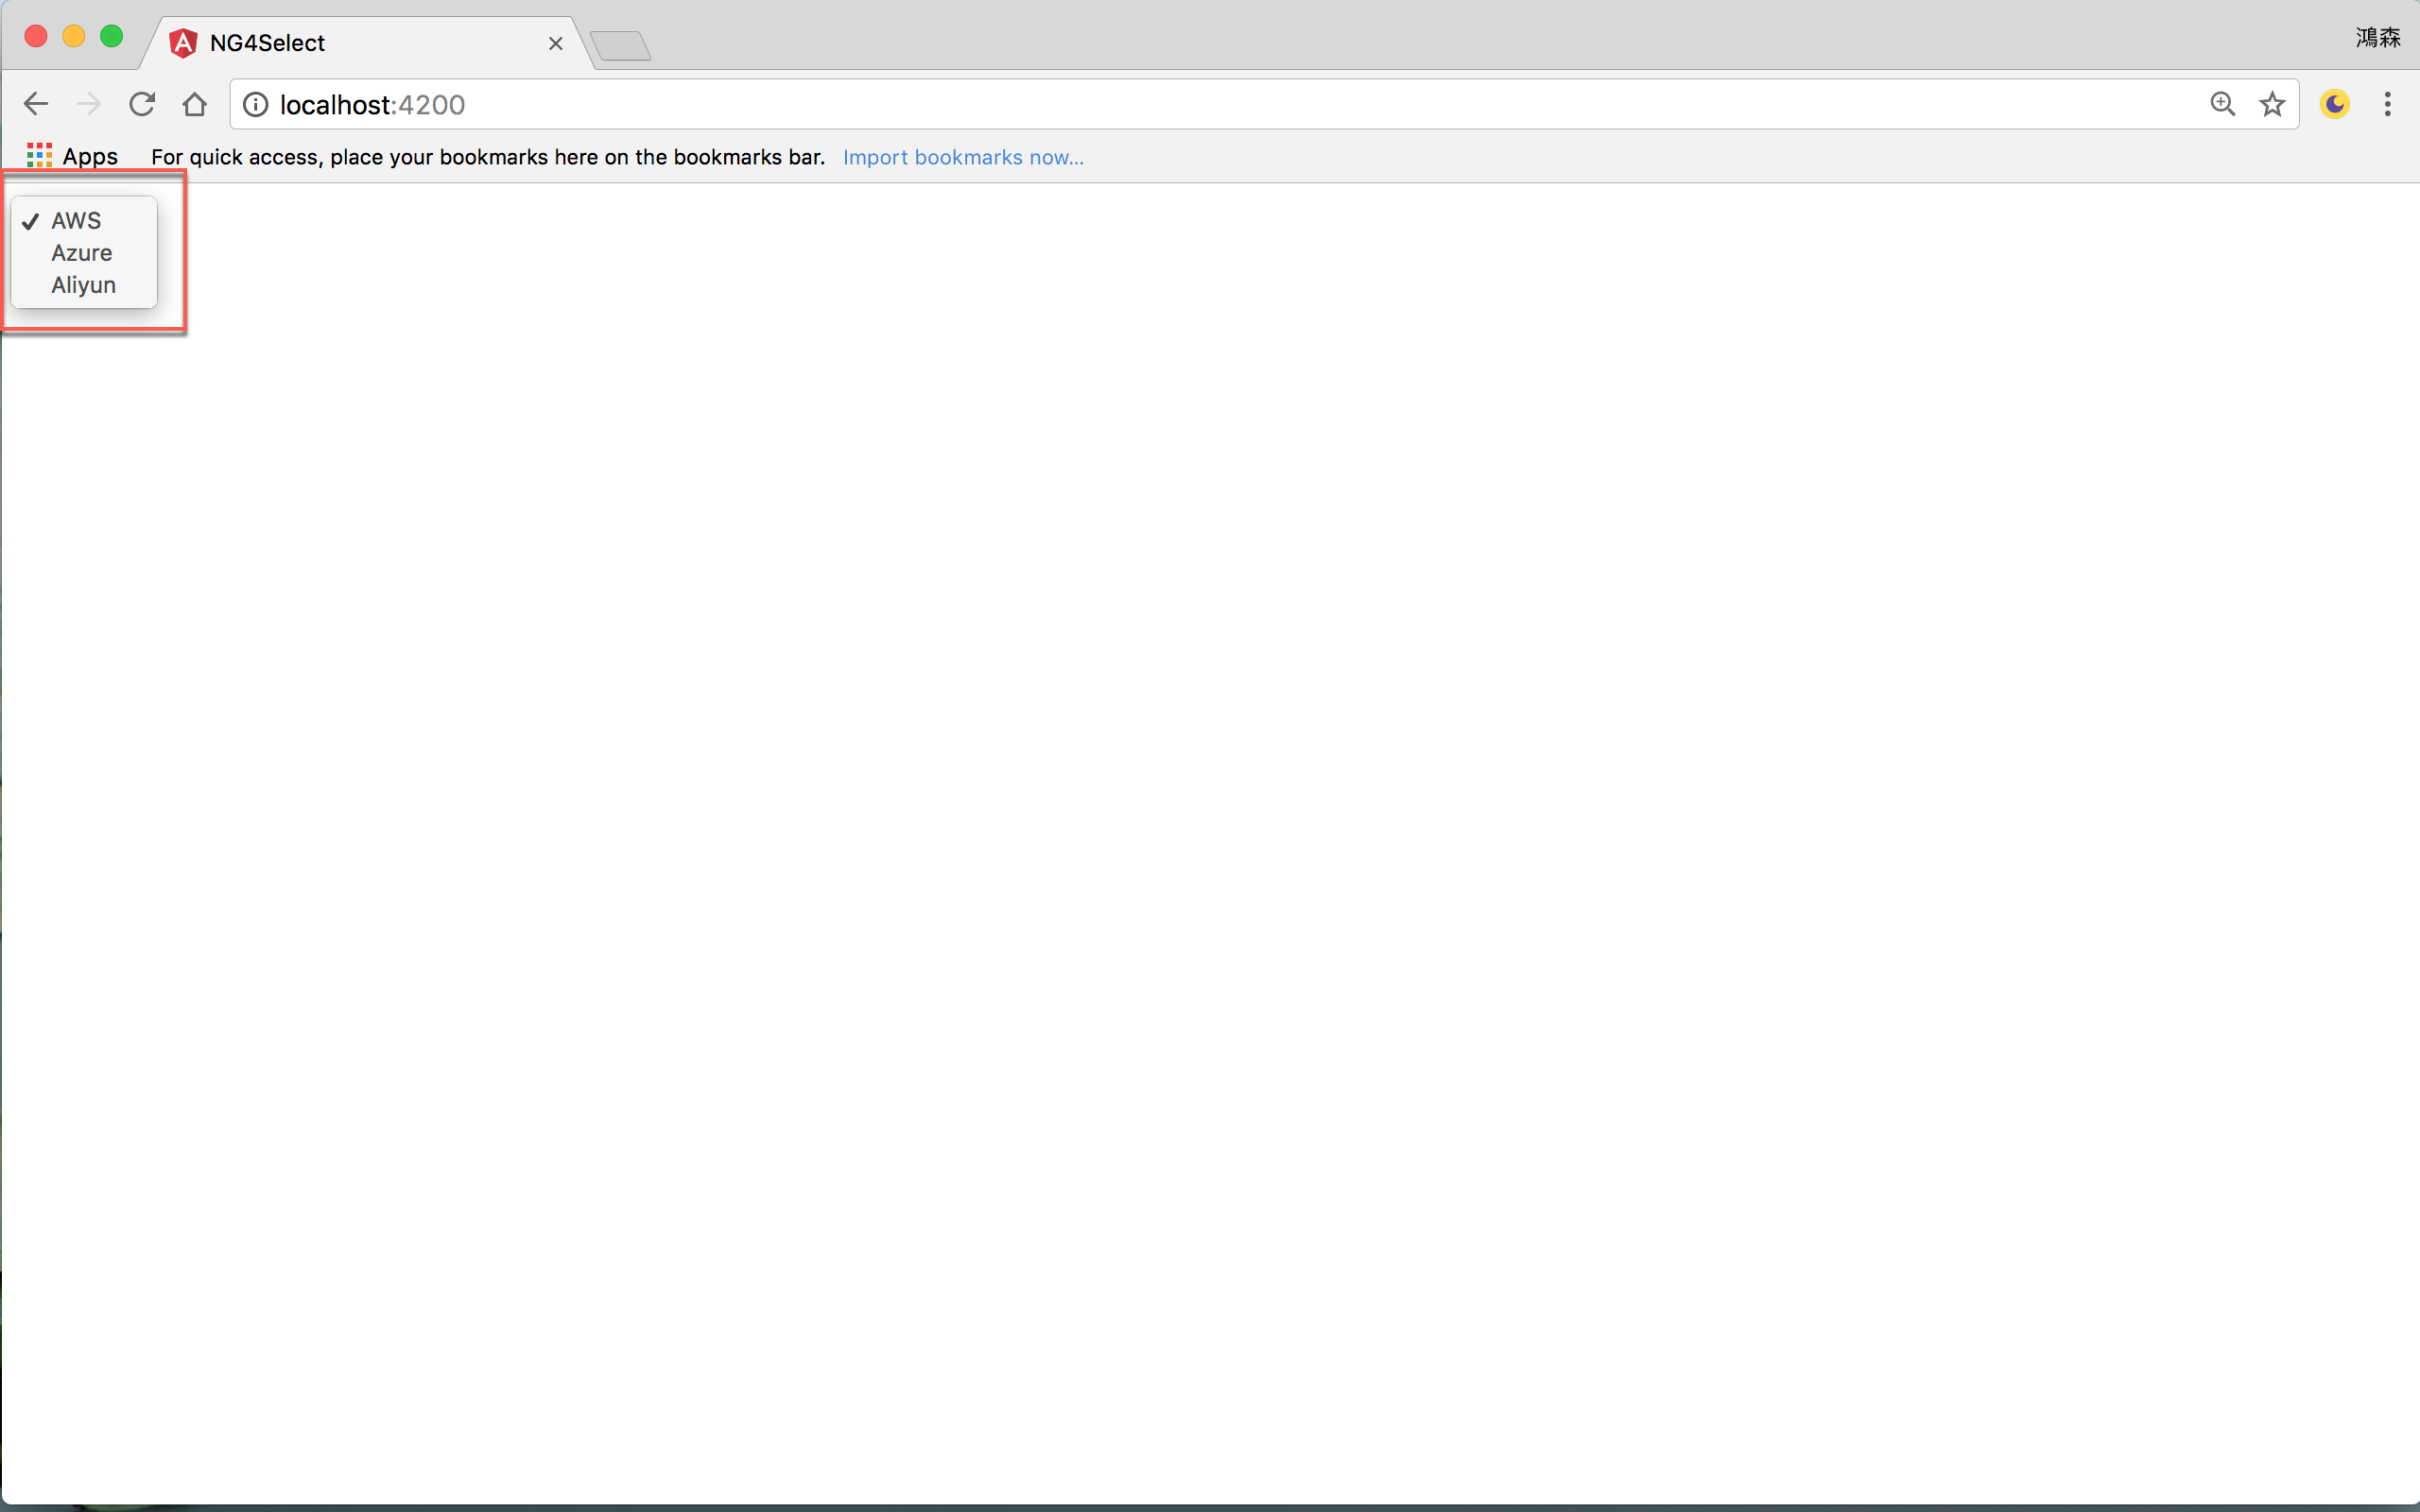
下拉選單內有 AWS、Azure 與 Aliyun 三個值。
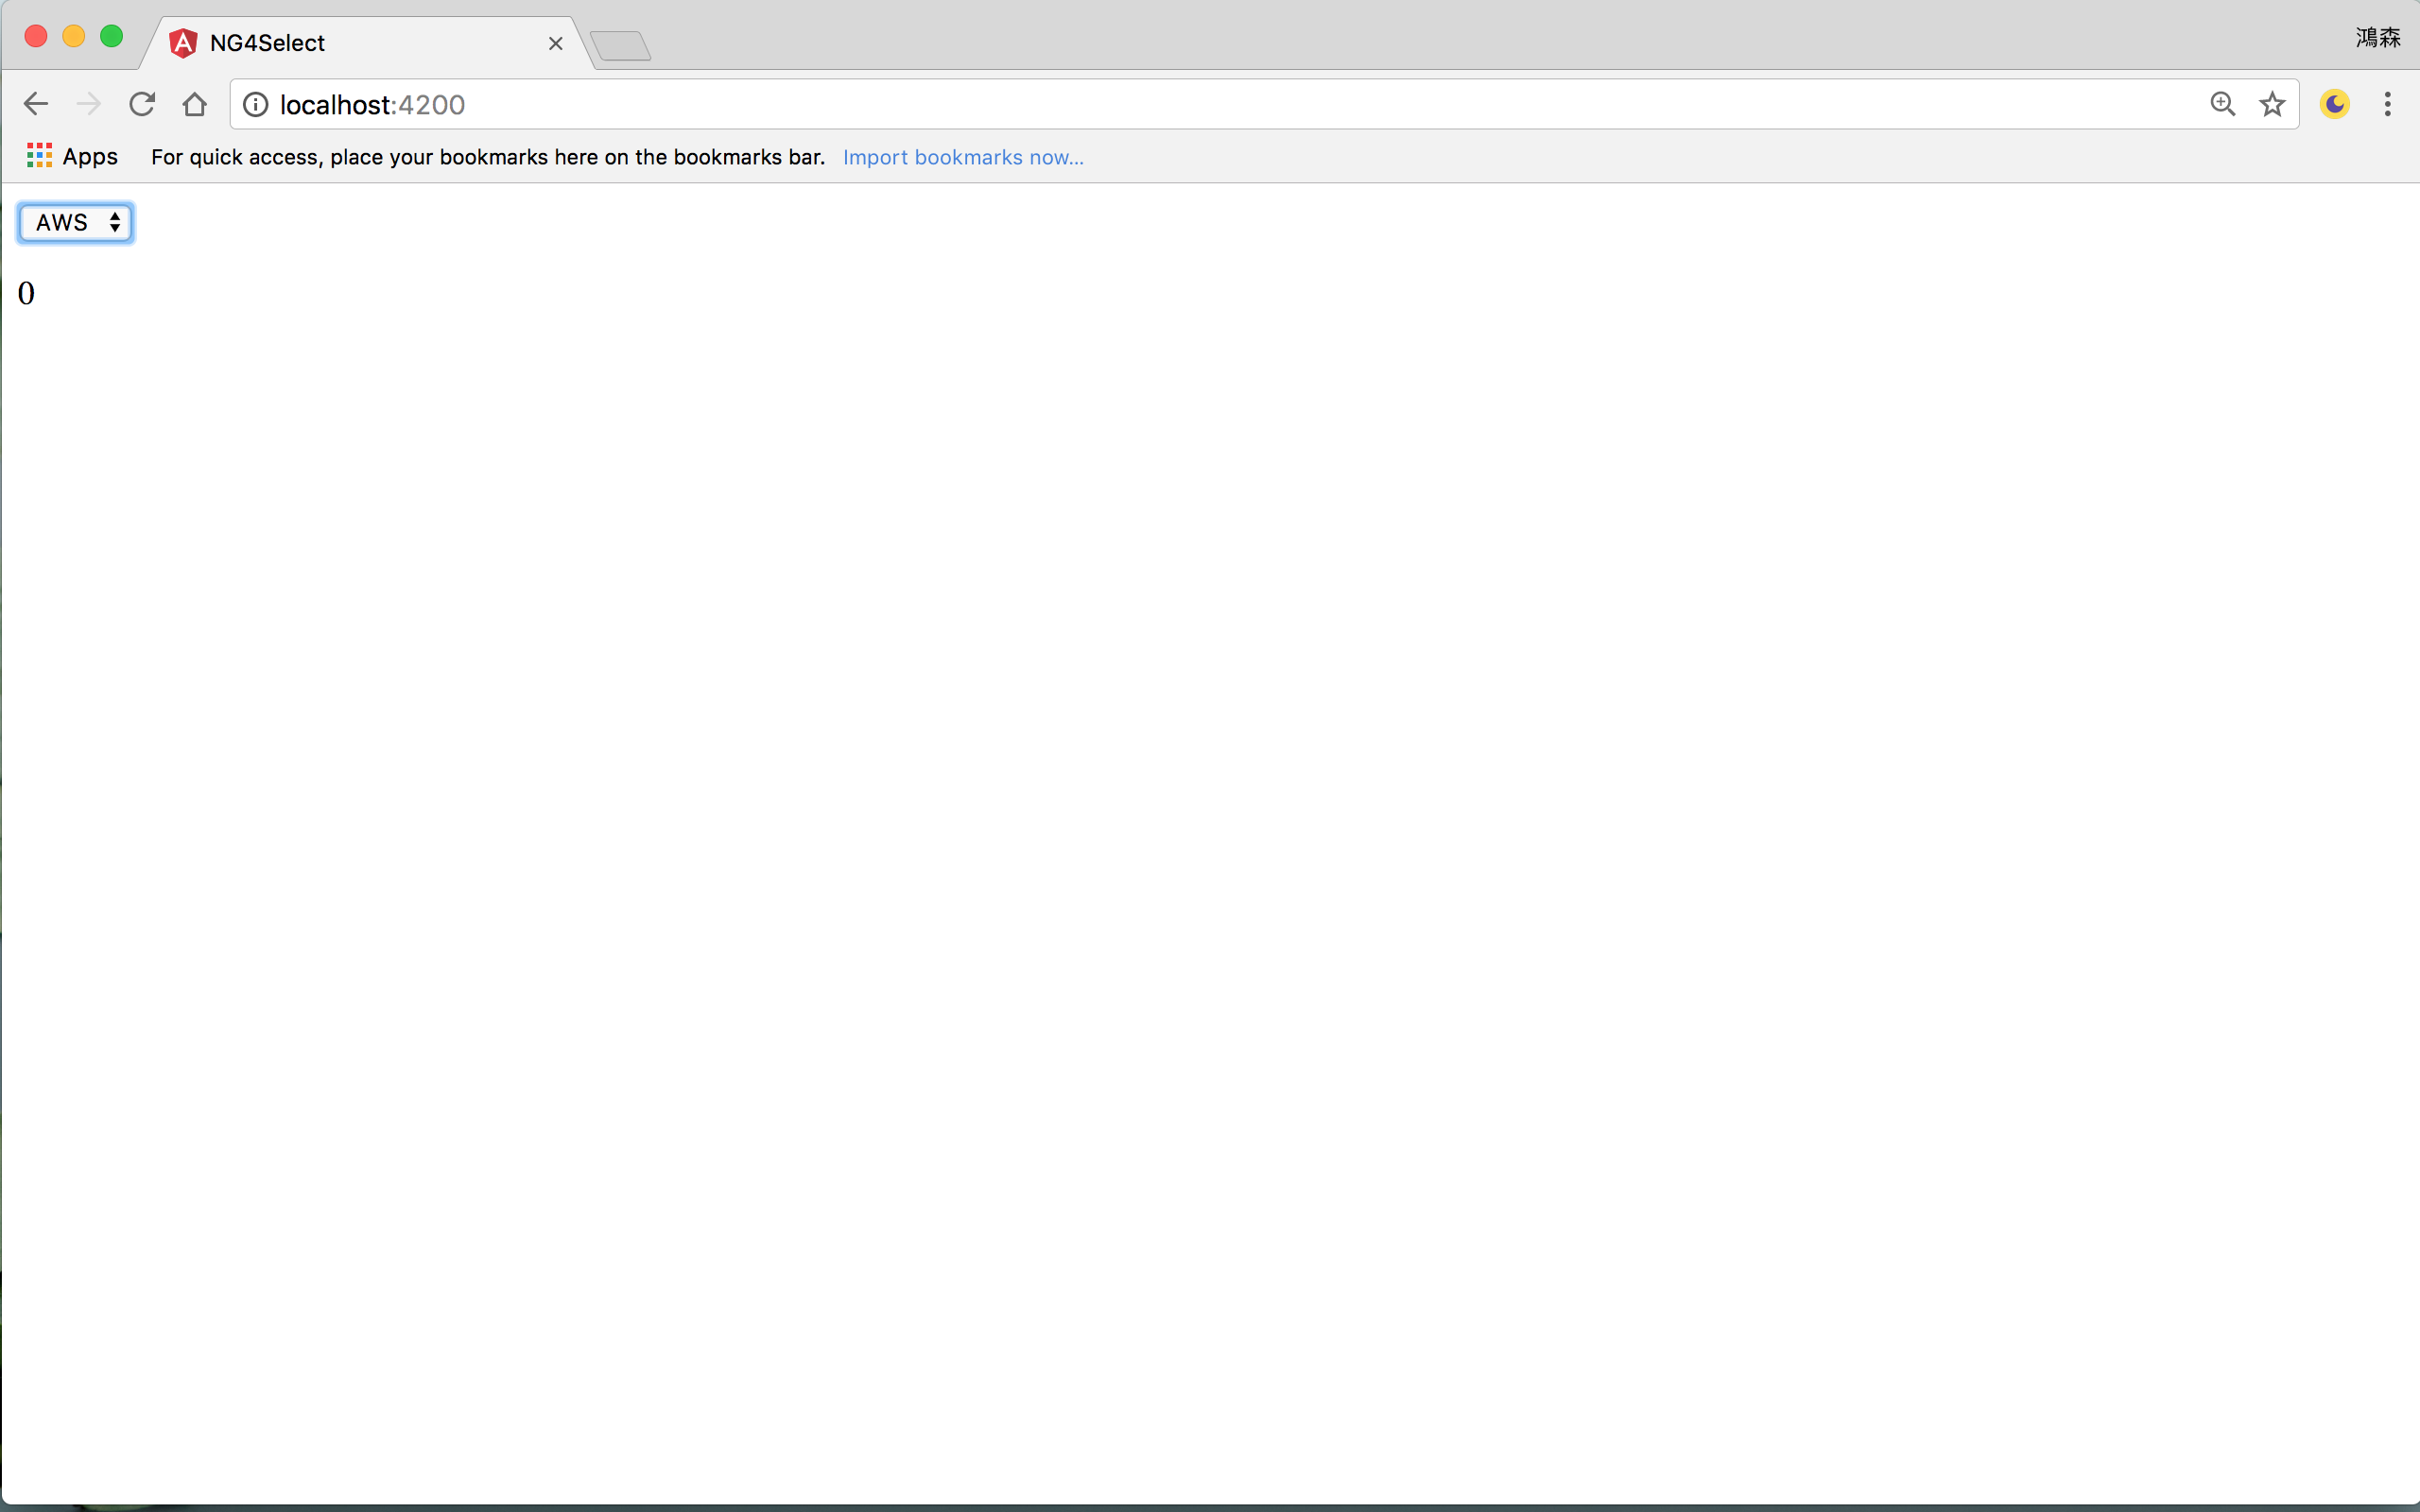
當選擇 AWS 時,在下方顯示 0。
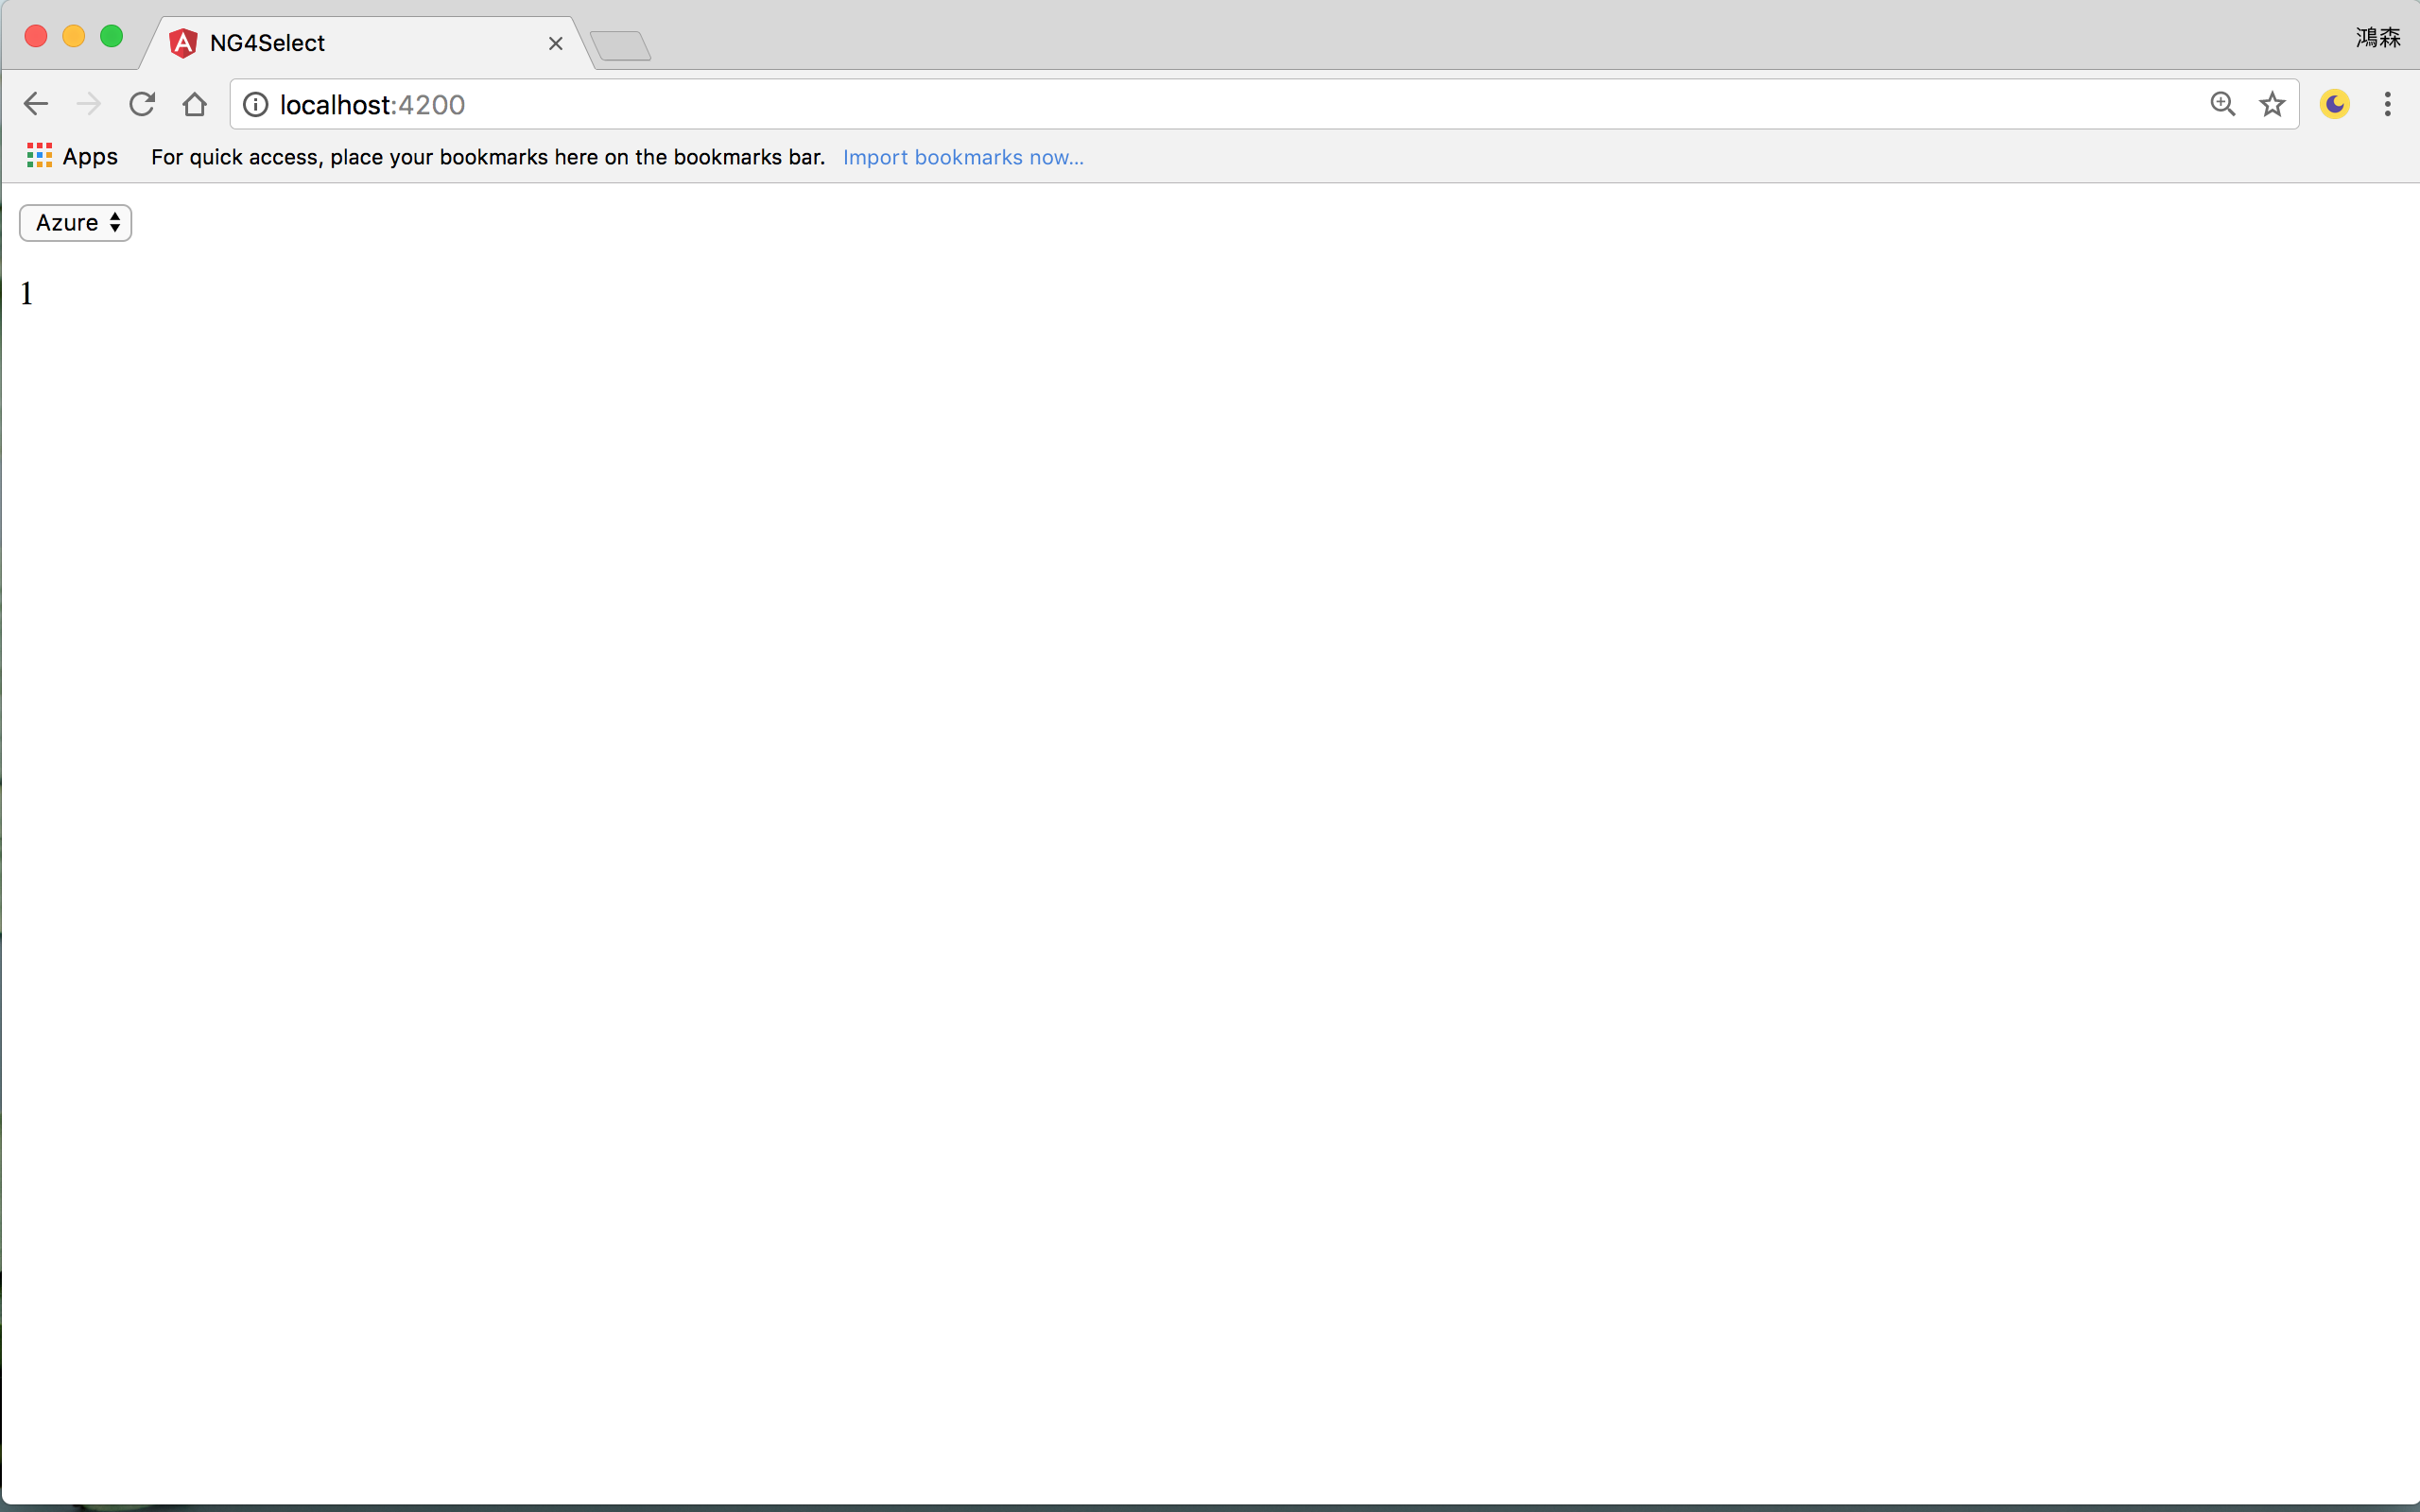
當選擇 Azure 時,在下方顯示 1。

當選擇 Aliyun 時,在下方顯示 2。
Acceptance Test (紅燈)
測試案例 :
- 應該有
1個下拉選單- 下拉選單應該有
3個選項- 選擇
AWS,下方應該出現0- 選擇
Azure時,下方應該出現1- 選擇
Aliyun時,下方應該出現2
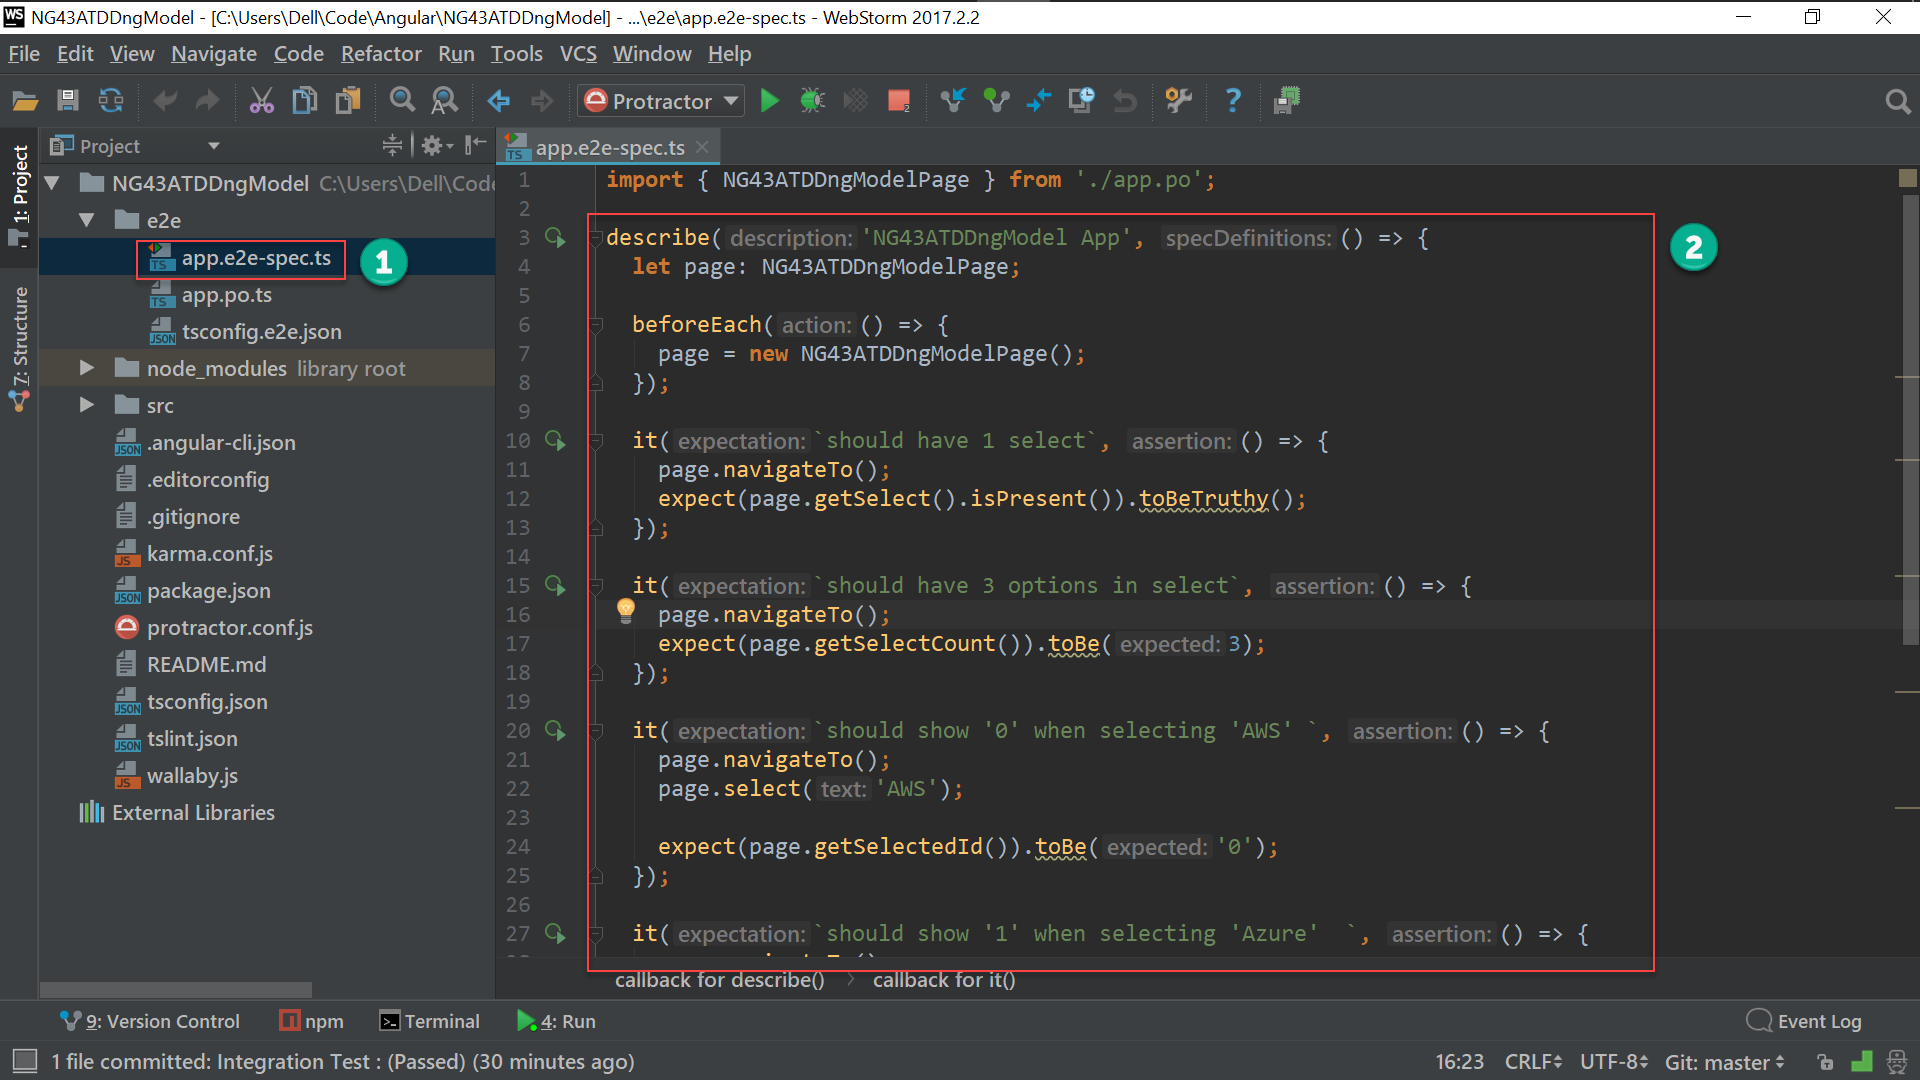
e2e/app.e2e-spec.ts
1 | import { NG43ATDDngModelPage } from './app.po'; |
10 行
1 | it(`should have 1 select`, () => { |
測試案例 : 應該有
1個下拉選單
若下拉選單存在,則 page.getSelect().isPresent() 回傳 true,否則為 false。
不是使用
expect(page.getSelect()).toBeTruthy(),這樣會永遠綠燈。
15 行
1 | it(`should have 3 options in select`, () => { |
測試案例 : 下拉選單應該有
3個選項
測試下拉選單的資料是否為 AWS、Azure 與 Aliyun,實務上這些資料會從後端 API 來,可測試 API 是否正常接上,也可以測試 API 的 SQL 或 ORM 是否正確。
若要測試資料完全相同比較困難時,最少可以測試資料的筆數是否正確。
20 行
1 | it(`should show '0' when selecting 'AWS' `, () => { |
測試案例 : 選擇
AWS,下方應該出現0
當選擇 AWS 時,下方應該顯示 0。
剩下 Azure 與 Aliyun 的寫法類似。
- 編輯
e2e/app.e2e-spec.ts - 加入驗收測試
e2e/app.po.ts
1 | import { browser, by, element } from 'protractor'; |
第 8 行
1 | getSelect(): any { |
回傳 id 為 TDDSelect 的 <select>。
12 行
1 | getSelectCount(): any { |
先由 element(by.id('TDDSelect')) 先抓到 <select>,再由 all() 取得 <select> 下所有 element,再將 by.tagName('option') 傳入 all(),找出 tag 為 <option> 的 element 加以 count()。
16 行
1 | select(text: string) { |
先由 element(by.id('TDDSelect')) 先抓到 <select>,再由 all() 取得 <select> 下所有 element,再將 by.cssContainingText('option', text) 取得正確 option 加以 click()。
使用 Protractor 在下拉選單選擇指定字串的寫法較為 tricky,需動用
by.cssContainingText()。
20 行
1 | getSelectedId(): any { |
下拉選單所選的值,預期只會用 <p> 包起來而已,因此 by.css('p') 即可。
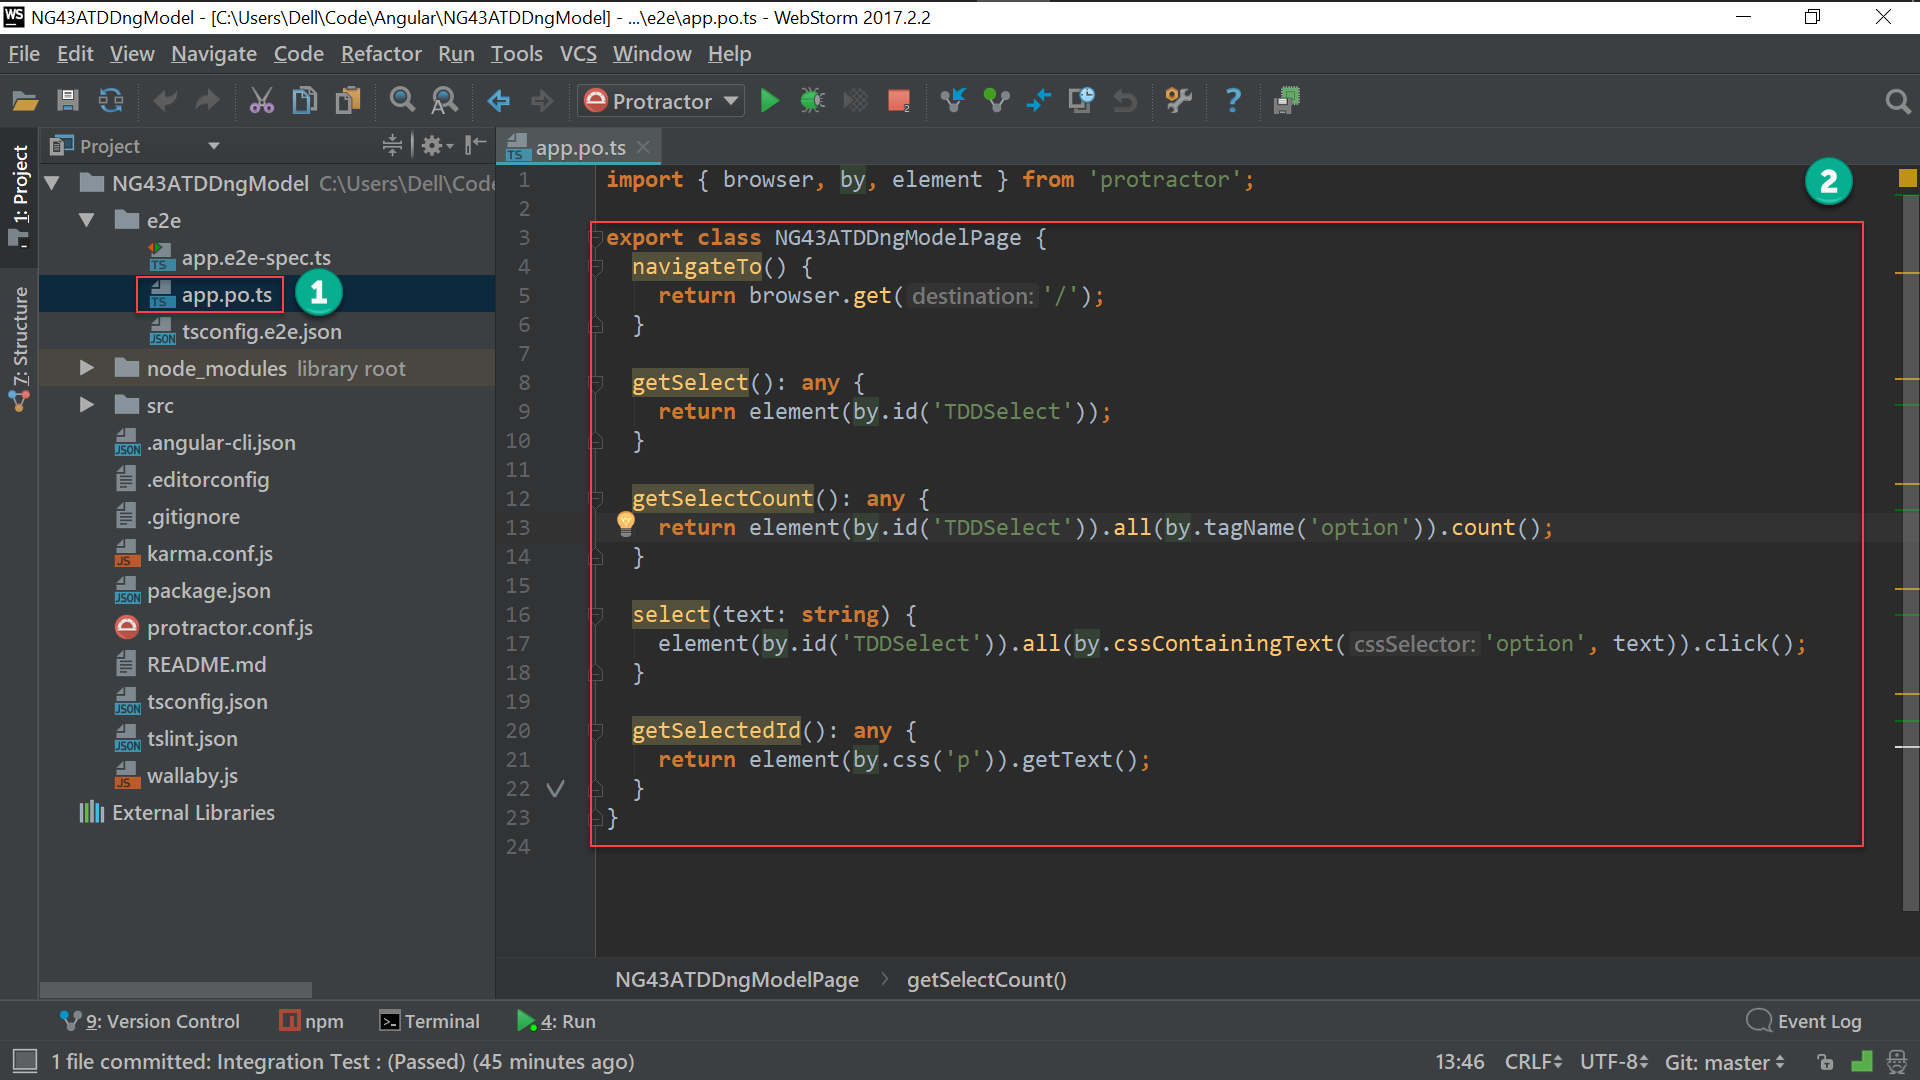
- 編輯
e2e/app.po.ts - 加入 page object
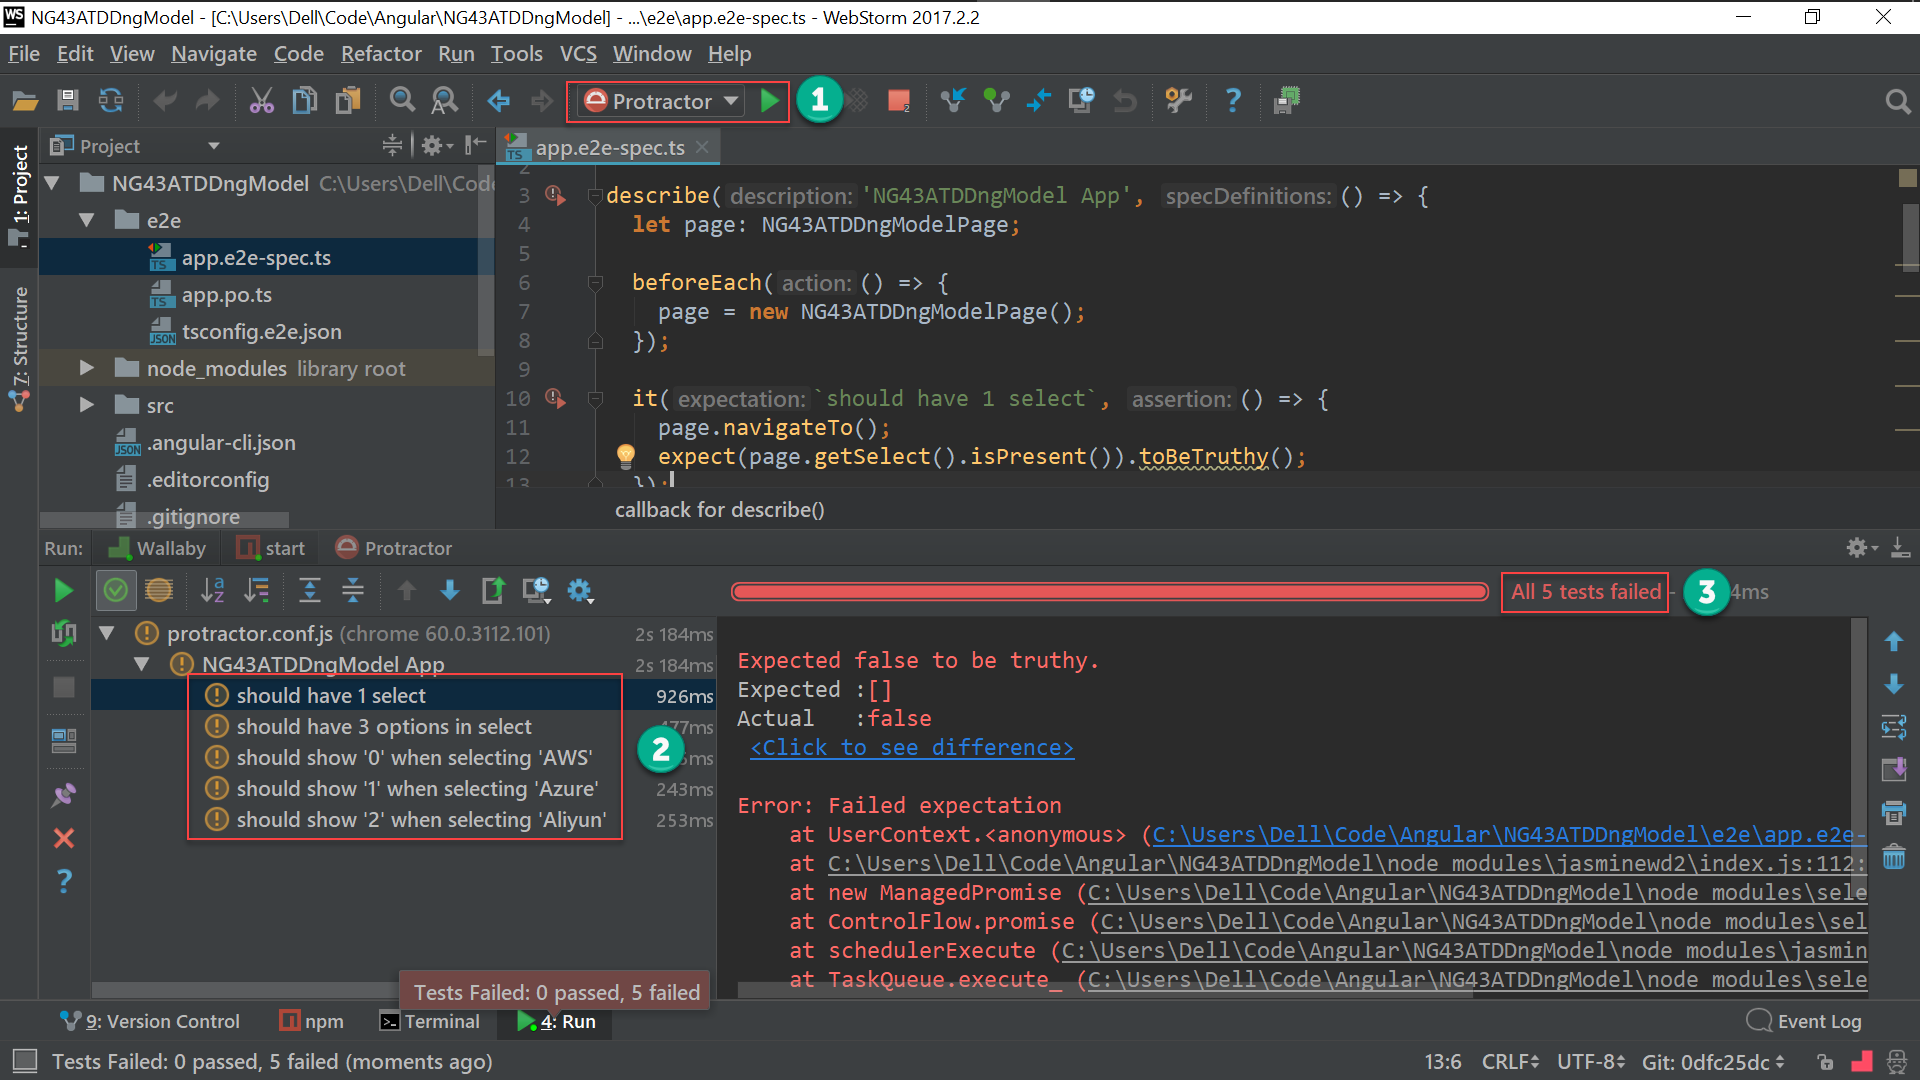
因為我們還沒實作此功能,得到預期的驗收測試 紅燈。
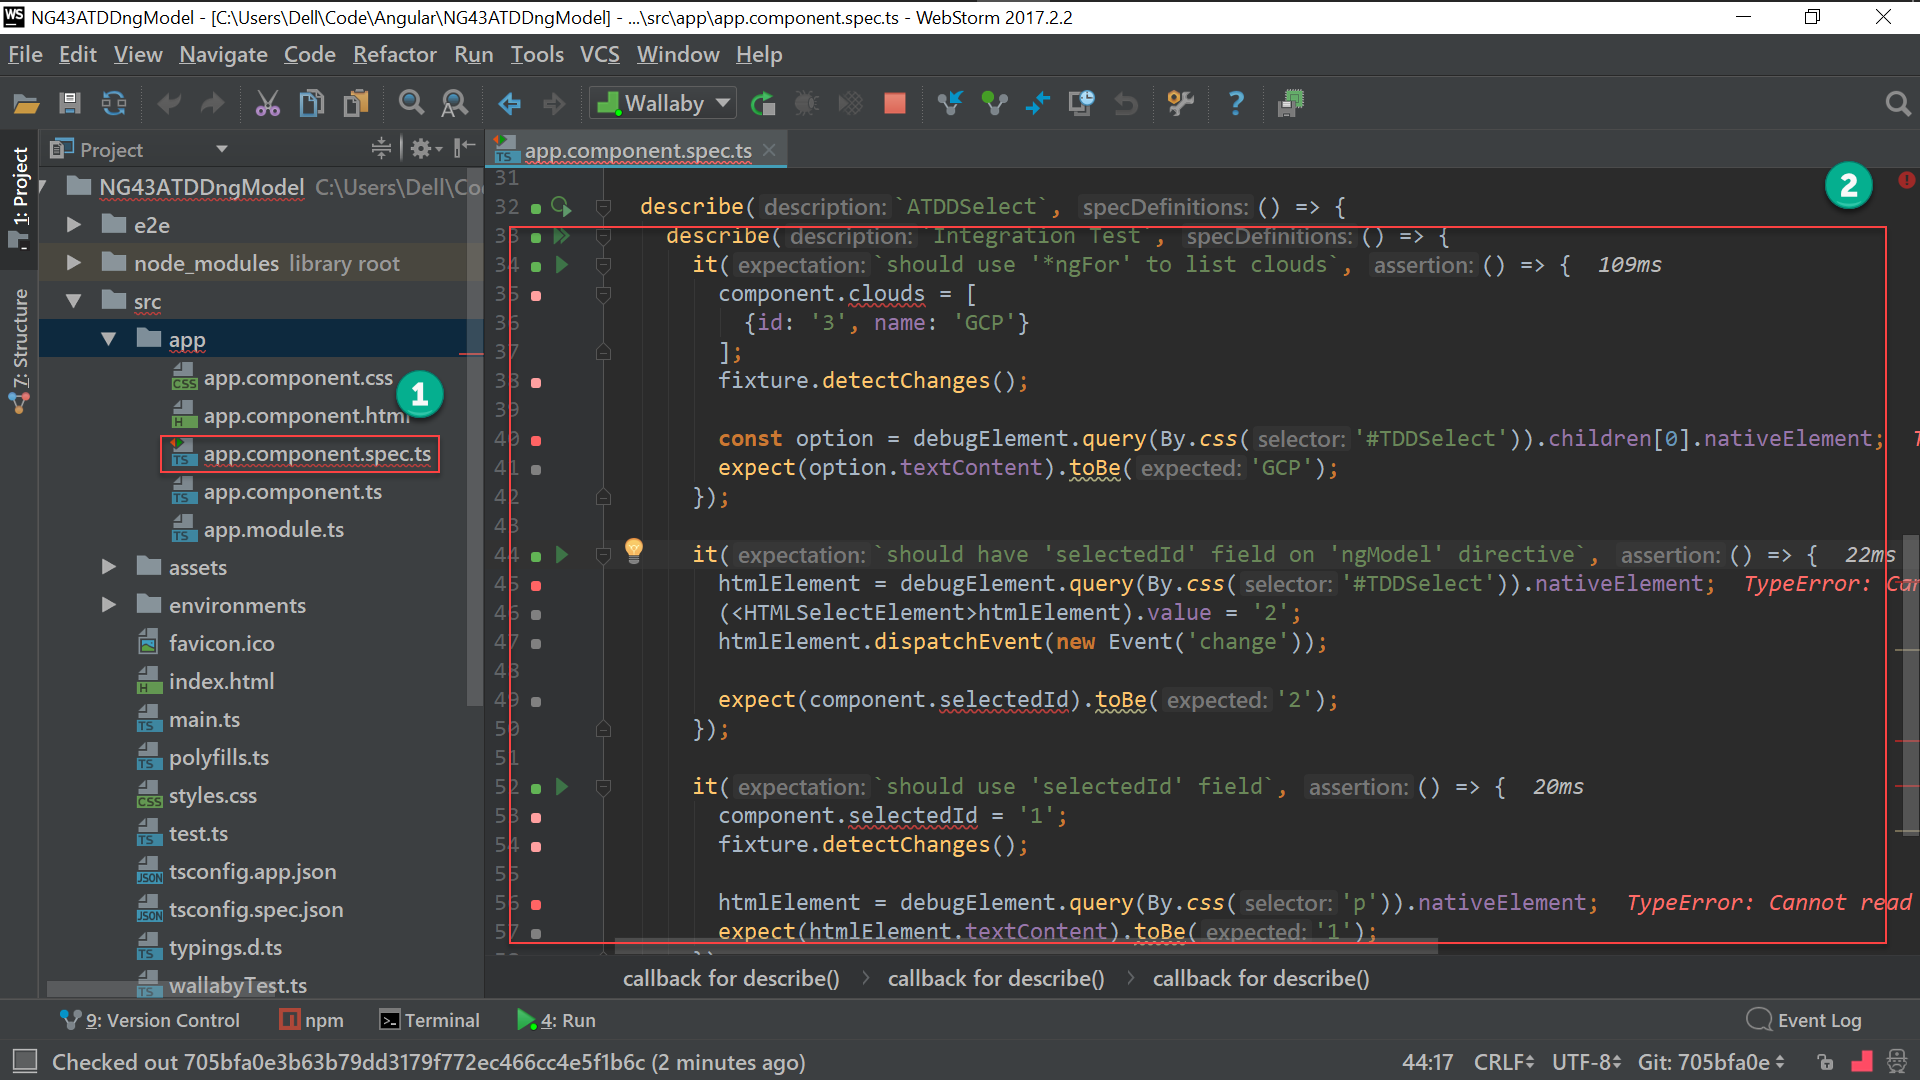
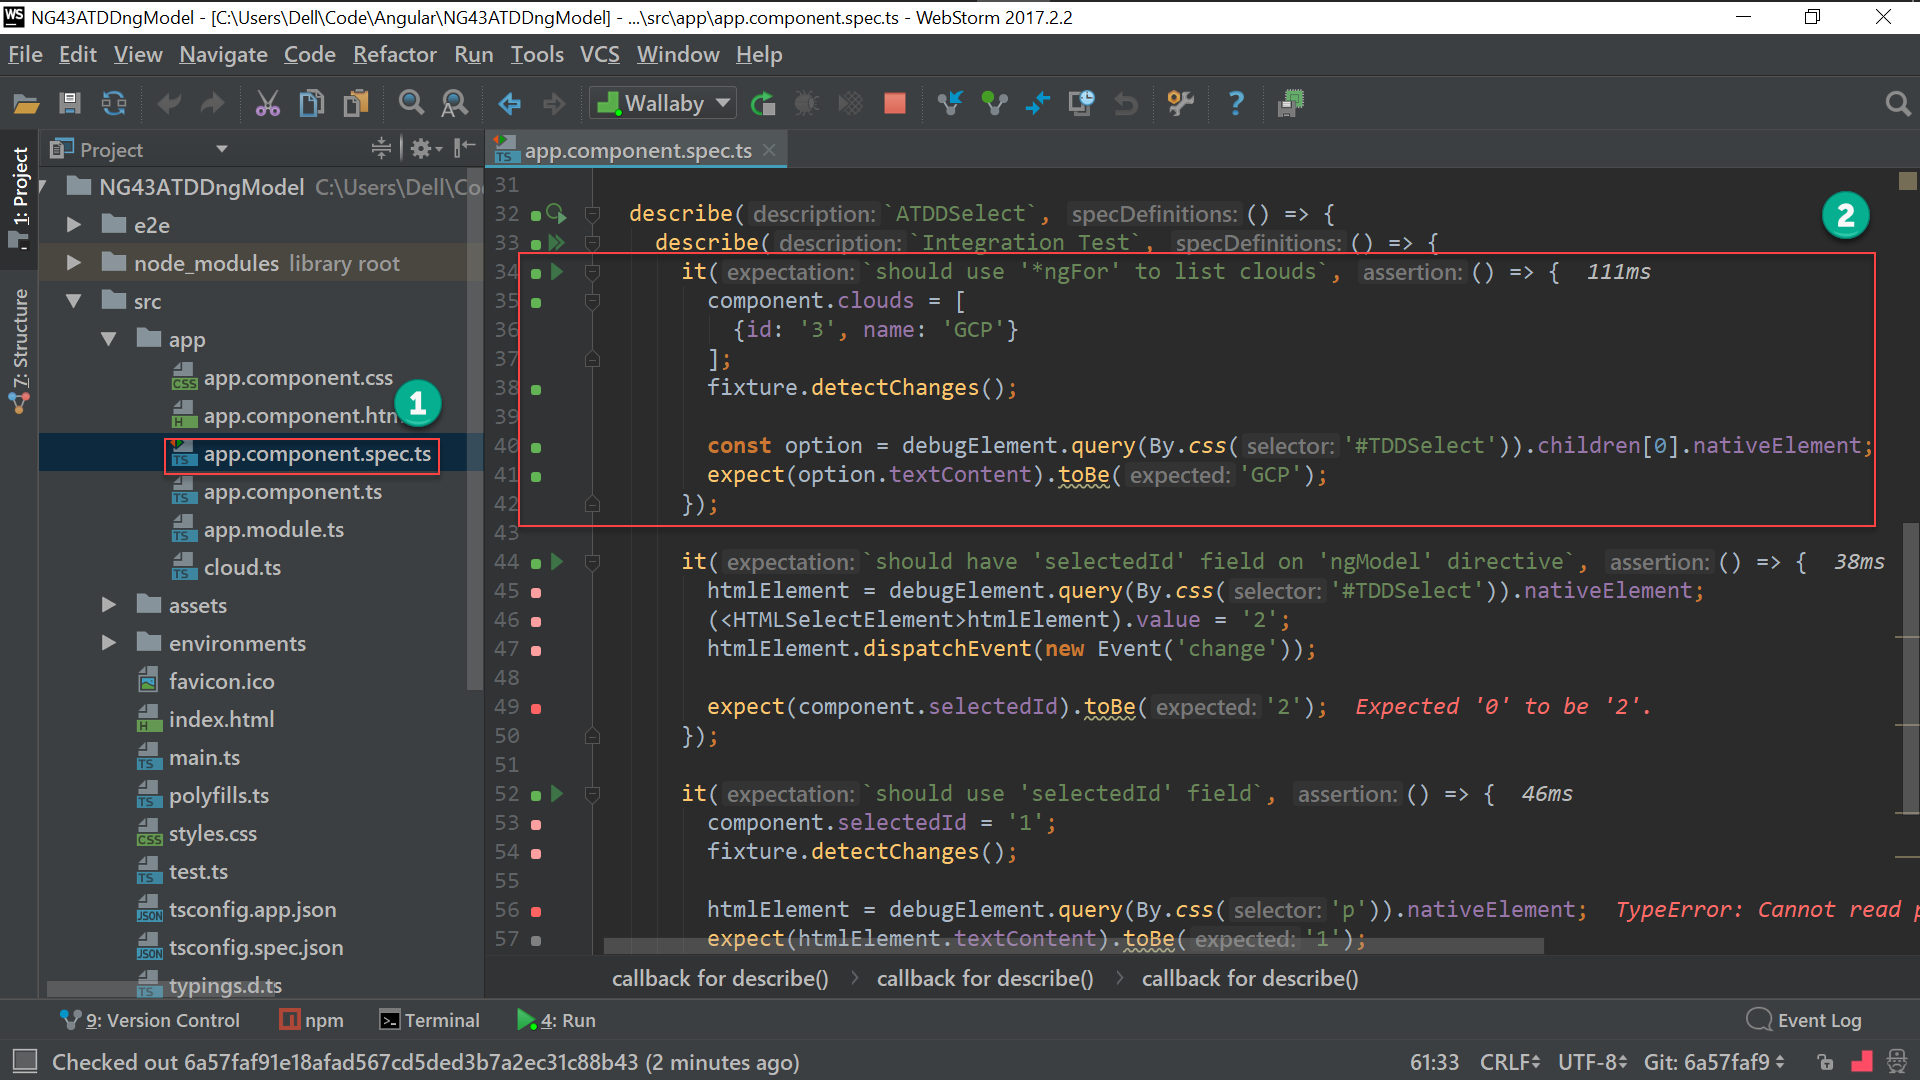
Integration Test (紅燈)
測試案例 :
<select>應該使用*ngFor產生<option>ngModel應該使用selectedIdfield<p>內應該使用selectedIdfield
src/app/app.component.spec.ts
1 | import { ComponentFixture, TestBed } from '@angular/core/testing'; |
34 行
1 | it(`should use '*ngFor' to list clouds`, () => { |
測試案例 :
<select>應該使用*ngFor產生<option>
整合測試除了測試 binding 是否正確外,另外一個目的就是要驅動出 directive 的使用。
<select> 的 <option> 有多筆資料,勢必會使用 *ngFor 顯示所 binding 的資料。
為了確認是否使用 *ngFor,一樣使用整合測試慣用的手法 :
建立 stub,並測試 stub
1 | component.clouds = [ |
建立 component.clouds 的 stub,並加上 fixture.detectChanges() 將假資料反映到 HTML 上。
1 | const option = debugElement.query(By.css('#TDDSelect')).children[0].nativeElement; |
由 debugElement.query(By.css('#TDDSelect')) 先抓到 <select>,由於目前 stub 只有一筆,故取其 children 陣列的第 0 筆資料即可,並取其 nativeElement。
1 | expect(option.textContent).toBe('GCP'); |
期望其 textContent 為 stub 的 GCP。
triggerEventHandler()
44 行
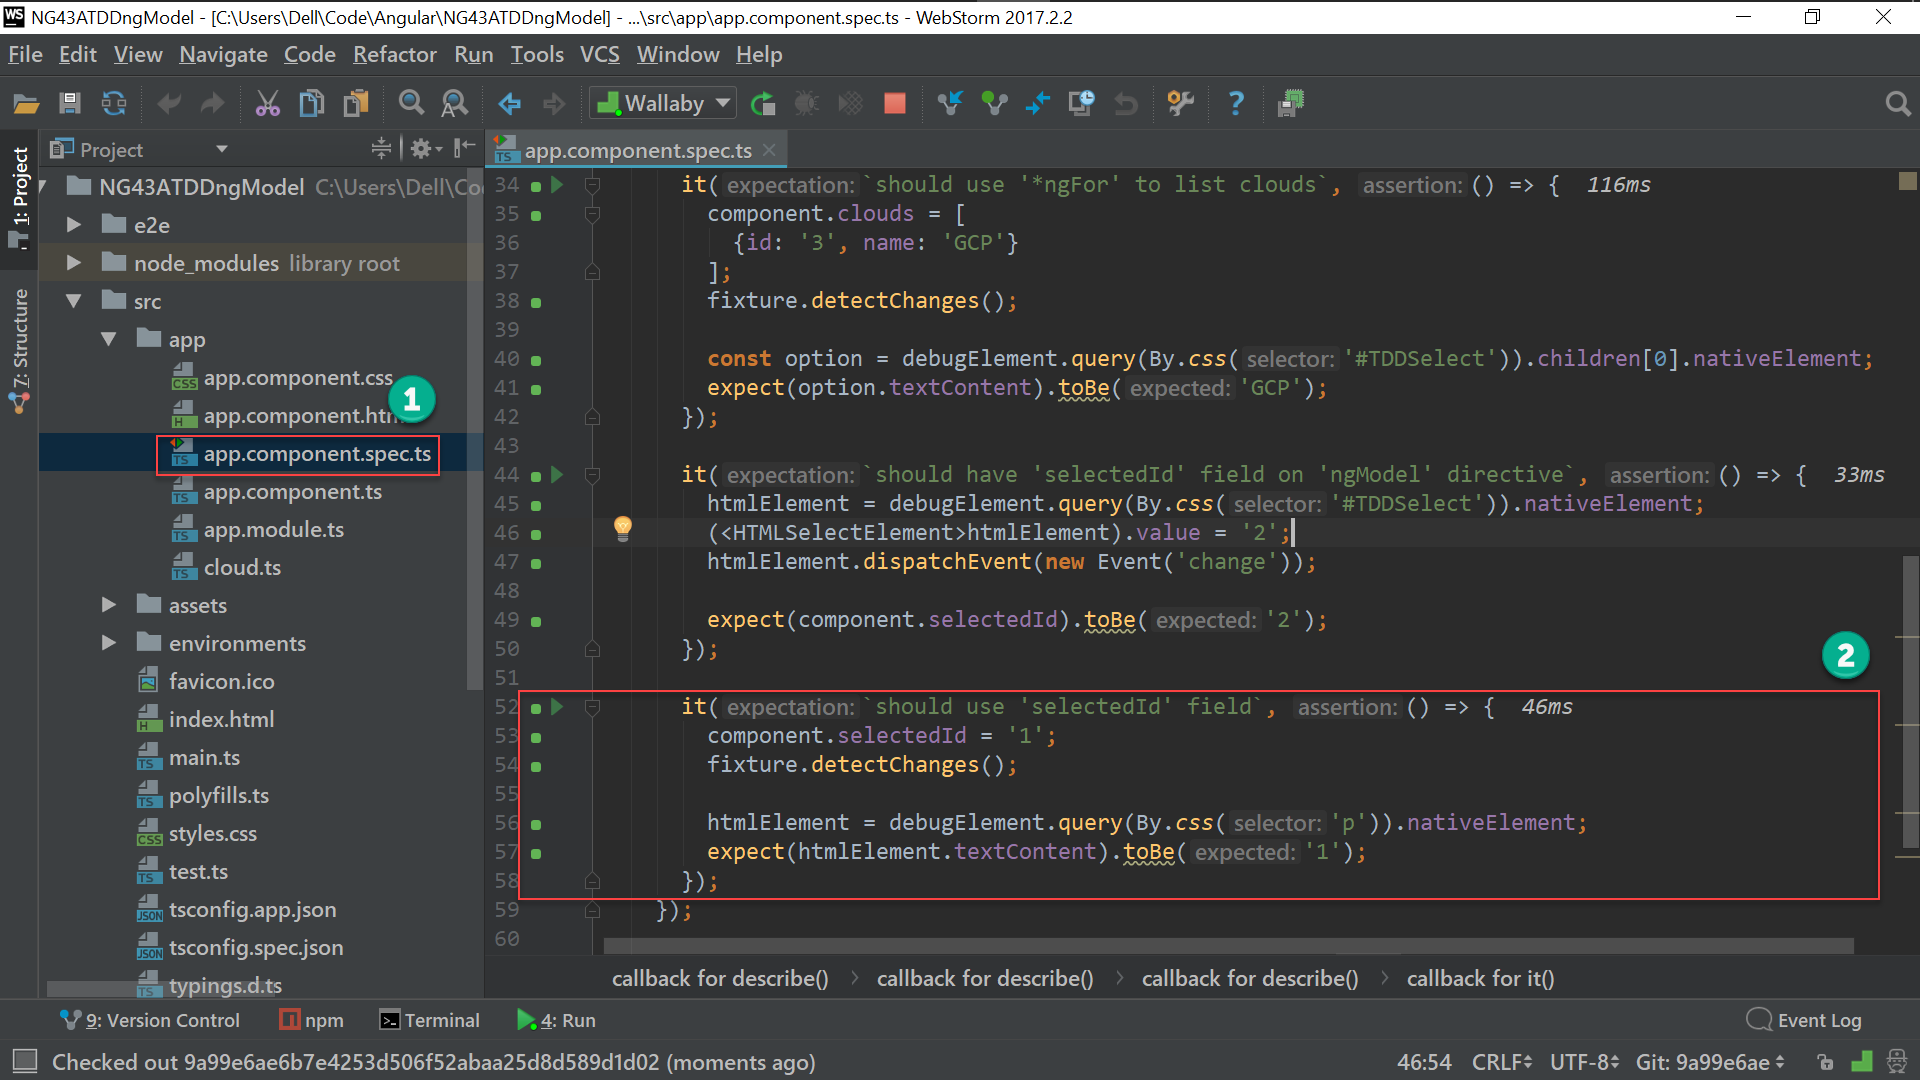
1 | it(`should have 'selectedId' field on 'ngModel' directive`, () => { |
測試案例 :
ngModel應該使用selectedIdfield
ngModel 就是要將 HTML element 直接綁定到 field,因此最重要的就是測試有沒有綁定到正確的 field。
Two-way binding 的重點在於當 HTML 改變時,class 的 field 會自動跟著改變,因此我們測試的手法就是改變 HTML,並測試 field 是否跟著 HTML 變化。
1 | debugElement.query(By.css('#TDDSelect')).triggerEventHandler('change', {target: {value: '2'}}); |
在整合測試時,我們慣用 triggerEventHandler() 去觸發 event,由於 DOM 的 change event 會觸發 ngModelChange event,因此我們使用 triggerEventHandler() 去觸發 change event。
我們對 <select> 做任何選擇的 value 值,會由 change() 的第 2 個參數的 $event.target.value 代入。
因此我們要準備 {target: {value: '2'}} 這個 stub,並測試 field 值否為此 stub,若相等,則表示 ngModel 有綁定到正確的 field。
1 | expect(component.selectedId).toBe('2'); |
期望 component.selectedId 為 stub 的 2。
dispatchEvent()
44 行
1 | it(`should have 'selectedId' field on 'ngModel' directive`, () => { |
測試案例 :
ngModel應該使用selectedIdfield
使用 triggerEventHandler() 方式雖然可行,但我們發現其第 2 個參數的 stub : {target: {value: '2'}} 有點小複雜,且必須很了解 $event 物件的結構。
1 | (<HTMLSelectElement>htmlElement).value = '2'; |
當 <select> 的選擇改變時,事實上就是改變其 value 值。
1 | htmlElement.dispatchEvent(new Event('change')); |
使用 dispatchEvent() 觸發 event,傳入 Event 物件,並以 evetn 名稱傳入 Event。
triggerEventHandler()與dispatchEvent()都是觸發 event,只是triggerEventHandler()是從 DOM 的方式去觸發 event,而dispatchEvent()是從 Angular 的方式觸發 event,兩種方式都可以,實務上建議使用dispatchEvent(),不用了解 DOM 的$event物件的結構,也比較物件導向。
52 行
1 | it(`should use 'selectedId' field`, () => { |
測試案例 :
<p>應該使用selectedIdfield
因為目前是整合測試,而 AppComponent 的 selectedId 根本還沒實現,理論上也應該使用 spyOn(),但可惜 Jasmine 的 spyOn() 並沒有支援 field,只能使用最基本的方式:建立 stub,並測試 stub 。
因為還沒實作,整合測試是預期的 紅燈。
Unit Test (紅燈)
測試案例 :
- Class 應該有
cloudsfield 且初始值為AWS、Azure與Aliyun- Class 應該有
selectedIdfield 且初始值為0
src/app/app.component.spec.ts
1 | import { ComponentFixture, TestBed } from '@angular/core/testing'; |
34 行
1 | it(`should have 'clouds' field with ['AWS', 'Azure', 'Aliyun']`, () => { |
測試案例 : Class 應該有
cloudsfield 且初始值為AWS、Azure與Aliyun
目前需求只有 3 筆資料,直接 expect().toEqual() 是否為預期陣列。
Q :
toBe()與toEqual()有什麼差別 ?
toBe(): 比較 valuetoEqual(): 比較 object
42 行
1 | it(`should have 'selectedId' field as '0'`, () => { |
測試案例 : Class 應該有
selectedIdfield且初始值為0
期望 target.selectedId 為 0。
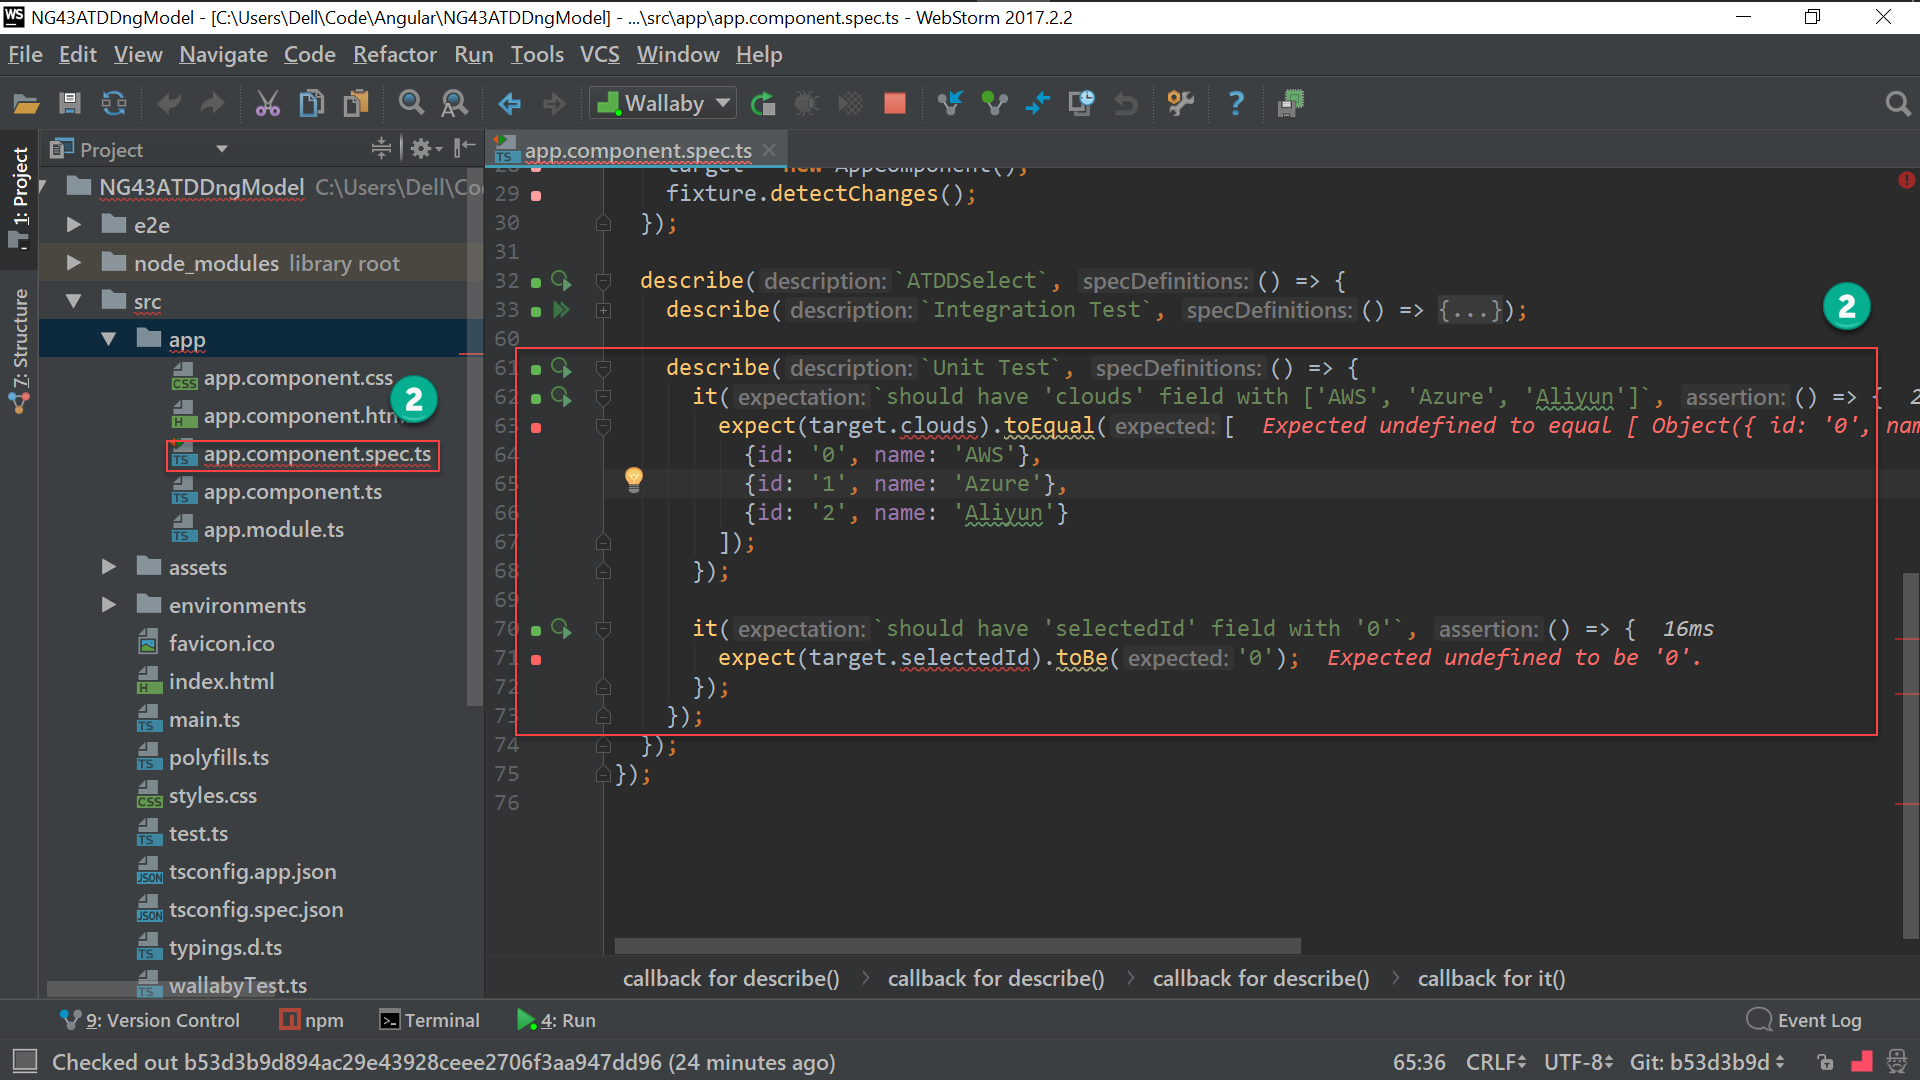
因為還沒實作,單元測試是預期的 紅燈。
Unit Test (綠燈)
測試案例 : Class 應該有
cloudsfield 且初始值為AWS、Azure與Aliyun
src/app/app.component.ts
1 | import { Component } from '@angular/core'; |
10 行
1 | clouds: Cloud[] = [ |
建立 cloud field 與設定初始陣列。
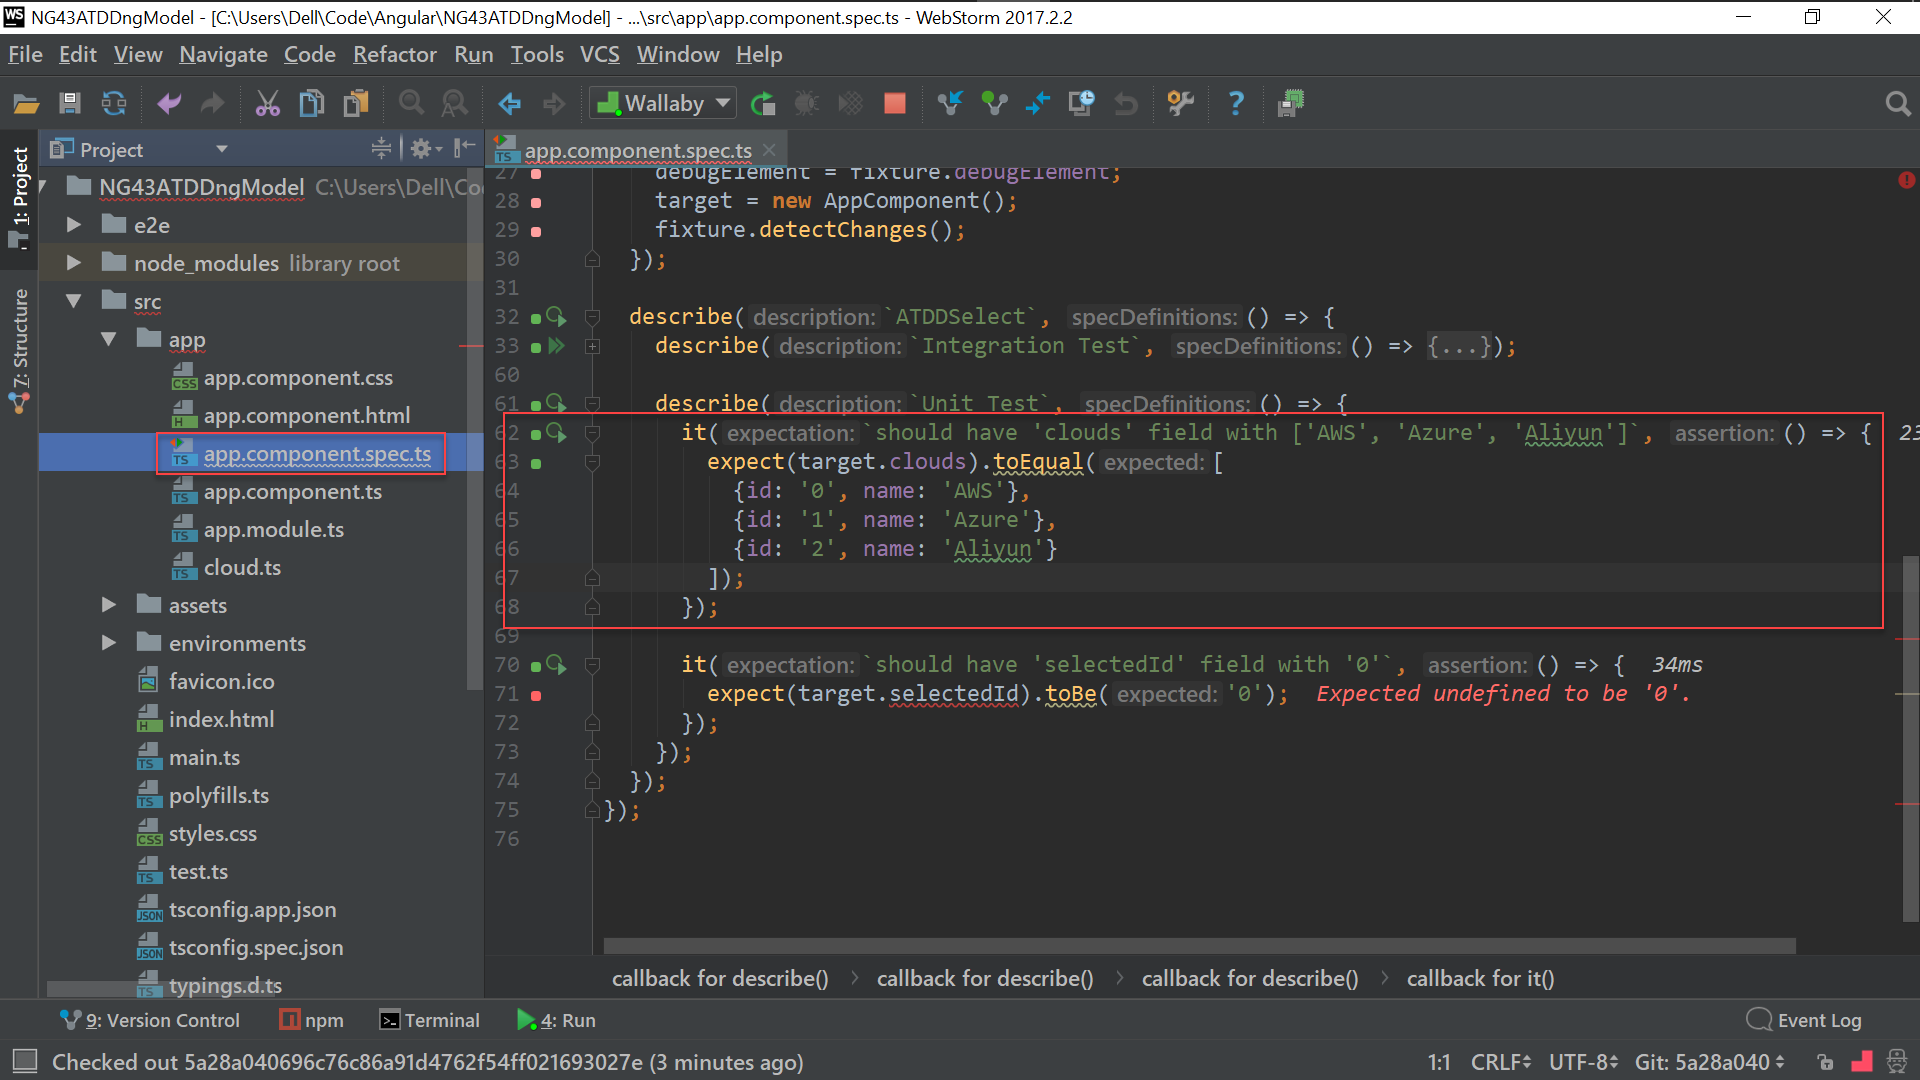
在 class 實作出 cloud field 後,Wallaby 單元測試就 綠燈 了。
測試案例 : Class 應該有
selectedIdfield 且初始值為0
src/app/app.component.ts
1 | import { Component } from '@angular/core'; |
16 行
1 | selectedId = '0'; |
建立 selected field 與設定初始值為 0。

在 class 實作出 selectedId field 後,Wallaby 單元測試就 綠燈 了。
Integration Test (綠燈)
測試案例 :
<select>應該使用*ngFor產生<option>
src/app/app.component.html
1 | <select id="TDDSelect"> |
使用 *ngFor 根據 clouds field 產生 <option>。
使用 *ngFor 之後,Wallaby 整合測試就 綠燈 了。
測試案例 :
ngModel應該使用selectedIdfield
src/app/app.module.ts
1 | import { BrowserModule } from '@angular/platform-browser'; |
12 行
1 | imports: [ |
ngModel directive 需要使用 FormsModule,而 Angular CLI 預設沒有載入,必須手動加上。
src/app/app.component.html
1 | <select id="TDDSelect" [(ngModel)]="selectedId"> |
在 <select> 加上 [(ngModel)]="selectedId"。
在 HTML 實作 ngModel 綁定到 selectedId field 之後,Wallaby 整合測試就 綠燈了。
src/app/app.component.html
測試案例 :
<p>內應該使用selectedIdfield
1 | <select id="TDDSelect" [(ngModel)]="selectedId"> |
在 <p> 內加上 selectedId。
在 HTML 實作 <p> 內的 selectedId 綁定之後,Wallaby 的整合測試就全部 綠燈 了。
Acceptance Test (綠燈)
測試案例
- 應該有
1個下拉選單- 下拉選單應該有
3個選項- 選擇
AWS,下方應該出現0- 選擇
Azure時,下方應該出現1- 選擇
Aliyun時,下方應該出現2
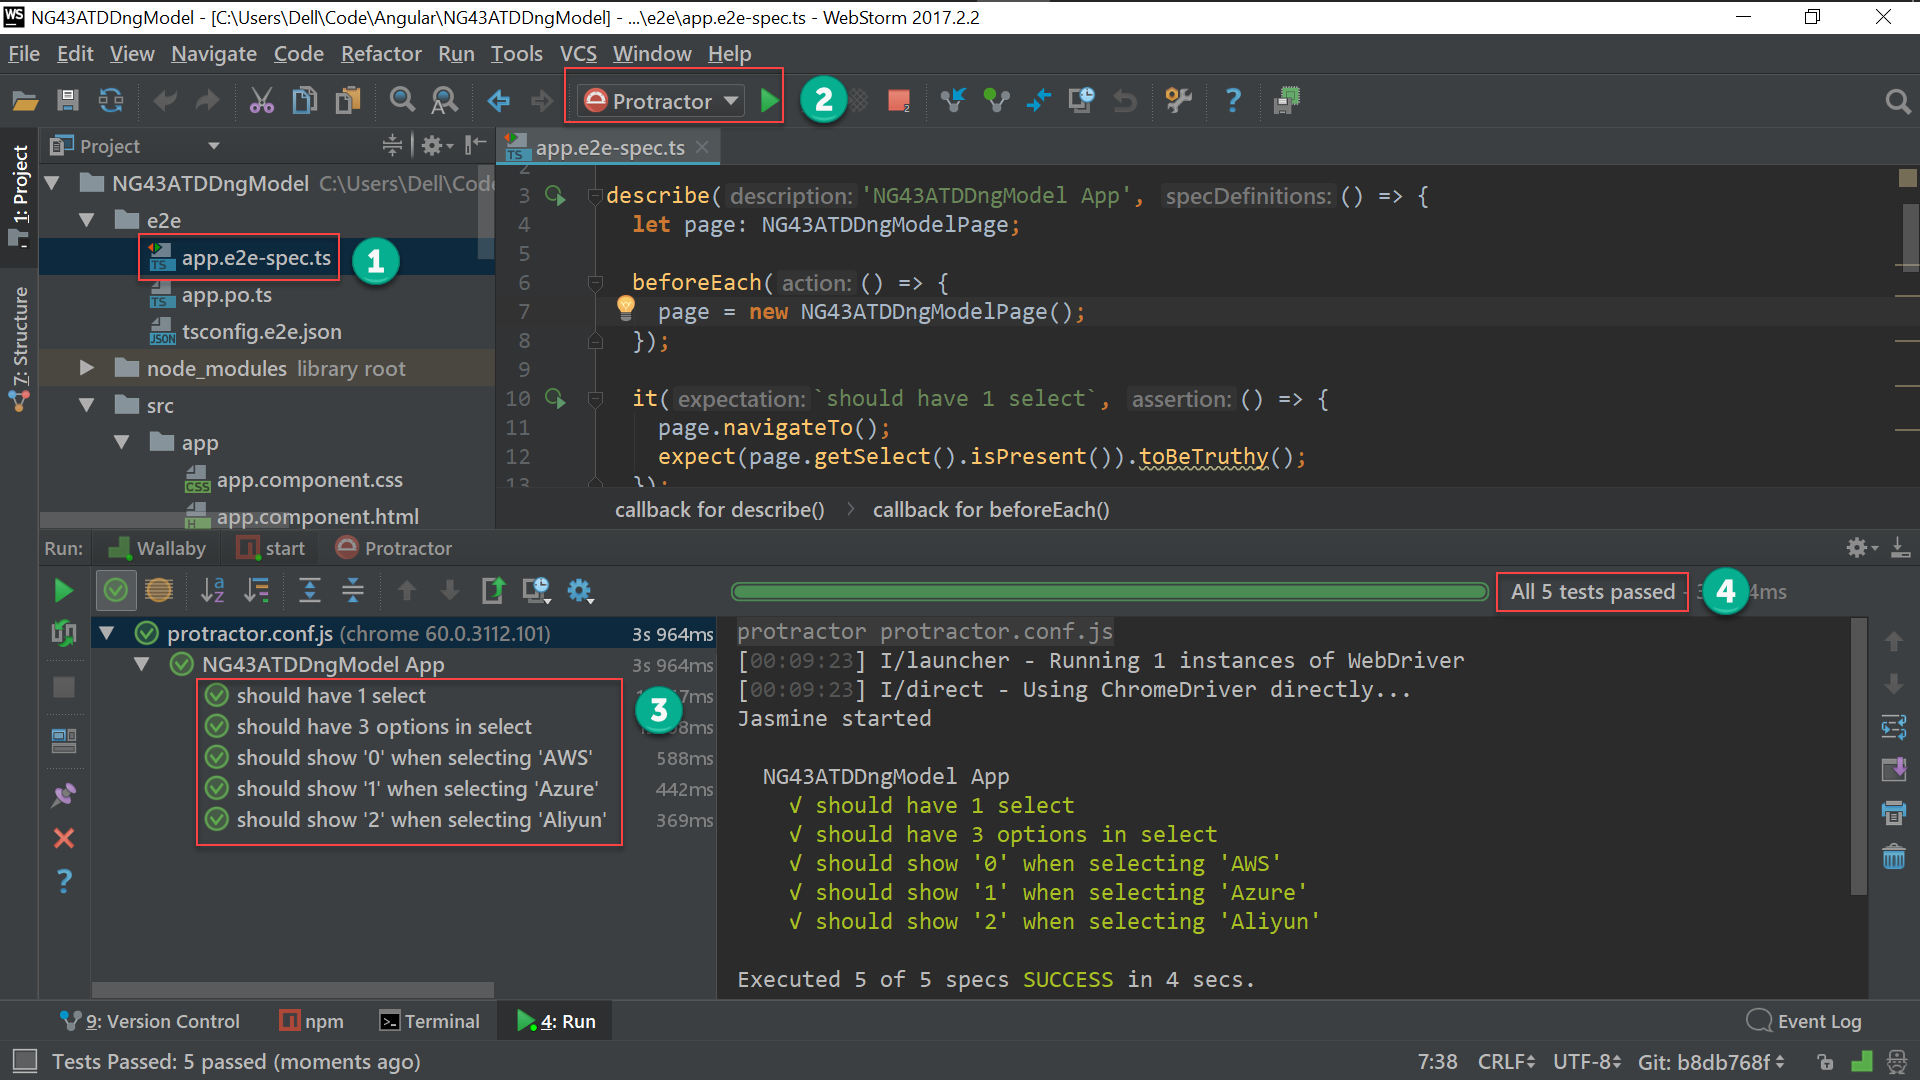
整合測試 綠燈 後,最後再跑一次驗收測試確認為 綠燈。
重構
因為 class 沒有邏輯,所以不需要重構。
Conclusion
ngModel整合測試的關鍵在於測試ngModel有沒有綁定到正確的 field,因此建立 stub,並觸發 DOM 的changeevent ,測試 field 值是否為 stub,則完成ngModel的整合測試。- 在整合測試觸發 event 時,可以使用
triggerEventHandler()或dispatchEvent(),實務上建議使用dispatchEvent(),較物件導向。
Reference
Andras Sevcsik, Testing ngModel in Angular 2
Sample Code
完整的範例可以在我的 GitHub 上找到。