使用 HttpTestingController 將大幅簡化單元測試

凡與顯示相關邏輯,我們會寫在 component;凡與資料相關邏輯,我們會寫在 service。而 service 最常見的應用,就是透過 HttpClient 存取 API。

對於 service 單元測試而言,我們必須對 HttpClient 加以隔離;而對 component 單元測試而言,我們必須對 service 加以隔離,我們該如何對 service 與 component 進行單元測試呢 ?

Version


Angular CLI 1.6.2
Node.js 8.9.4
Angular 5.2.2

User Story

service000

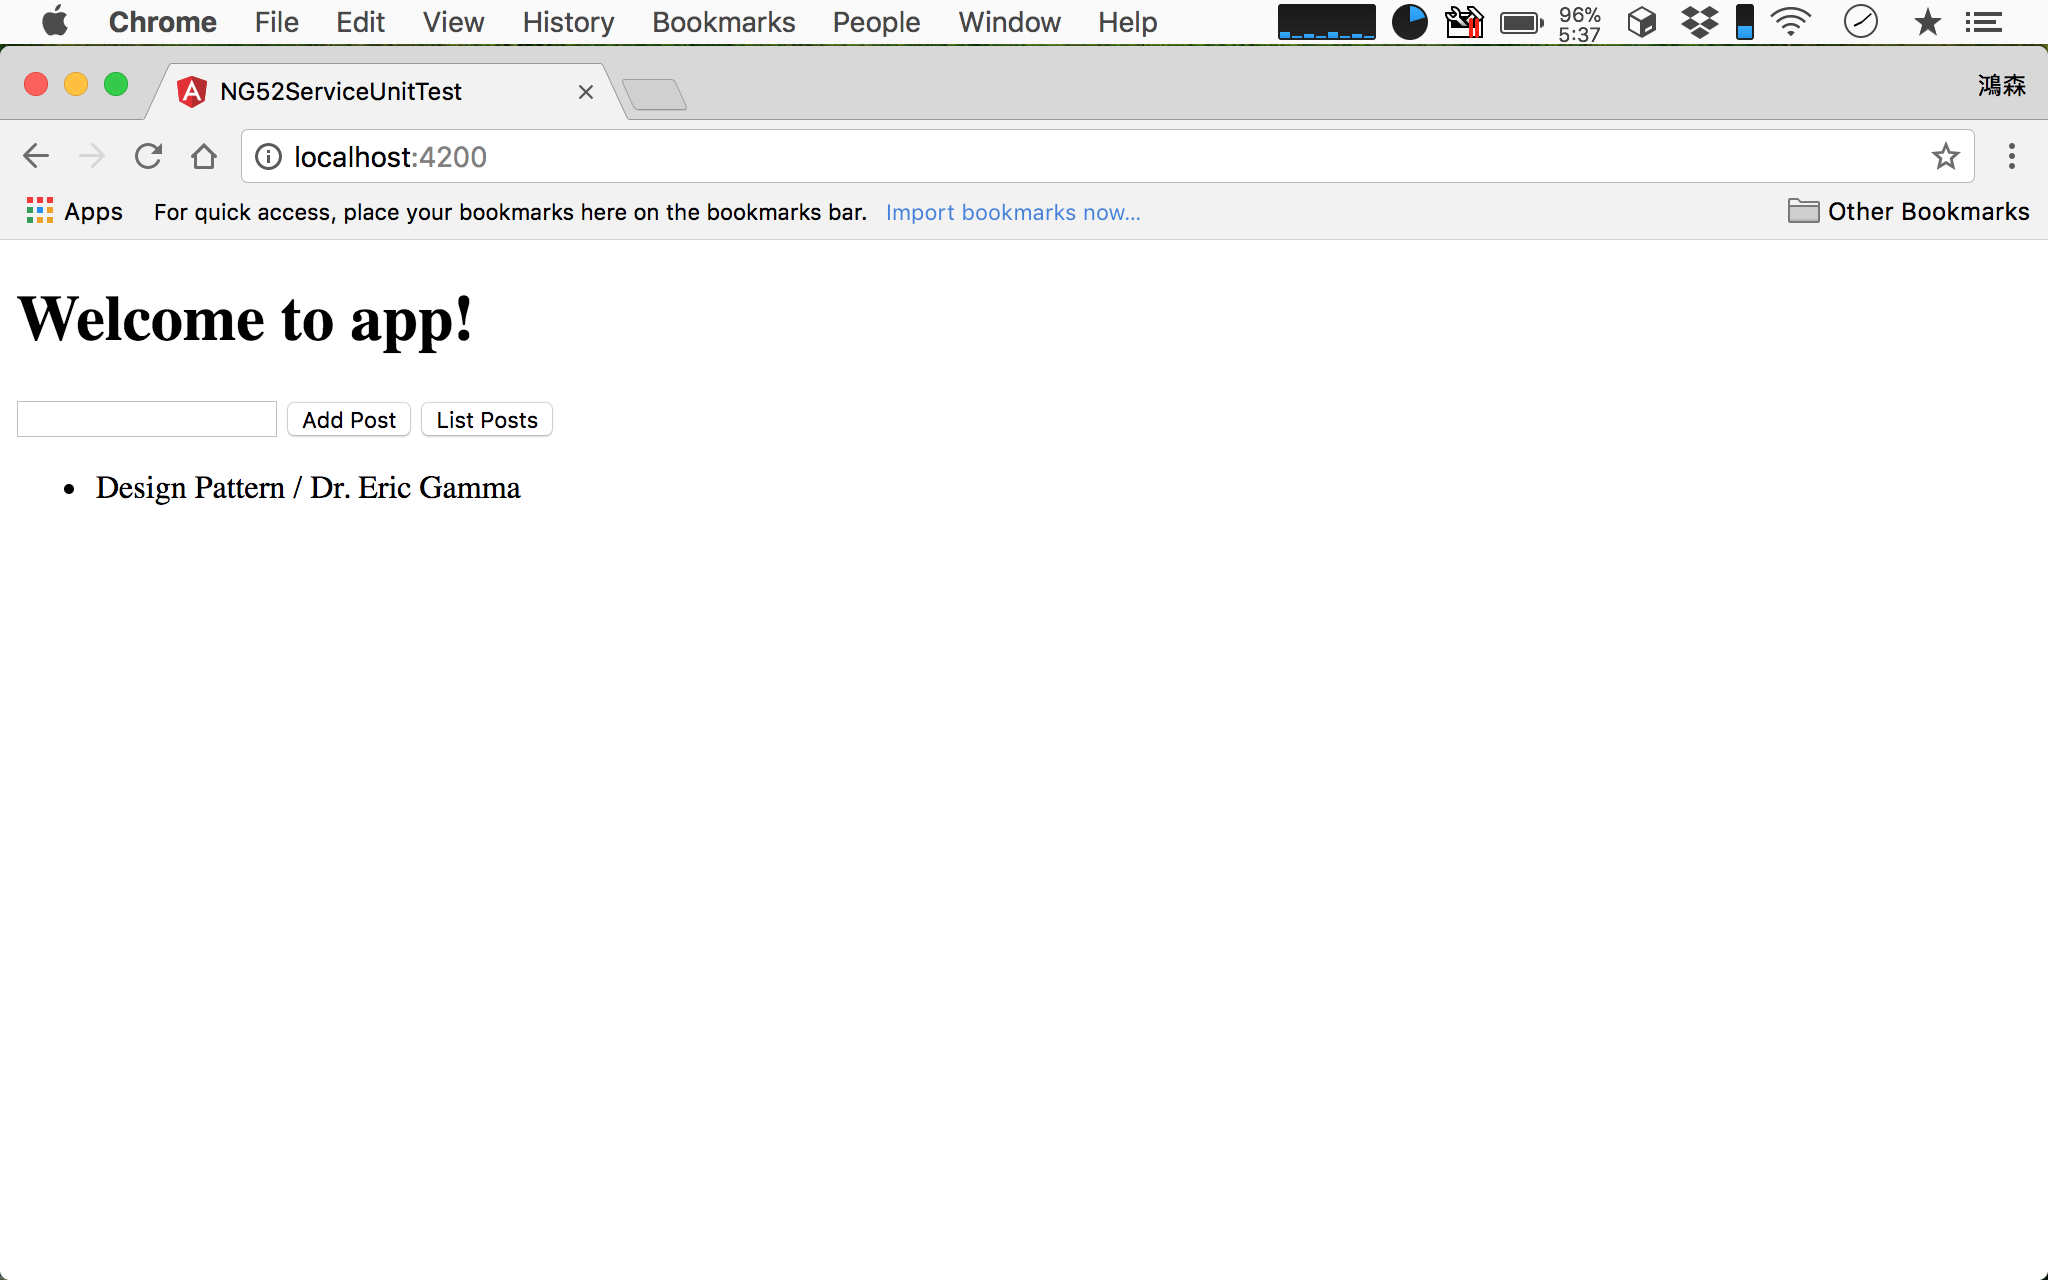
  • Header 會顯示 Welcome to app!
  • 程式一開始會顯示 所有 post
  • Add Post 會呼叫 POST API 新增 post
  • List Posts 會呼叫 GET API 回傳 所有 post

Task


  • 目前有 PostService 使用 HttpClient 存取 API,為了對 PostService單元測試,必須對 HttpClient 加以隔離
  • 目前有 AppComponent 使用 PostService, 為了對 AppComponent單元測試,必須對 PostService 加以隔離

Architecture


service001

  • AppComponent 負責 新增 post顯示 post 的介面顯示;而 PostService 負責 API 的串接
  • 根據 依賴反轉原則AppComponent 不應該直接相依於 PostService,而是兩者相依於 interface
  • 根據 介面隔離原則AppComponent 只相依於它所需要的 interface,因此以 AppComponent 的角度訂出 PostInterface,且 PostService 必須實作此 interface
  • 因為 AppComponentPostService 都相依於 PostInterface,兩者都只知道 PostInterface 而已,而不知道彼此,因此 AppComponentPostService 徹底解耦合
  • 透過 DI 將實作 PostInterfacePostService 注入到 AppComponent ,且將 HttpClient 注入到 PostService

Implementation


AppComponentPostService 的實作並非本文的重點,本文的重點在於實作 AppComponentPostService單元測試 部分。

PostService

service002

post.service.spec.ts

1
2
3
4
5
6
7
8
9
10
11
12
13
14
15
16
17
18
19
20
21
22
23
24
25
26
27
28
29
30
31
32
33
34
35
36
37
38
39
40
41
42
43
44
45
46
47
48
49
50
51
52
53
54
55
56
57
58
59
60
61
62
63
64
65
66
67
68
69
70
71
72
73
74
75
76
77
78
79
80
81
82
83
84
import { TestBed } from '@angular/core/testing';
import { PostService } from './post.service';
import { HttpClientTestingModule, HttpTestingController } from '@angular/common/http/testing';
import { PostInterfaceToken } from '../interface/injection.token';
import { Post } from '../../model/post.model';
import { environment } from '../../environments/environment';
import { PostInterface } from '../interface/post.interface';

describe('PostService', () => {
let postService: PostInterface;
let mockHttpClient: HttpTestingController;

beforeEach(() => {
TestBed.configureTestingModule({
imports: [
HttpClientTestingModule
],
providers: [
{provide: PostInterfaceToken, useClass: PostService}
]
});

postService = TestBed.get(PostInterfaceToken, PostService);
mockHttpClient = TestBed.get(HttpTestingController);
});

it('should be created', () => {
expect(PostService).toBeTruthy();
});

it(`should list all posts`, () => {
/** act */
const expected: Post[] = [
{
id: 1,
title: 'Design Pattern',
author: 'Dr. Eric Gamma'
}
];

postService.listPosts$().subscribe(posts => {
/** assert */
expect(posts).toEqual(expected);
});

/** arrange */
const mockResponse: Post[] = [
{
id: 1,
title: 'Design Pattern',
author: 'Eric Gamma'
}
];

mockHttpClient.expectOne({
url: `${environment.apiServer}/posts`,
method: 'GET'
}).flush(mockResponse);
});

it(`should add post`, () => {
/** act */
const expected: Post = {
id: 1,
title: 'OOP',
author: 'Sam'
};

postService.addPost(expected).subscribe(post => {
/** assert */
expect(post).toBe(expected);
});

/** arrange */
mockHttpClient.expectOne({
url: `${environment.apiServer}/posts`,
method: 'POST'
}).flush(expected);
});

afterEach(() => {
mockHttpClient.verify();
});
});

14 行

1
2
3
4
5
6
7
8
TestBed.configureTestingModule({
imports: [
HttpClientTestingModule
],
providers: [
{provide: PostInterfaceToken, useClass: PostService}
]
});

Angular 有 module 觀念,若使用到了其他 module,必須在 imports 設定;若使用到 DI,則必須在 providers 設定。

若只有一個 module,則在 AppModule 設定。

但是單元測試時,並沒有使用 AppModule 的設定,因為我們可能在測試時使用其他替代 module,也可能自己實作 fake 另外 DI。

Angular 提供了 TestBed.configureTestingModule(),讓我們另外設定跑測試時的 importsproviders 部分。

15 行

1
2
3
imports: [
HttpClientTestingModule
],

原本 HttpClient 使用的是 HttpClientModule,這會使得 HttpClient 真的透過網路去打 API,這就不符合單元測試 隔離 的要求,因此 Angular 另外提供 HttpClientTestingModule 取代 HttpClientModule

18 行

1
2
3
providers: [
{provide: PostInterfaceToken, useClass: PostService}
]

由於我們要測試的就是 PostService,因此 PostService 也必須由 DI 幫我們建立。

但因爲 PostService 是基於 PostInterface 建立,因此必須透過 PostInterfaceToken mapping 到 PostService

23 行

1
2
postService = TestBed.get(PostInterfaceToken, PostService);
mockHttpClient = TestBed.get(HttpTestingController);

providers 設定好 interface 與 class 的 mapping 關係後,我們必須透過 DI 建立 postServicemockHttpClient

其中 HttpTestingController 相當於 mock 版的 HttpClient,因此取名為 mockHttpClient

TestBed.get() 其實相當於 new,只是這是藉由 DI 幫我們 new 而已

31 行

1
2
3
4
5
6
7
8
9
10
11
12
13
14
15
16
17
18
19
20
21
22
23
24
25
26
27
28
29
it(`should list all posts`, () => {
/** act */
const expected: Post[] = [
{
id: 1,
title: 'Design Pattern',
author: 'Dr. Eric Gamma'
}
];

postService.listPosts$().subscribe(posts => {
/** assert */
expect(posts).toEqual(expected);
});

/** arrange */
const mockResponse: Post[] = [
{
id: 1,
title: 'Design Pattern',
author: 'Eric Gamma'
}
];

mockHttpClient.expectOne({
url: `${environment.apiServer}/posts`,
method: 'GET'
}).flush(mockResponse);
});

先談談如何測試 GET

3A 原則的 arrange 習慣都會寫在最前面,但在 service 的單元測試時,arrange 必須寫在最後面,否則會執行錯誤,稍後會解釋原因。

32 行

1
2
3
4
5
6
7
8
9
10
11
12
13
/** act */
const expected: Post[] = [
{
id: 1,
title: 'Design Pattern',
author: 'Dr. Eric Gamma'
}
];

postService.listPosts$().subscribe(posts => {
/** assert */
expect(posts).toEqual(expected);
});

直接對 PostService.listPost$() 測試,由於 listPost$() 回傳 Observable,因此 expect() 必須寫在 subscribe() 內。

將預期的測試結果寫在 expected 內。

一般 Observable 會在 subscribe() 後執行,不過在 HttpTestingController 的設計裡,subscribe() 會在 flush() 才執行,稍後會看到 flush(),所以此時並還沒有執行 expect() 測試

46 行

1
2
3
4
5
6
7
8
9
10
11
12
13
/** arrange */
const mockResponse: Post[] = [
{
id: 1,
title: 'Design Pattern',
author: 'Eric Gamma'
}
];

mockHttpClient.expectOne({
url: `${environment.apiServer}/posts`,
method: 'GET'
}).flush(mockResponse);

之前已經使用 HttpClientTestingModule 取代 HttpClientHttpTestingController 取代 HttpClient,這只能確保呼叫 API 時不用透過網路。

還要透過 expectOne() 設定要 mock 的 URI 與 action,之所以取名為 expectOne(),就是期望有人真的呼叫這個 URI 一次,且必須為 GET,若沒有呼叫這個 URI 或者不是 GET,將造成單元測試 紅燈

這也是為什麼 HttpTestingController 的設計是 actassert 要先寫,最後再寫 arrange,因為 HttpTestingController 本身也有 assert 功能,必須有 act,才能知道 assert URI 與 GET 有沒有錯誤。

最後使用 flush() 設定 mock 的回傳值,flush 英文就是 沖水,當 HttpTestingControllermockResponse 沖出去後,才會執行 subscribe() 內的 expect() 測試。

也就是說若你忘了寫 flush(),其實單元測試也會 綠燈,但此時的綠燈並不是真的測試通過,而是根本沒有執行到 subscribe() 內的 expect()

81 行

1
2
3
afterEach(() => {
mockHttpClient.verify();
});

實務上可能真的忘了寫 expectOne()flush(),導致 subscribe() 內的 expect() 根本沒跑到而造成單元測試 綠燈,因此必須在每個單元測試跑完補上 mockHttpClient.verify(),若有任何 API request 卻沒有經過 expectOne()flush() 測試,則 verify() 會造成單元測試 紅燈,藉以彌補忘了寫 expectOne()flush() 的人為錯誤。

Q : 我們在 listPosts$() 的單元測試到底測試了什麼 ?

  • 若 service 的 API 與 mock 不同,會出現單元測試 紅燈,可能是 service 的 API 錯誤
  • 若 service 的 action 與 mock 不同,會出現單元測試 紅燈,可能是 service 的 action 錯誤
  • 若 service 的 response 與 expected 不同,可能是 service 的邏輯錯誤
61 行

1
2
3
4
5
6
7
8
9
10
11
12
13
14
15
16
17
18
19
it(`should add post`, () => {
/** act */
const expected: Post = {
id: 1,
title: 'OOP',
author: 'Sam'
};

postService.addPost(expected).subscribe(post => {
/** assert */
expect(post).toBe(expected);
});

/** arrange */
mockHttpClient.expectOne({
url: `${environment.apiServer}/posts`,
method: 'POST'
}).flush(expected);
});

再來談談如何測試 POST

62 行

1
2
3
4
5
6
7
8
9
10
11
/** act */
const expected: Post = {
id: 1,
title: 'OOP',
author: 'Sam'
};

postService.addPost(expected).subscribe(post => {
/** assert */
expect(post).toBe(expected);
});

直接對 PostService.addPost() 測試,由於 addPost() 回傳 Observable,因此 expect() 必須寫在 subscribe() 內。

將預期的測試結果寫在 expected 內。

74 行

1
2
3
4
5
/** arrange */
mockHttpClient.expectOne({
url: `${environment.apiServer}/posts`,
method: 'POST'
}).flush(expected);

因為要 mock POST,因此 method 部分改為 POST,其他部分與 GET 部分完全相同。

Q : 我們在 addPost() 到底測試了什麼 ?

  • 若 service 的 API 與 mock 不同,會出現單元測試 紅燈,可能是 service 的 API 錯誤
  • 若 service 的 action 與 mock 不同,會出現單元測試 紅燈,可能是 service 的 action 錯誤
  • 若 service 的 response 與 expected 不同,可能是 service 的邏輯錯誤

service004

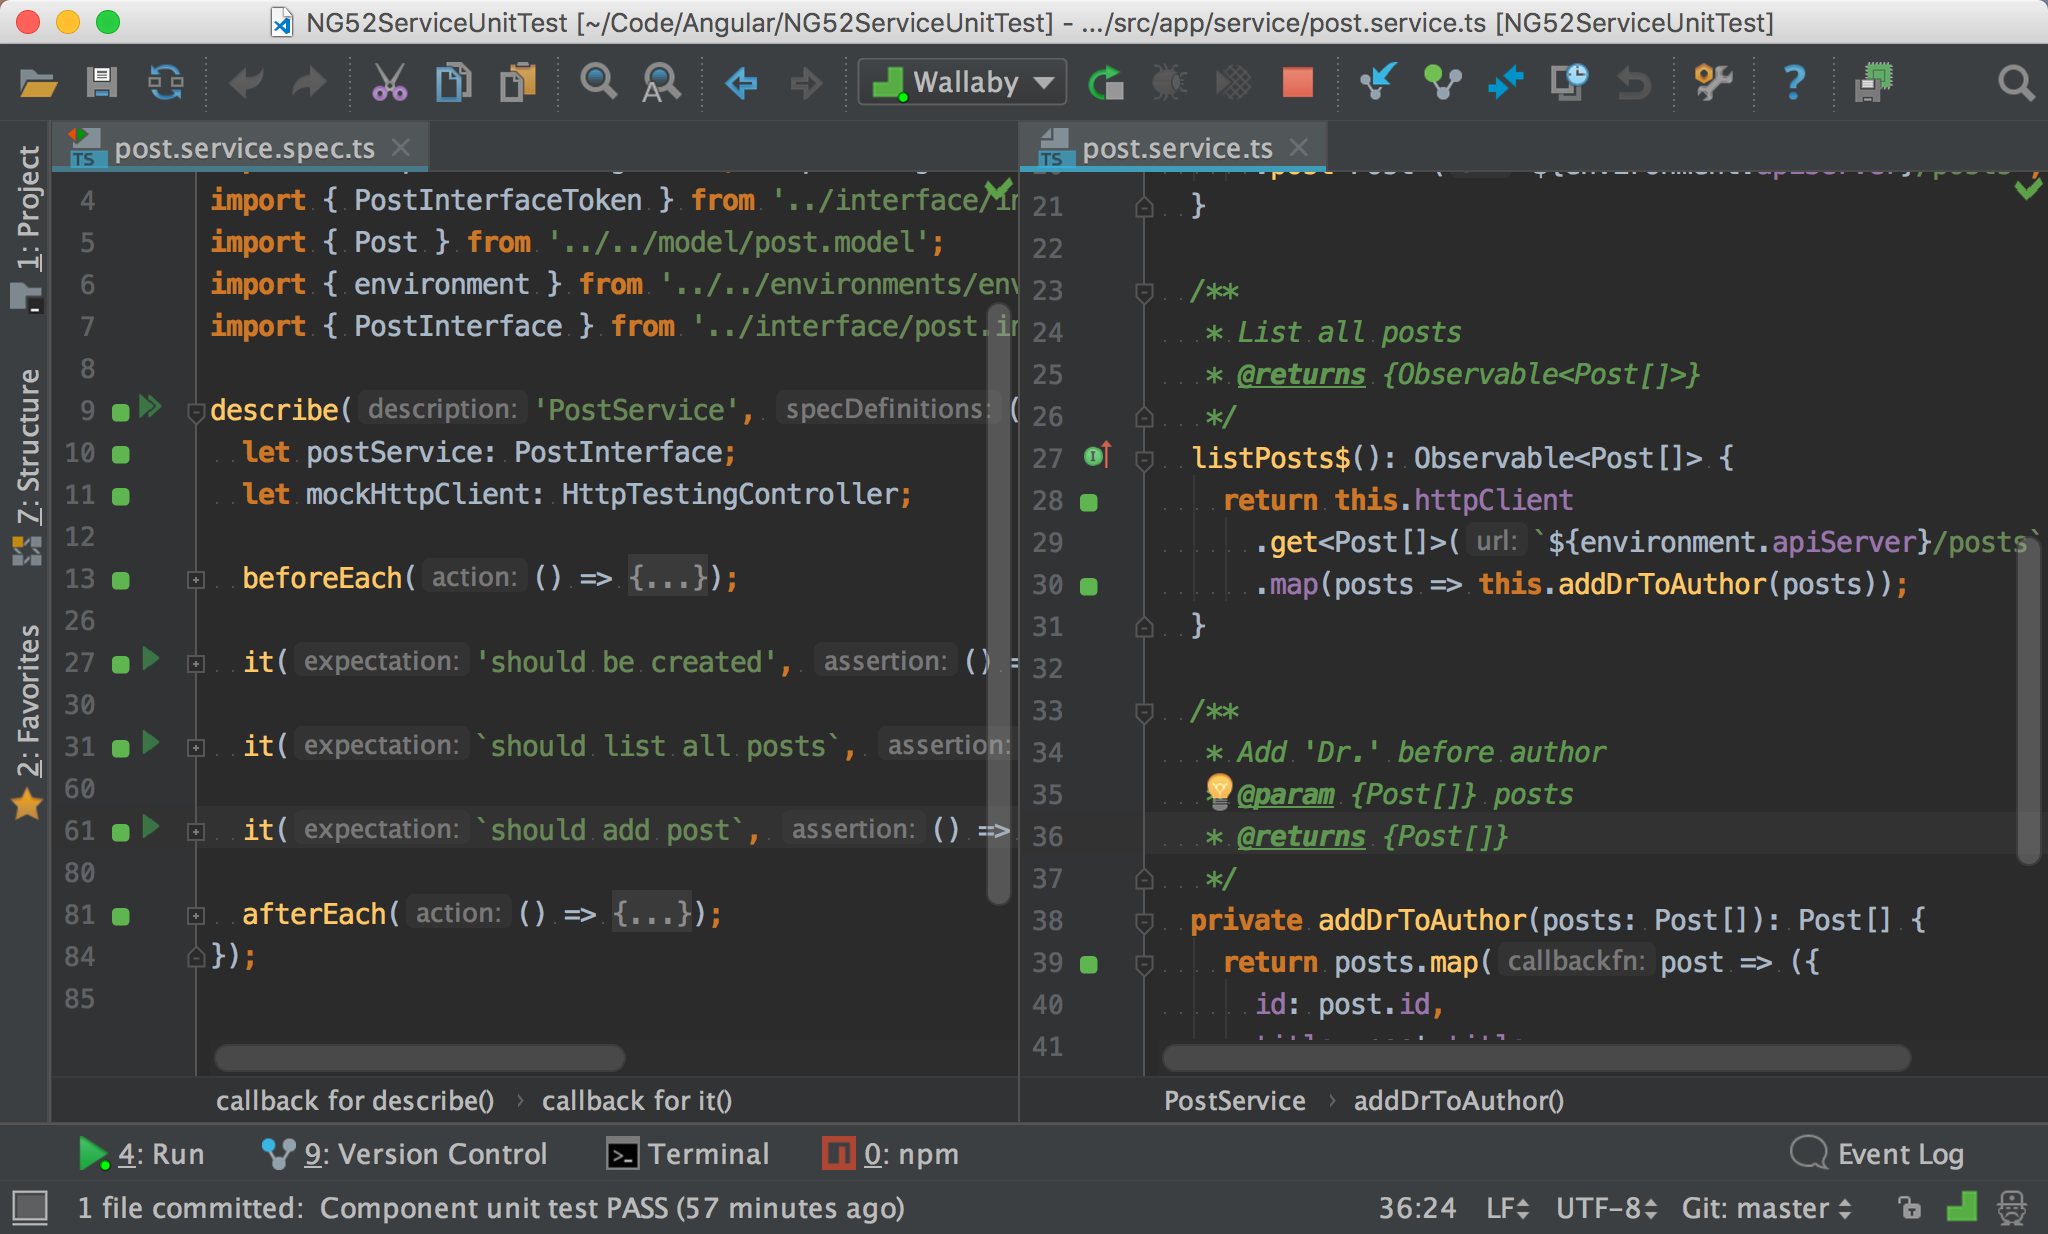
使用 Wallaby.js 通過所有 service 單元測試。

AppComponent

service003

app.component.spec.ts

1
2
3
4
5
6
7
8
9
10
11
12
13
14
15
16
17
18
19
20
21
22
23
24
25
26
27
28
29
30
31
32
33
34
35
36
37
38
39
40
41
42
43
44
45
46
47
48
49
50
51
52
53
54
55
56
57
58
59
60
61
62
63
64
65
66
67
68
69
70
71
72
73
74
75
76
77
78
79
80
81
82
83
84
85
86
87
import { async, ComponentFixture, TestBed } from '@angular/core/testing';
import { AppComponent } from './app.component';
import { FormsModule } from '@angular/forms';
import { HttpClientTestingModule } from '@angular/common/http/testing';
import { PostService } from './service/post.service';
import { PostInterfaceToken } from './interface/injection.token';
import { DebugElement } from '@angular/core';
import { Observable } from 'rxjs/Observable';
import 'rxjs/add/observable/of';
import { PostInterface } from './interface/post.interface';

describe('AppComponent', () => {
let fixture: ComponentFixture<AppComponent>;
let appComponent: AppComponent;
let debugElement: DebugElement;
let htmlElement: HTMLElement;
let postService: PostInterface;

beforeEach(async(() => {
TestBed.configureTestingModule({
declarations: [
AppComponent
],
imports: [
FormsModule,
HttpClientTestingModule
],
providers: [
{provide: PostInterfaceToken, useClass: PostService}
]
}).compileComponents();

fixture = TestBed.createComponent(AppComponent);
appComponent = fixture.componentInstance;
debugElement = fixture.debugElement;
htmlElement = debugElement.nativeElement;
fixture.detectChanges();

postService = TestBed.get(PostInterfaceToken, PostService);
}));

it('should create the app', async(() => {
expect(appComponent).toBeTruthy();
}));

it(`should have as title 'app'`, async(() => {
expect(appComponent.title).toEqual('app');
}));

it('should render title in a h1 tag', async(() => {
expect(htmlElement.querySelector('h1').textContent).toContain('Welcome to app!');
}));

it(`should list posts`, () => {
const expected$ = Observable.of([
{
id: 1,
title: 'Design Pattern',
author: 'Dr. Eric Gamma'
}
]);

/** arrange */
spyOn(postService, 'listPosts$').and.returnValue(expected$);
/** act */
appComponent.onListPostsClick();
/** assert */
expect(appComponent.posts$).toEqual(expected$);
});

it(`should add post`, () => {
const expected$ = Observable.of(
{
id: 1,
title: 'Design Pattern',
author: 'Dr. Eric Gamma'
}
);

/** arrange */
const spy = spyOn(postService, 'addPost').and.returnValue(expected$);
/** act */
appComponent.onAddPostClick();
/** assert */
expect(spy).toHaveBeenCalled();
});
});

20 行

1
2
3
4
5
6
7
8
9
10
11
12
TestBed.configureTestingModule({
declarations: [
AppComponent
],
imports: [
FormsModule,
HttpClientTestingModule
],
providers: [
{provide: PostInterfaceToken, useClass: PostService}
]
}).compileComponents();

跑 component 單元測試時,一樣沒有使用 AppModule 的設定,因為我們可能在測試時使用其他替代 module,也可能自己實作 fake 另外 DI。

因此一樣使用 TestBed.configureTestingModule(),讓我們另外設定跑測試時的 importsproviders 部分。

24 行

1
2
3
4
imports: [
FormsModule,
HttpClientTestingModule
],

因為在 component 使用了 two-way binding,因此要加上 FormsModule

Q : 為什麼要 import HttpClientTestingModule 呢 ?

AppComponent 依賴的是 PostService,看起來與 HttpClient 無關,應該不需要注入 HttpClientTestingModule

但其實 DI 並不是這樣運作,雖然 AppComponent 只用到了 PostService,但 DI 會將 PostService 下所有的 dependency 都一起注入,所以也要 import HttpClientTestingModule

28 行

1
2
3
providers: [
{provide: PostInterfaceToken, useClass: PostService}
]

由於我們要測試的就是 PostService,因此 PostService 也必須由 DI 幫我們建立。

但因爲 PostService 是基於 PostInterface 建立,因此必須透過 PostInterfaceToken mapping 到 PostService

39 行

1
postService = TestBed.get(PostInterfaceToken, PostService);

providers 設定好 interface 與 class 的 mapping 關係後,我們必須透過 DI 建立 postService 與。

53 行

1
2
3
4
5
6
7
8
9
10
11
12
13
14
15
16
it(`should list posts`, () => {
const expected$ = Observable.of([
{
id: 1,
title: 'Design Pattern',
author: 'Dr. Eric Gamma'
}
]);

/** arrange */
spyOn(postService, 'listPosts$').and.returnValue(expected$);
/** act */
appComponent.onListPostsClick();
/** assert */
expect(appComponent.posts$).toEqual(expected$);
});

55 行

1
2
3
4
5
6
7
const expected$ = Observable.of([
{
id: 1,
title: 'Design Pattern',
author: 'Dr. Eric Gamma'
}
]);

透過 Observable.of()Post[] 轉成 Observable<Post[]>

63 行

1
2
/** arrange */
spyOn(postService, 'listPosts$').and.returnValue(expected$);

由於我們要隔離 PostService,因此使用 spyOn()PostServicelistPost$() 加以 mock,並設定其假的回傳值。

65 行

1
2
/** act */
appComponent.onListPostsClick();

實際測試 onListPostClick()

67 行

1
2
/** assert */
expect(appComponent.posts$).toEqual(expected$);

測試 AppComponent.post$ 是否如預期。

Q : 我們在 onListPostsClick() 到底測試了什麼 ?

  • 若 component 的 return 與 expected 不同,可能是 component 的邏輯錯誤

70 行

1
2
3
4
5
6
7
8
9
10
11
12
13
14
15
16
it(`should add post`, () => {
const expected$ = Observable.of(
{
id: 1,
title: 'Design Pattern',
author: 'Dr. Eric Gamma'
}
);

/** arrange */
const spy = spyOn(postService, 'addPost').and.returnValue(expected$);
/** act */
appComponent.onAddPostClick();
/** assert */
expect(spy).toHaveBeenCalled();
});

72 行

1
2
3
4
5
6
7
const expected$ = Observable.of(
{
id: 1,
title: 'Design Pattern',
author: 'Dr. Eric Gamma'
}
);

透過 Observable.of()Post 轉成 Observable<Post>

80 行

1
2
/** arrange */
const spy = spyOn(postService, 'addPost').and.returnValue(expected$);

由於我們要隔離 PostService,因此使用 spyOn()PostServiceaddPost 加以 mock,並設定其假的回傳值。

82 行

1
2
/** act */
appComponent.onAddPostClick();

實際測試 onAddPostClick()

84 行

1
2
/** assert */
expect(spy).toHaveBeenCalled();

由於 onAddPostClick() 回傳值為 void,且 PostService.addPost() 已經有單元測試保護,因此只要測試 PostService.addPost() 曾經被呼叫過即可。
service005

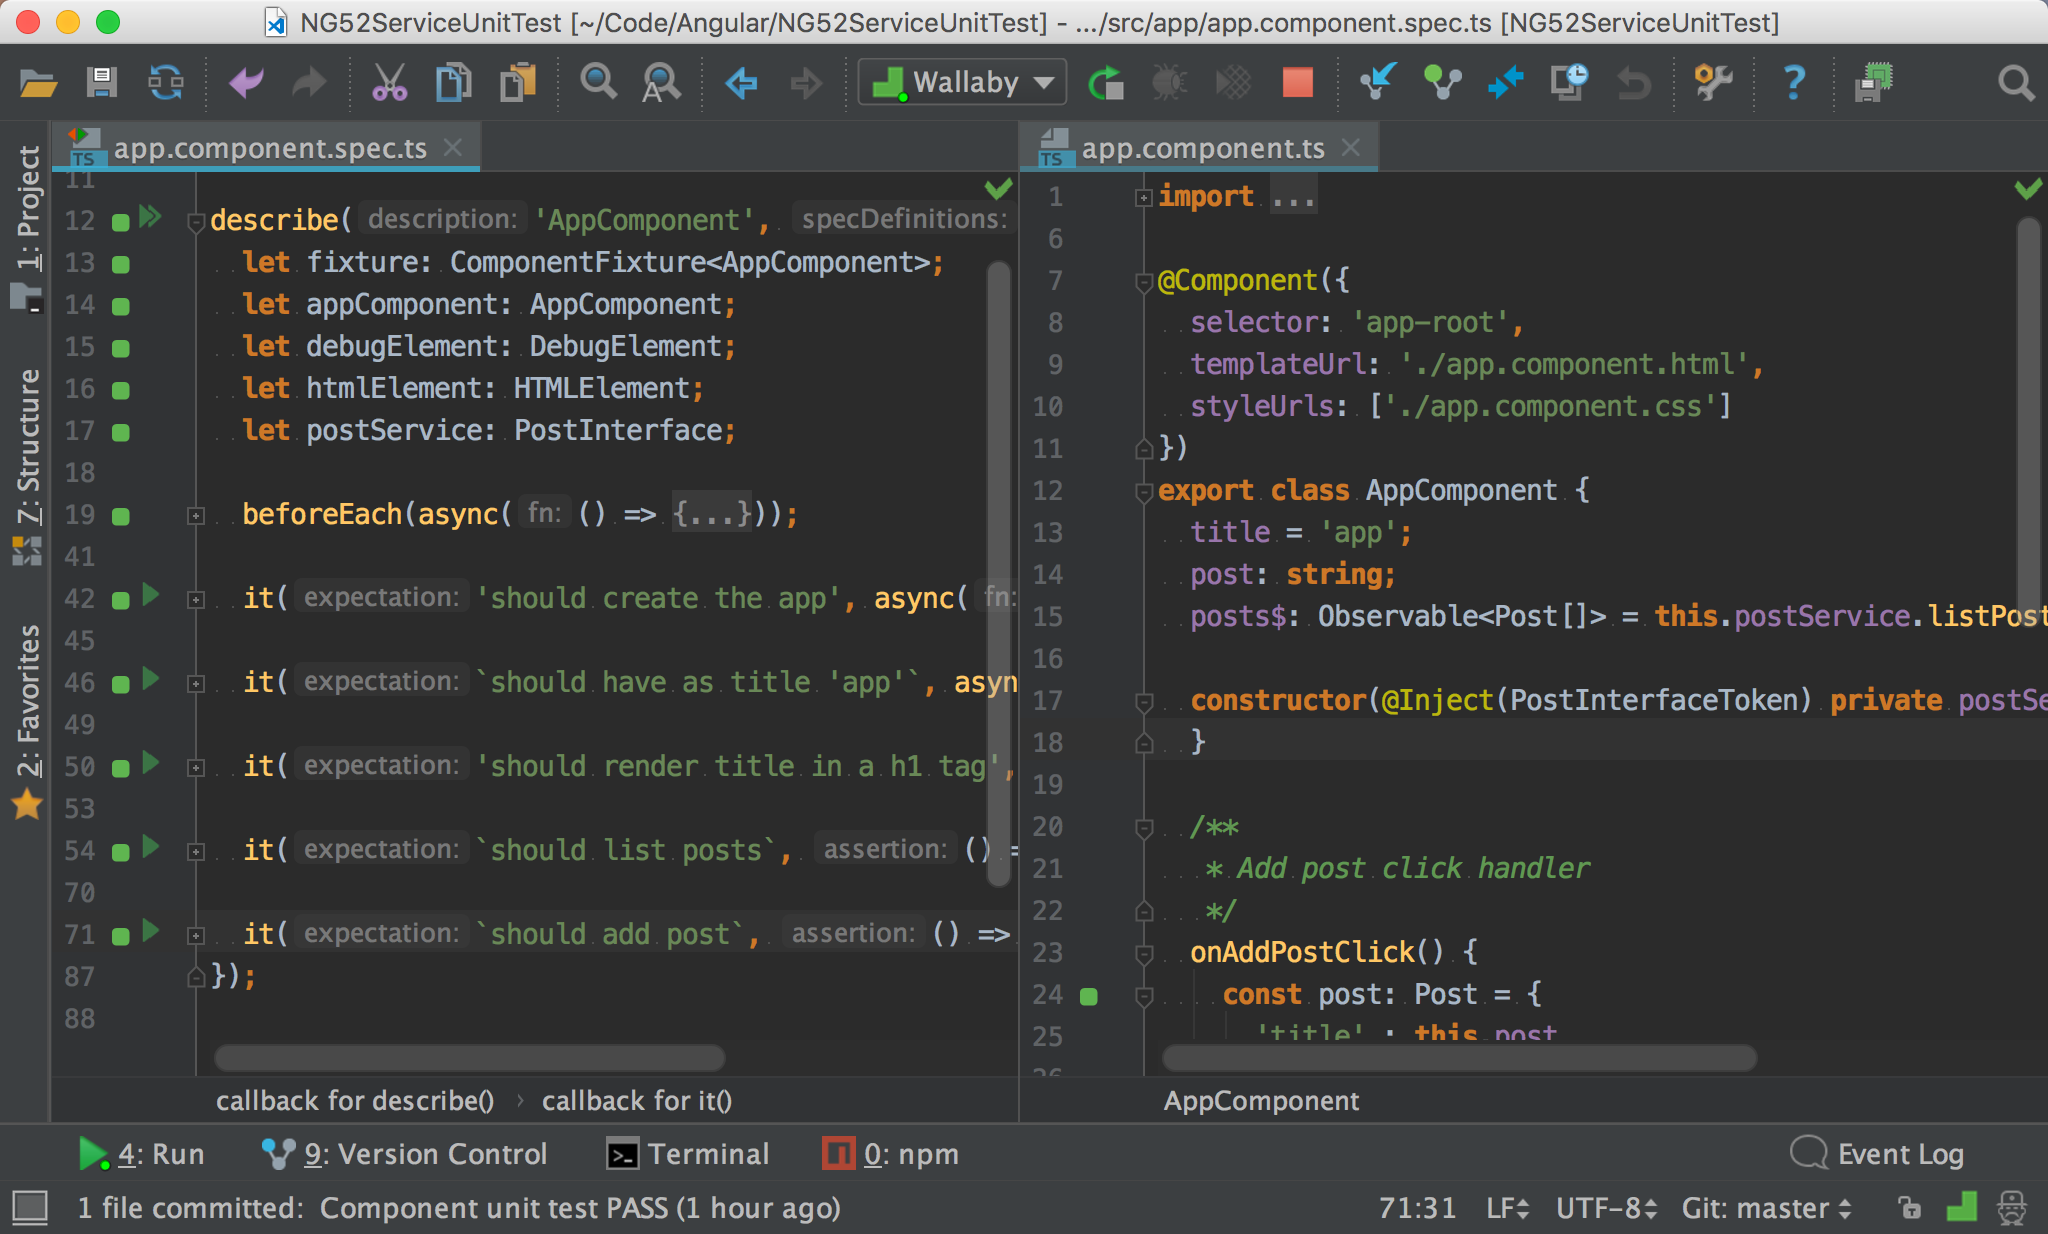
使用 Wallaby.js 通過所有 component 單元測試。

Conclusion


  • 當 component 使用了 service,若要單元測試就牽涉到 DI 與 spyOn()
  • Service 單元測試可透過 HttpTestingController 加以隔離 HttpClient
  • Component 單元測試可透過 spyOn() 加以隔離 service

Sample Code


完整的範例可以在我的 GitHub 上找到

Reference


Angular, Testing
Angular, HttpClient
Fabian Gosebrink, Testing Angular Http Service
Chris Pawlukiewicz, Simple Observable Unit Testing in Angular 2
Jesse Palmer, Testing Angular Applications

2018-01-28