JSON Server 簡介
在前後端分離下,Angular 需要倚賴後端 API 才能對資料庫存取,在實務上,當 API 規格確立後,前端工程師不可能等後端工程師寫好 API 才開始開發,而是一起同時開發,因此前端工程師需要有假 API 才能開發測試。
前端工程師不必為了假 API 安裝後端環境與資料庫,只要安裝 JSON Server,就能模擬出假 API。
Version
JSON Server 0.12.0
安裝 JSON Server
使用 NPM 安裝
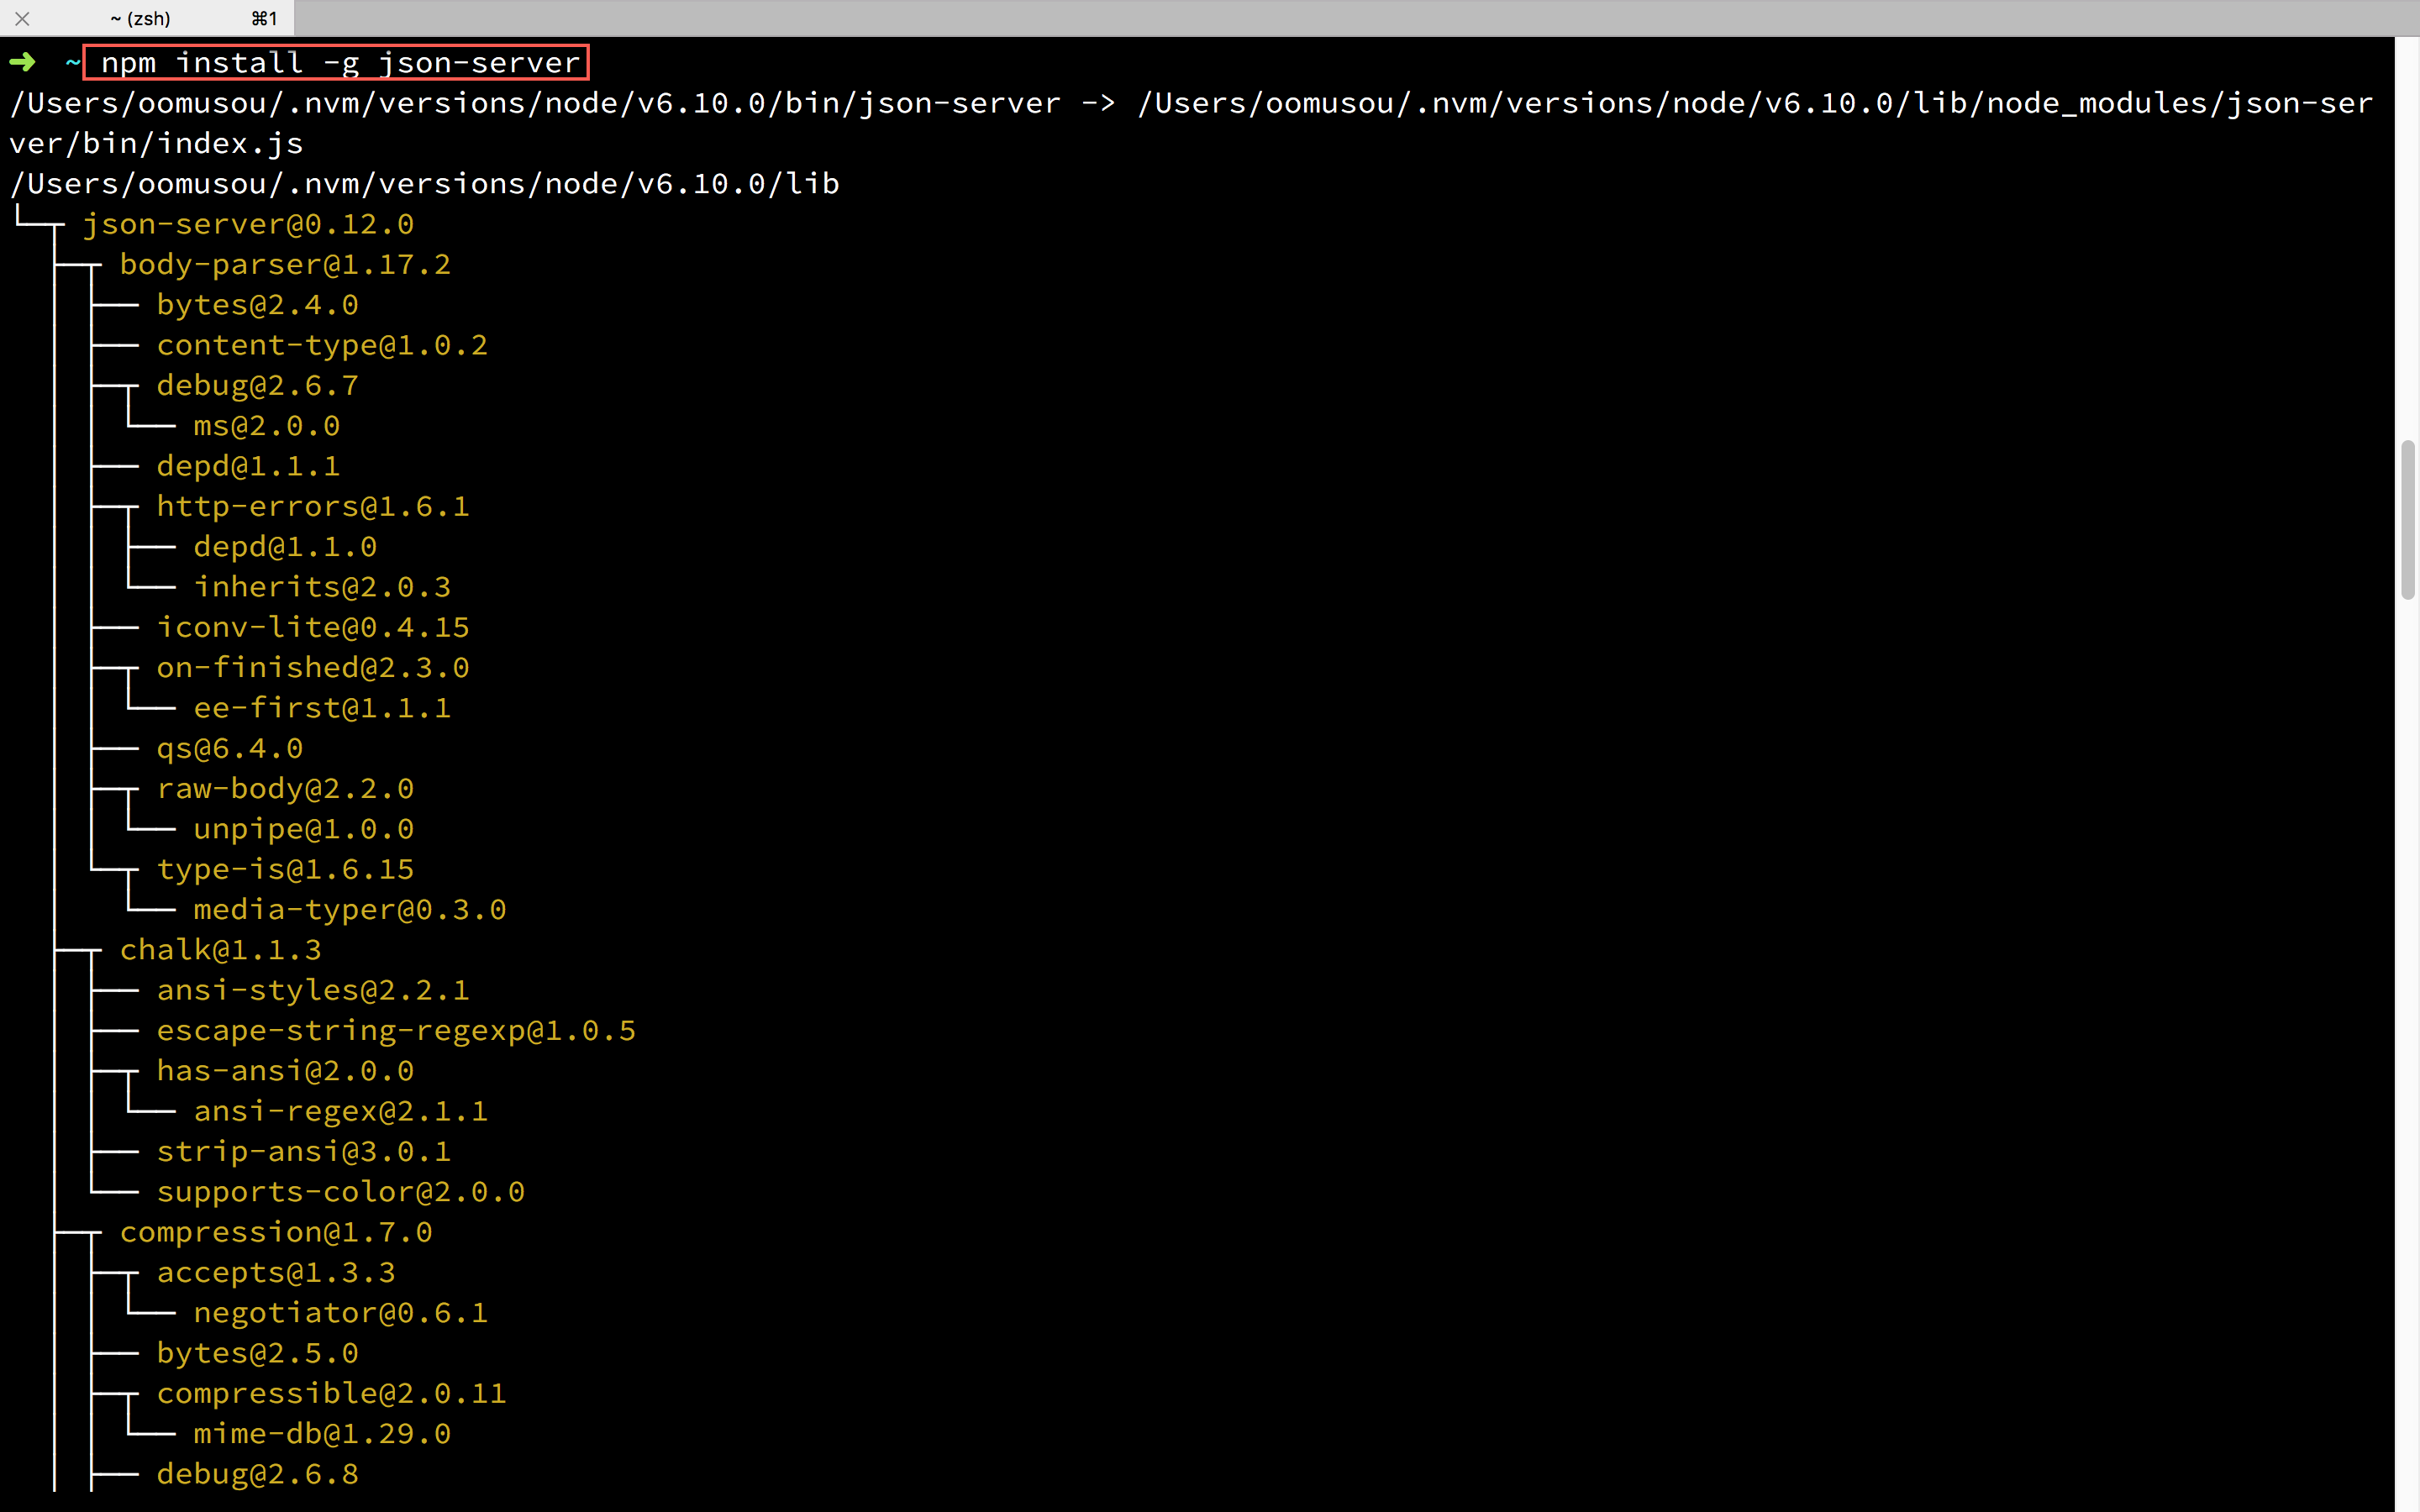
1 | $ npm install -g json-server |
將 JSON Server 安裝在 global 環境。
啟動 JSON Server
1 | ~$ cd MyProject |
- 進入
MyProject專案目錄 - 在專案目錄下建立
json-server目錄 - 啟動 JSON Server,指定
db.json為資料庫檔案
若 db.json 檔案存在,則 JSON Server 會以此檔案為資料庫,若不存在,則會建立新的 db.json 檔案。
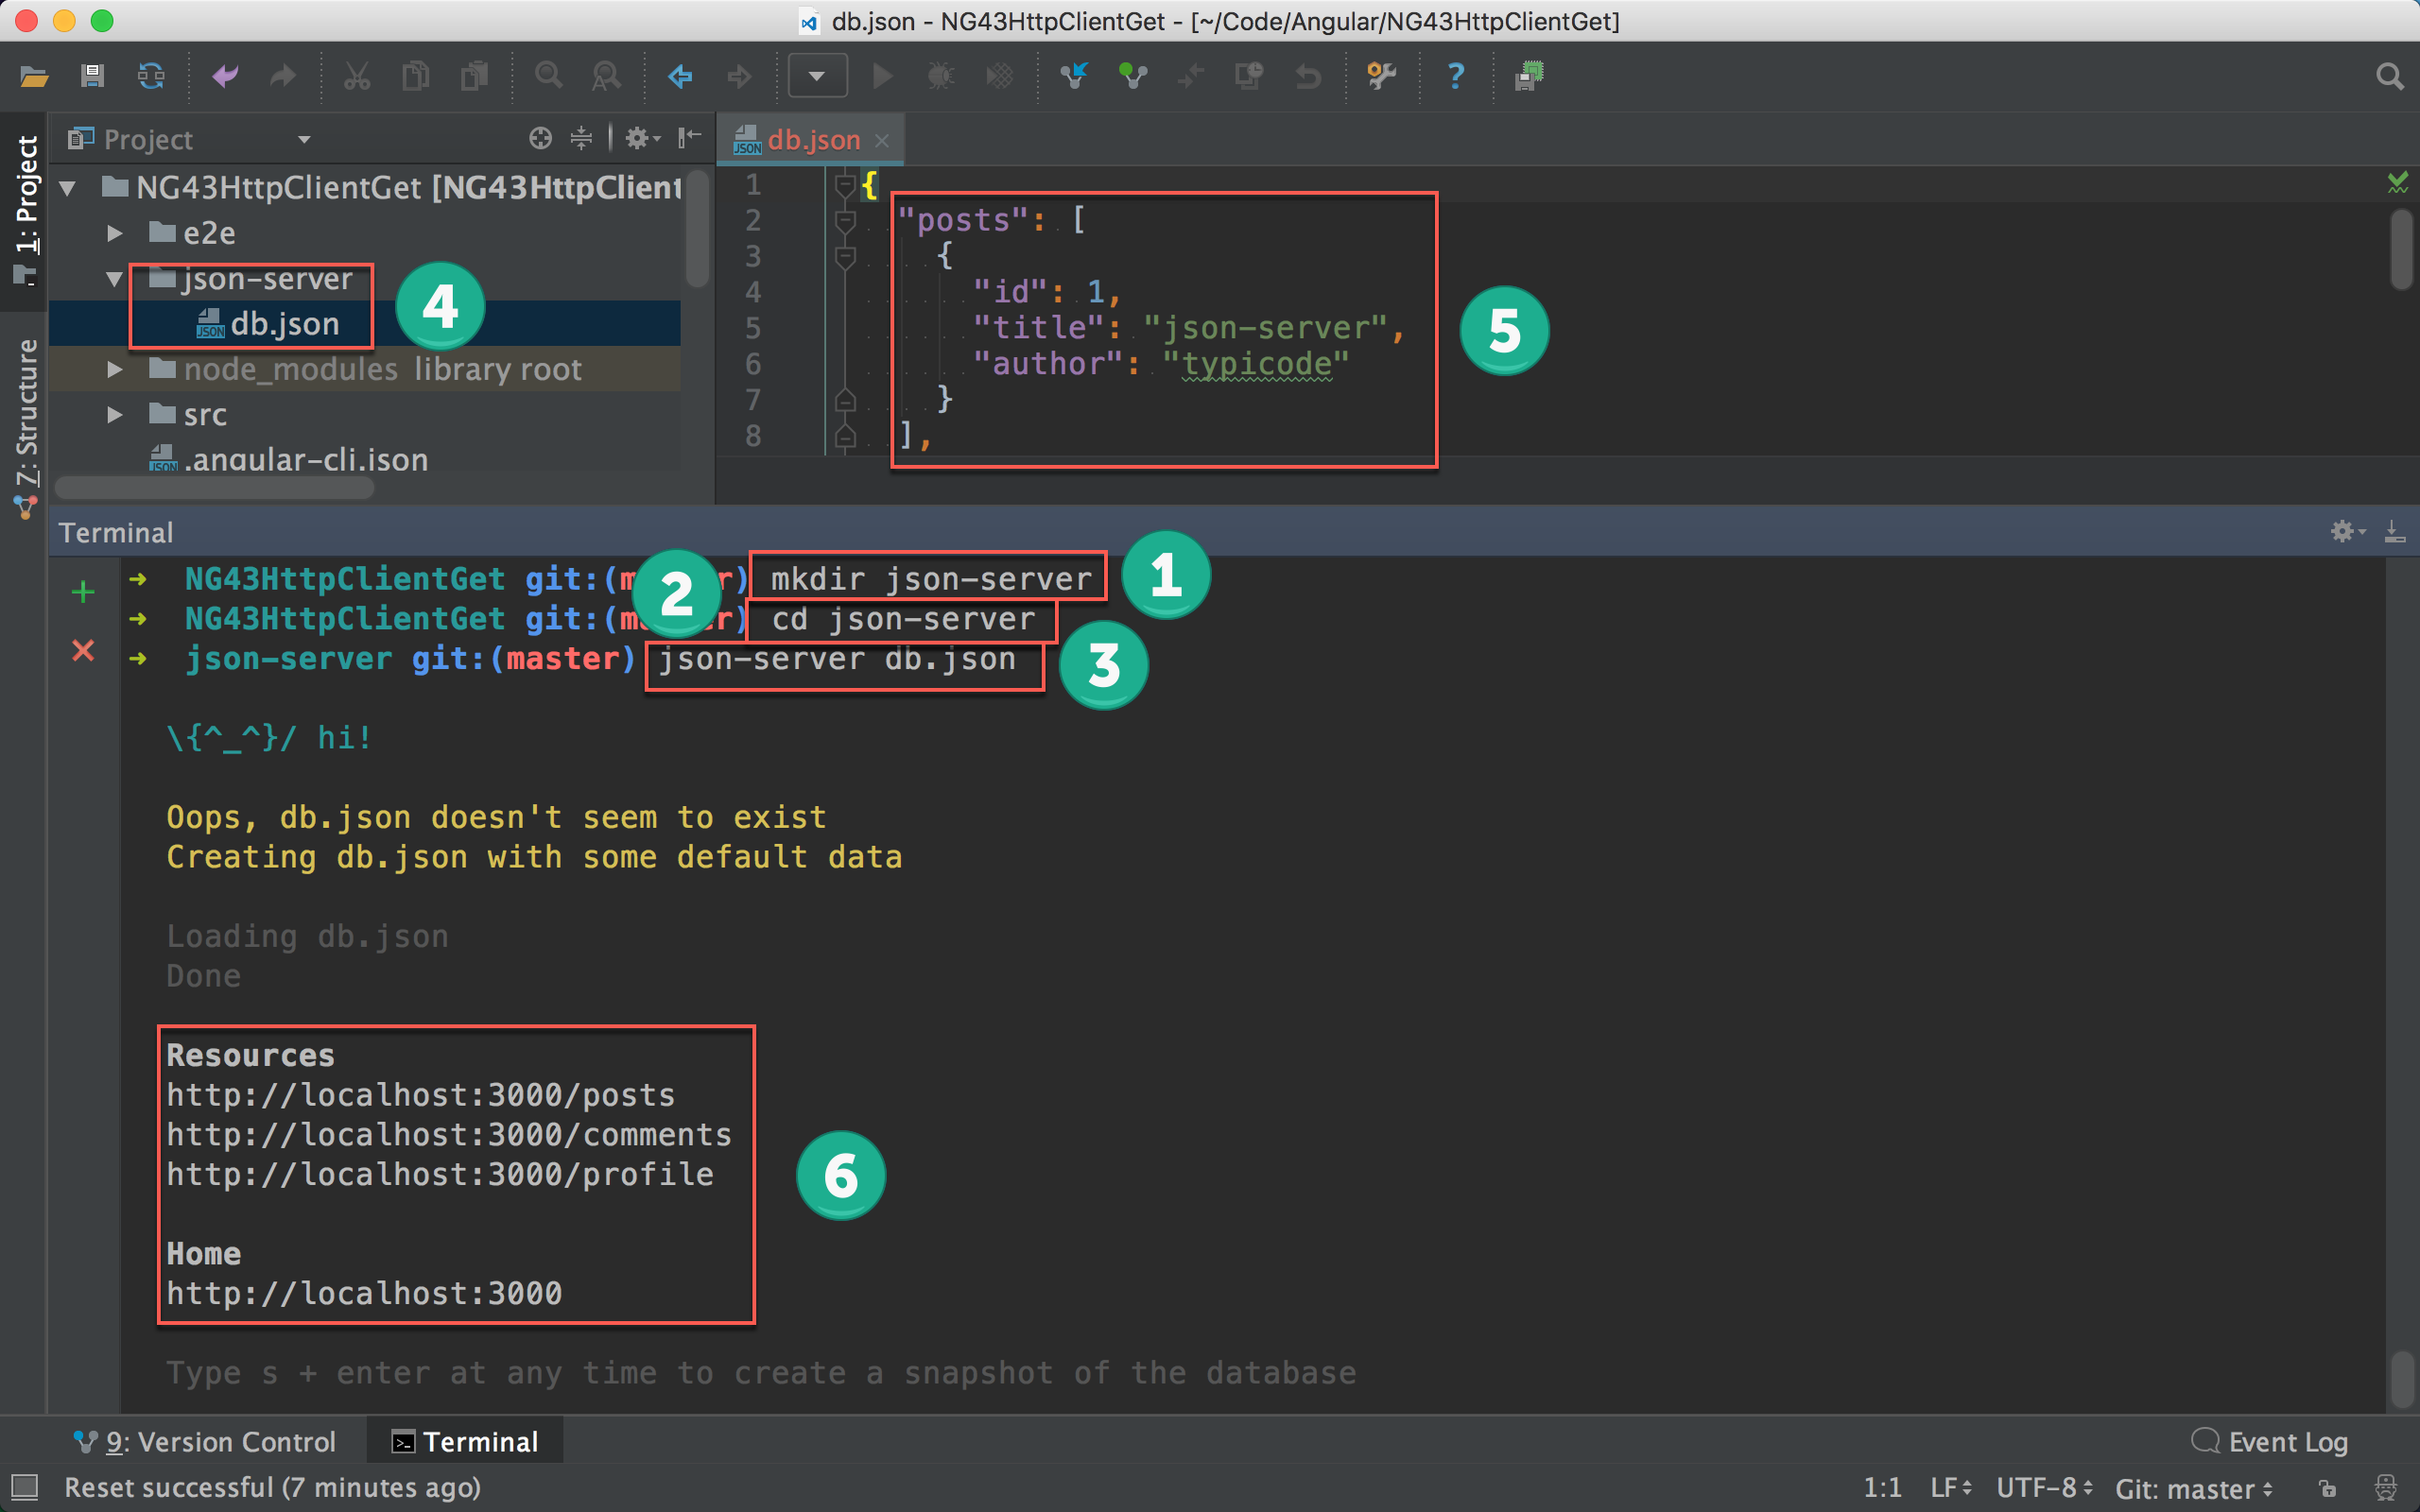
- 建立
json-server目錄 - 進入
json-server目錄 - 在
json-server目錄啟動 JSON Server,並將db.json檔案建立在json-server目錄下 - JSON Server 在
json-server目錄下產生db.json檔案 db.json預設已經有預設資料了- JSON Server 預設提供了網址可供測試
測試 JSON Server
預設 db.json 已經有資料,可藉此測試 JSON Server 是否有成功啟動。
1 | http://localhost:3000/posts |
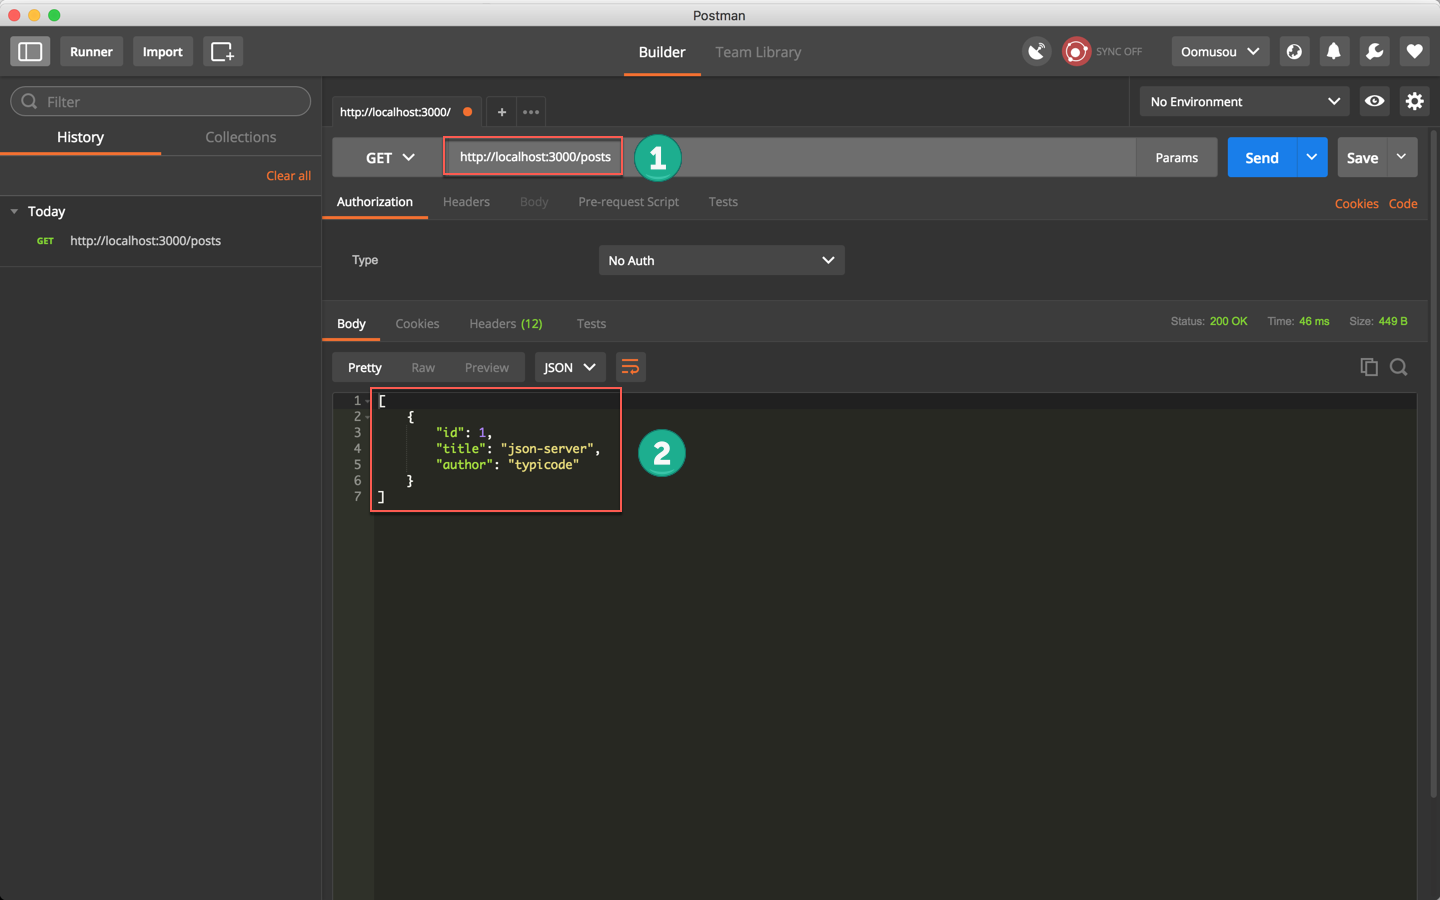
使用 Postman 測試 http://localhost:3000/posts,確定能抓到資料。
1 | http://localhost:3000 |
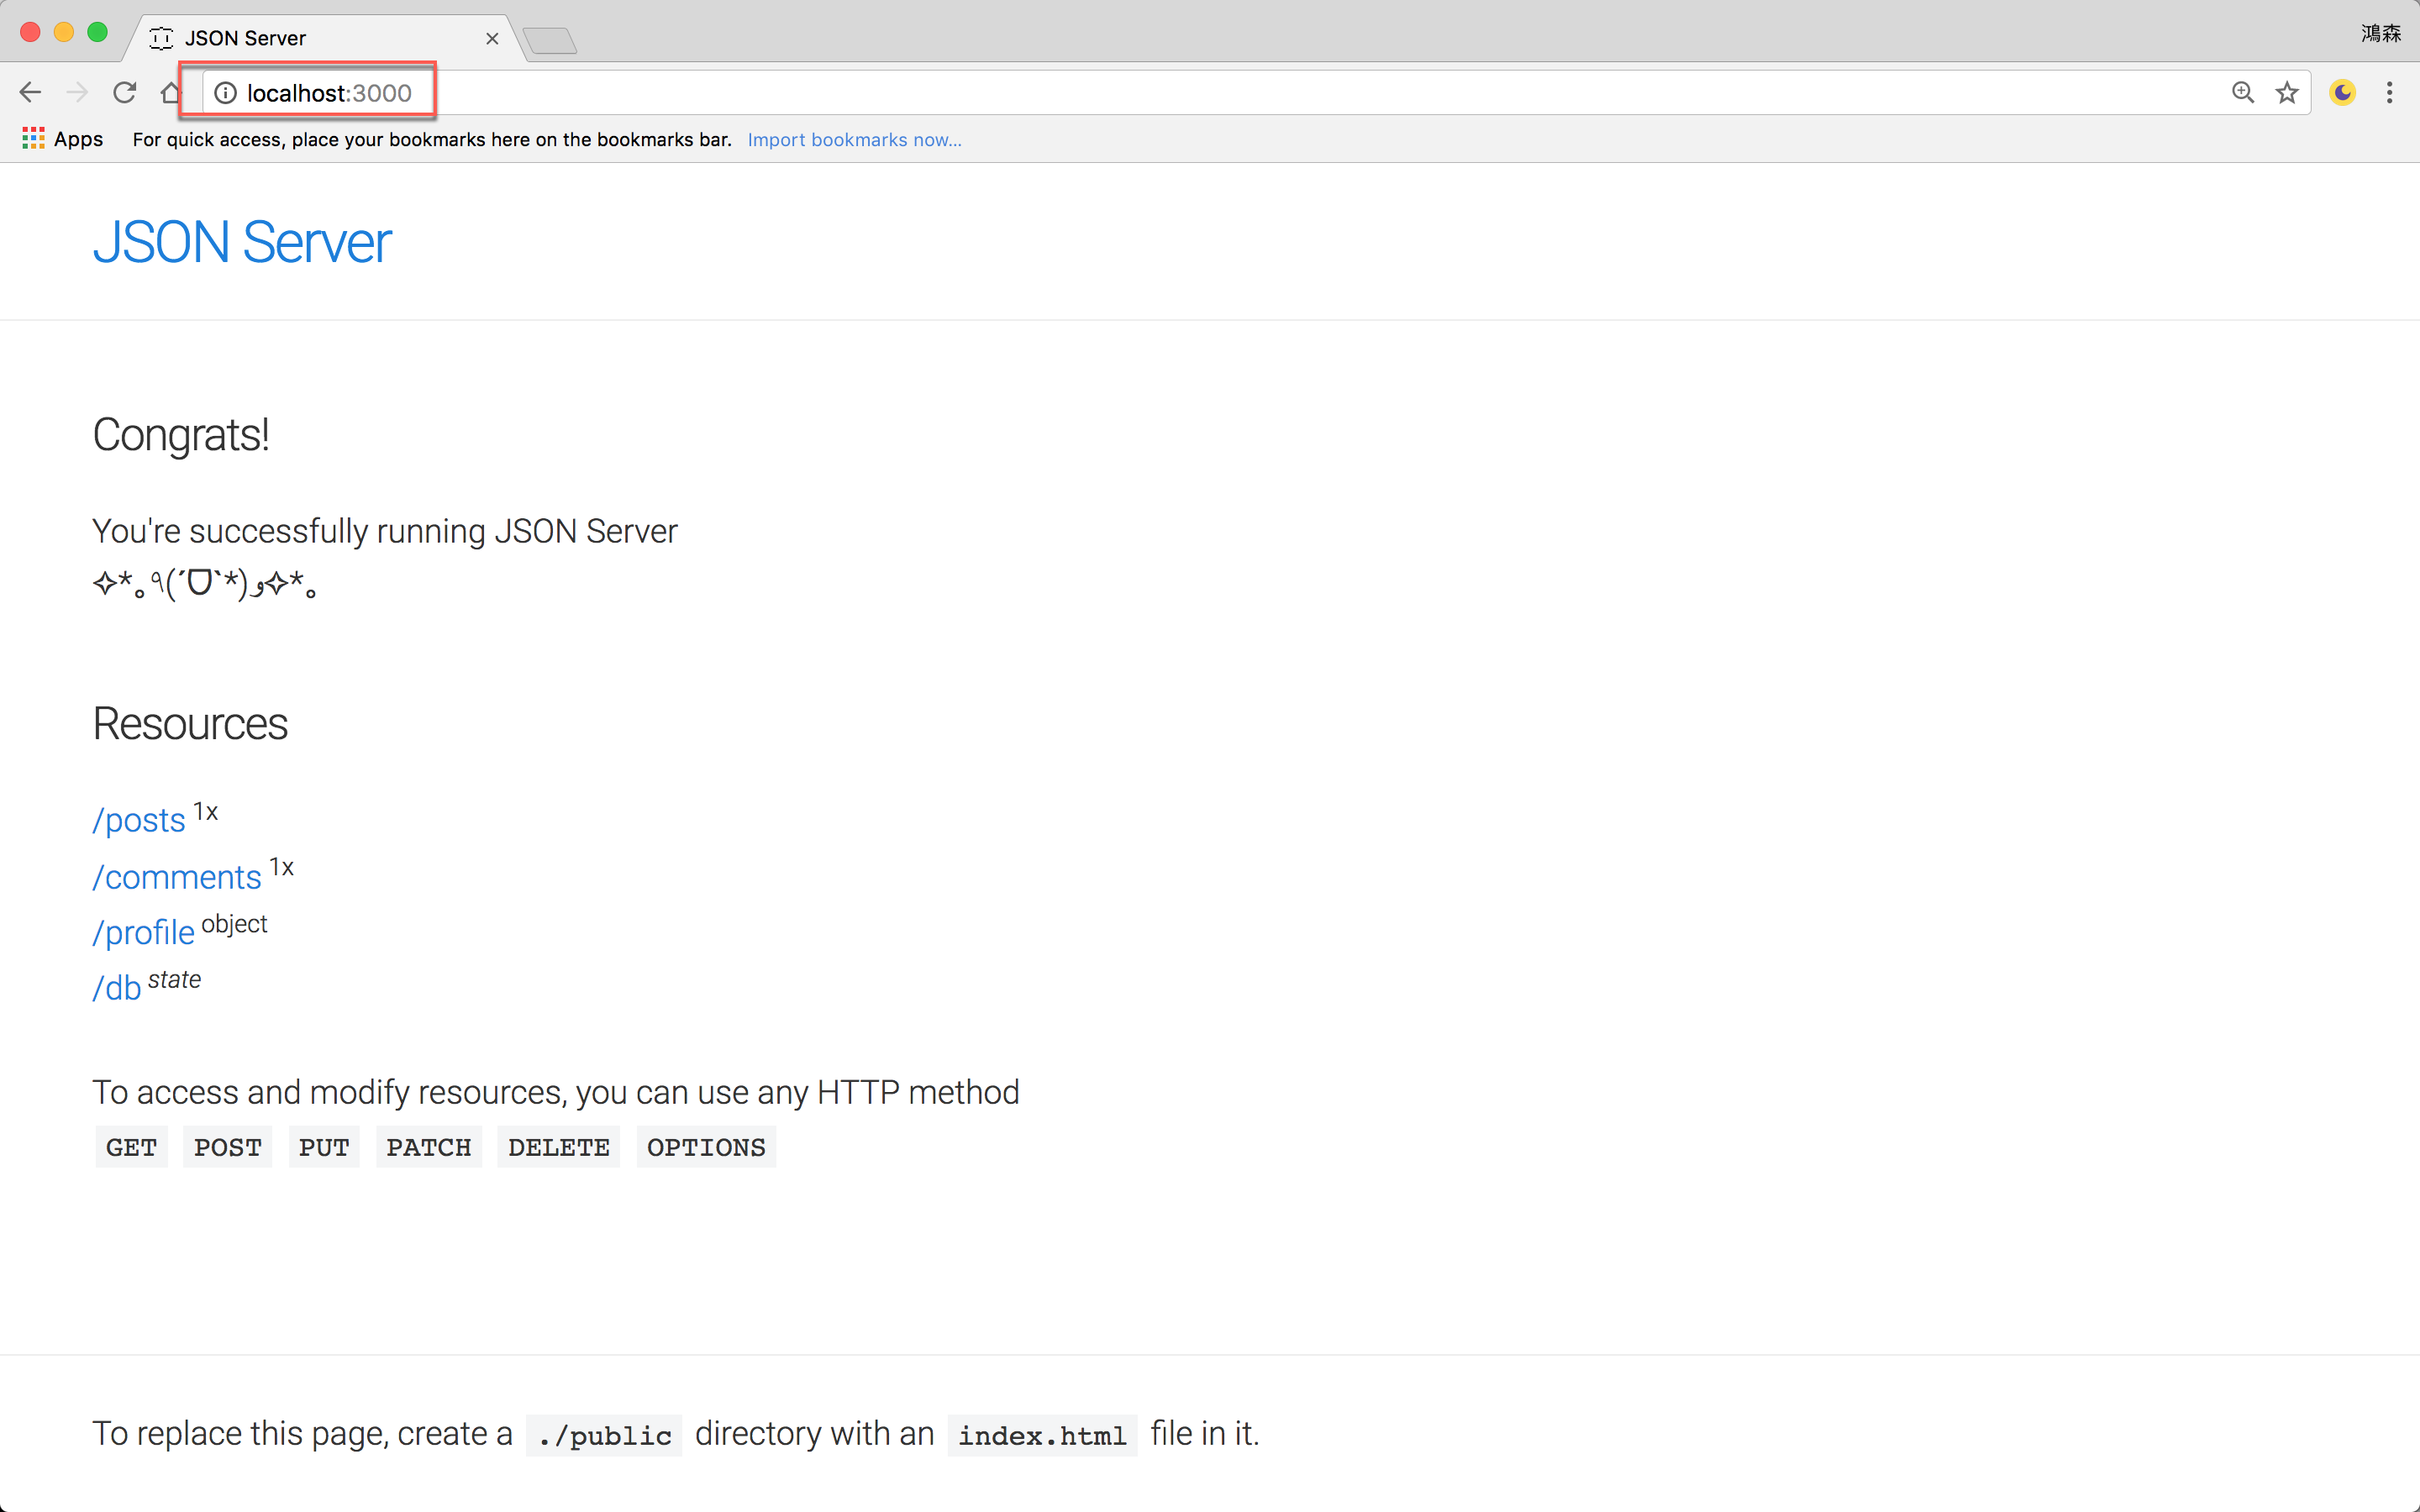
使用瀏覽器測試 http://localhost:3000,確定 JSON Server 內建 Web server 已經成功啟動。
HTTP Request Method
JSON Server 支援開發中最常用的 GET、POST、PUT、PATCH 與 DELETE 等 request method。
GET
用於取得 resource。
1 | http://localhost:3000/posts |
取得所有 post 資料。
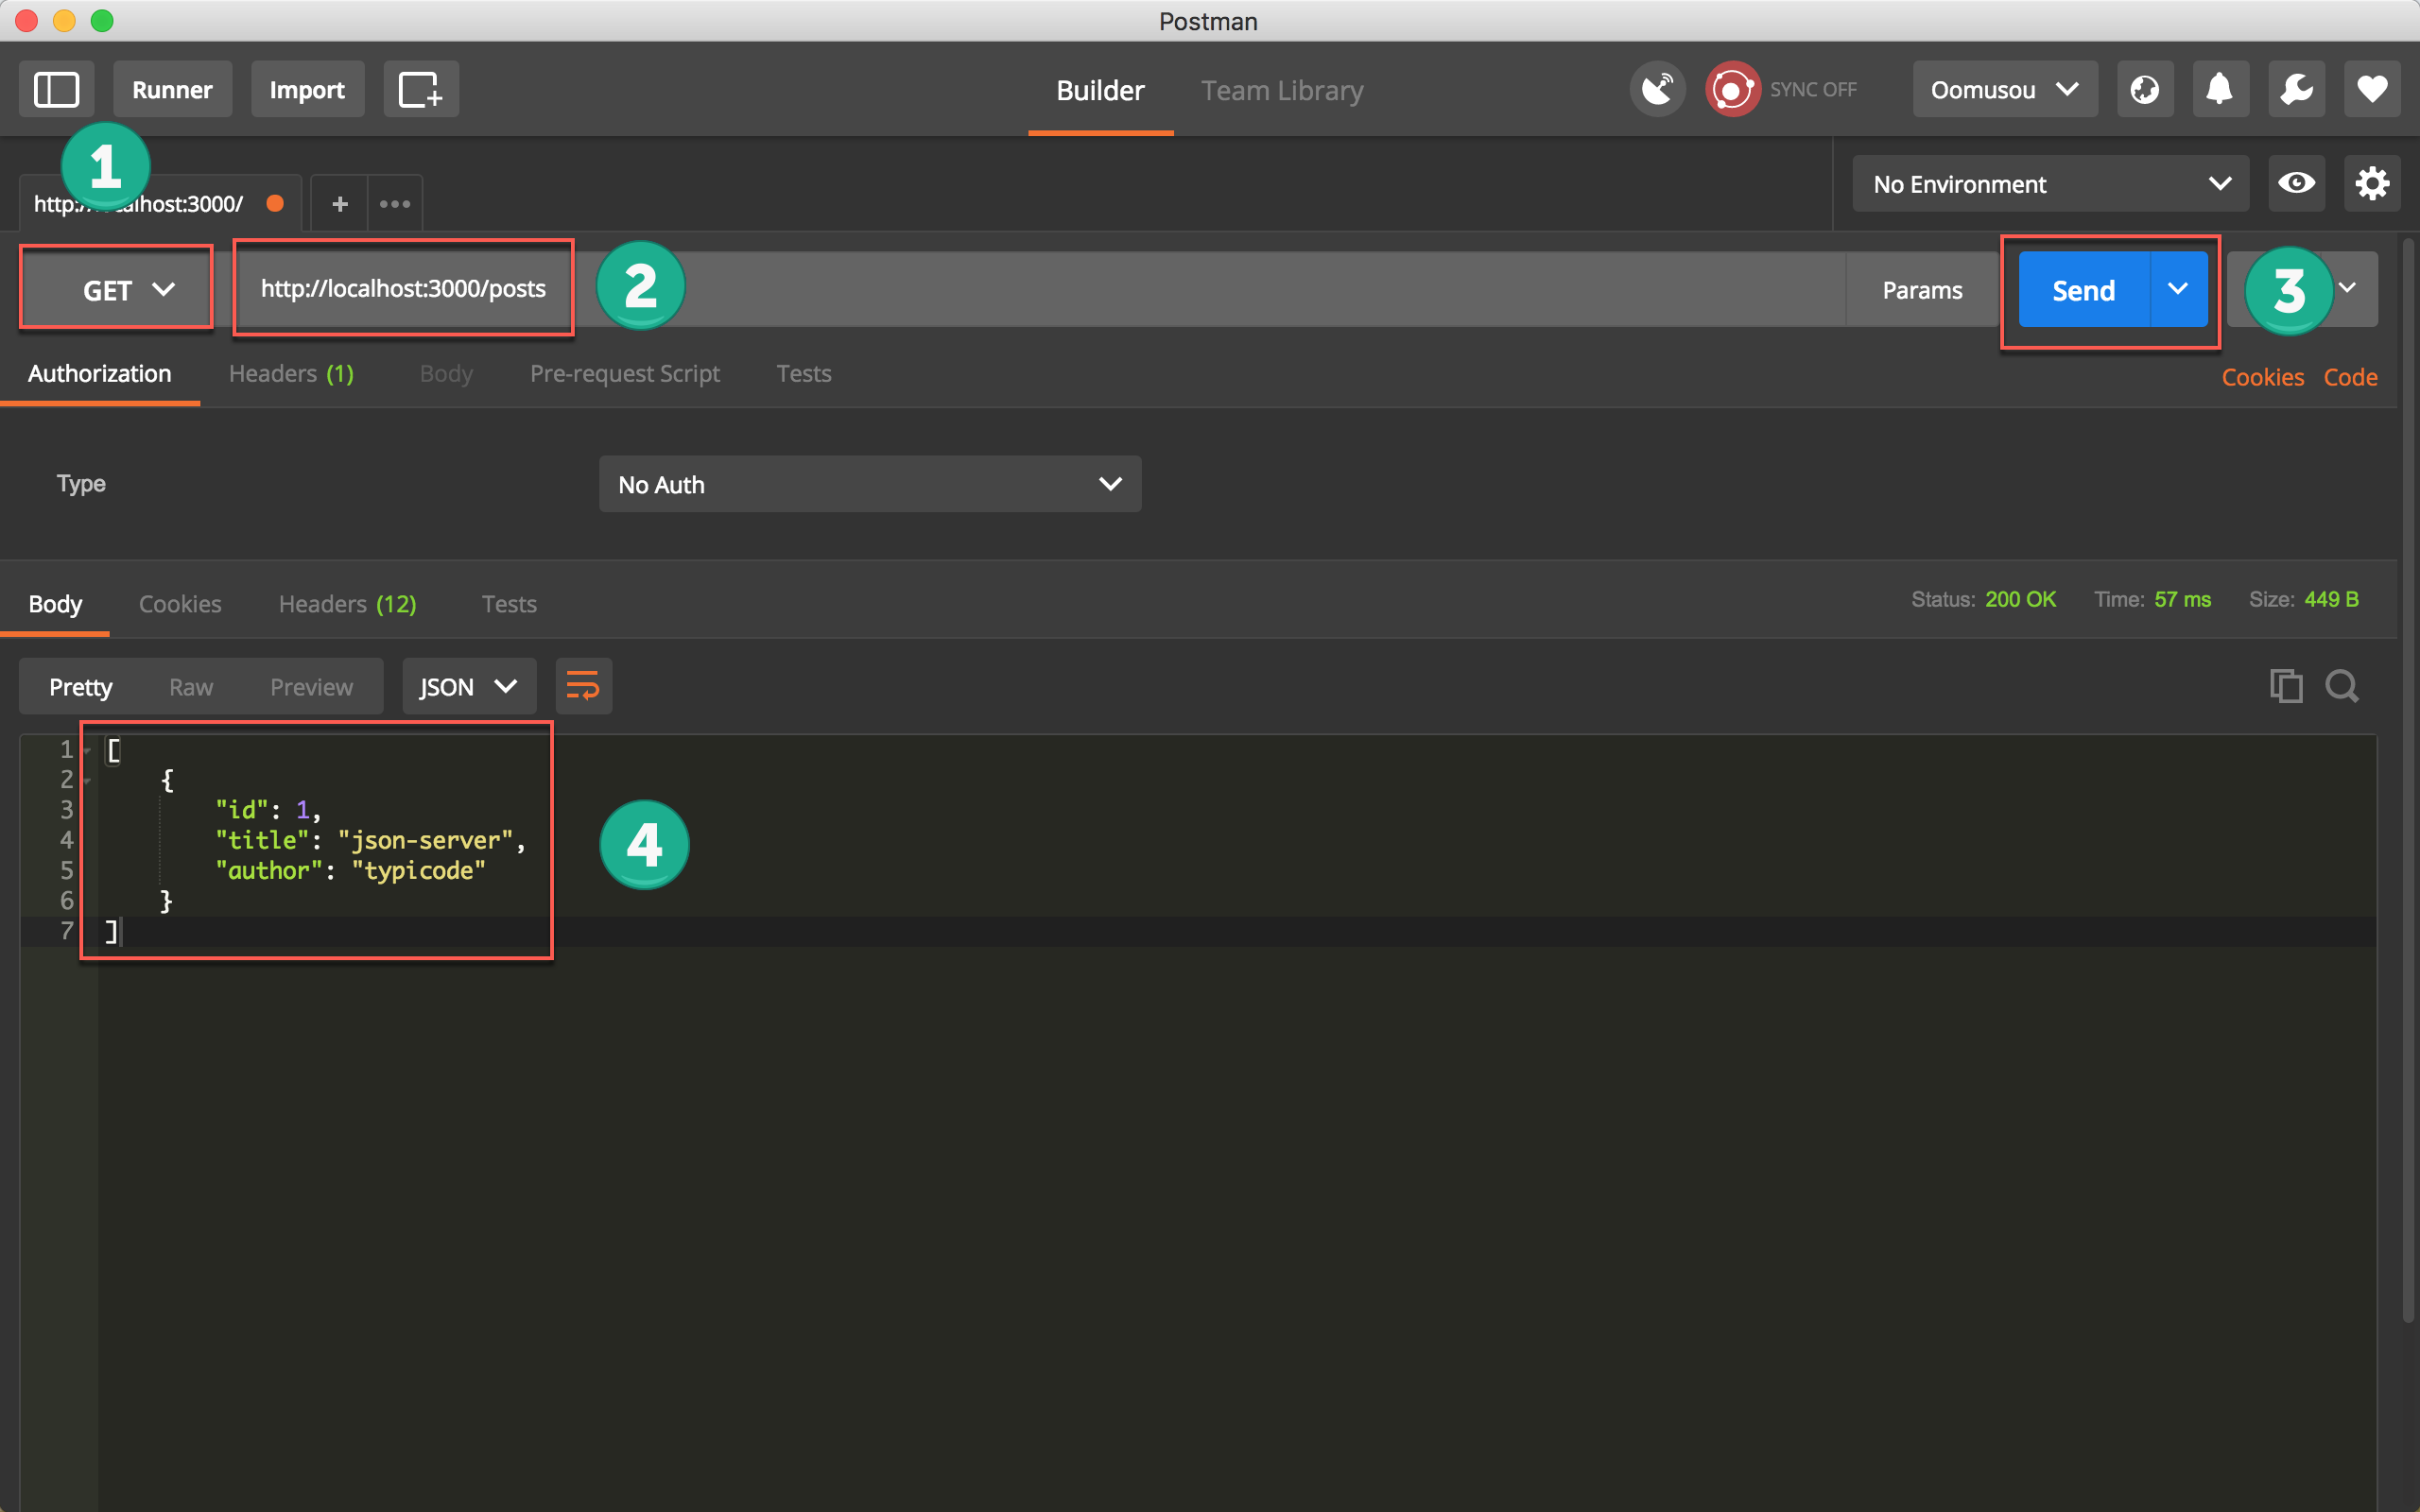
- 選擇
GET - 輸入
http://localhost:3000/posts - 按
Send送出 request - 回傳 JSON 物件陣列
1 | http://localhost:3000/posts/1 |
取得 id 為 1 的 post 資料。
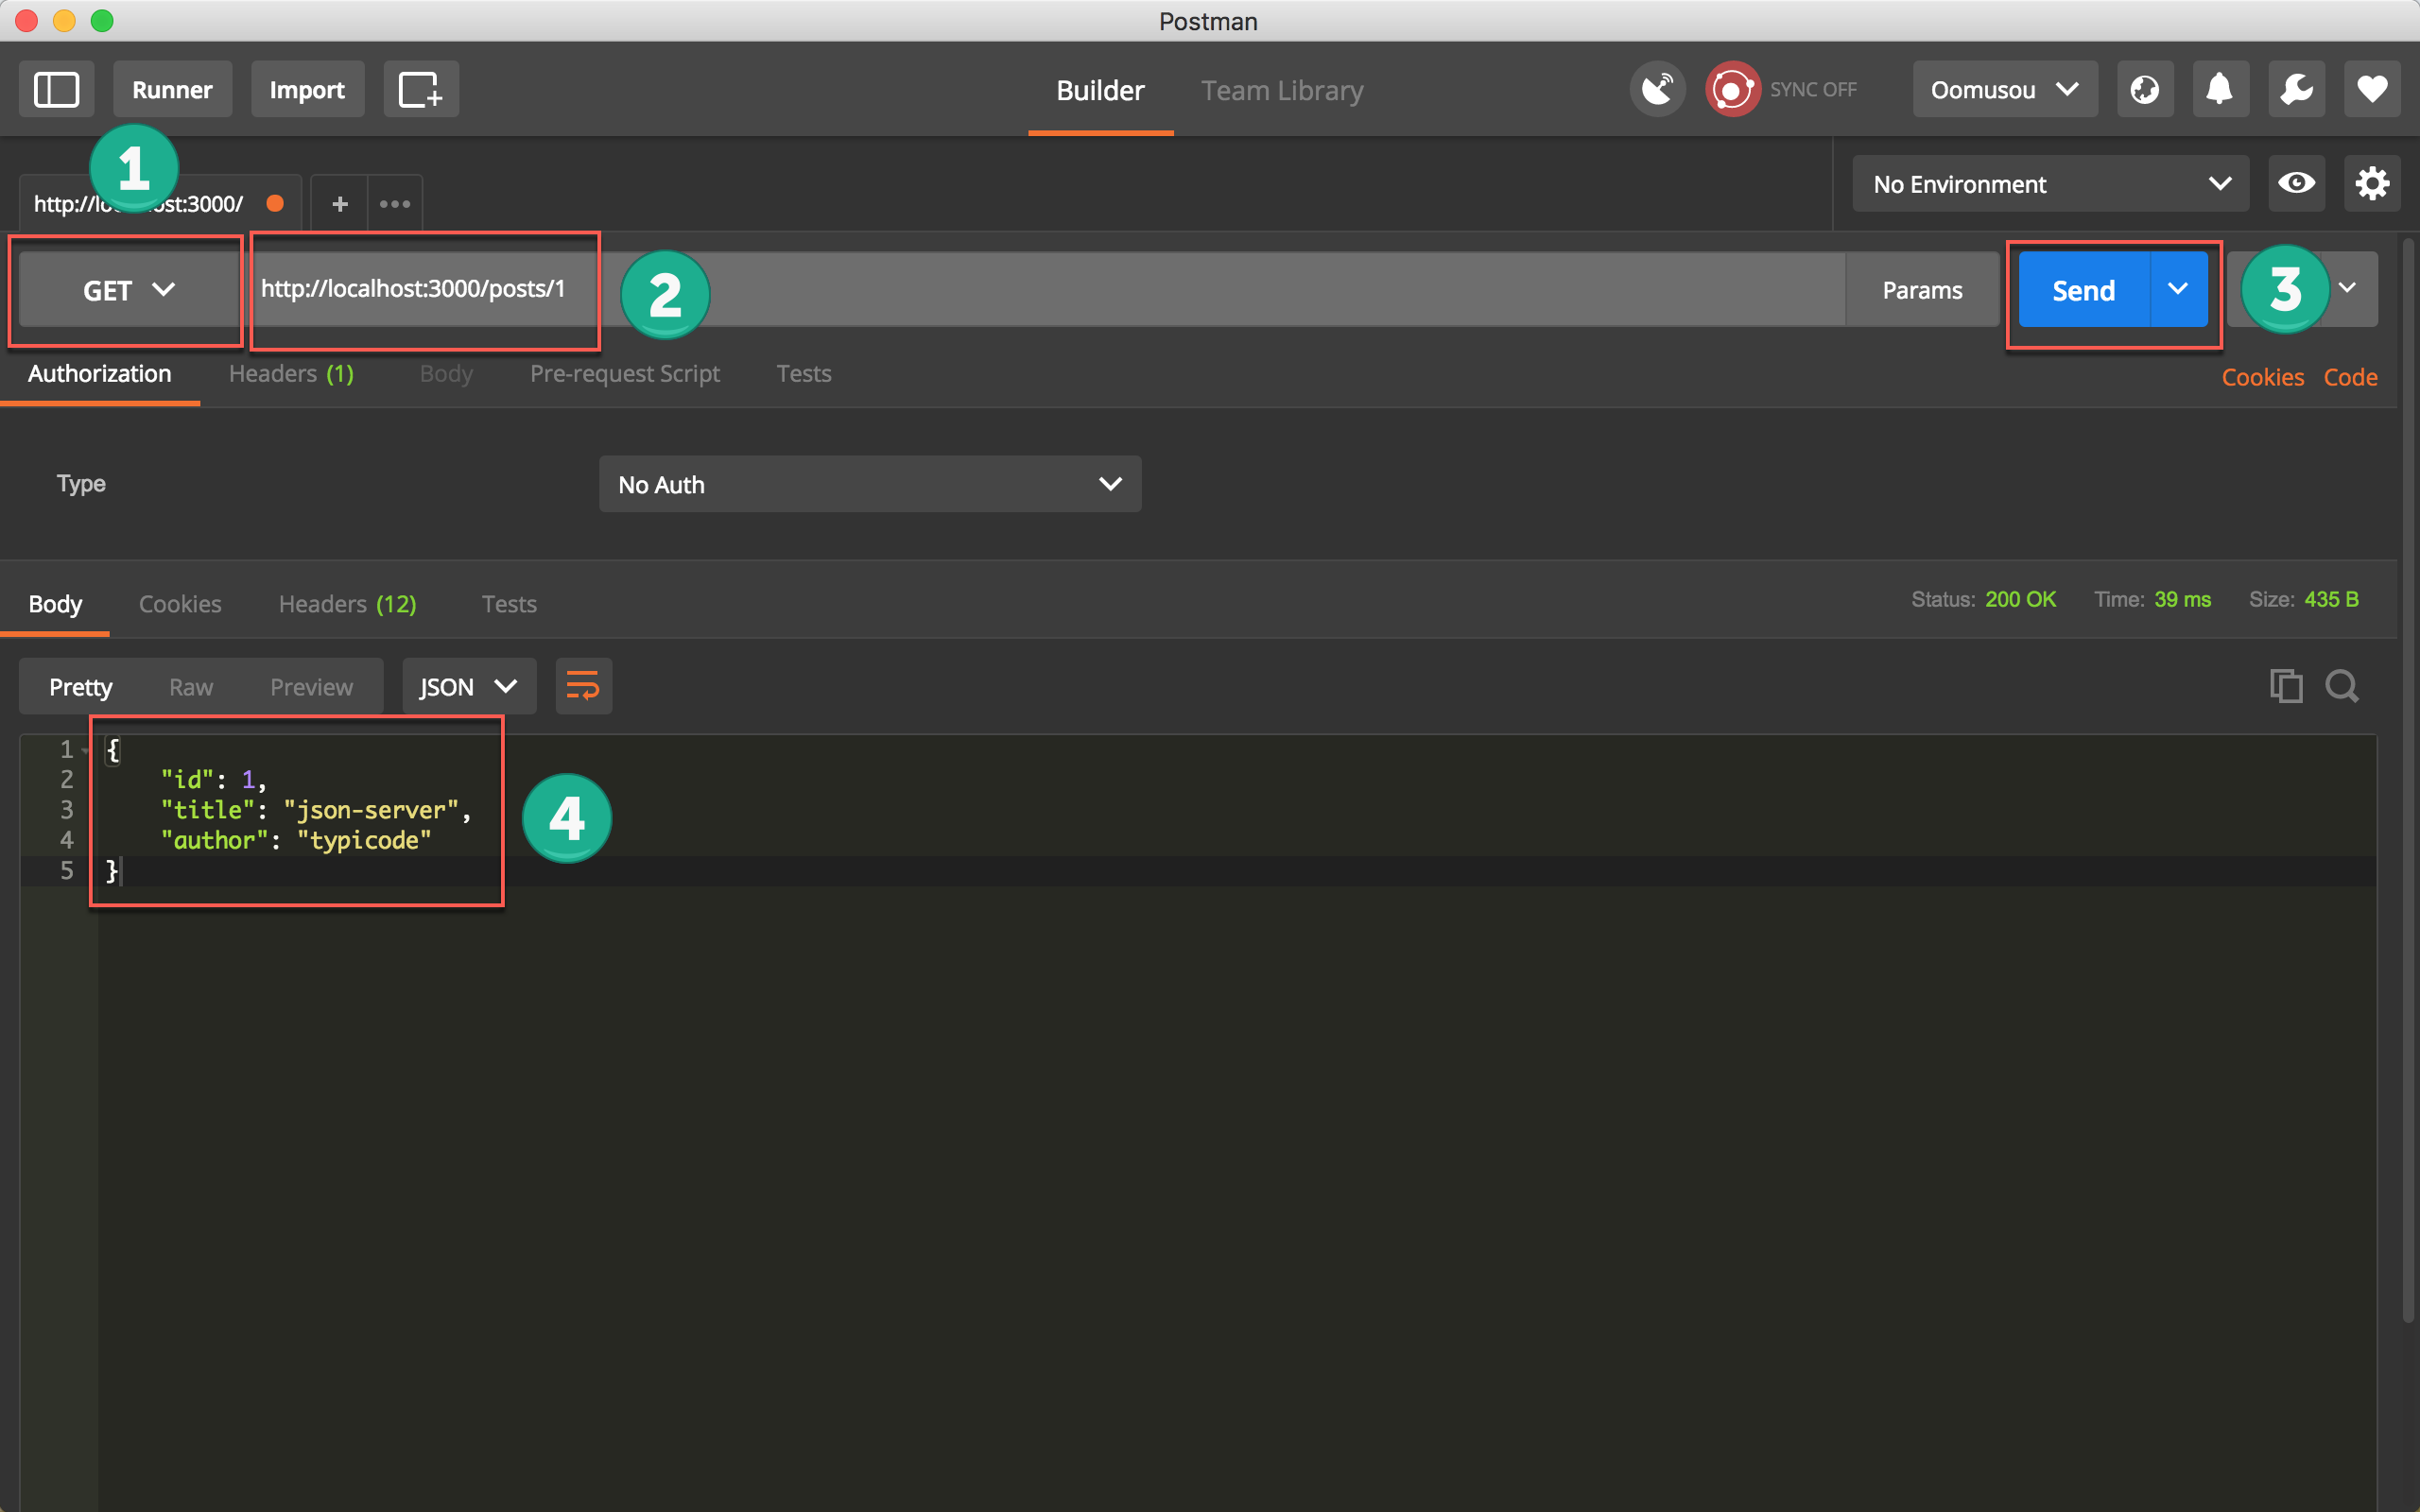
- 選擇
GET - 輸入
http://localhost:3000/posts/1 - 按
Send送出 request - 回傳 JSON 物件
POST
用於建立 resource。
1 | http://localhost:3000/posts |
建立新的一筆 post 資料。
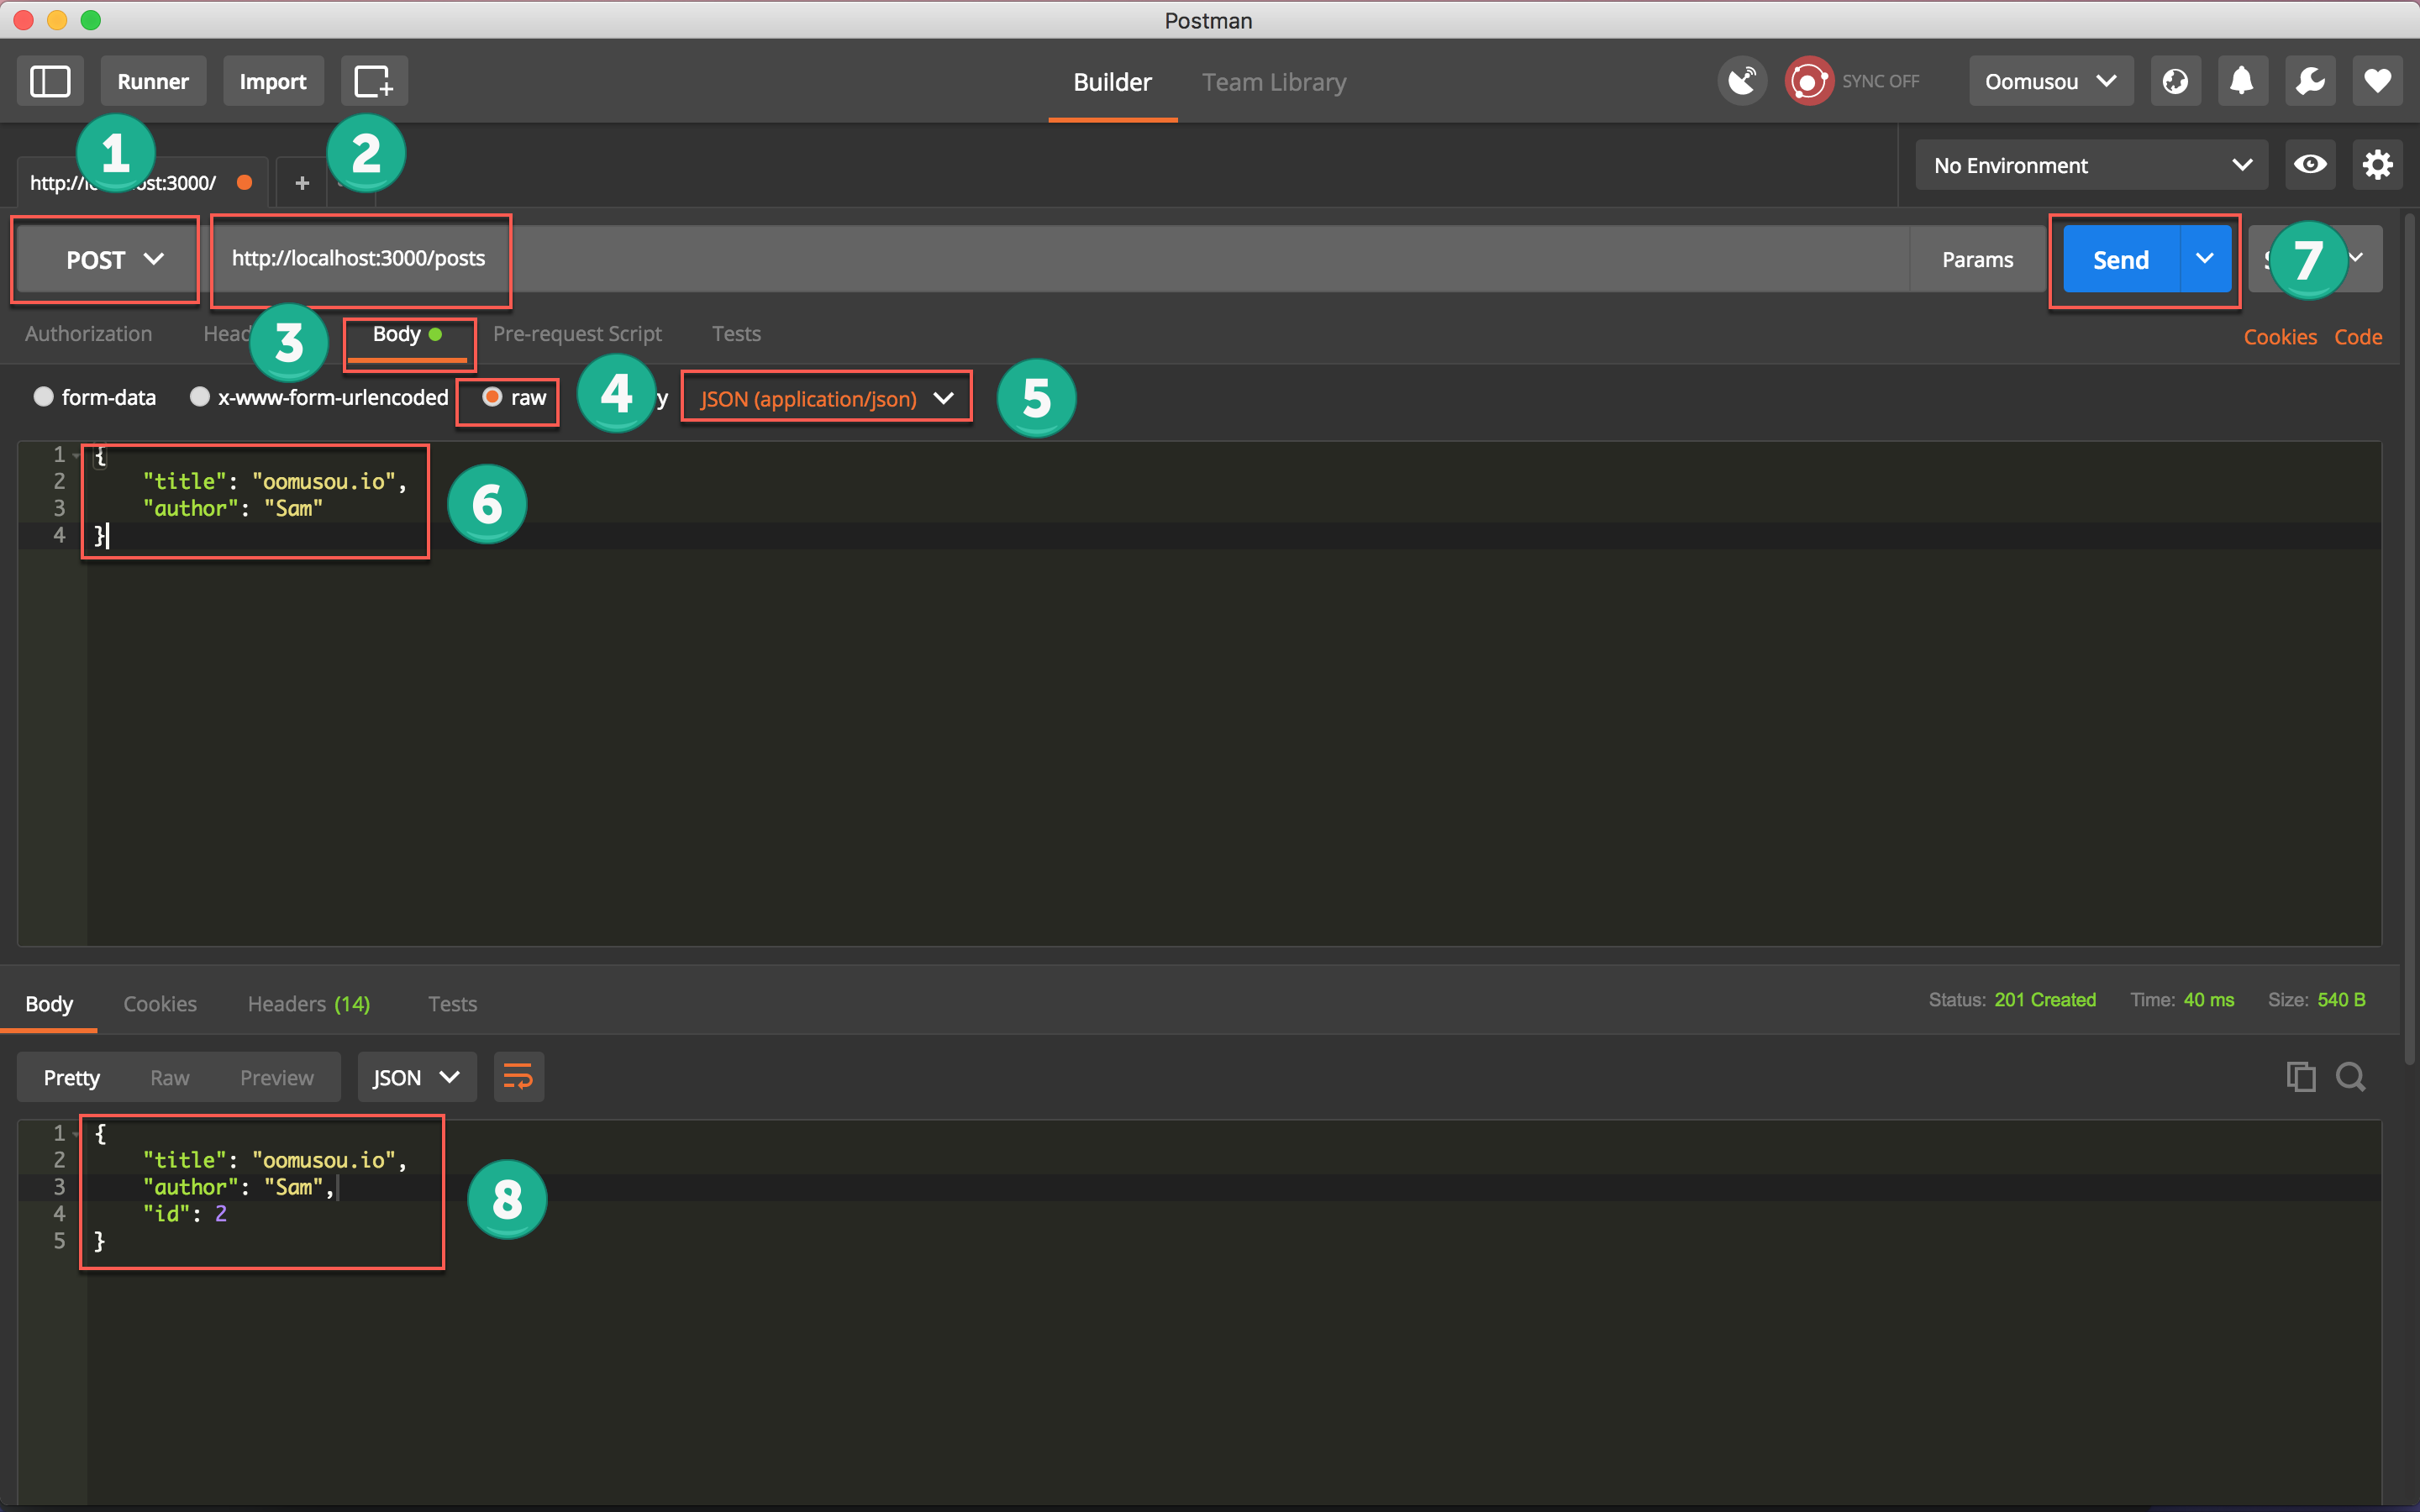
- 選擇
POST - 輸入
http://localhost:3000/posts - 選擇
Body - 選擇
raw格式 - 選擇
JSON (application/json)格式 - 要新增的 JSON 物件
- 按
Send送出 request - 回傳所新增的 JSON 物件,並包含
id
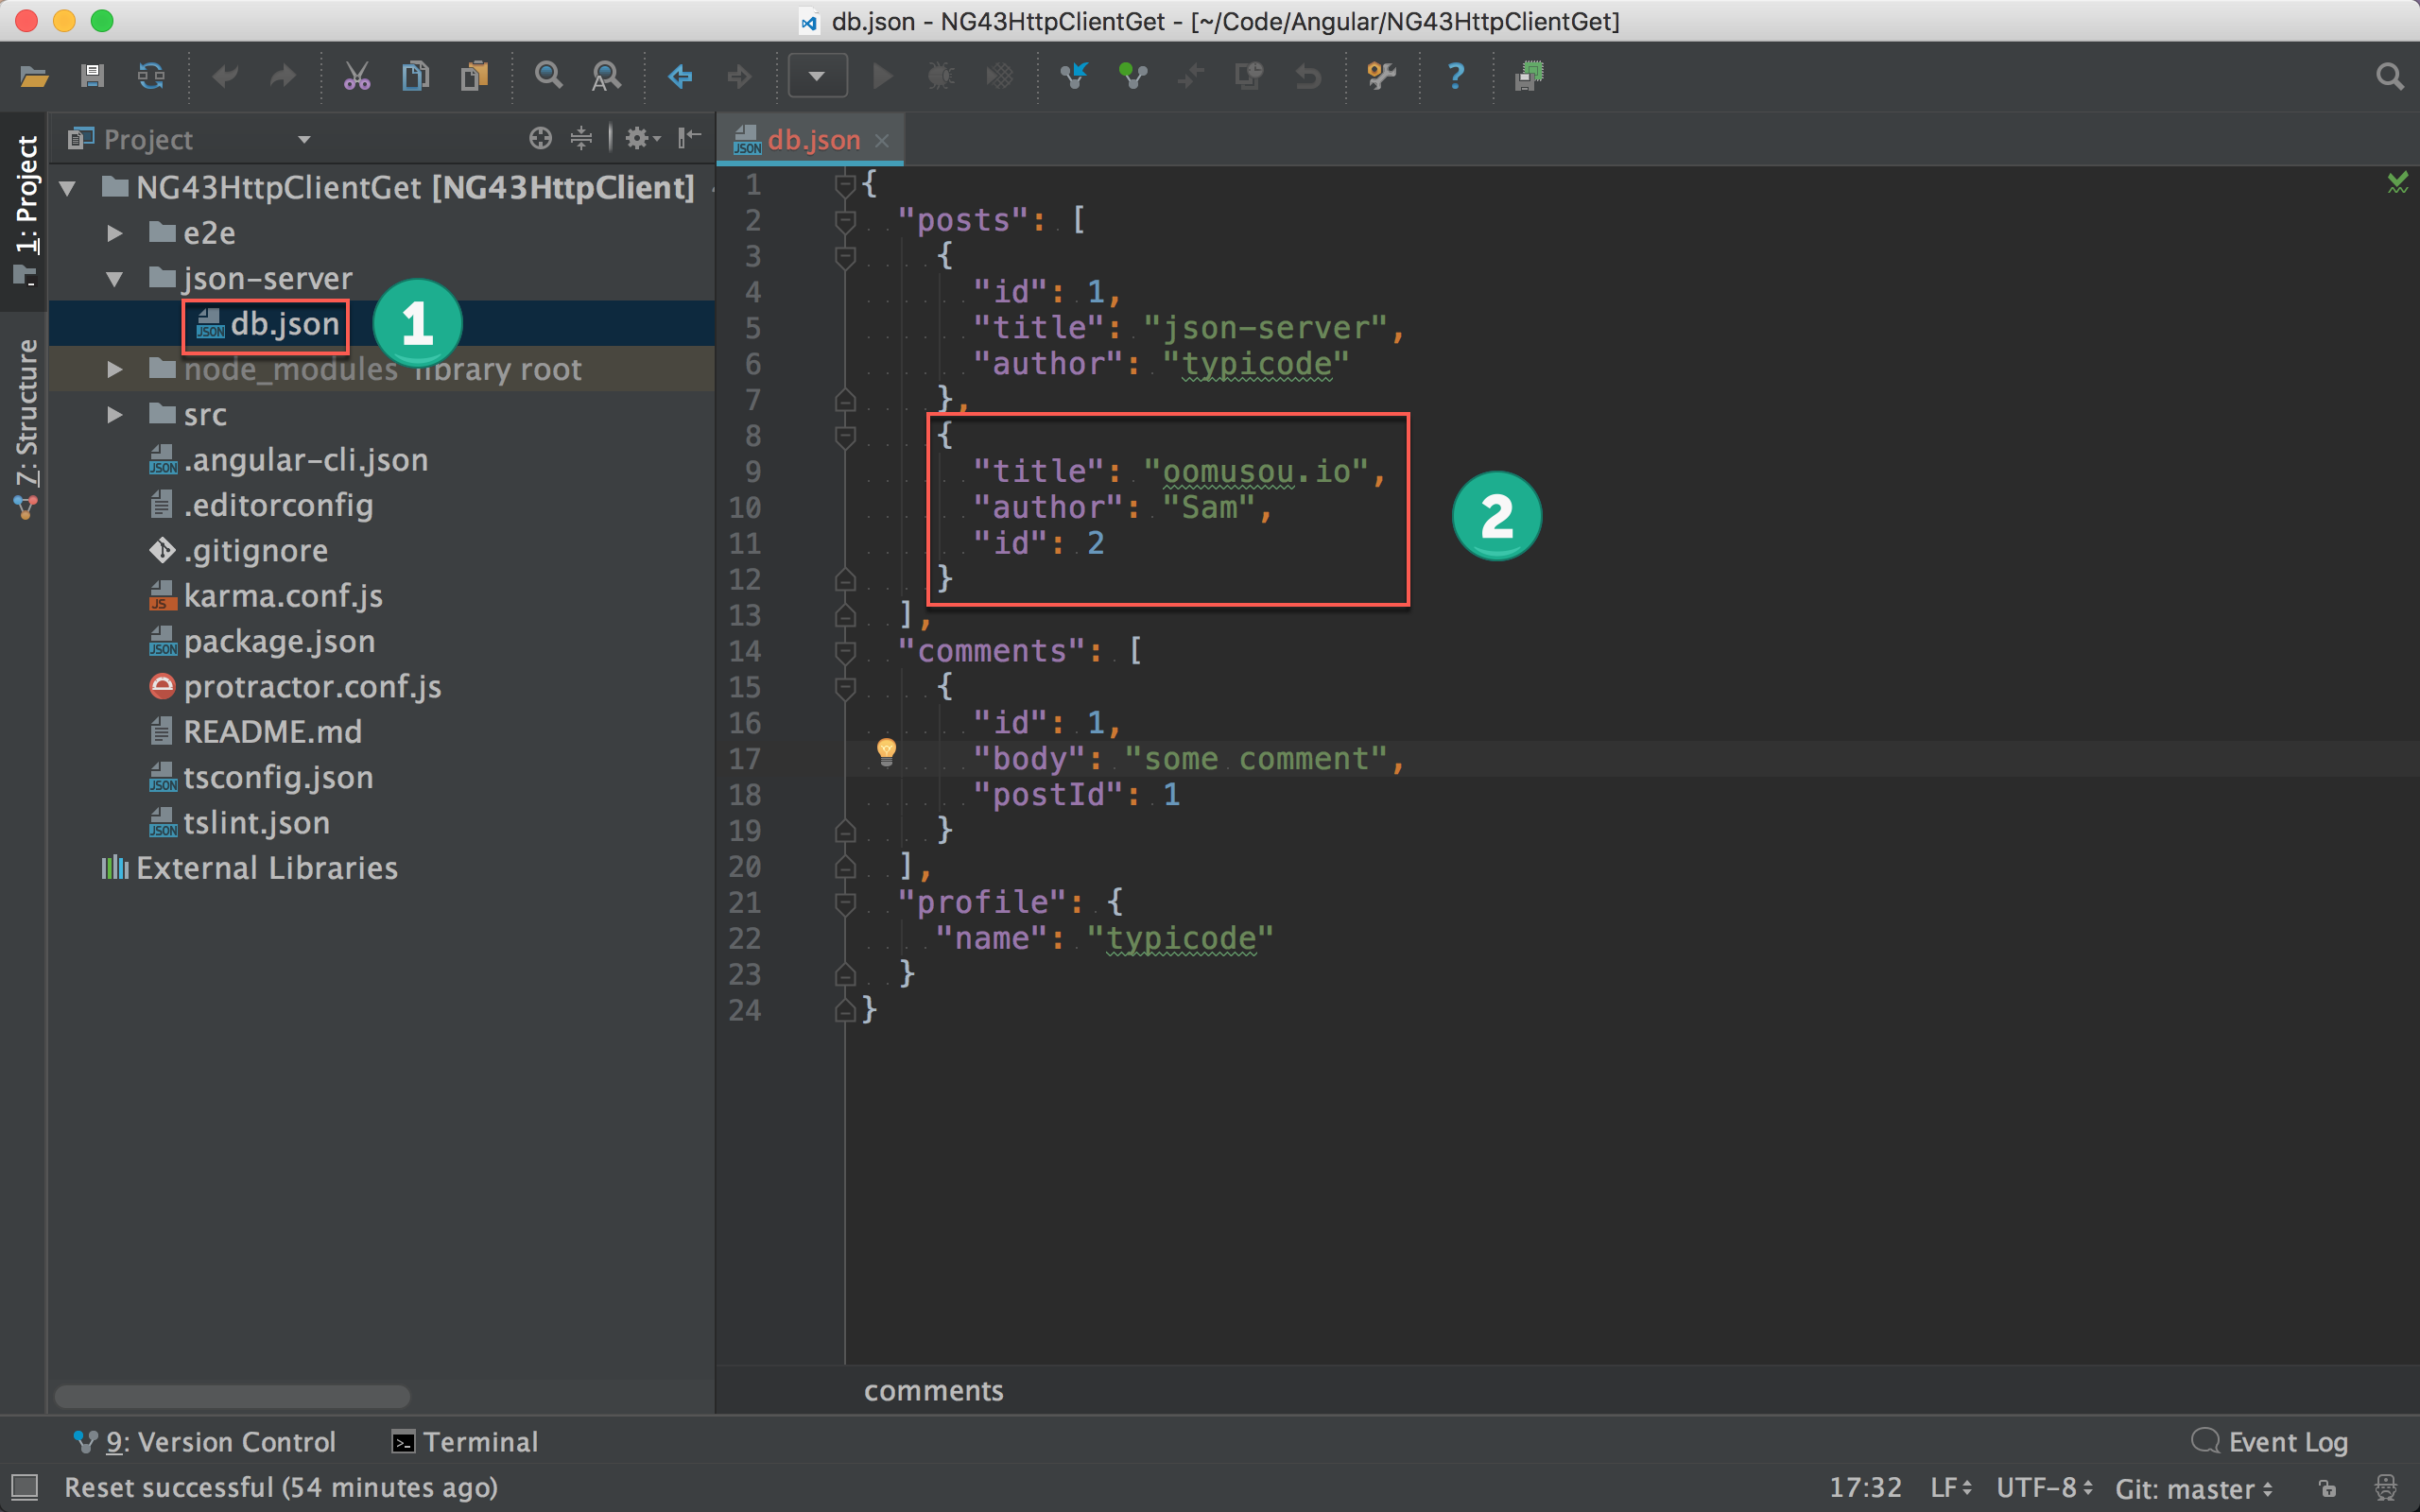
- 開啟
/json-server/db.json - 剛剛新增的
post已經寫入db.json
PUT
用於更新完整 resource。
1 | http://localhost:3000/posts/2 |
更新 id 為 2 的完整 post 資料。
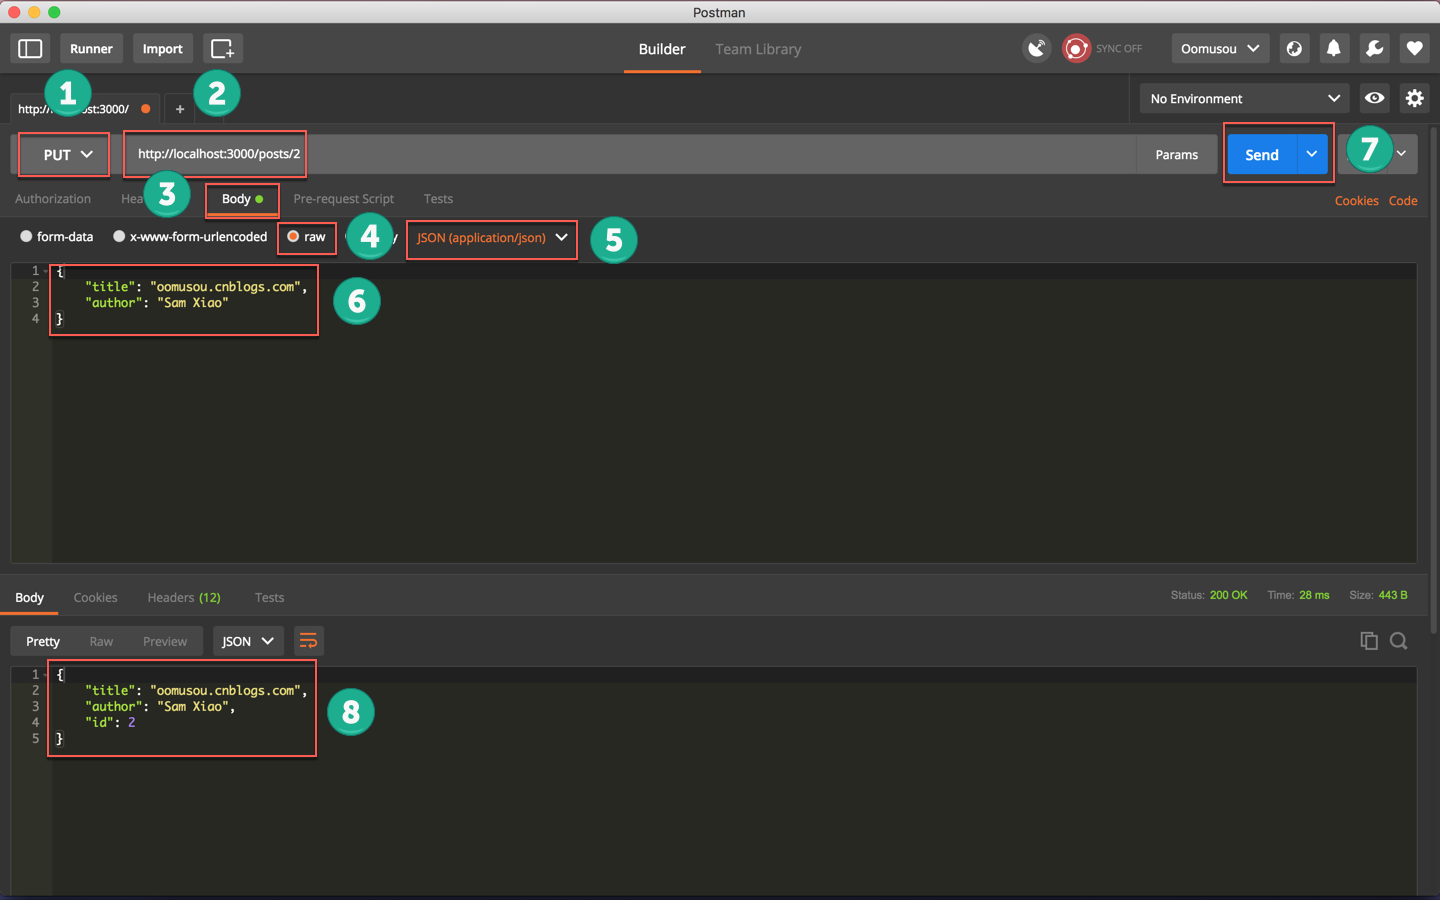
- 選擇
PUT - 輸入
http://localhost:3000/posts/2 - 選擇
Body - 選擇
raw格式 - 選擇
JSON (application/json)格式 - 要更新的 JSON 物件 (不用含
id,要包含全部欄位) - 按
Send送出 request - 回傳整筆 JSON 物件,並包含
id
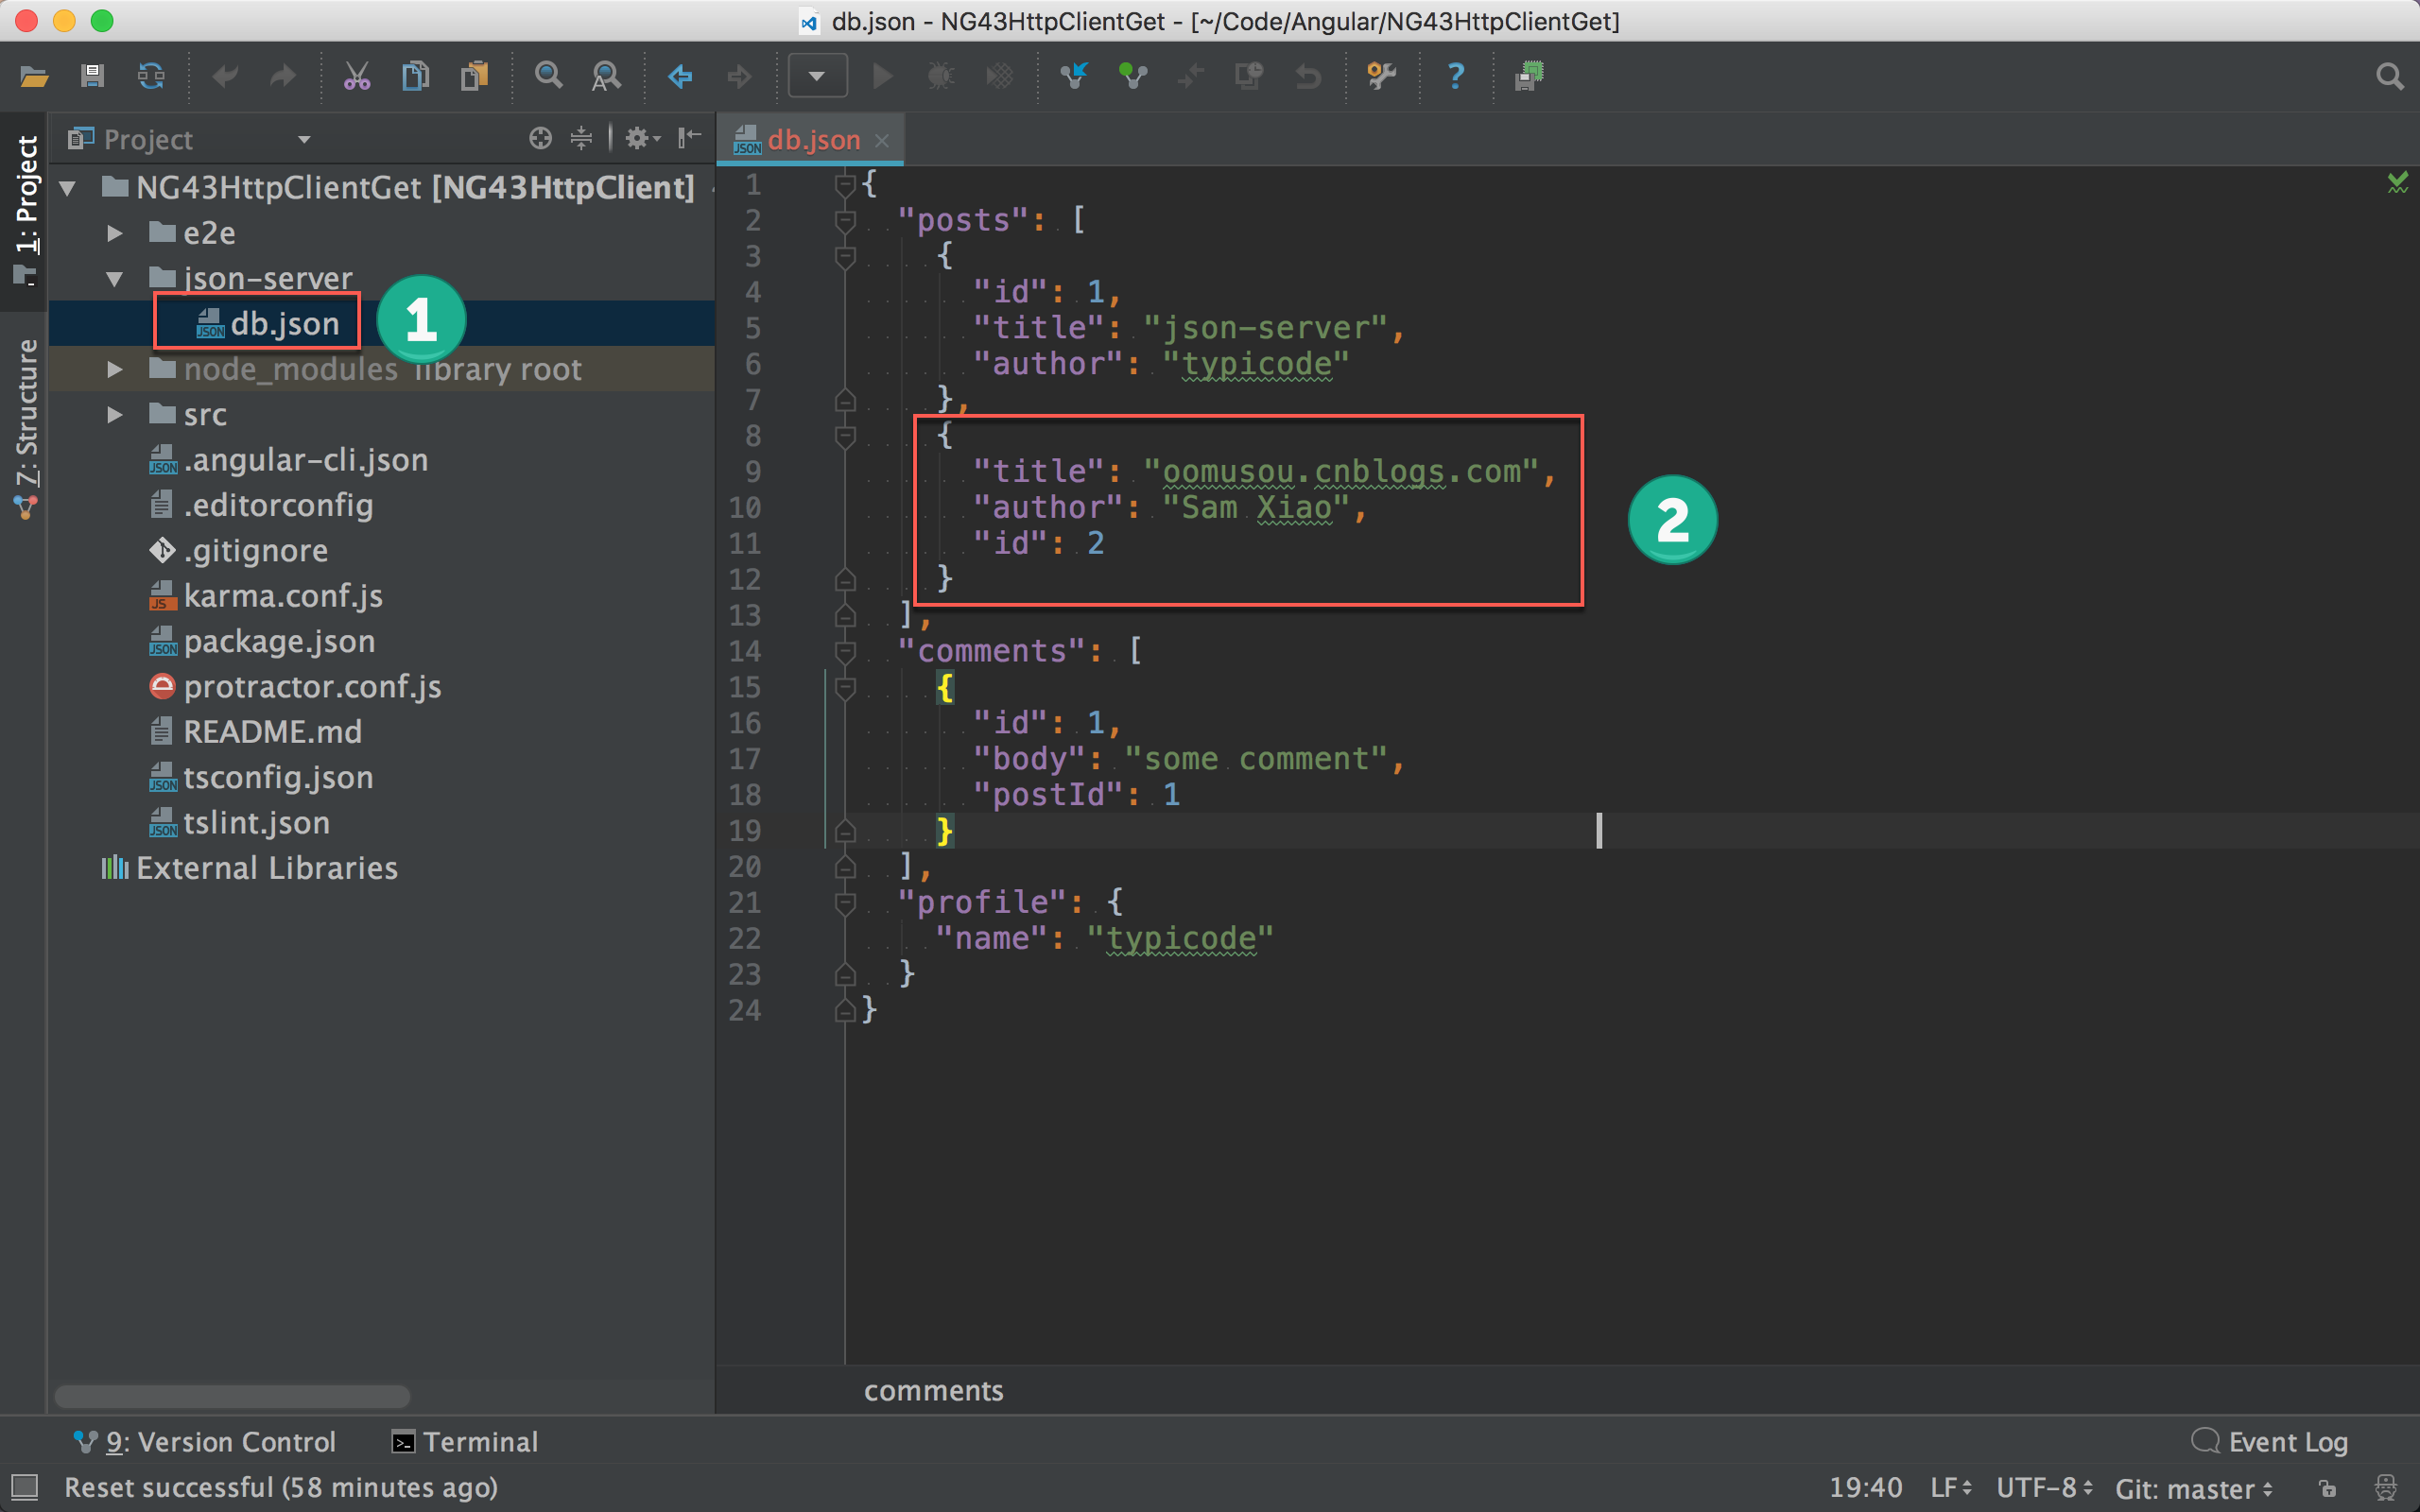
- 開啟
/json-server/db.json - 剛剛更新的
post已經寫入db.json
使用
PUT要小心,他是將整個 JSON 物件寫入原來的id,也就是說原本有3個欄位,若PUT時的 JSON 物件只有 2 個欄位,則PUT後就只剩下2個欄位。
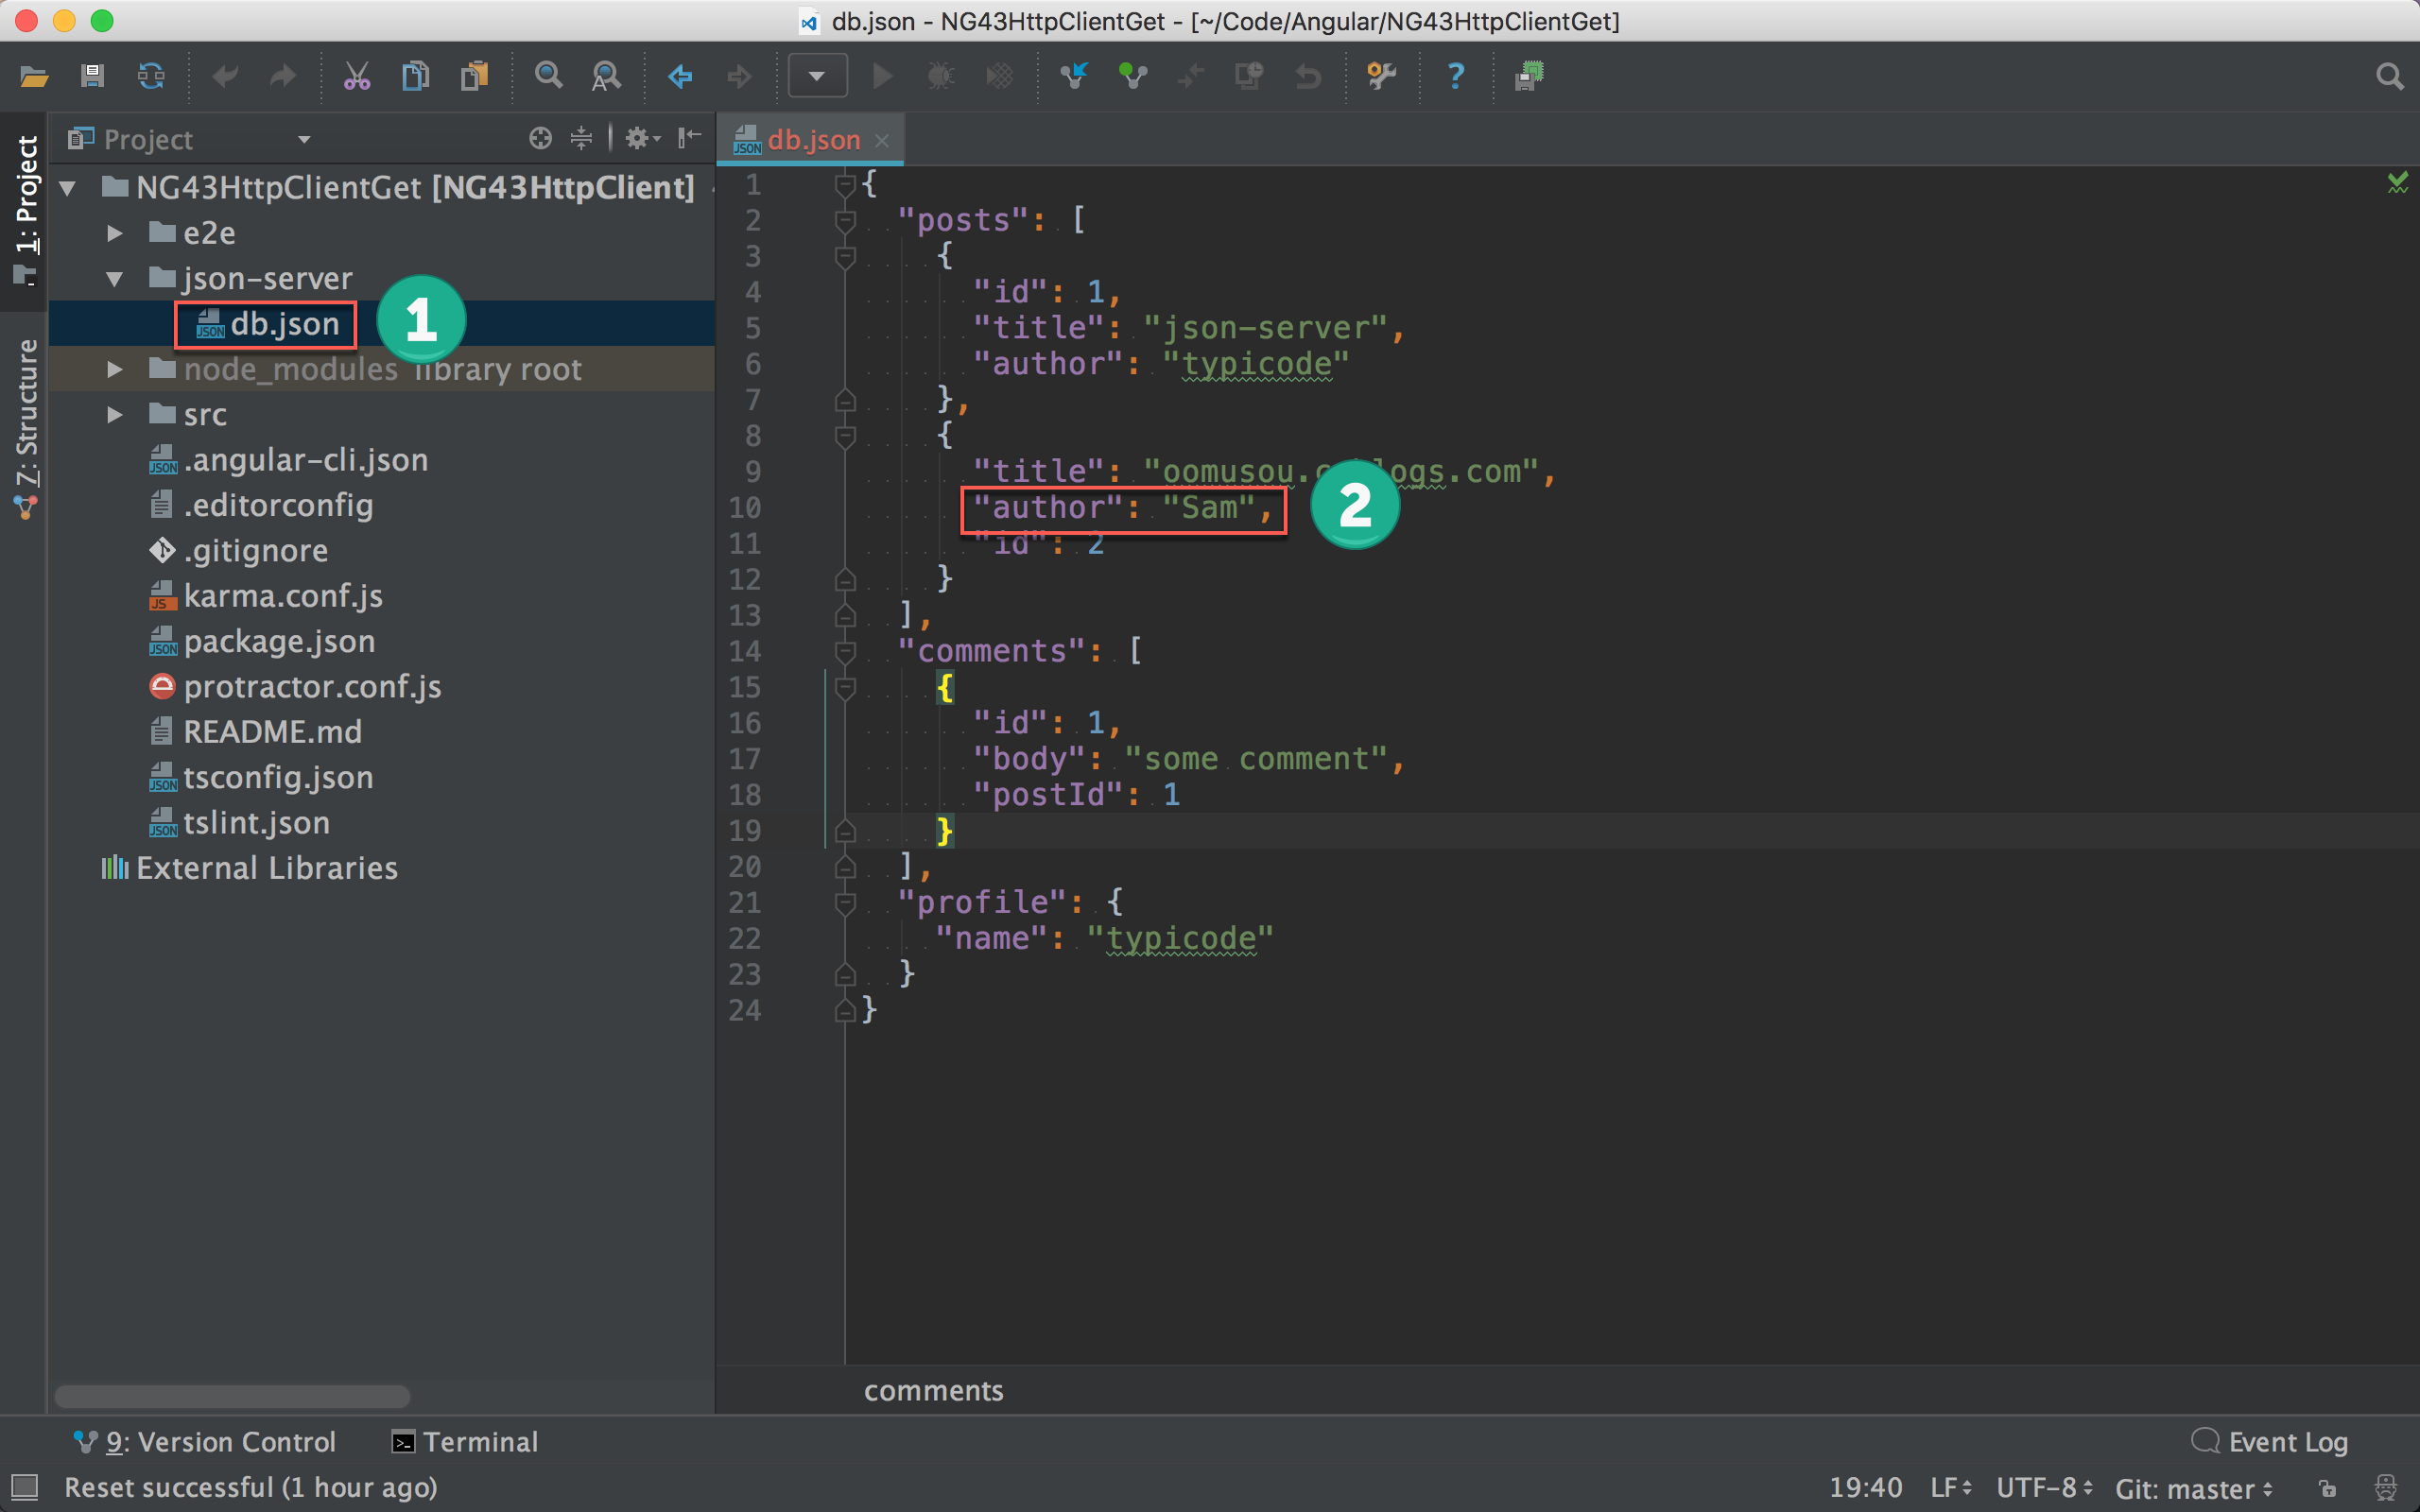
PATCH
用於更新部分 resource。
1 | http://localhost:3000/posts/2 |
更新 id 為 2 的部分 post 資料。

- 選擇
PUT - 輸入
http://localhost:3000/posts/2 - 選擇
Body - 選擇
raw格式 - 選擇
JSON (application/json)格式 - 要更新的 JSON 物件 (不用含
id,不用包含全部欄位) - 按
Send送出 request - 回傳整筆 JSON 物件,並包含
id
- 開啟
/json-server/db.json - 剛剛更新的
post已經寫入db.json,且只更新1個欄位資料。
DELETE
用於刪除 resource。
1 | http://localhost:3000/posts/2 |
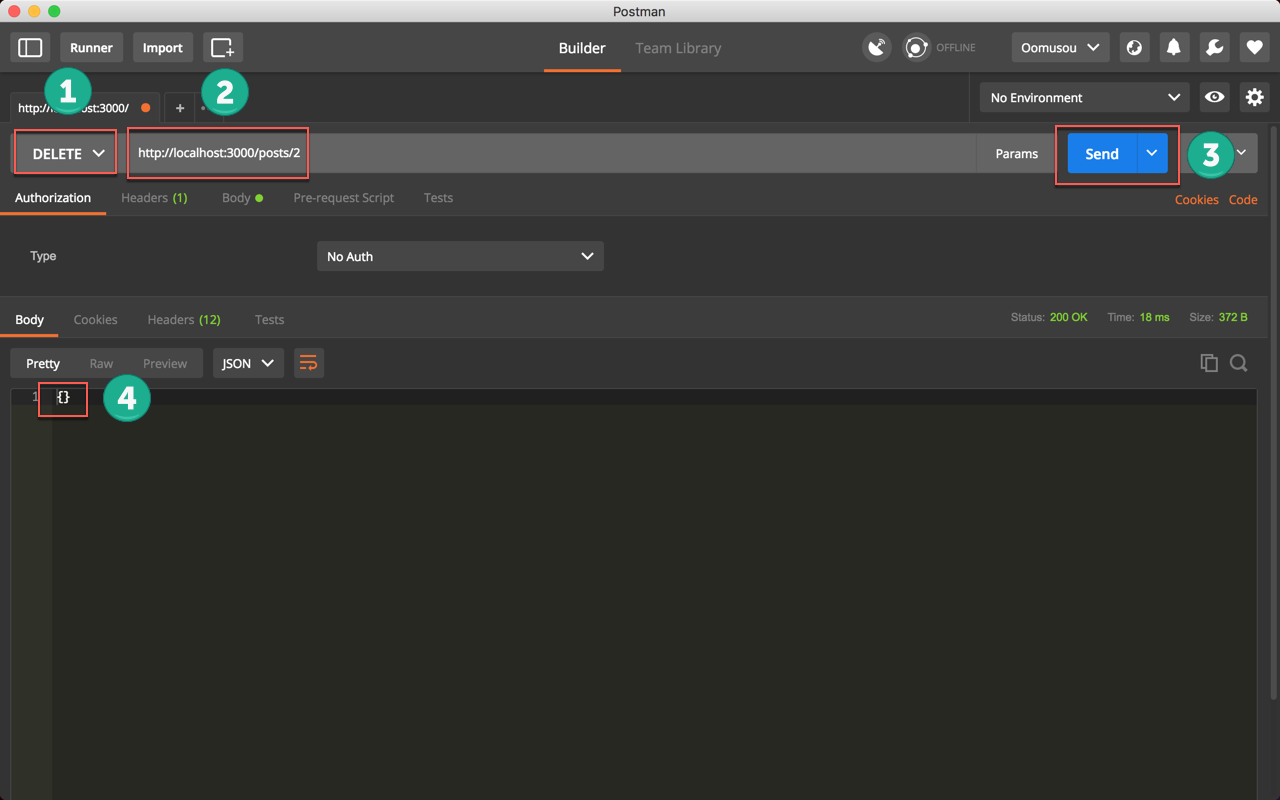
- 選擇
DELETE - 輸入
http://localhost:3000/posts/2 - 按
Send送出 request - 回傳空的 JSON 物件
- 開啟
/json-server/db.json - 剛剛更新的
post資料已經被刪除。
修改資料
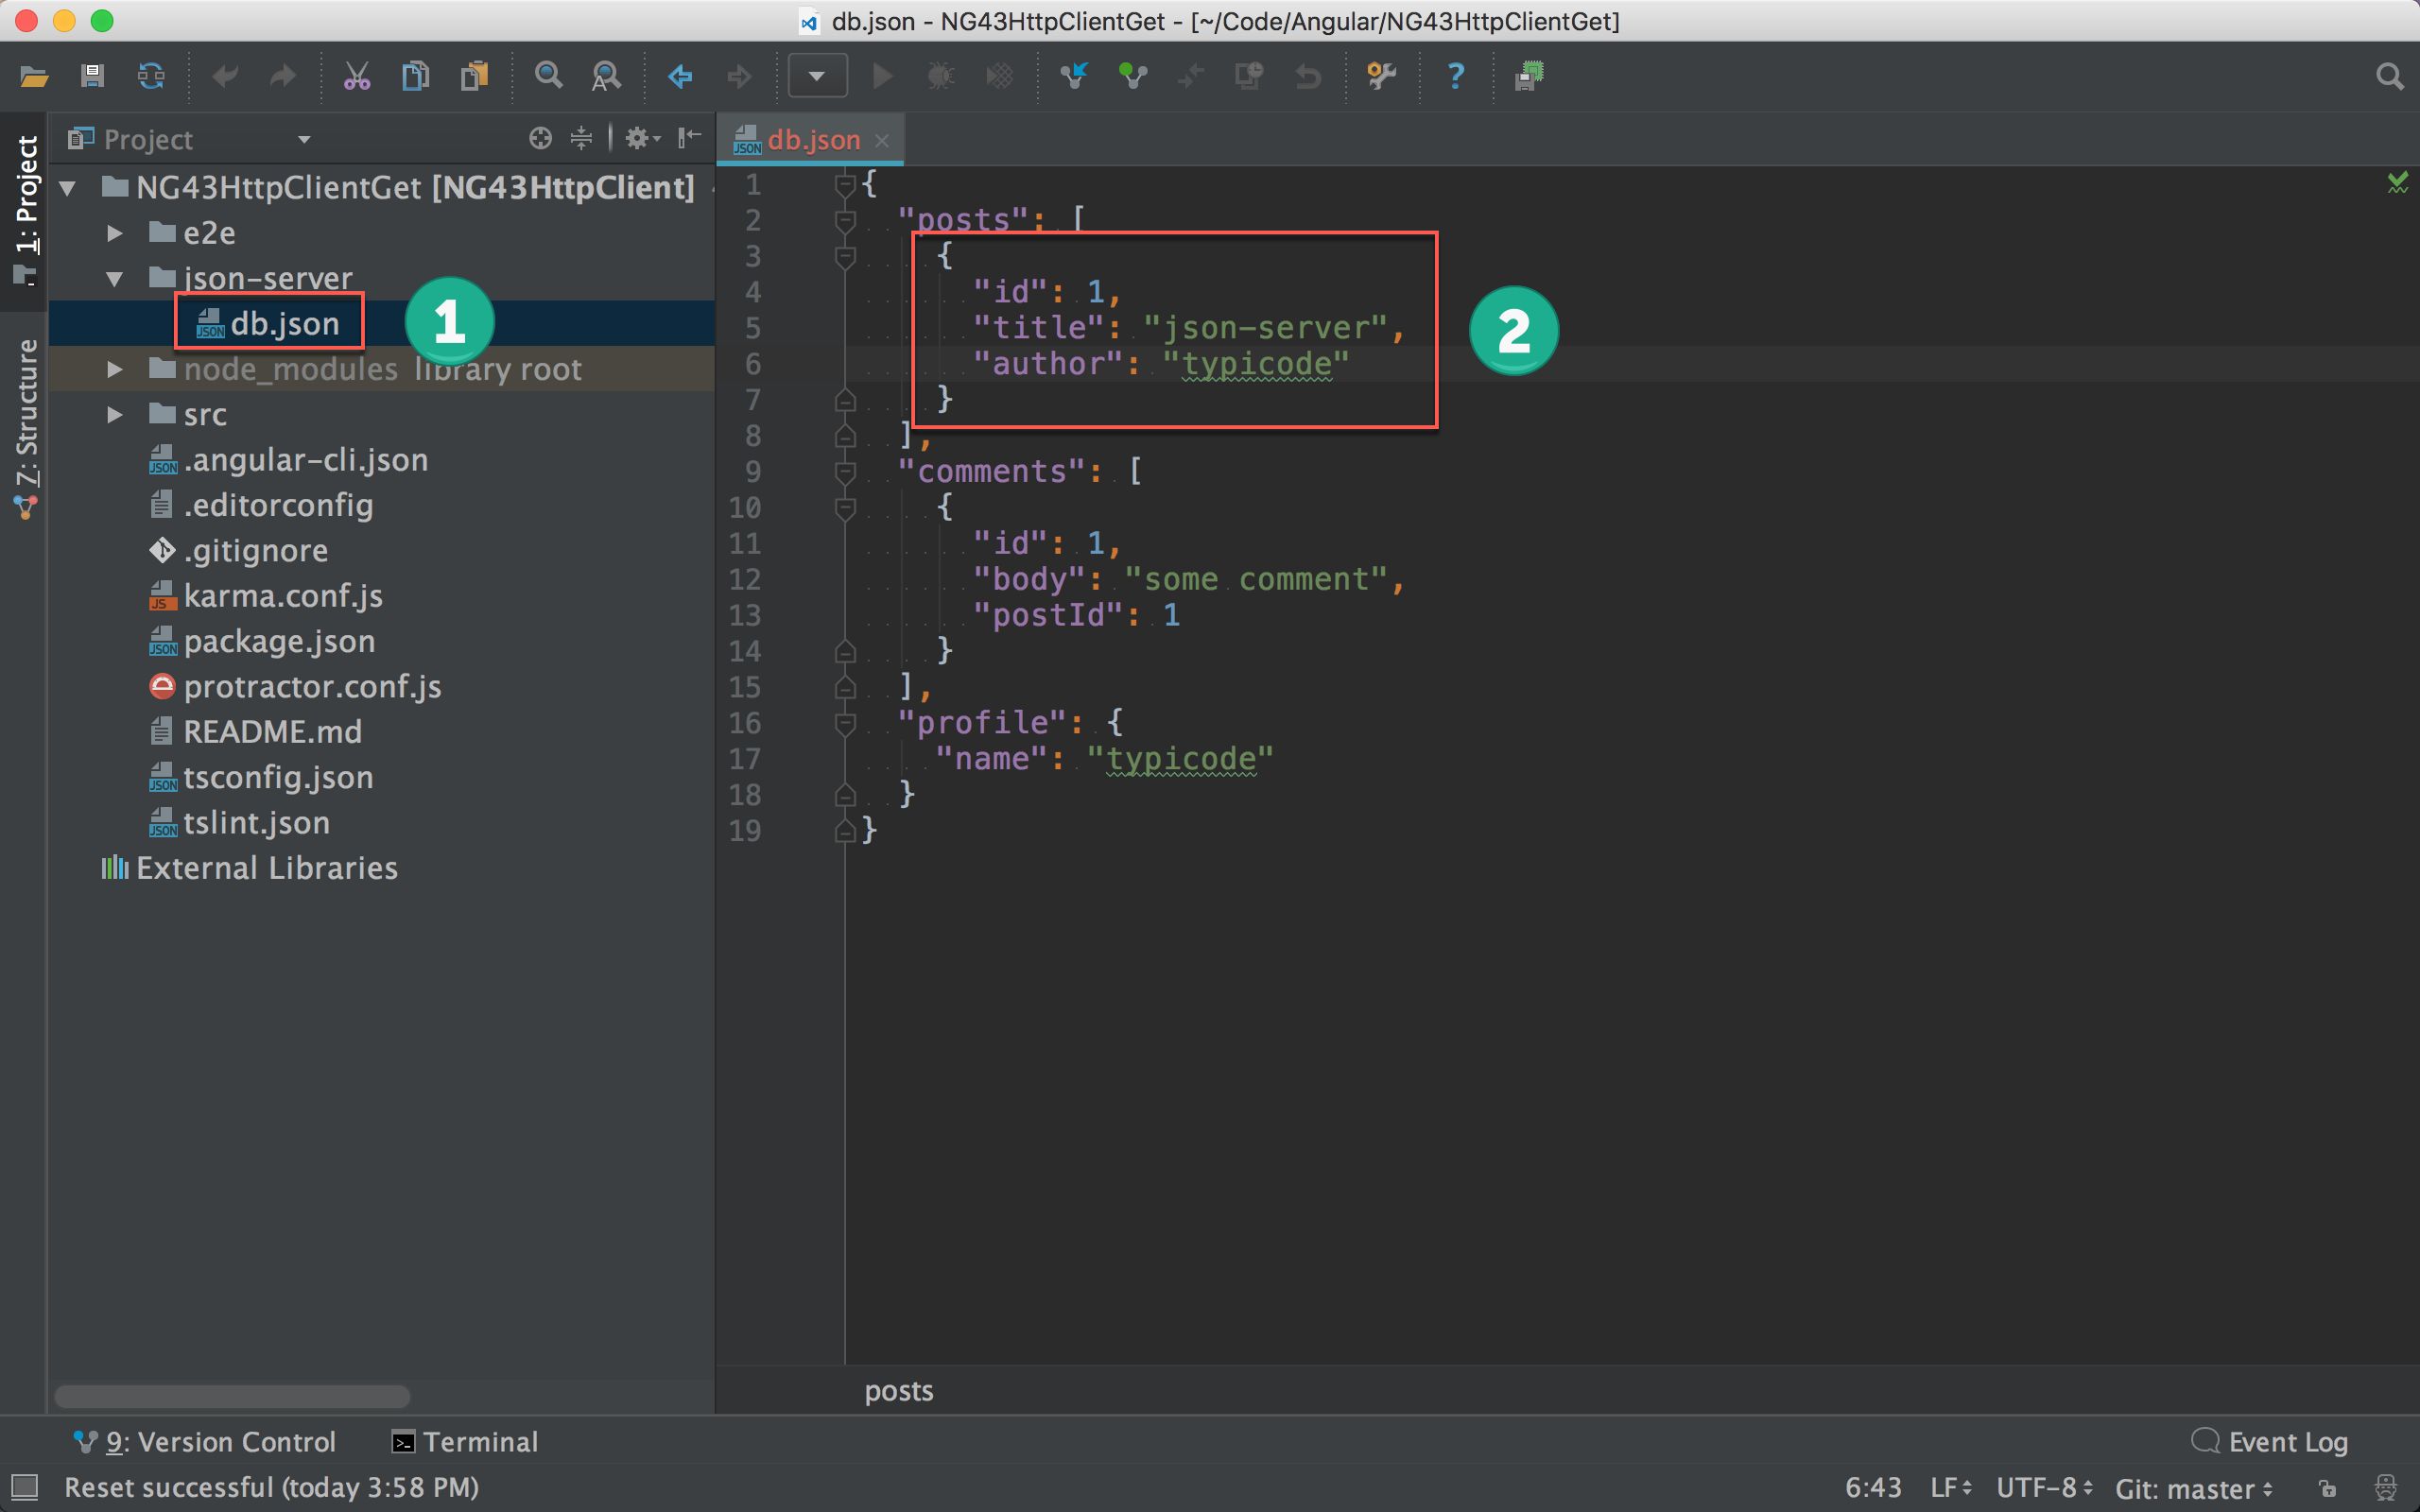
JSON Server 並沒有搭配資料庫,因此也不需要 Sequel Pro 或 DataGrip 之類的工具連到資料庫,它只是個文字檔。
/json-server/db.json
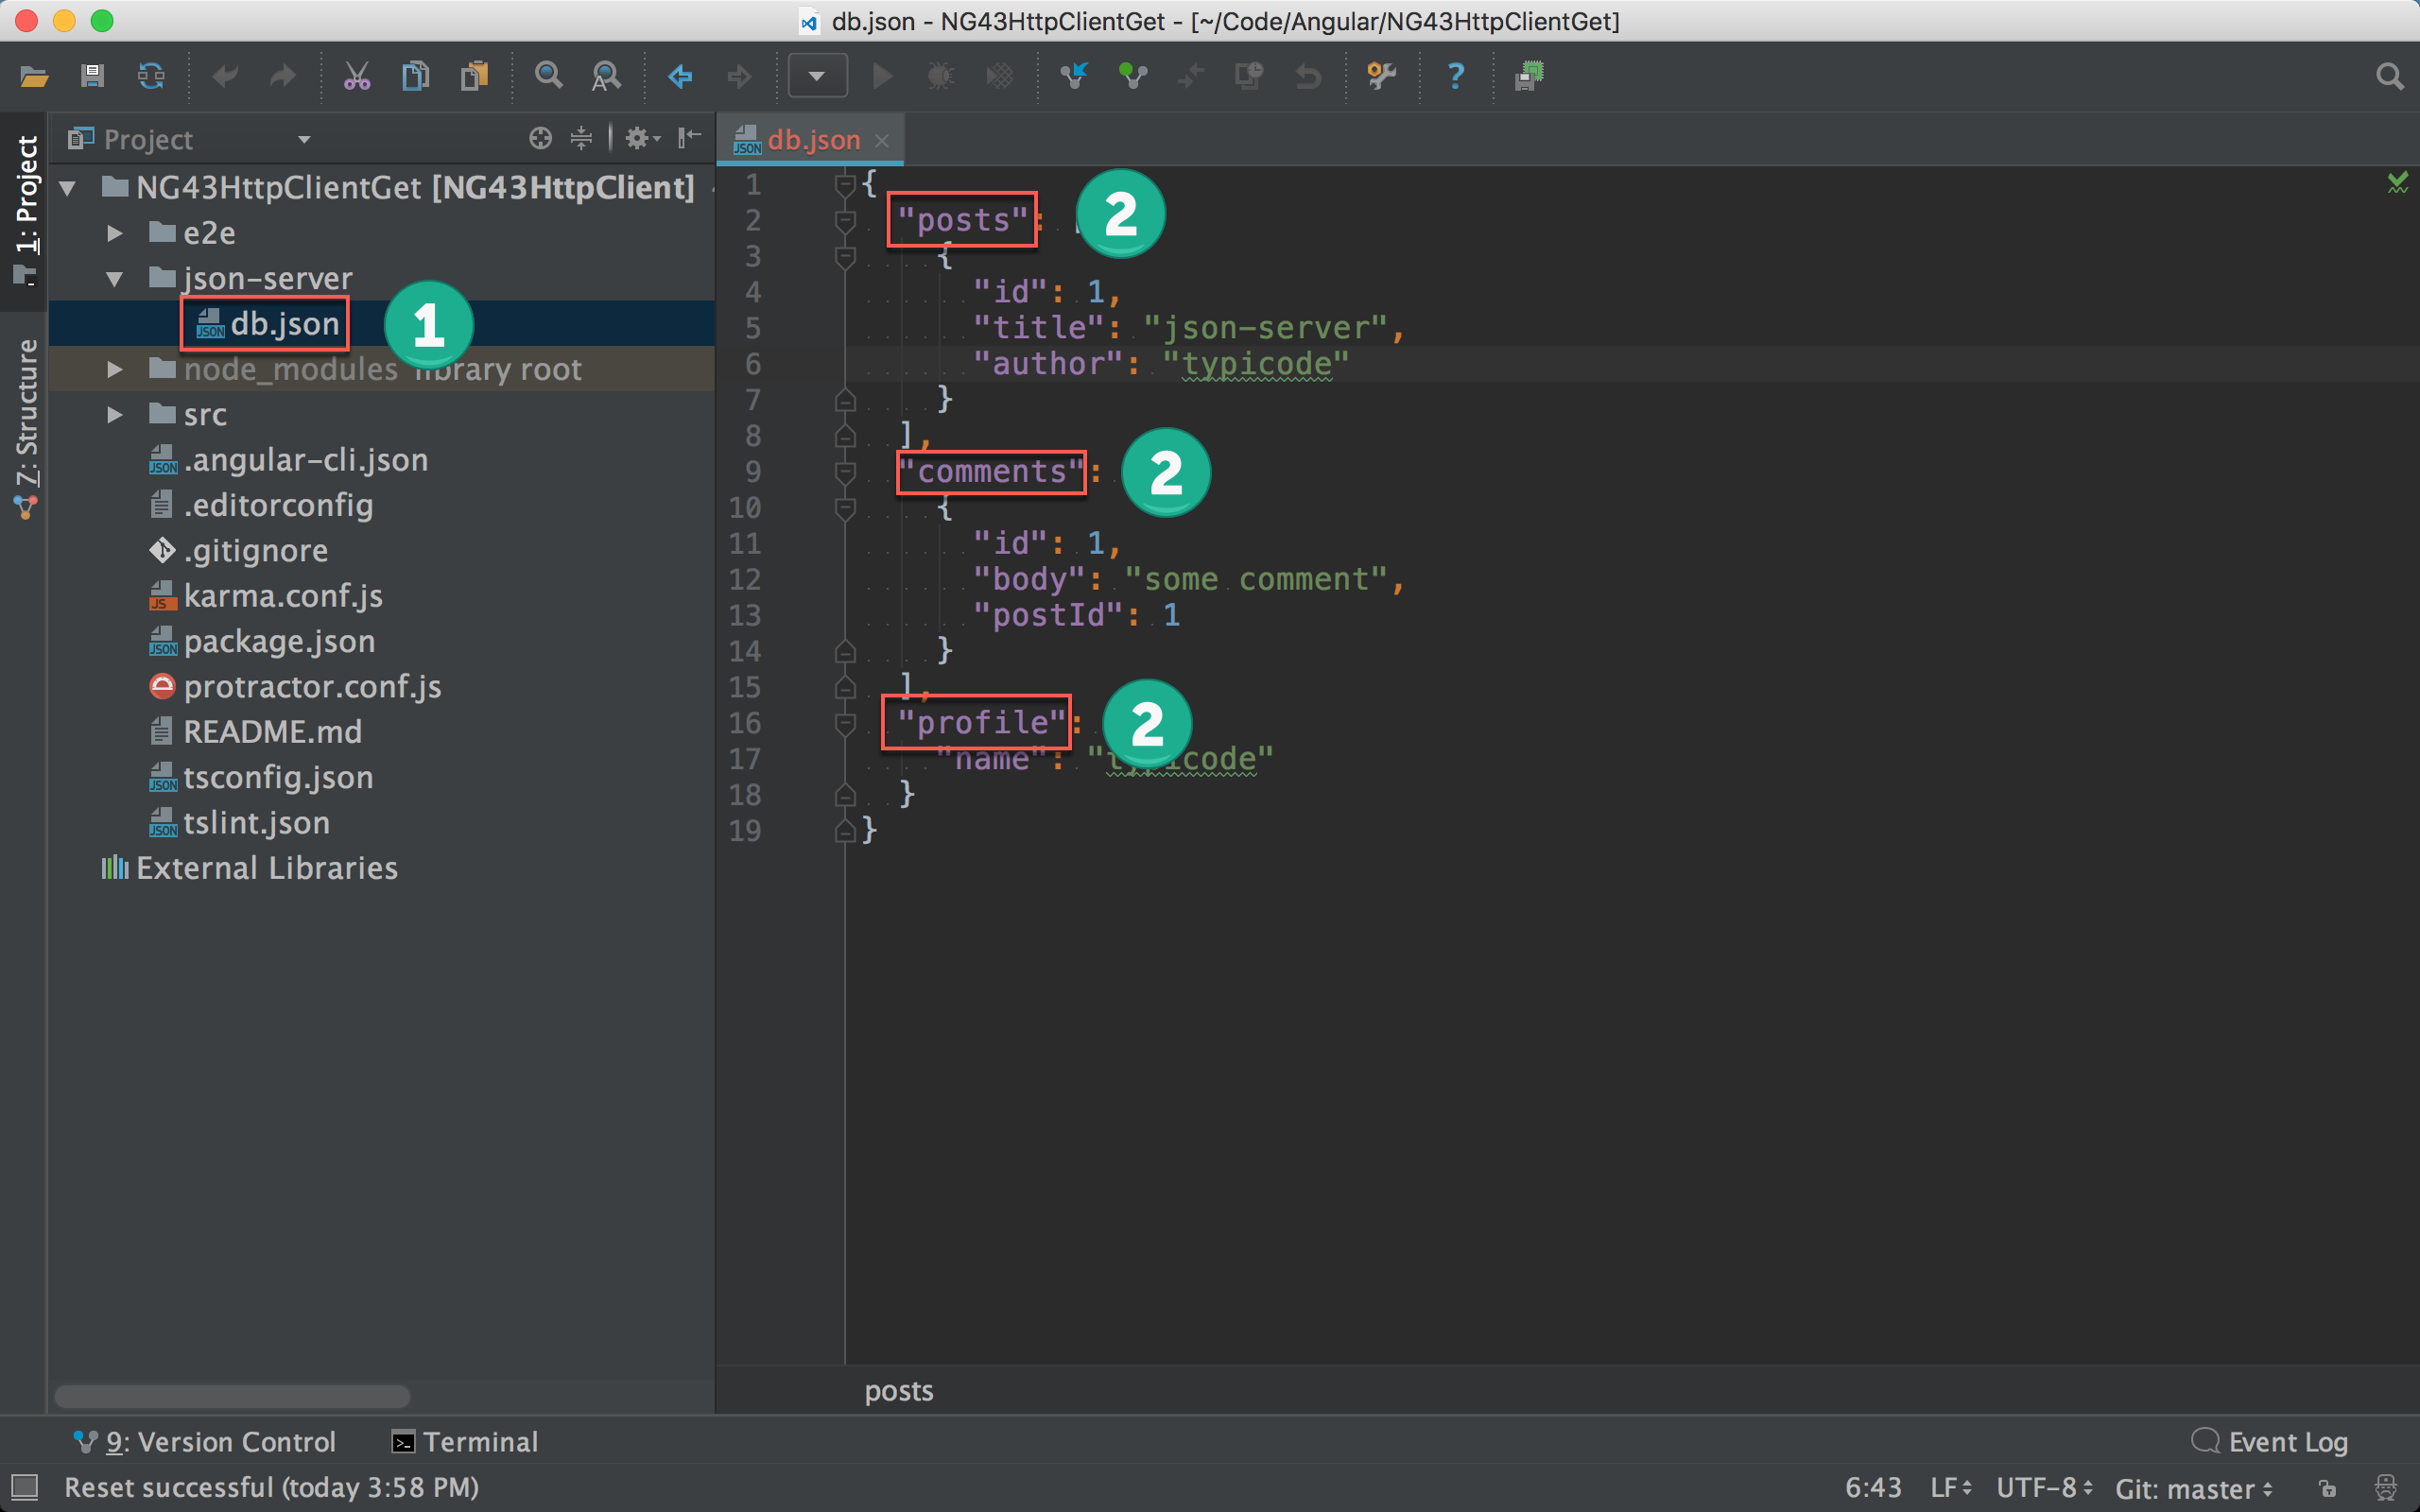
- 開啟
/json-server/db.json - 每個 field 相當於資料庫的 table 名稱,可自行修改,後面接的是 JSON 物件陣列,也可以自行修改 JSON 建立假資料
建立 Snapshot
在實務上有時會想將目前的資料先存起來做備份,當作 golden sample,JSON Server 可以幫我們將目前的所有資料備份成 snapshot。
熱鍵:S + enter
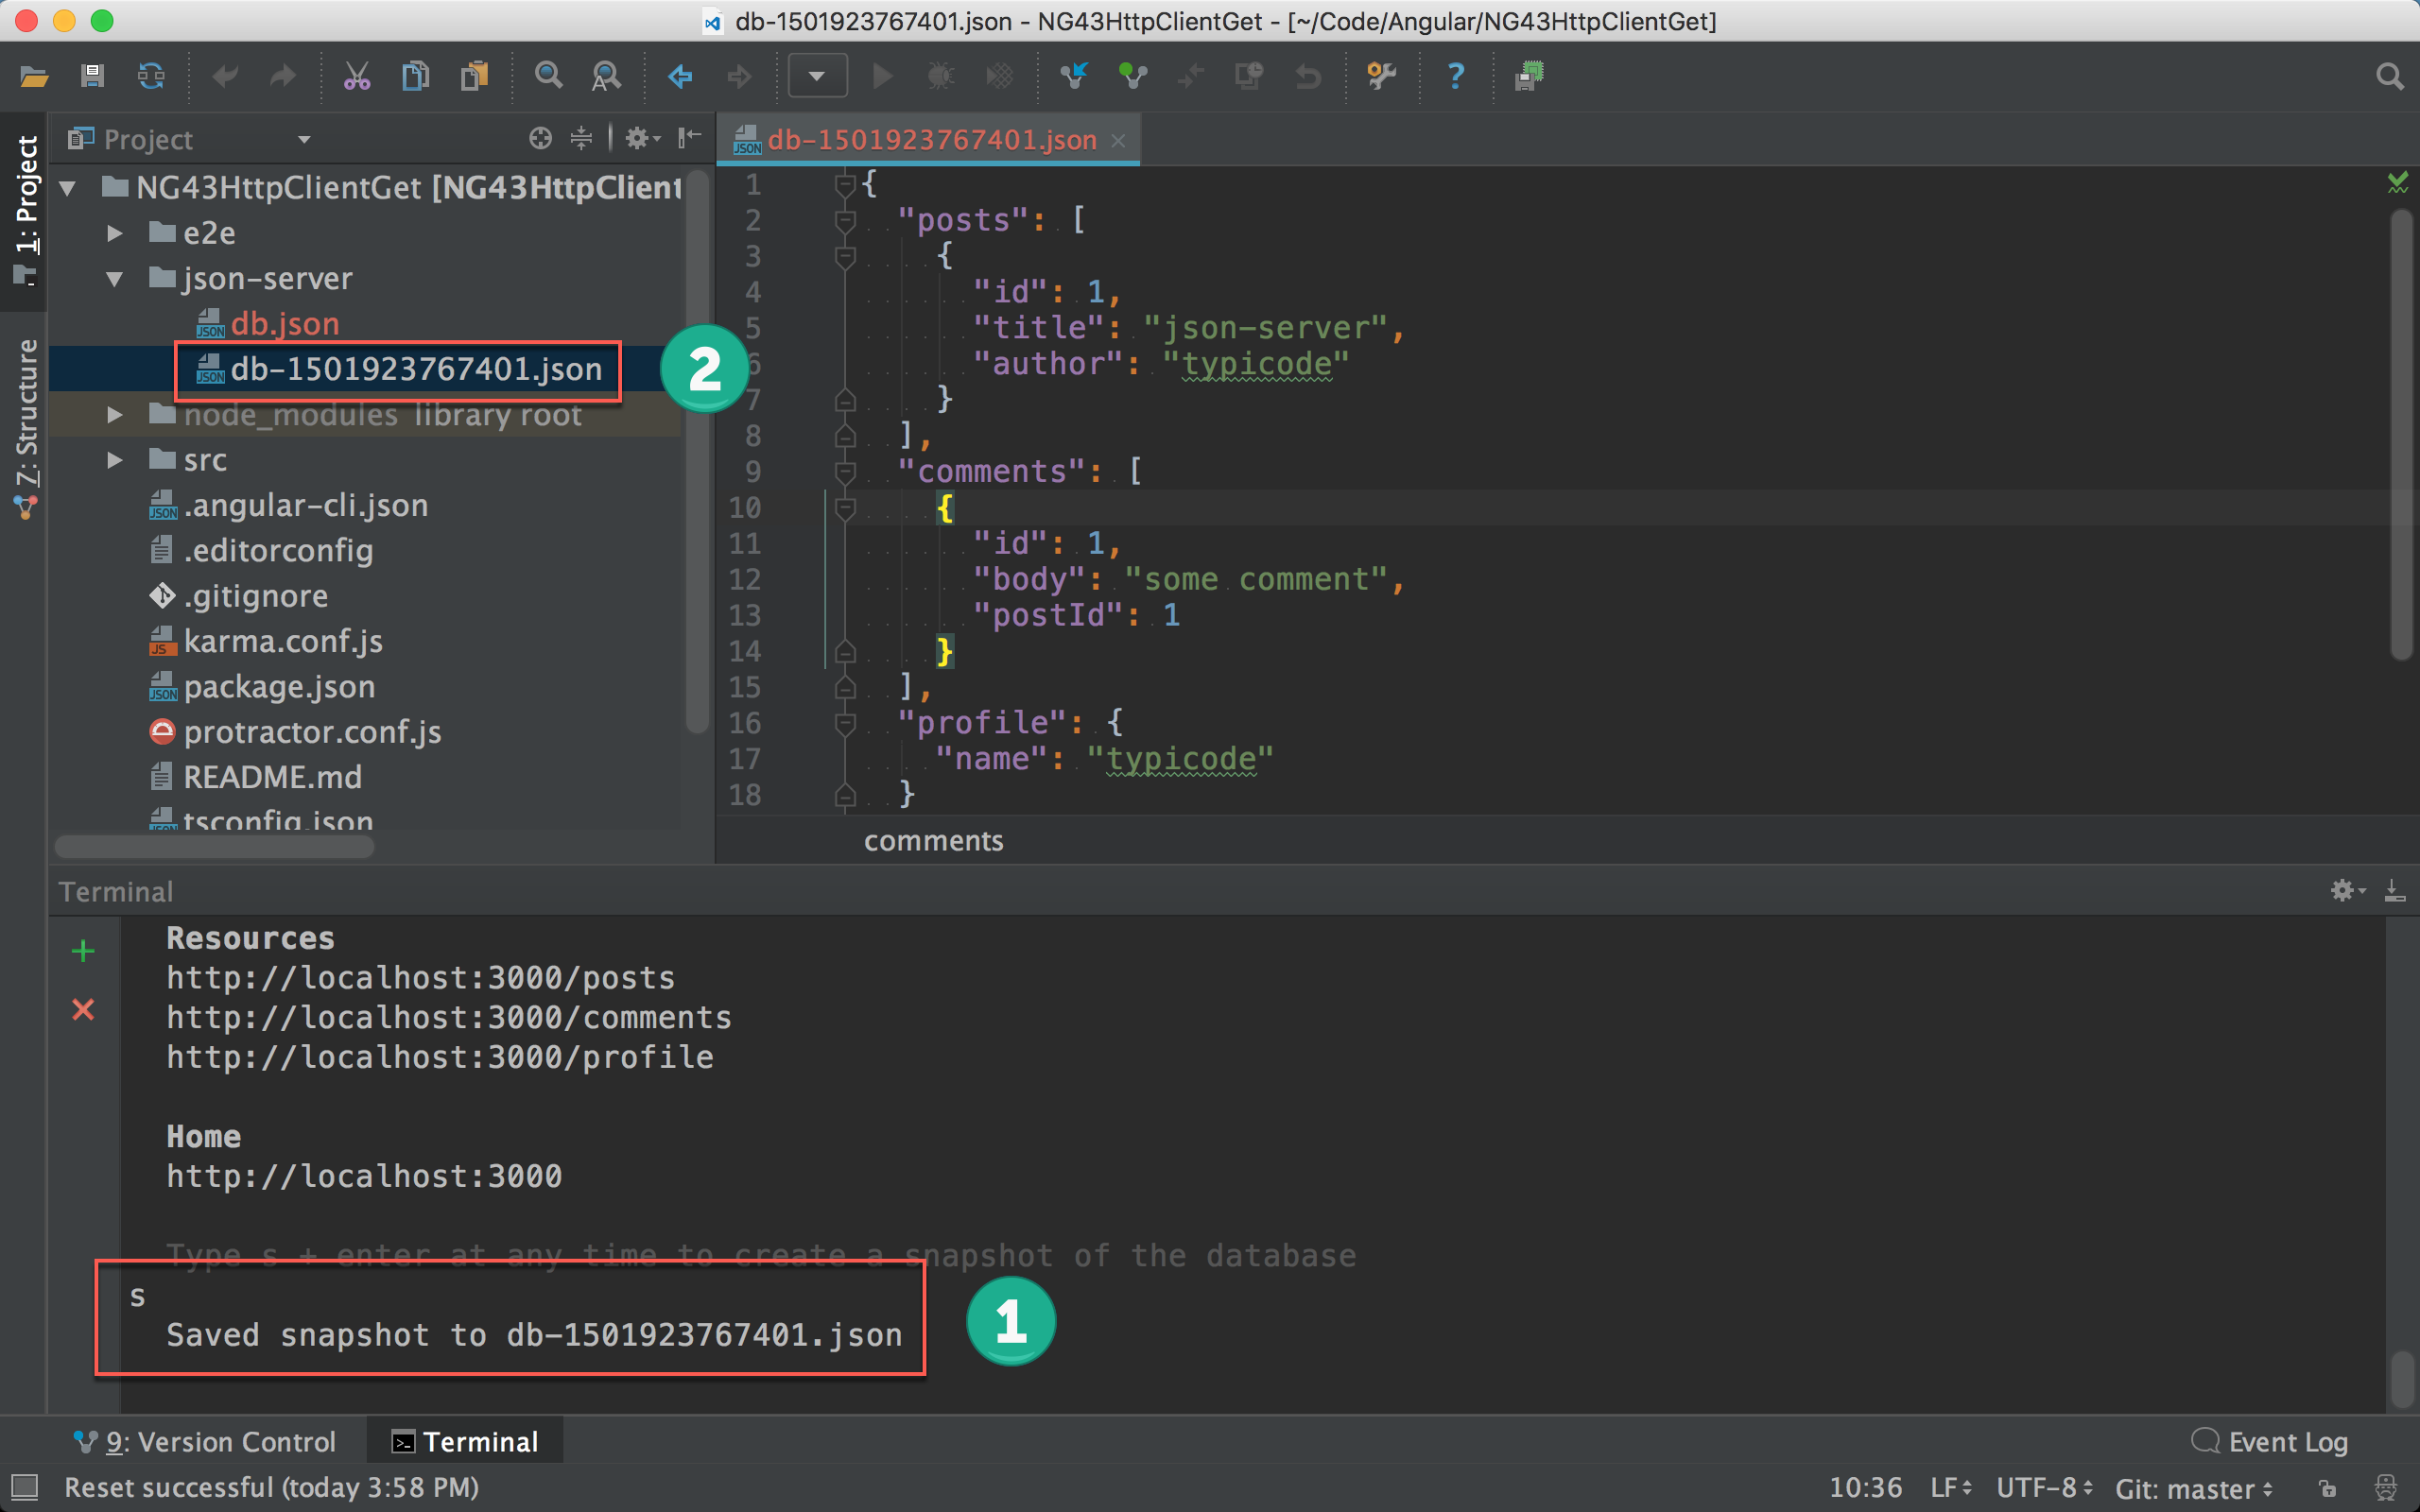
- 在 terminal 下輸入熱鍵
S + enter - JSON Server 會亂數產生檔案,將目前的
db.json做 snapshot
自訂新 Route
JSON Server 預設是以 table 名稱作為 route,但實務上 API 的 route 可能不一樣,如 /api/posts 與 api/posts/1。
新增 routes.json
json-server/routes.json
1 | { |
將 /api/ports 指向原本的 /posts。
將 /api/posts/1 只像原本的 /posts/1。
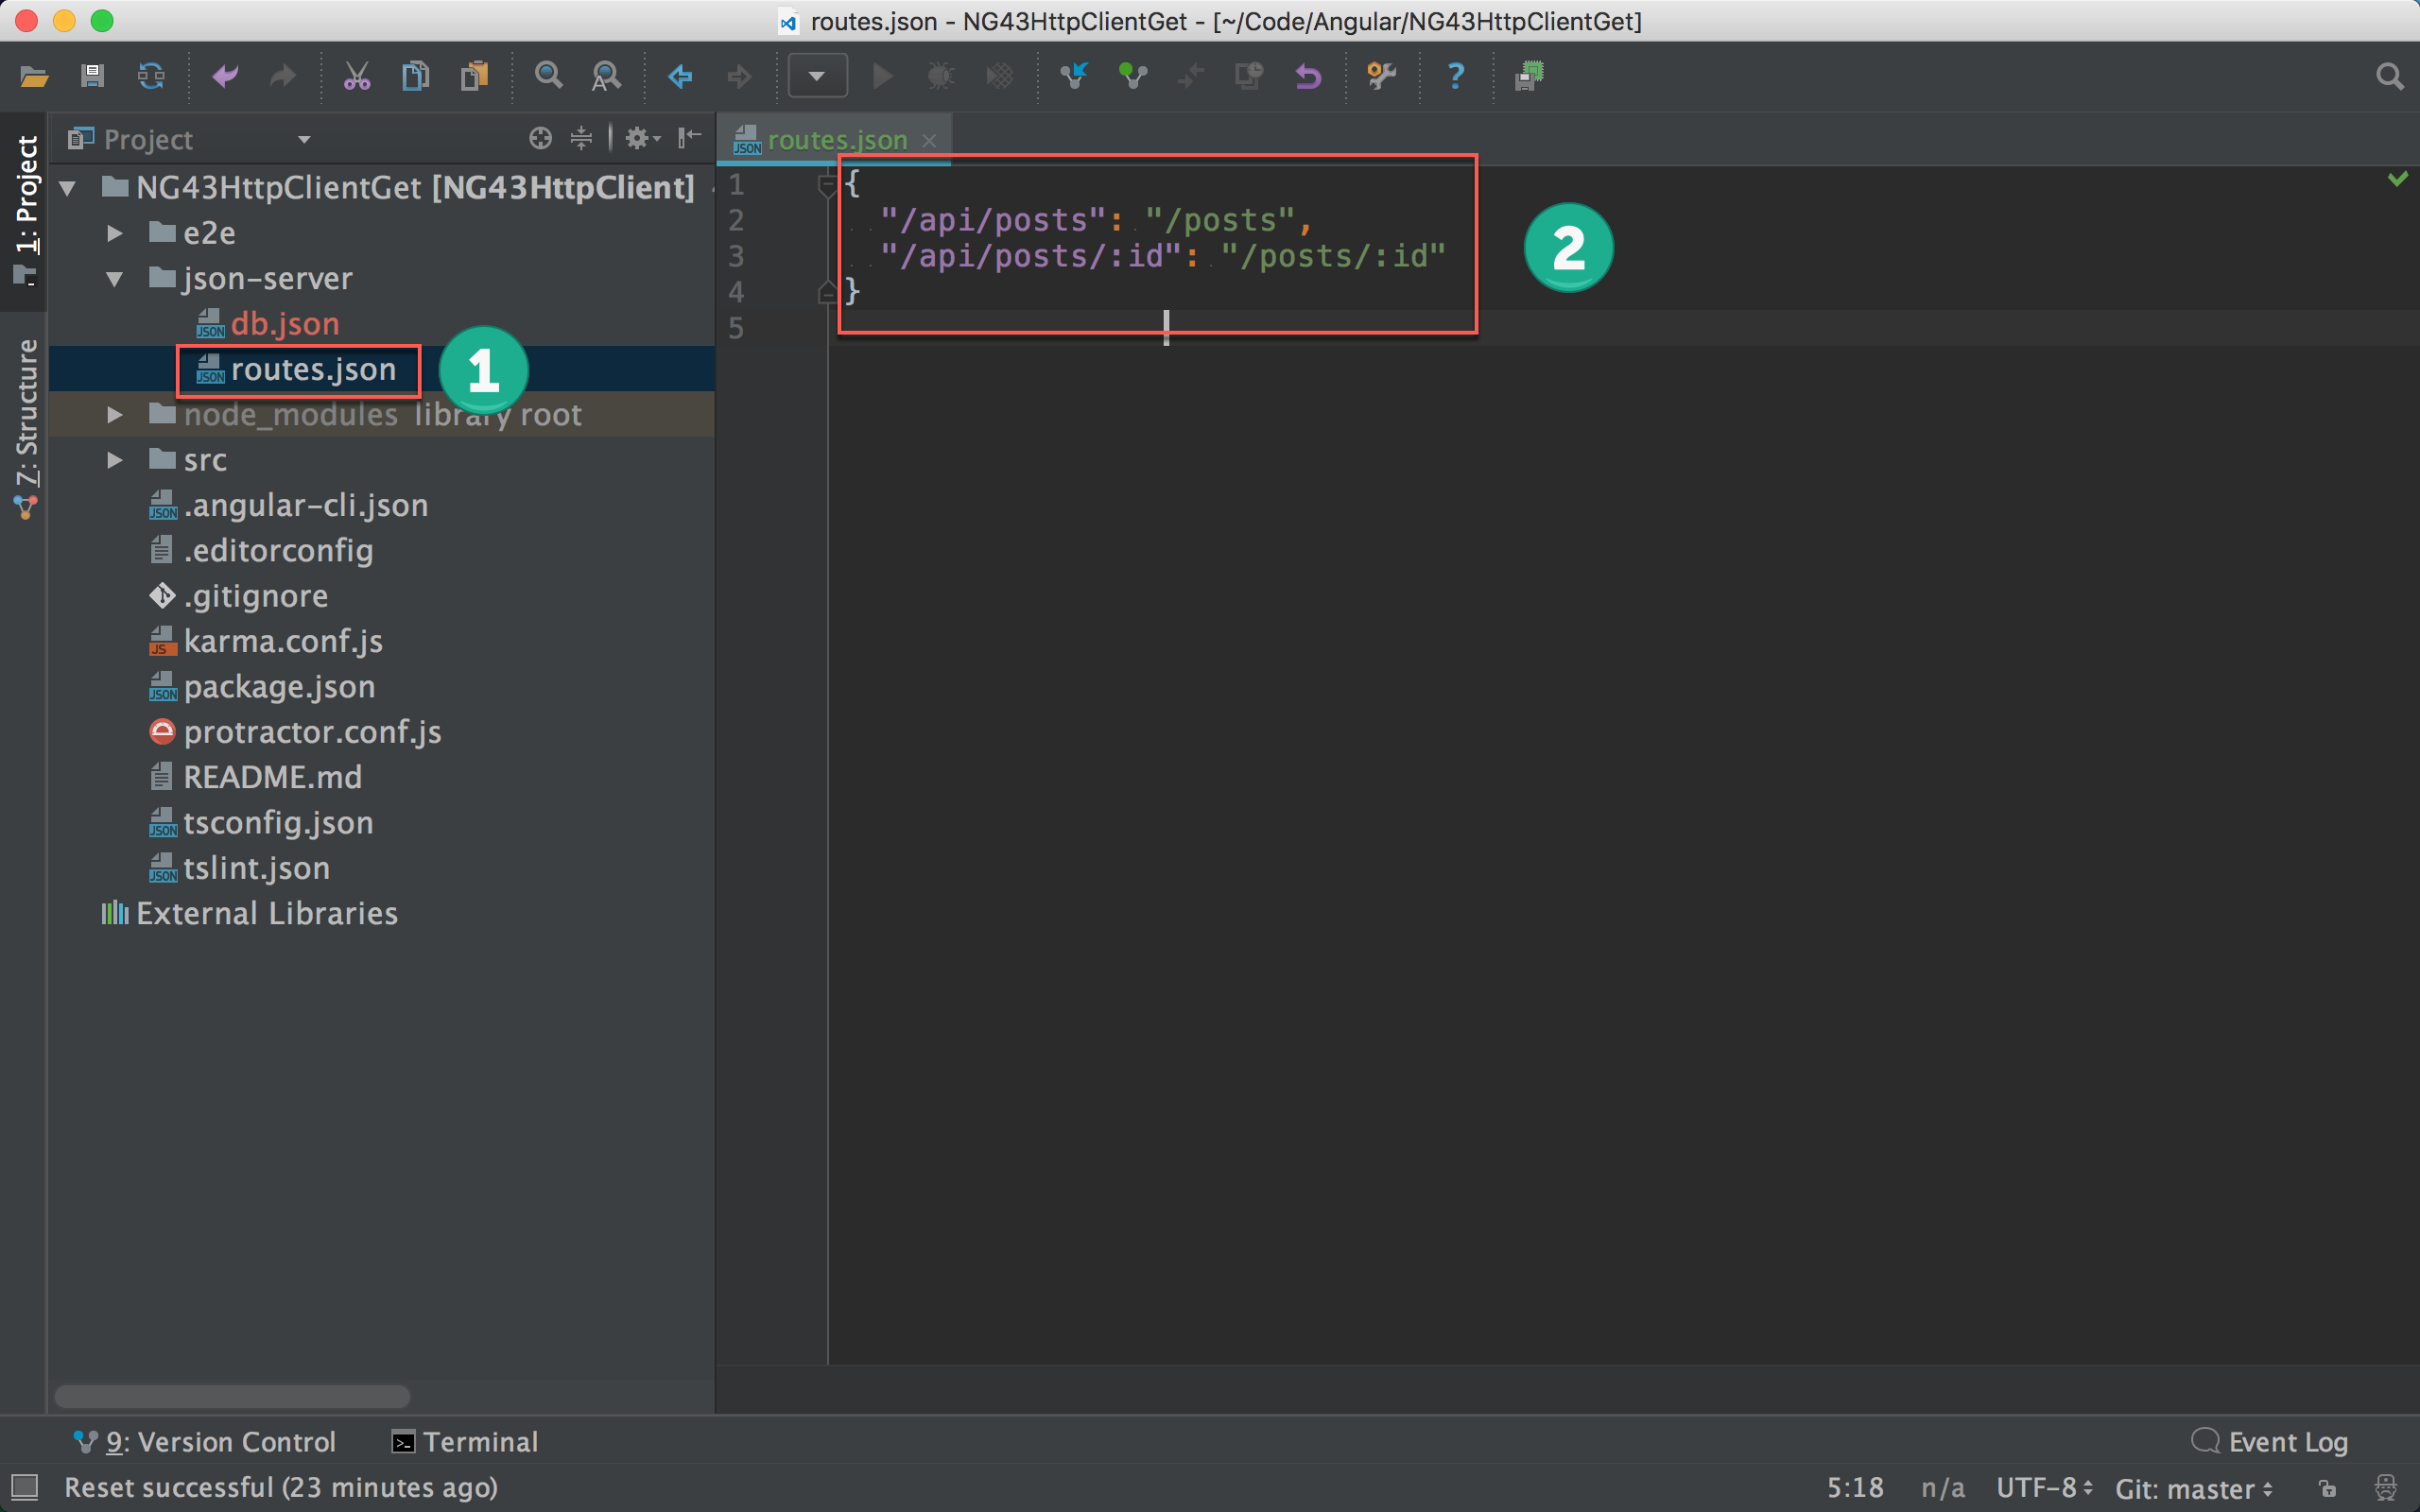
- 新增
json-server/routes.json - 編輯 routes 的對應規則
套用新 Route
1 | ~/MyProject/json-server$ json-server db.json --routes routes.json |
重新啟動 JSON Server,加上 —-routes 參數,指定套用 routes.json。
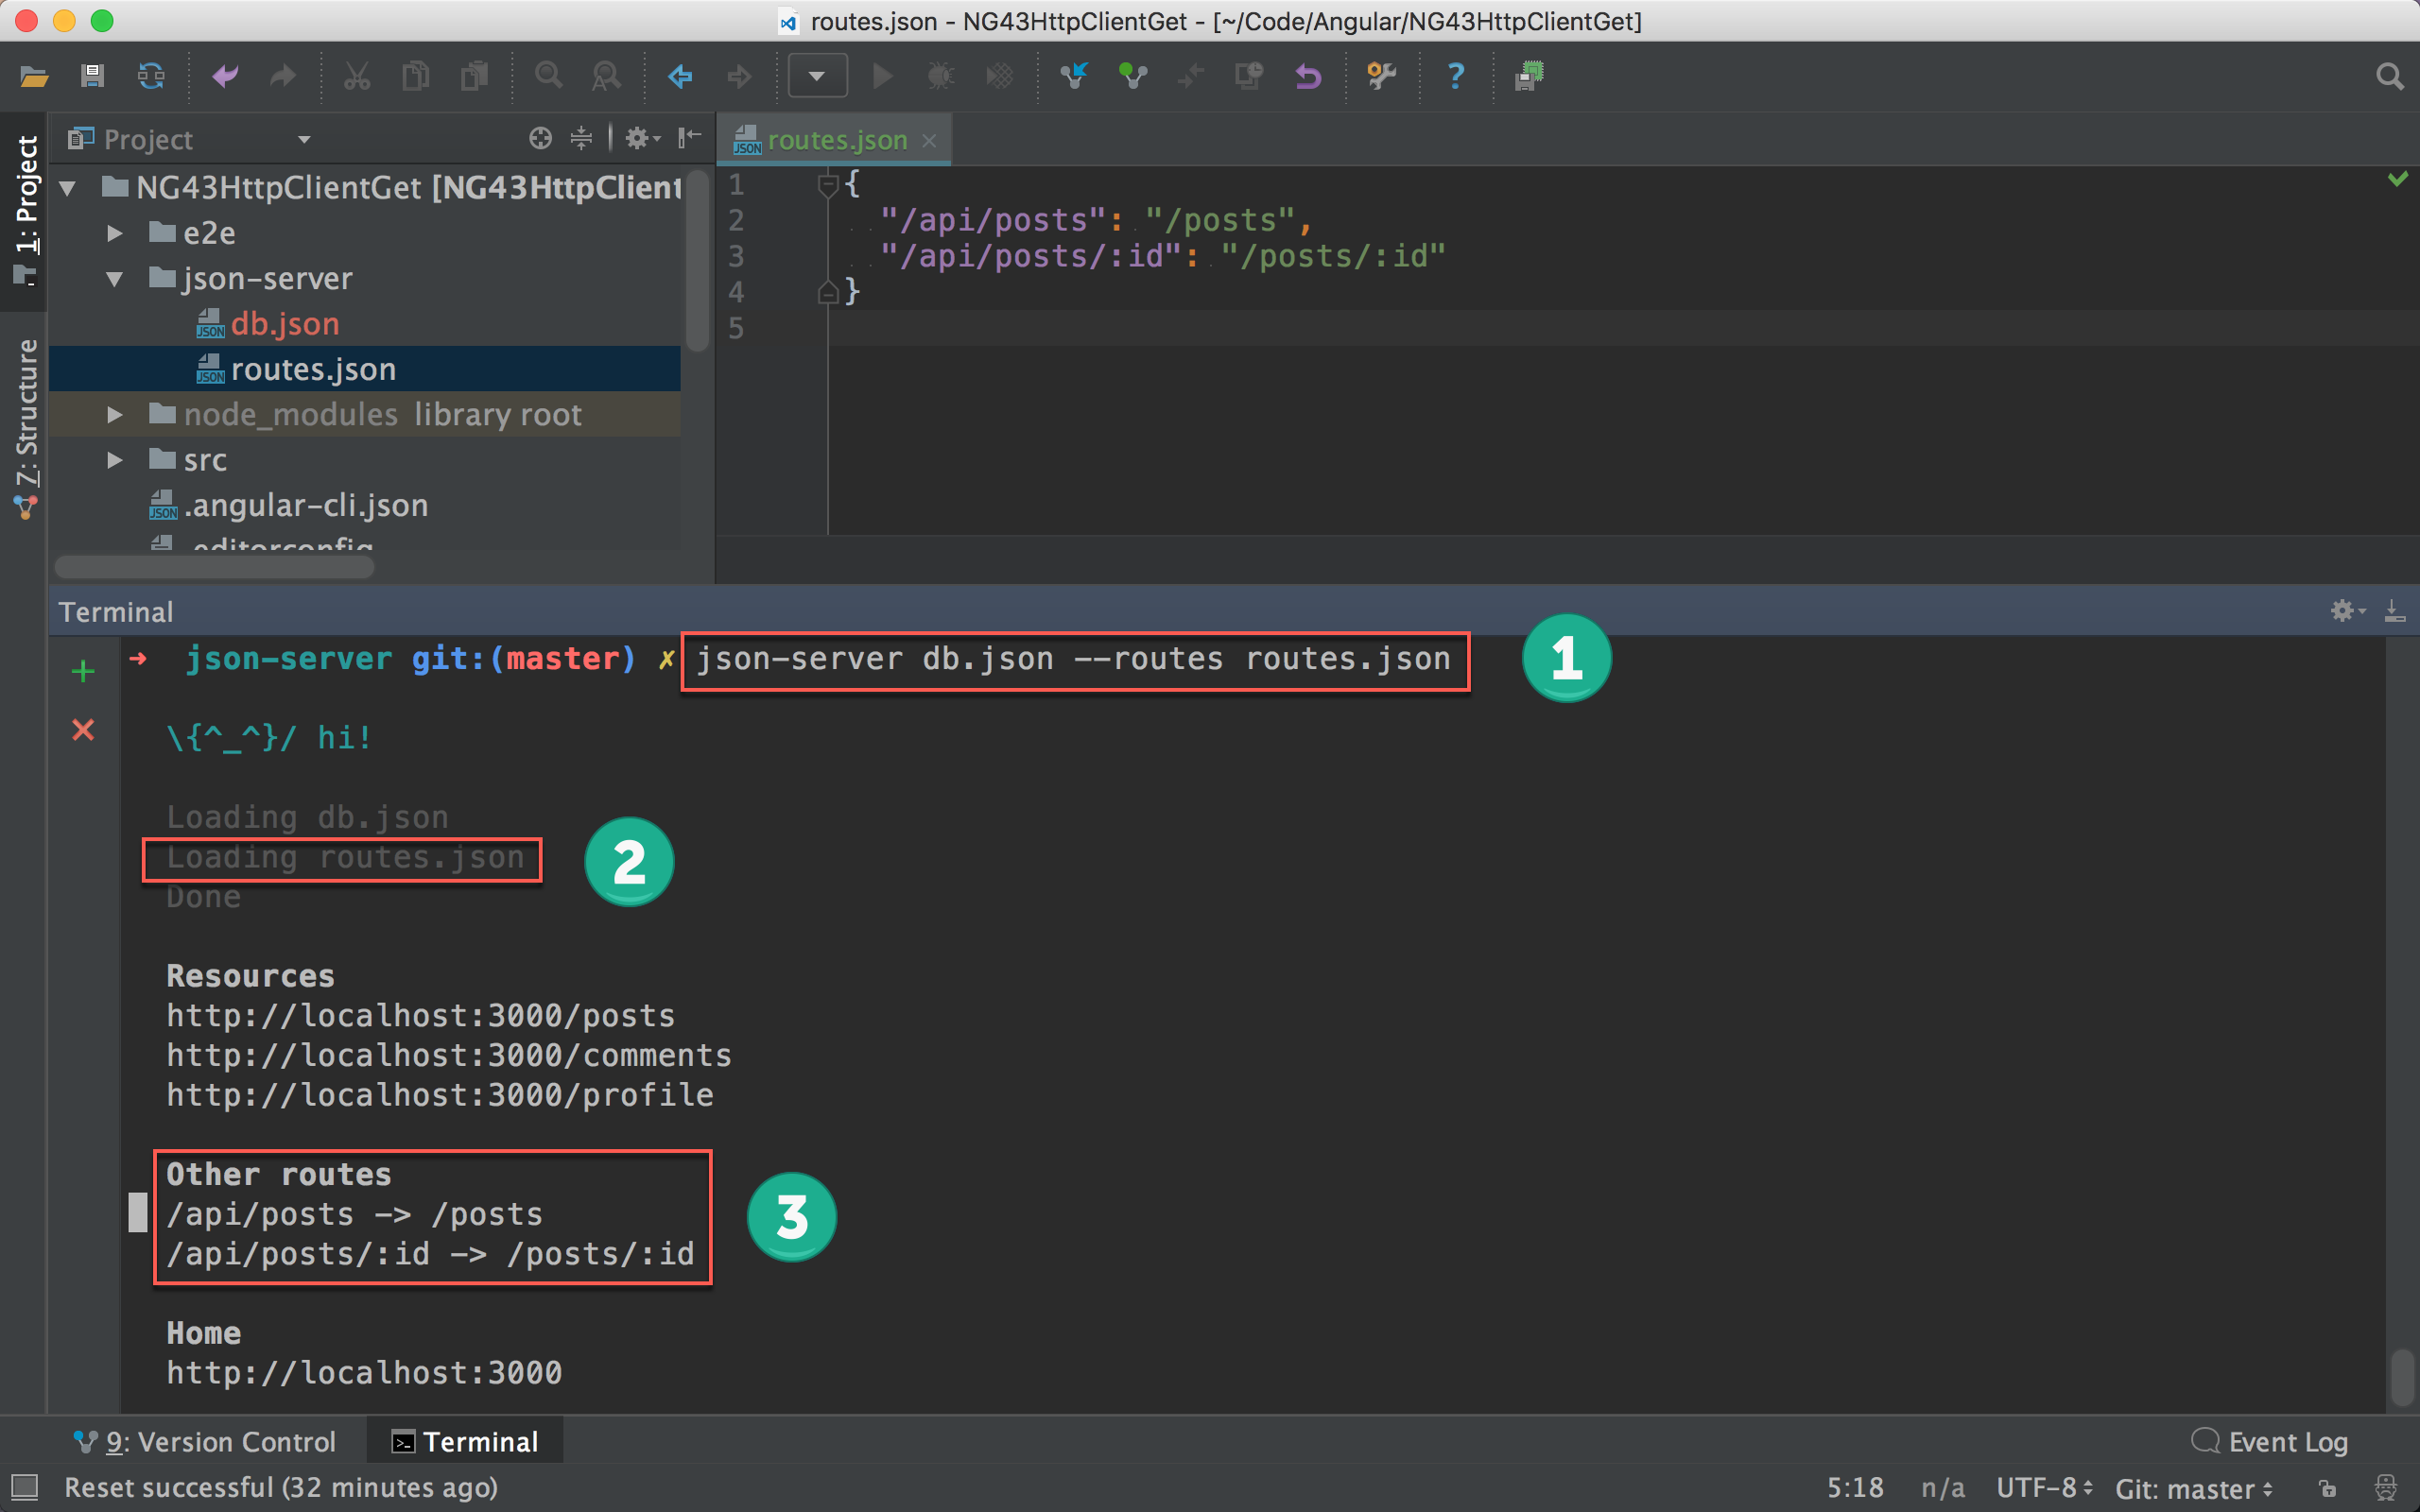
重新啟動 JSON Server,並加上
—-routes參數與routes.jsonJSON Server 提示載入
routes.json顯示新增的 route
測試新 Route
1 | http://localhost:3000/api/posts |
取得所有 post 資料。
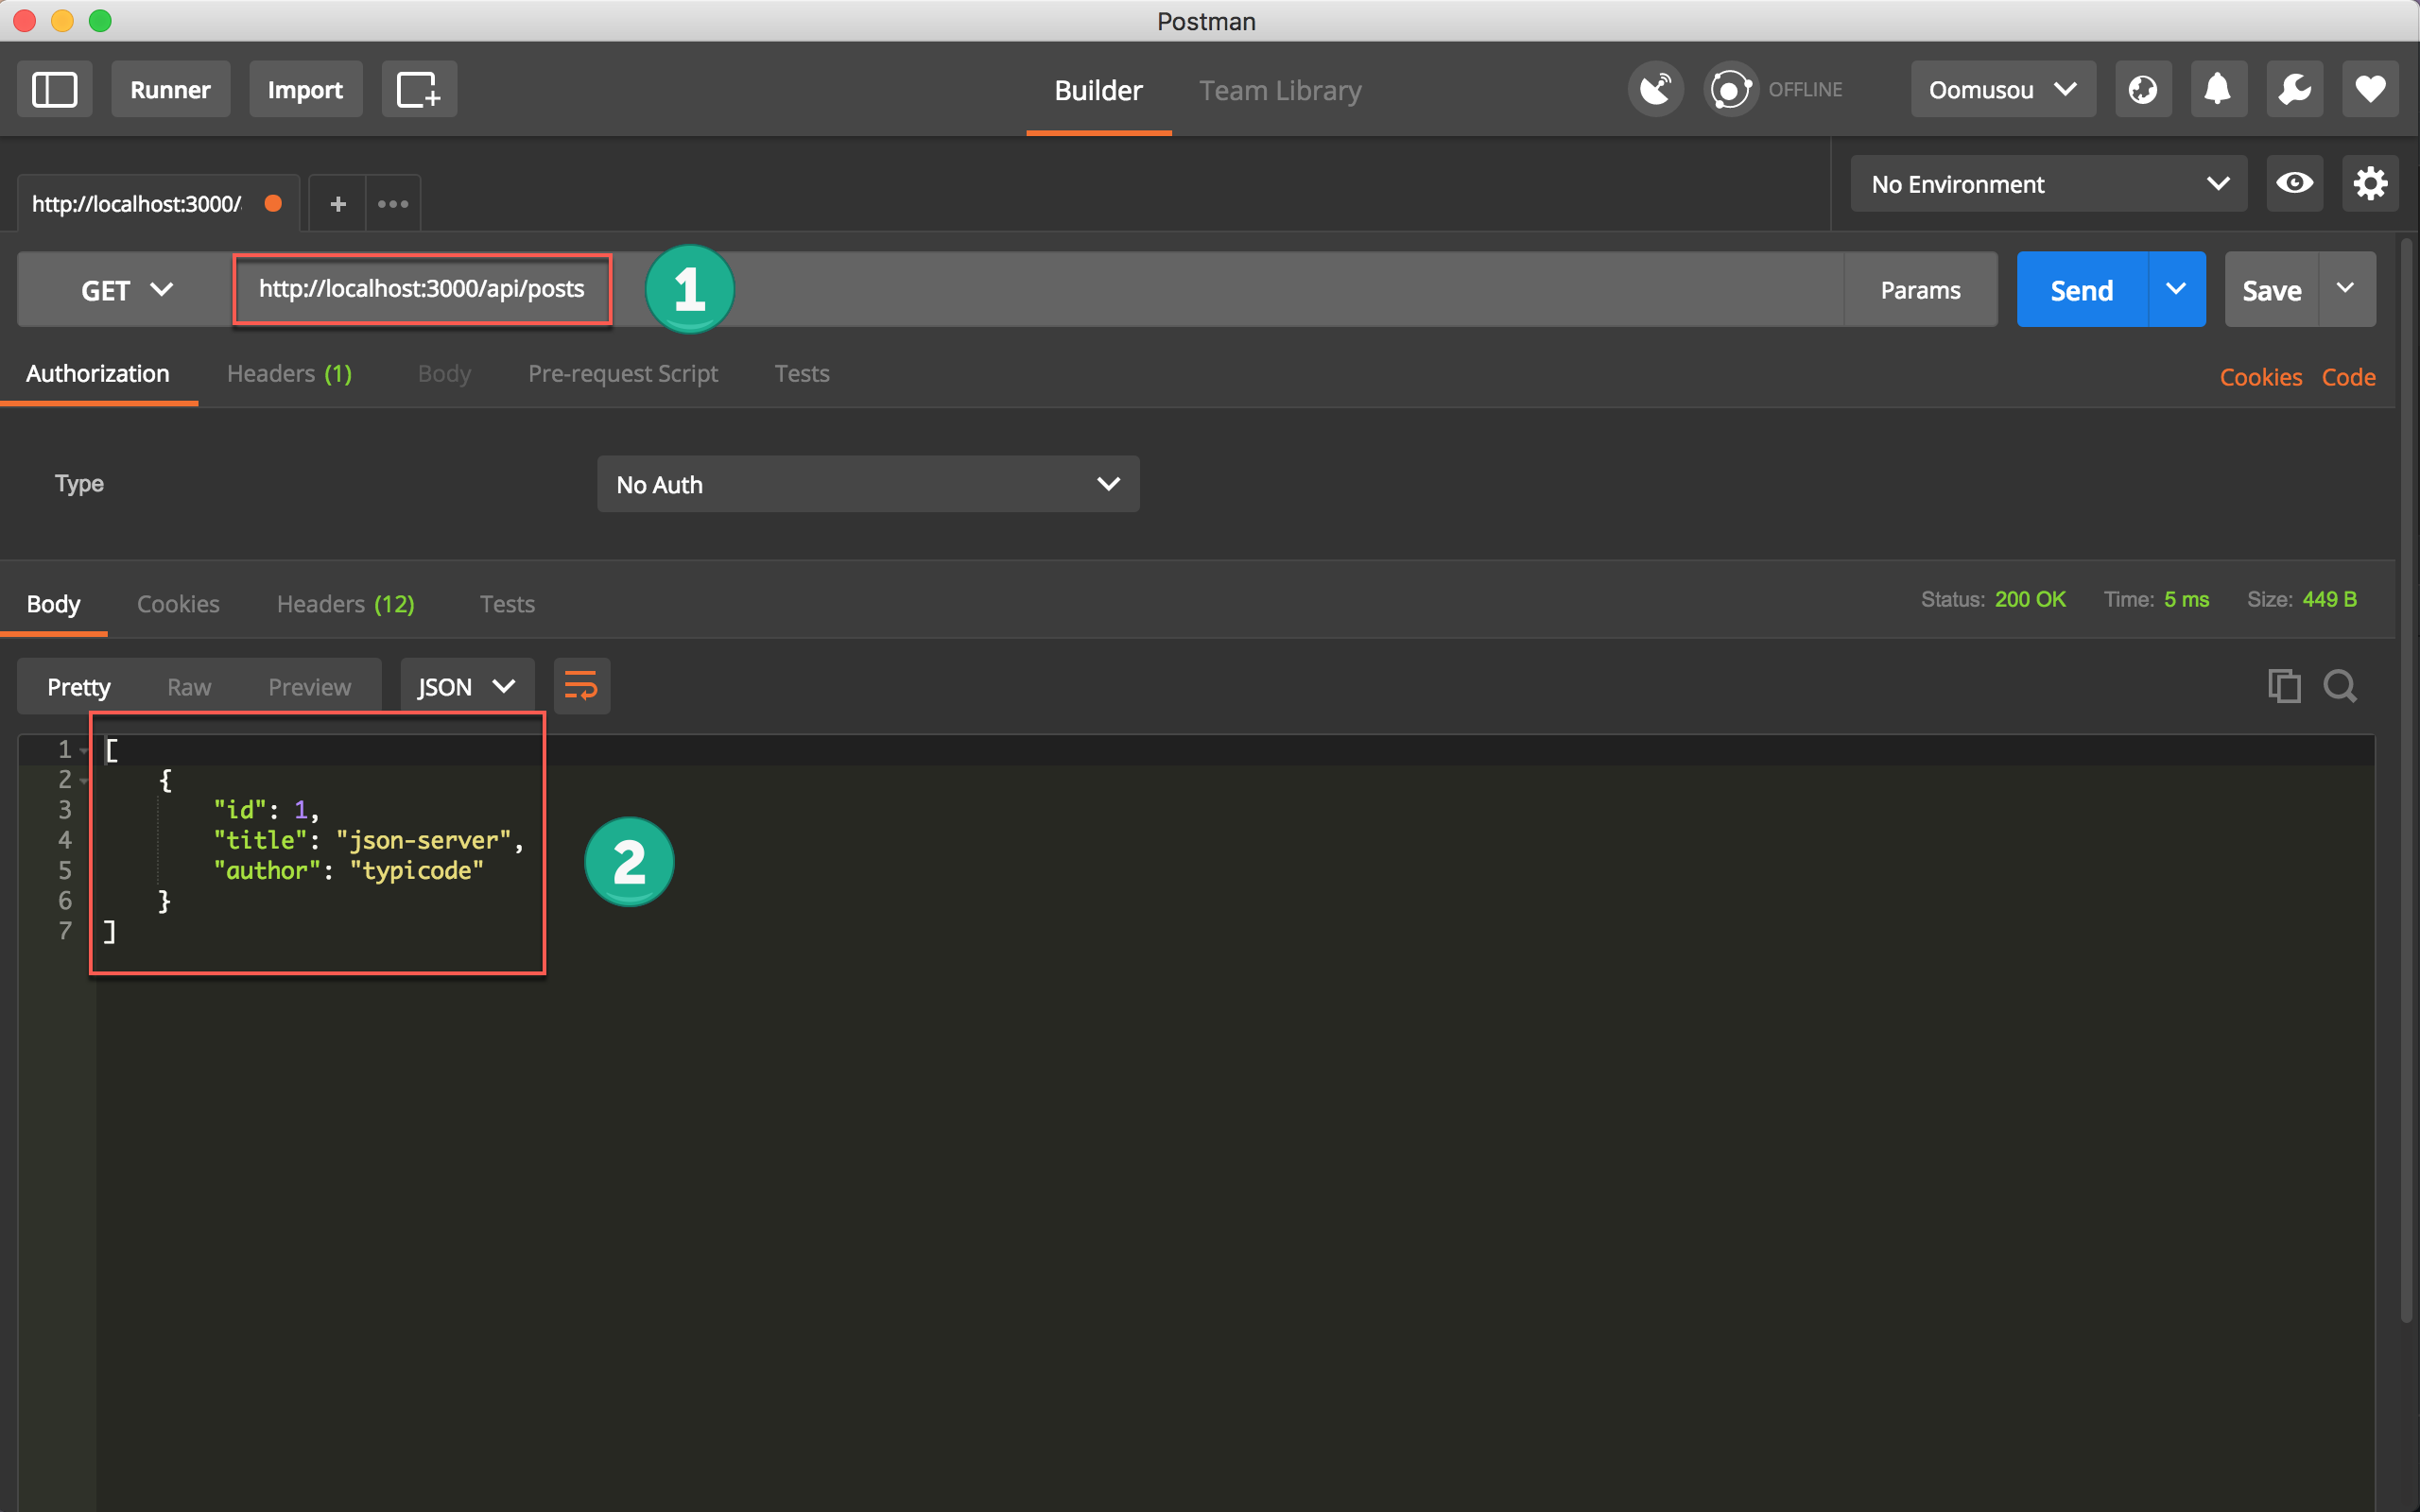
- 使用新的
http://localhost/api/posts測試 - 一樣回傳 JSON 物件陣列
1 | http://localhost:3000/api/posts/1 |
取得 id 為 1 的 post 資料。
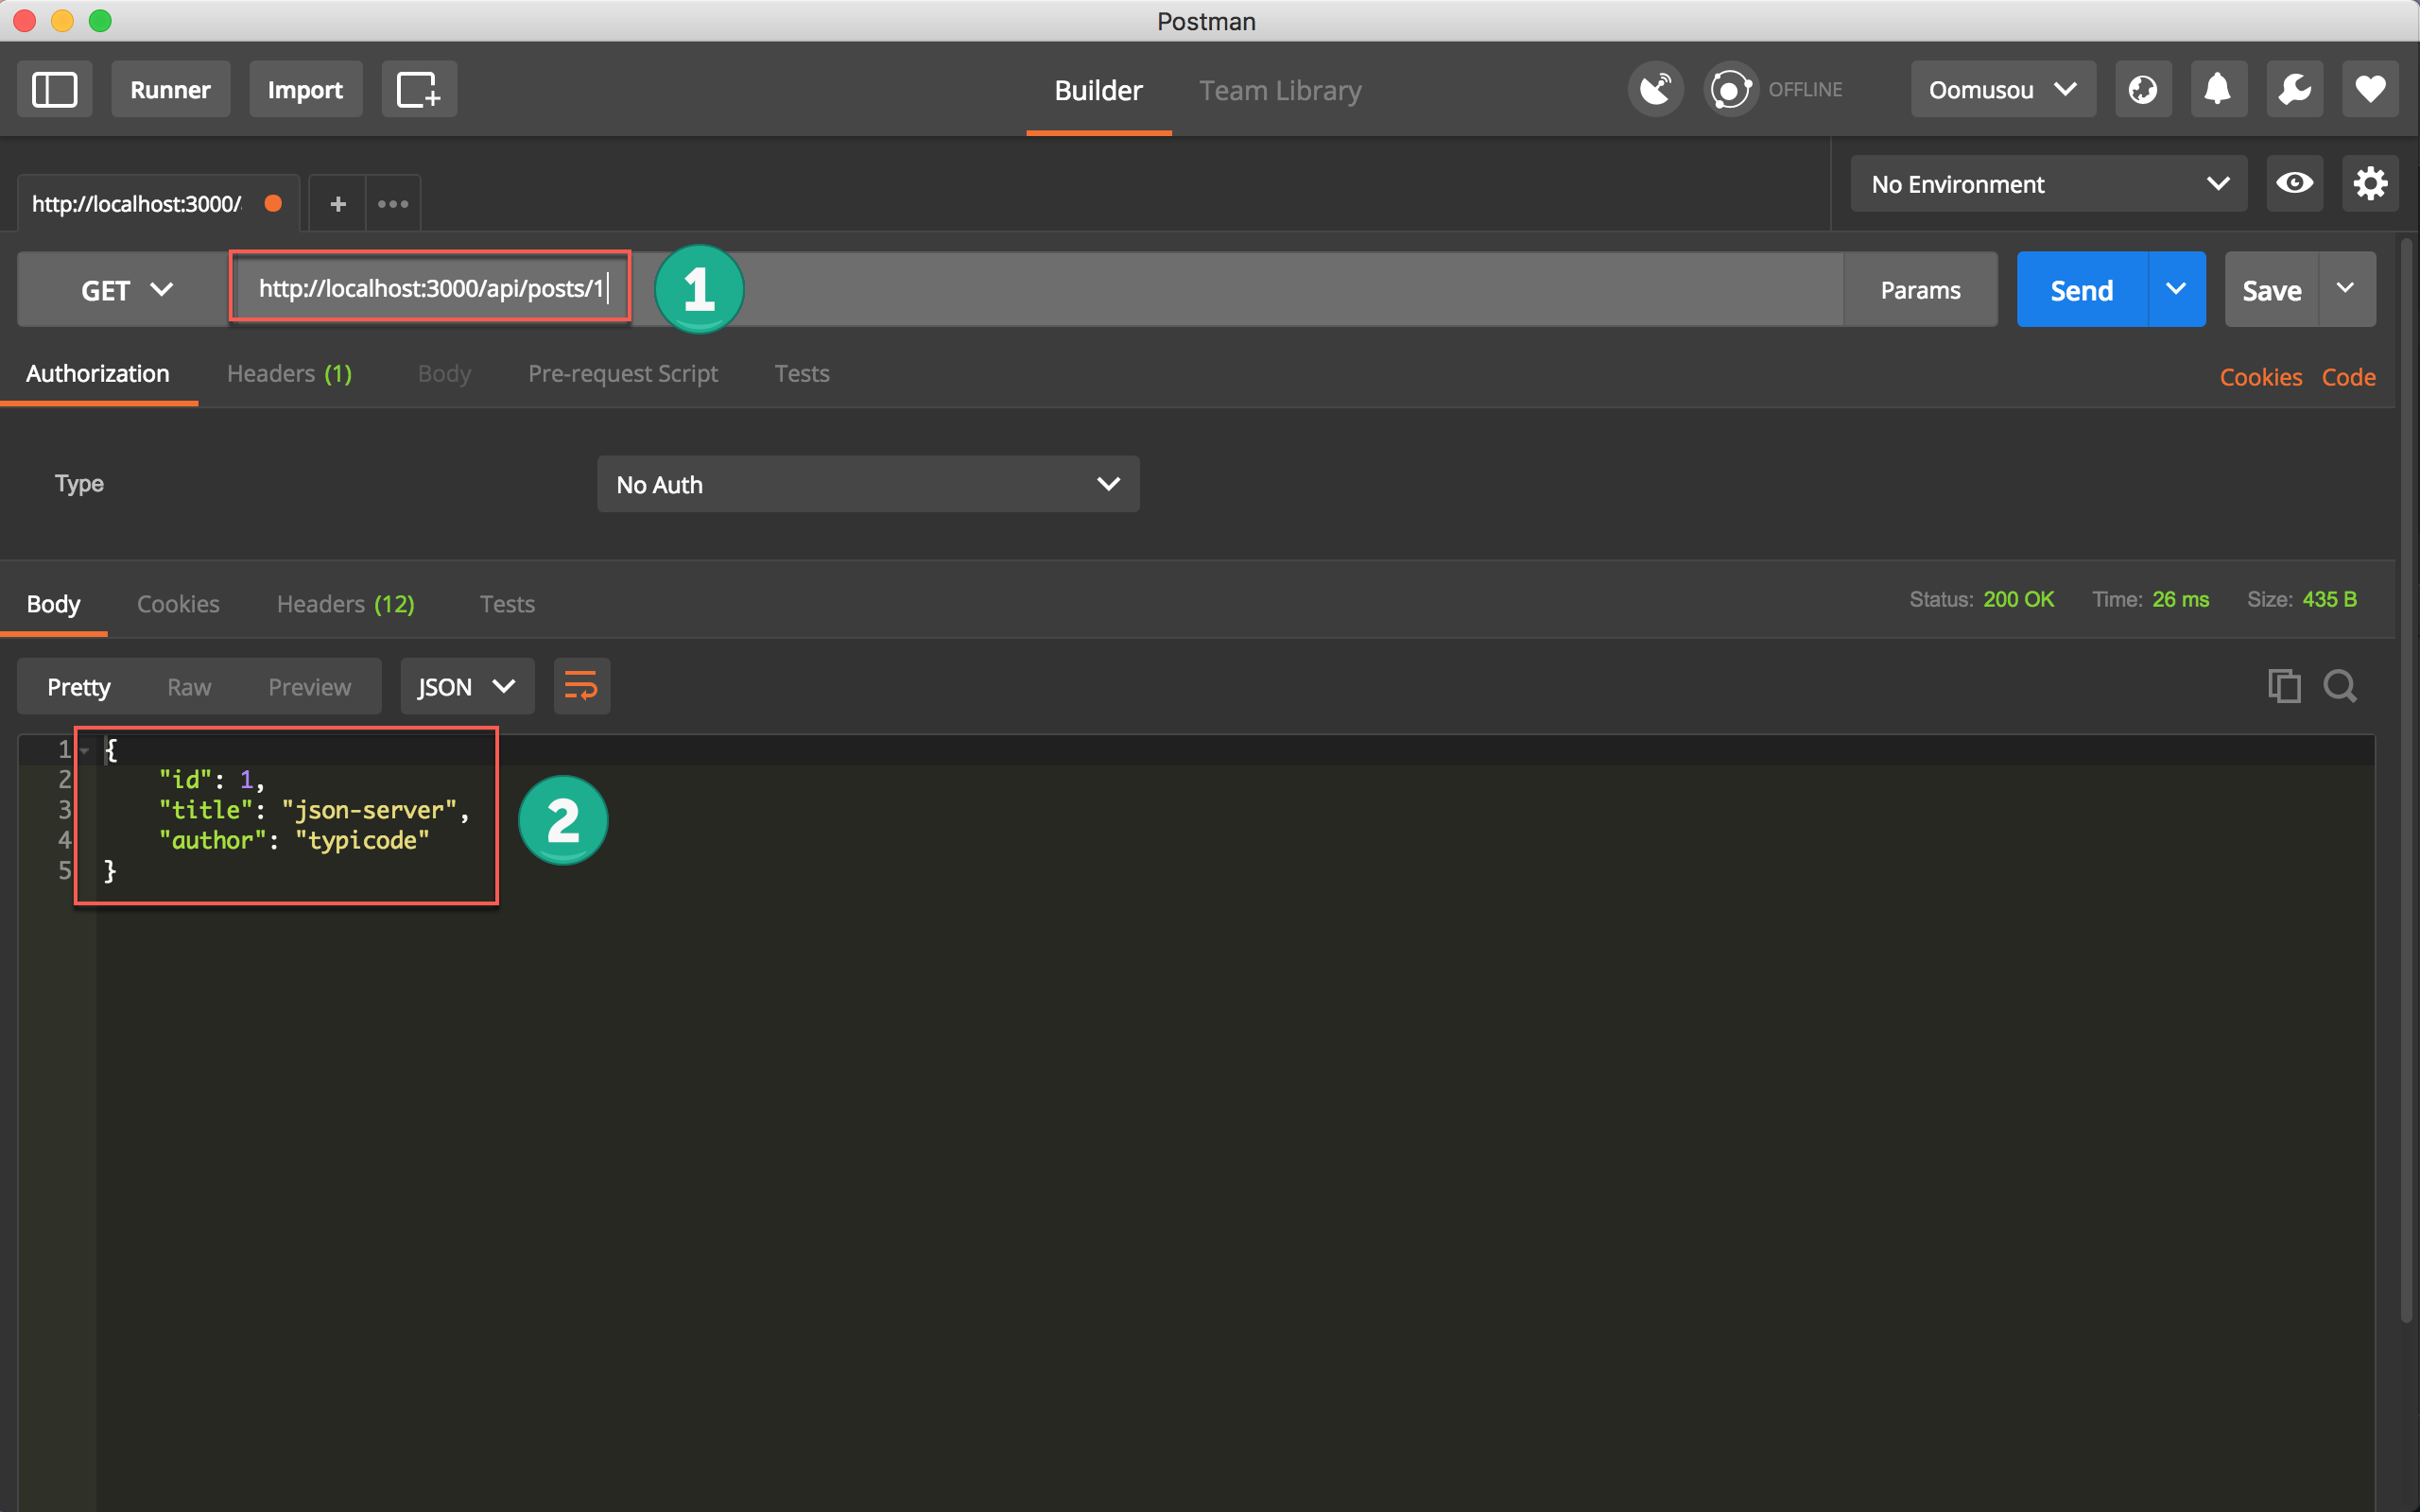
- 使用新的
http://localhost/api/posts/1測試 - 一樣回傳 JSON 物件
Conclusion
- JSON Server 讓我們不用安裝後端環境,也不用安裝資料庫,就可以快速建立前端開發測試用的 API。
- JSONPlaceholder 其實就是以 JSON Server 架設,若為了 demo 方便,可直接使用 JSONPlaceholder,但若在實務上使用,JSON Server 的彈性更高。
- 本文僅針對實務上最常用的功能介紹 JSON Server,更進階的功能請參考 reference 部分。