如何使用 Protractor 寫 Checkbox 的驗收測試 ?
HTML 的 <input type="checkbox"> 是常見的控制項,該如何使用 Protractor 對 checkbox 寫驗收測試 ?
Version
Protractor 5.1.2
Requirement
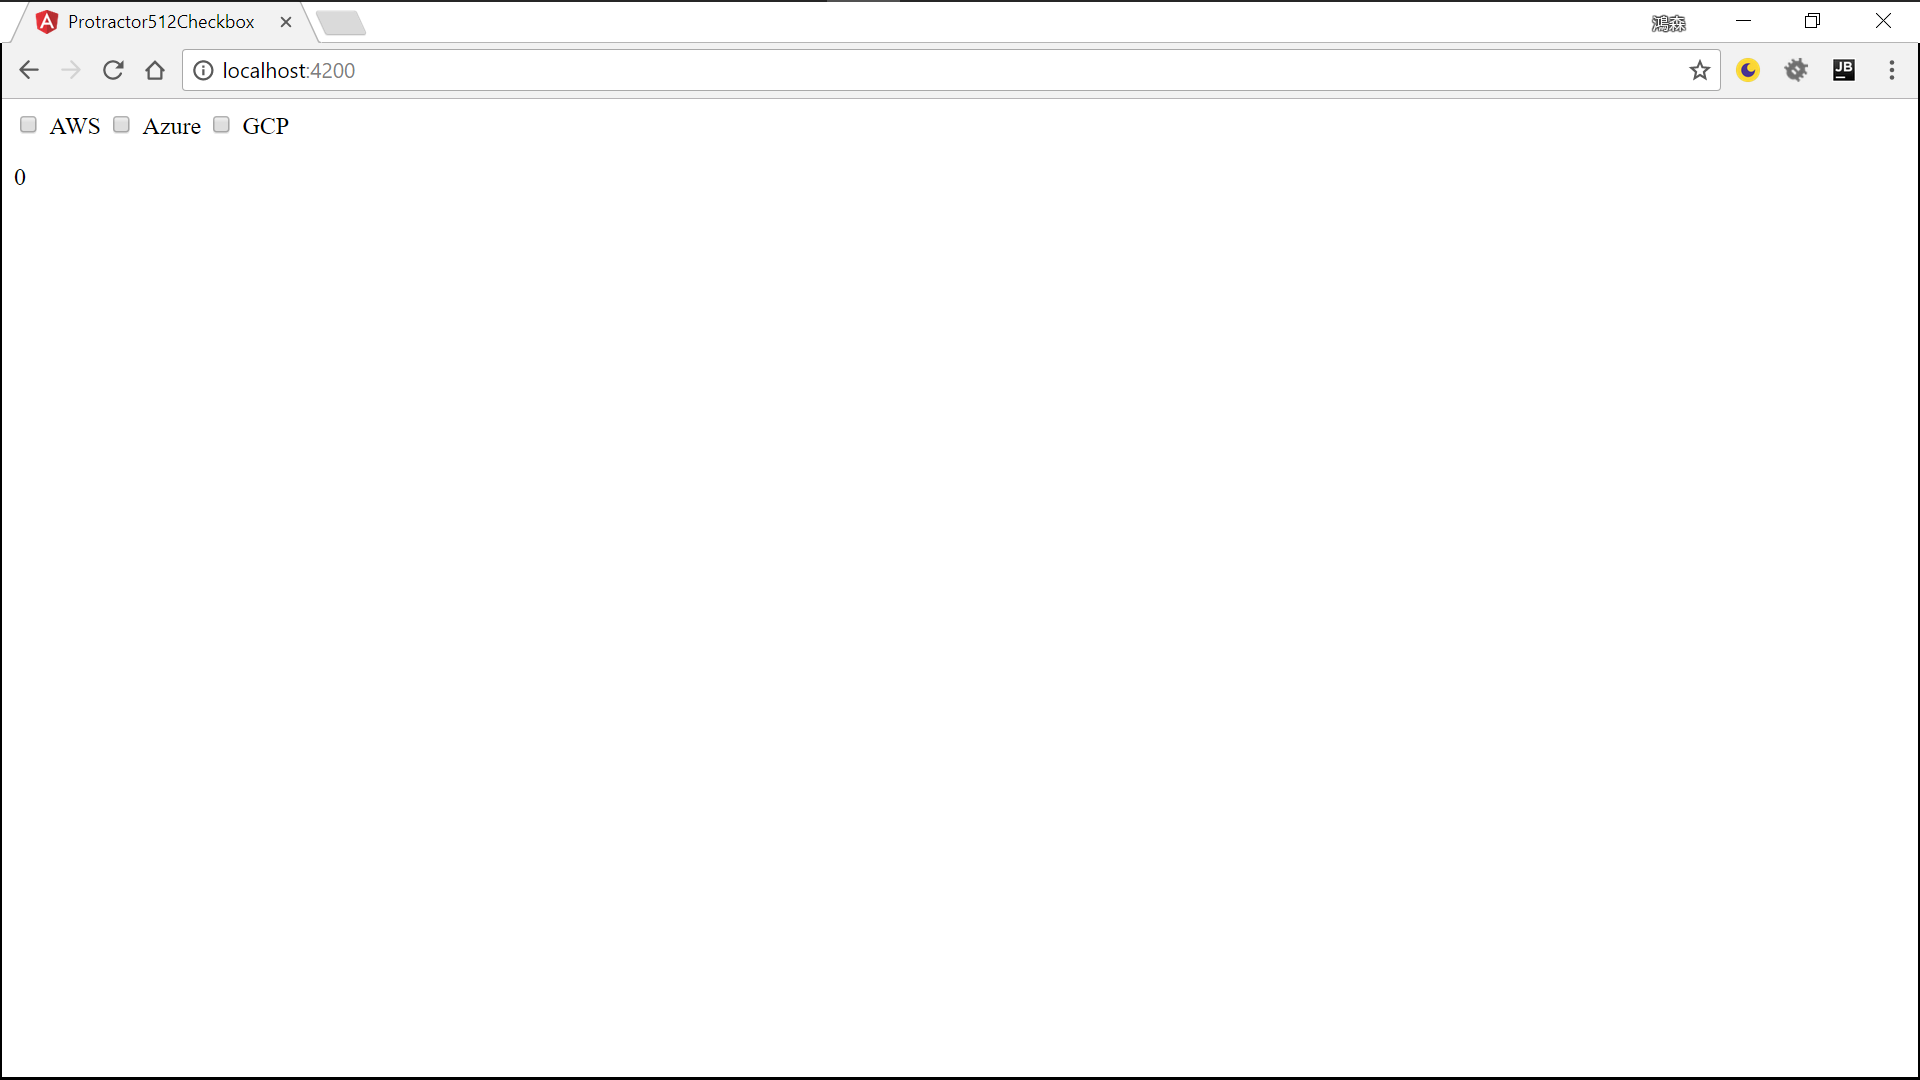
畫面上共有 3 個 checkbox,各為 AWS、Azure 與 GCP。
下方會顯示目前所選擇的 checkbox 數量。
下方一開始數量為 0。

當選擇 AWS 時,下方顯示為 1。

當選擇 AWS 與 Azure 時,下方顯示為 2。

當選擇 AWS、Azure 與 GCP 時,下方顯示為 3。
Acceptance Test (紅燈)
測試案例 :
- 應該有
3個<label>- 應該有
3個<input type="checkbox">- 一開始下方應該出現
0- 當選擇
AWS,下方應該出現1- 當選擇
AWS與Azure,下方應該出現2- 當選擇
AWS、Azure與GCP,下方應該出現3
e2e/app.e2e-spec.ts
1 | import { AppPage } from './app.po'; |
11 行
1 | it(`should have '3' labels`, () => { |
測試案例 : 應該有
3個<label>
page.getLabelCount() 將由 page object 傳回 <label> 的個數。
15 行
1 | it(`should have '3' checkboxes`, () => { |
測試案例 : 應該有
3個<input type="checkbox">
page.getCheckboxCount() 將由 page object 傳回 checkbox 的個數。
19 行
1 | it(`should have '0' checkbox selected by default`, () => { |
測試案例 : 一開始下方應該出現
0
page.getSelectedCloudCount() 將由 page object 傳回下方所顯示的選擇個數。
23 行
1 | it(`should show '1' when 'AWS' selected`, () => { |
測試案例 : 當選擇
AWS,下方應該出現1
要模擬 user 選擇 checkbox,有兩種方式,一種是使用 index 選擇,一種是使用文字選擇。
page.selectCloudByIndex() 將由 index 方式選擇 checkbox。
28 行
1 | it(`should have '2' when 'AWS' and 'Azure' selected`, () => { |
測試案例 : 當選擇
AWS與Azure,下方應該出現2
page.selectCloudByText() 將使用文字方式選擇 checkbox。
e2e/app.po.ts
1 | import { browser, by, element } from 'protractor'; |
*.e2e-spec.ts 負責描述測試案例,不包含 HTML 與 CSS 部分。
*.po.ts 則負責描述 HTML 與 CSS 部分。
Page object 主要目的在於讓測試與 HTML/CSS 解耦合,不要 designer 若變動了 HTML 或 CSS,則所有驗收測試都要修改,只要修改 page object 即可。
驗收測試應該只根據需求變動而修改,不應該因為 HTML/CSS 變動而修改。
第 8 行
1 | getLabelCount(): any { |
回傳所有 <label> 的個數。
count()的型別不是number,而是wdpromise.Promise<number>,因為型別比較複雜,所以迴船型別使用any代替。
12 行
1 | getCheckboxCount(): any { |
使用 CSS selector 方式找到所有 checkbox。all() 回傳為陣列,加上 count() 可獲得陣列的筆數。
16 行
1 | selectCloudByIndex(index: number): AppPage { |
使用 index 選擇 checkbox。
因為 checkbox 已經被包在 <label> 內,所以 click <label>,就相當於 click checkbox。
實務上 <label> 會使用 name,表示同一組 checkbox ,因此可用 by.css('label[name="cloud"]') 找到所有 <label> 的陣列,再透過 get(index) 選擇 <label> ,最後 click()。
24 行
1 | selectCloudByText(text: string): AppPage { |
使用文字選擇 checkbox。
因為 checkbox 已經被包在 <label> 內,所以 click <label>,就相當於 click checkbox。
因為文字是屬於 <label>,而不是屬於 checkbox,所以使用 by.cssContainingText('label', cloud) 直接找到符合條件的 <label>,然後 click()。
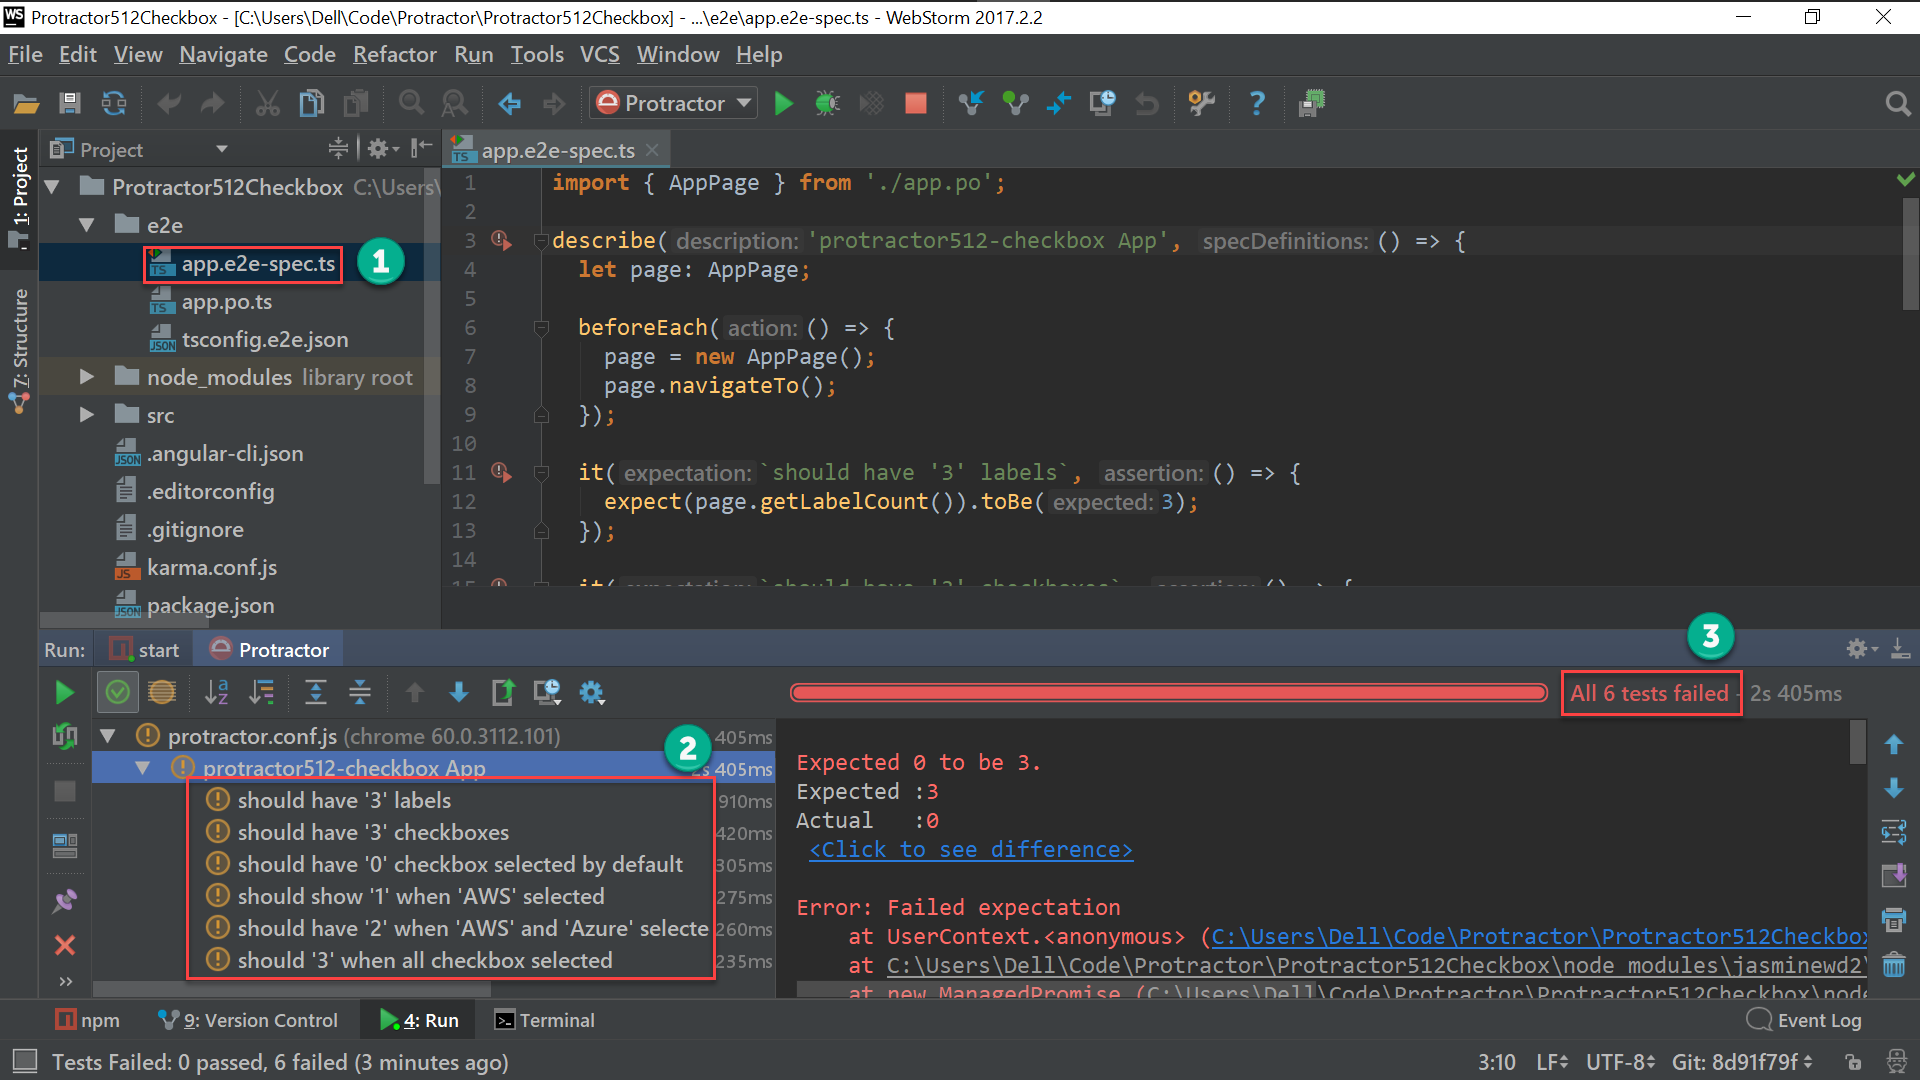
因為我們還沒實作任何功能,得到預期的驗收測試 紅燈。
Acceptance Test (綠燈)
測試案例 :
- 應該有
3個<label>- 應該有
3個<input type="checkbox">- 一開始下方應該出現
0- 當選擇
AWS,下方應該出現1- 當選擇
AWS與Azure,下方應該出現2- 當選擇
AWS、Azure與GCP,下方應該出現3
src/app/app.component.html
1 | <label *ngFor="let cloud of clouds" name="cloud" [for]="cloud.name|lowercase"> |
1 | <label *ngFor="let cloud of clouds" name="cloud" [for]="cloud.name|lowercase">{{ cloud.name }}</label> |
<label> 與 <input type="checkbox"> 會依賴後端的資料顯示,故適合使用 *ngFor 產生。
for 會與 checkbox 的 id 先對應,使用 lowercase pipe 將 cloud.name 轉成小寫。
<label> 所顯示的值則使用 cloud.name 直接 interpolation binding。
1 | <input type="checkbox" [id]="cloud.name|lowercase" [name]="cloud" [checked]="cloud.checked" (change)="onChange(myCheckbox)" #myCheckbox> |
為了讓 checkbox 同一組,故 name 都使用 cloud。
id 使用 lowercase pipe 將 cloud.name 轉成小寫。
checked 根據 cloud.checked 決定 radio 一開始是否選取。
將 change event 綁訂到 onChange(),並將 #myCheckbox 傳入 onChange()。
src/app/app.component.ts
1 | import { Component } from '@angular/core'; |
第 10 行
1 | selectedCount = 0; |
selectedCount field 預設為 0。
11 行
1 | clouds: Cloud[] = [ |
建立 cloud field 與設定初始陣列。
17 行
1 | onChange(element: HTMLInputElement) { |
若 element.checked 為 true,則 selectedCount + 1,否則 selectedCount - 1 。
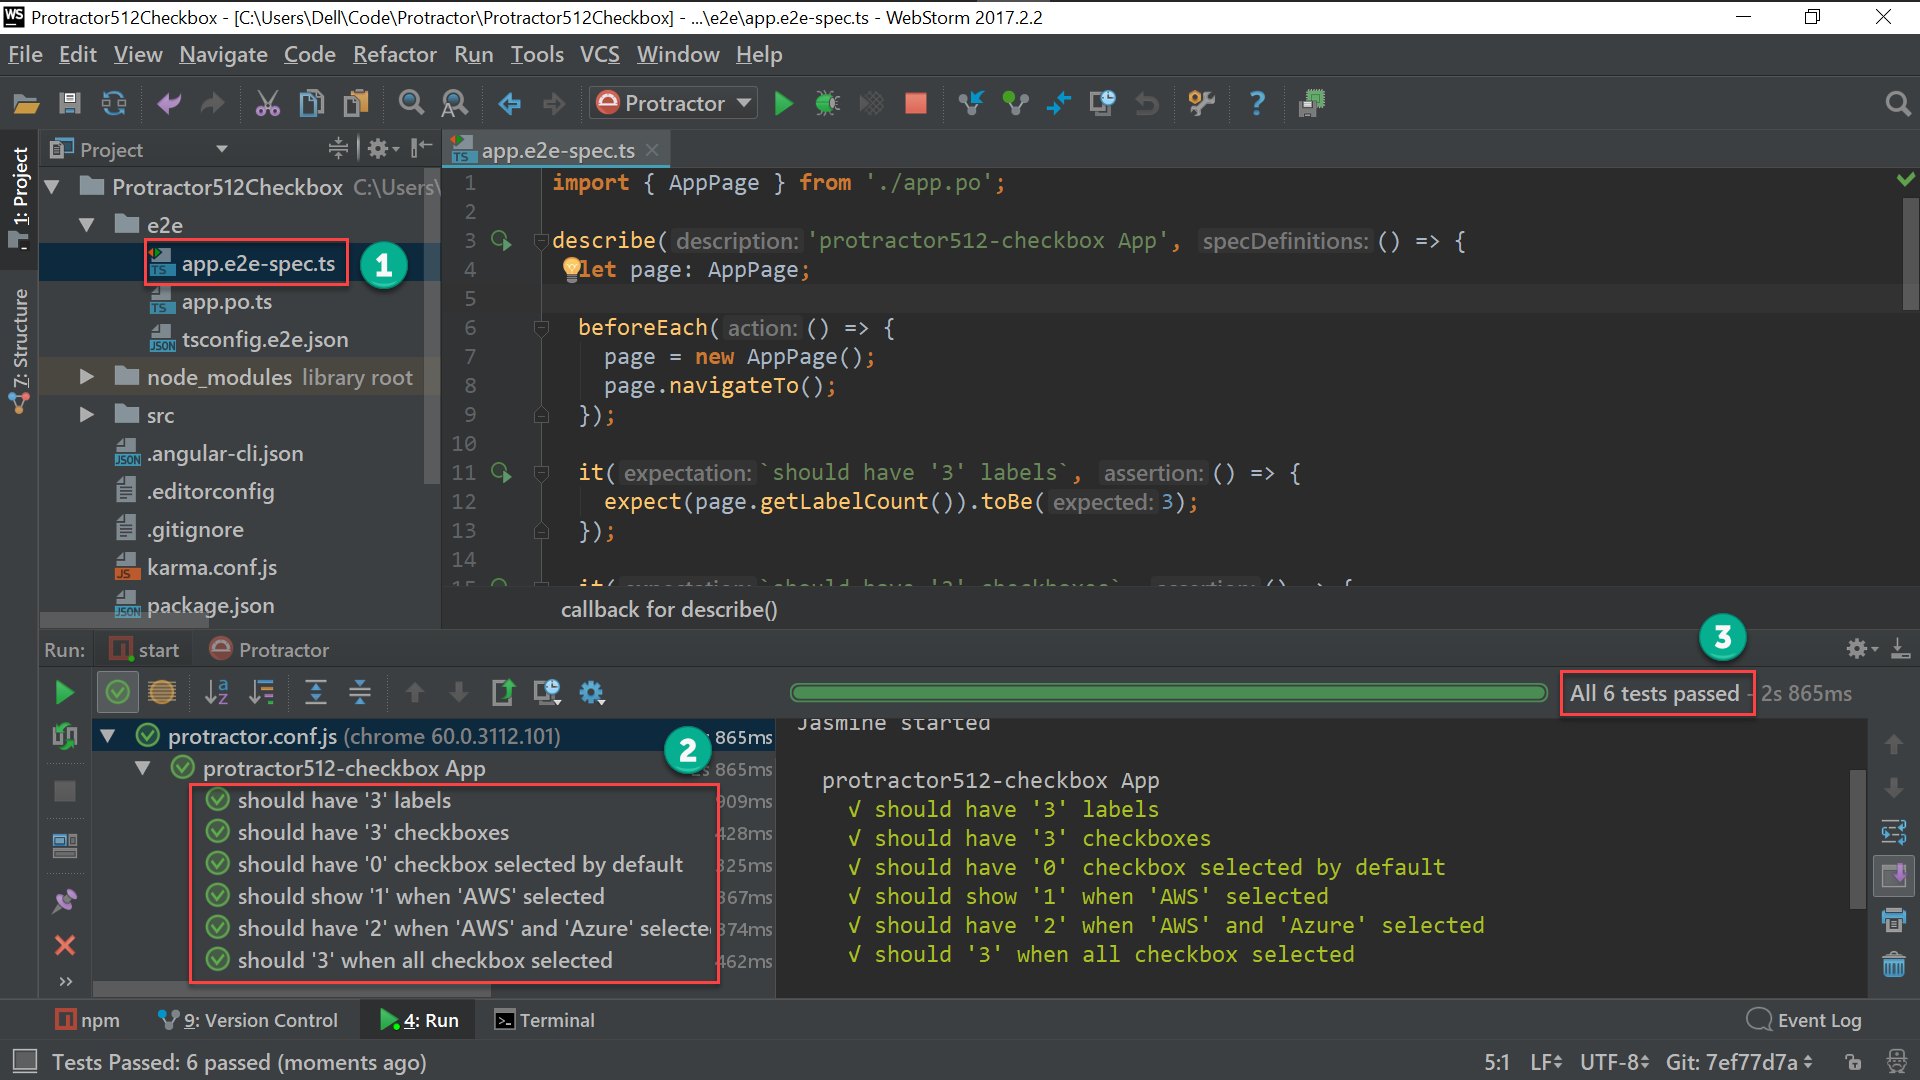
功能都實作出來了,重新跑一次驗收測試確認都為 綠燈。
Conclusion
- 實務上整個 ATDD 循環應該是驗收測試 (紅燈) -> 整合測試 (紅燈) -> 單元測試 (紅燈) -> 單元測試 (綠燈) -> 整合測試 (綠燈) -> 驗收測試 (綠燈),因為本文重點在於 Protract 驗收測試的 radio 寫法,所以省略了整合測試與單元測試部分。
- 本文特別針對 checkbox 展示了
selectCloudByIndex()與selectCloudByText()兩種寫法。
Sample Code
完整的範例可以在我的 GitHub 找到。