如何為 Slack 設定 Bitbucket 通知 ?
讓 Slack 成為 CI 的訊息中心
Contents
當對 Bitbucket 有任何動作時,我們希望在 Slack 的 channel 能收到通知,如此可避免所有訊息都透過 Email,只有真正與人相關的訊息才使用 Email,讓 Slack 成為持續整合的訊息中心。
Version
macOS High Sierra 10.13.3
Slack 3.0.5
設定 Slack
新增 Channel
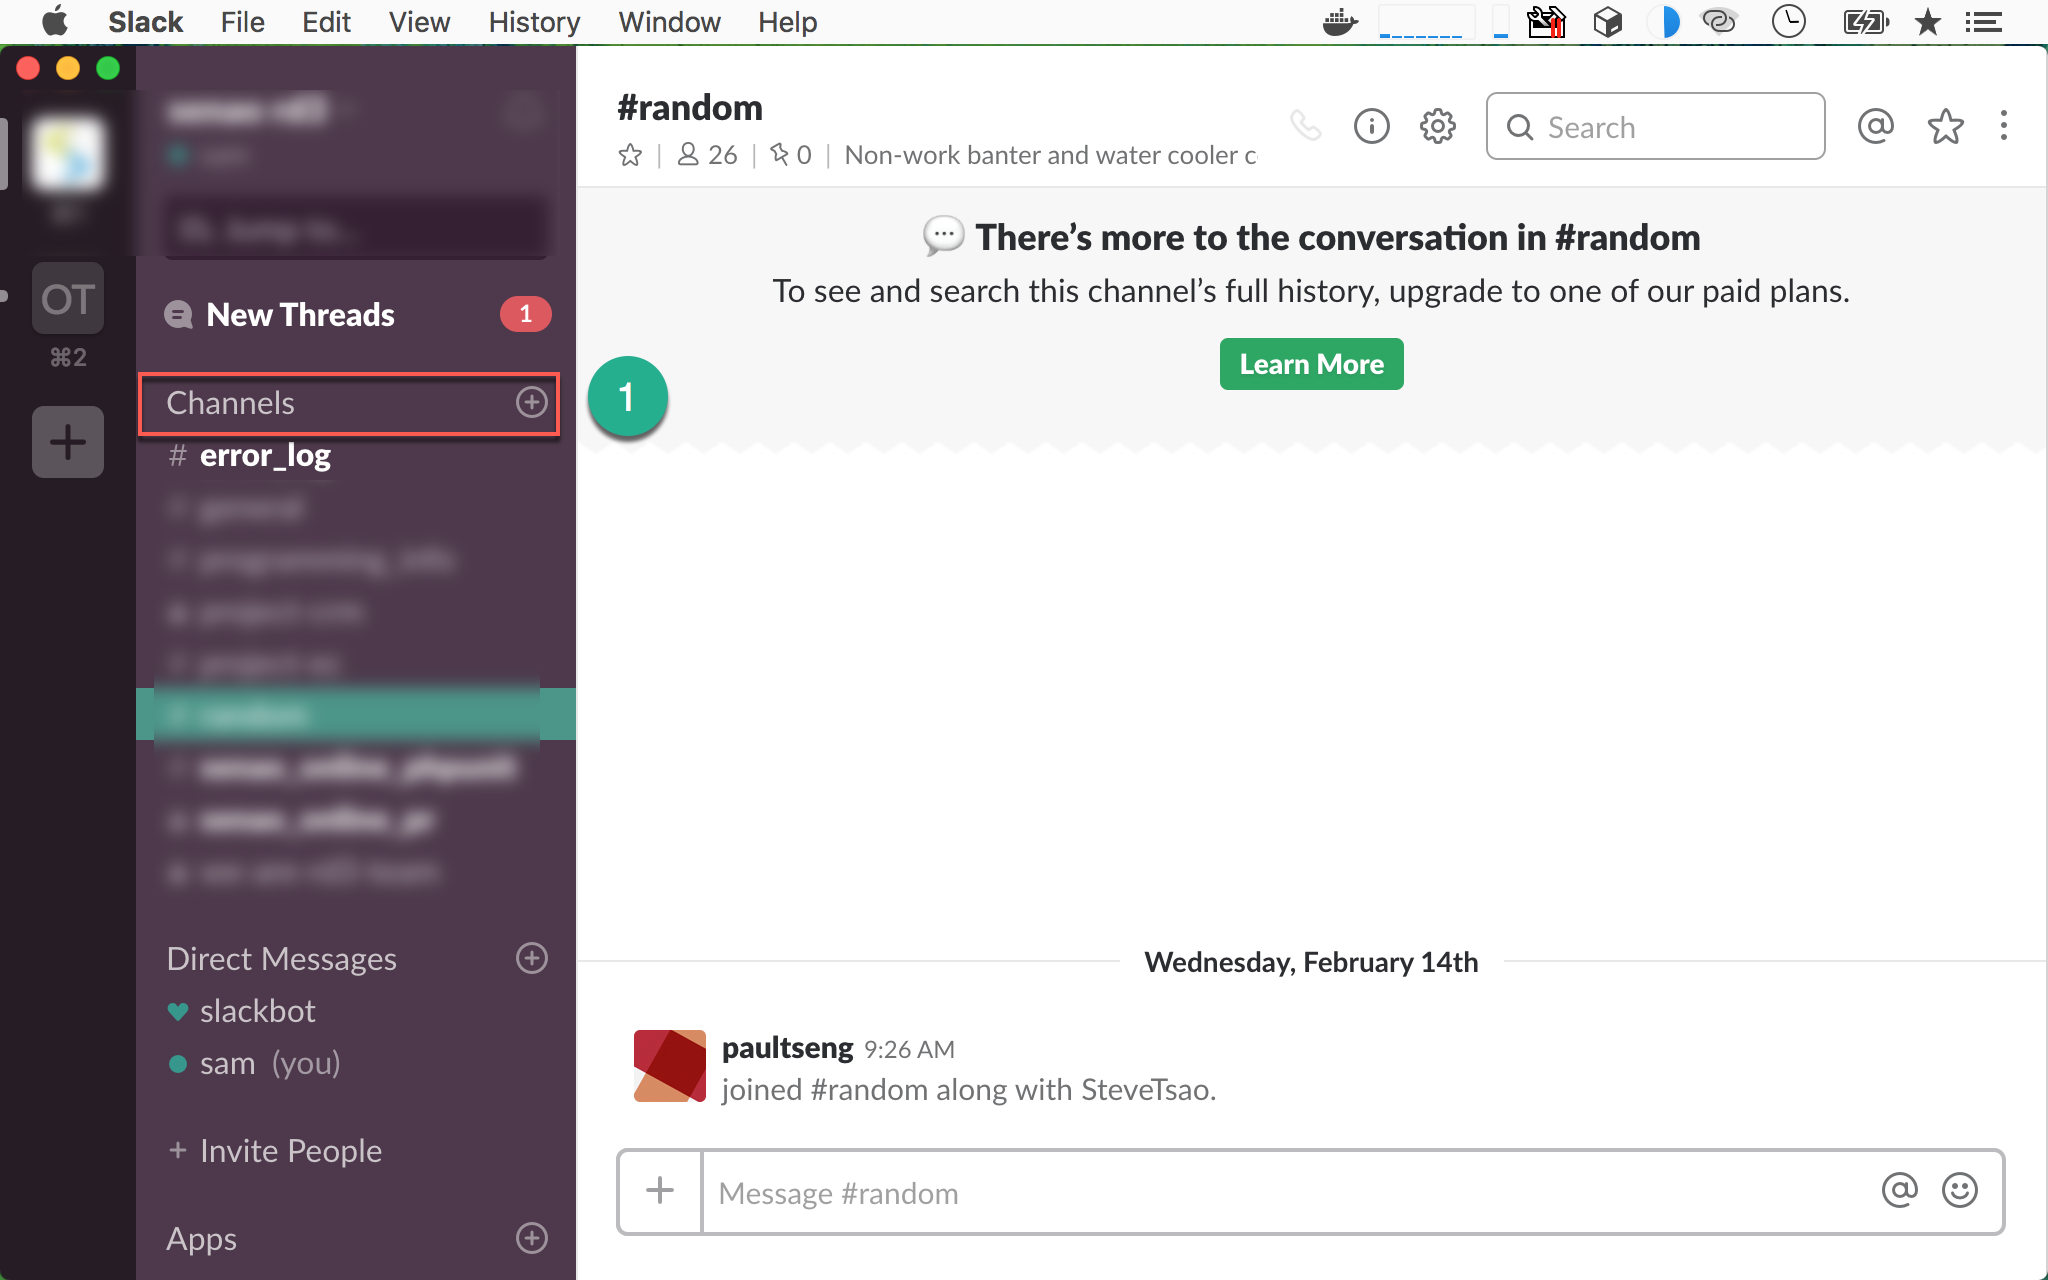
- 按下
Channels右側的+新增 channel
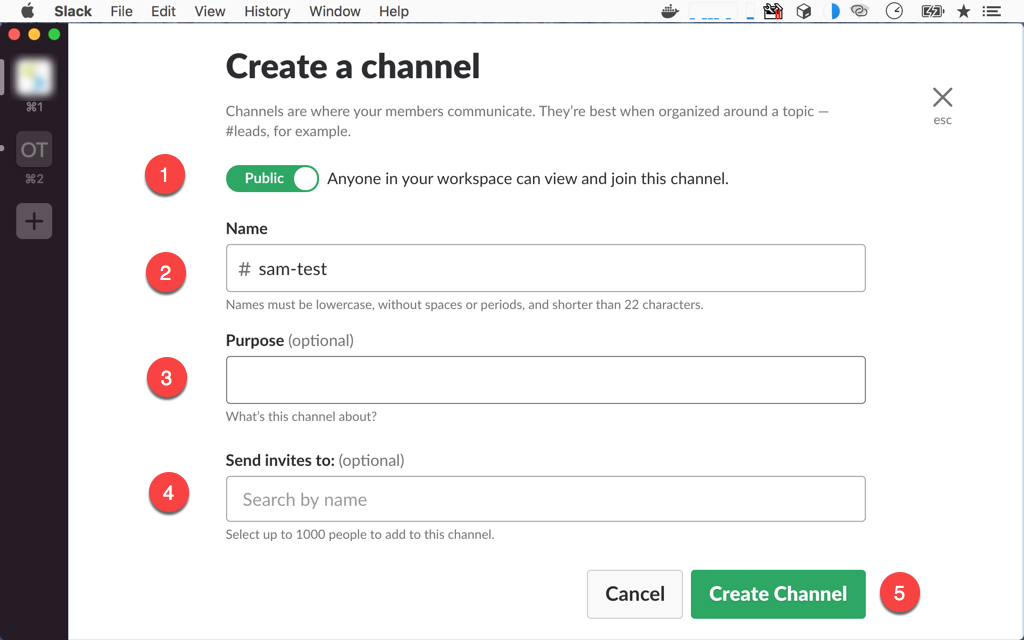
- Privacy : 設定為
Public或Privatechannel - Name : 設定 channel 名稱
- Purpose : channel 的功能描述,可以不輸入
- Send invites to : 設定 channel 成員,可以稍後再設定
- 按
Create Channel開始建立 channel
設定 Notification
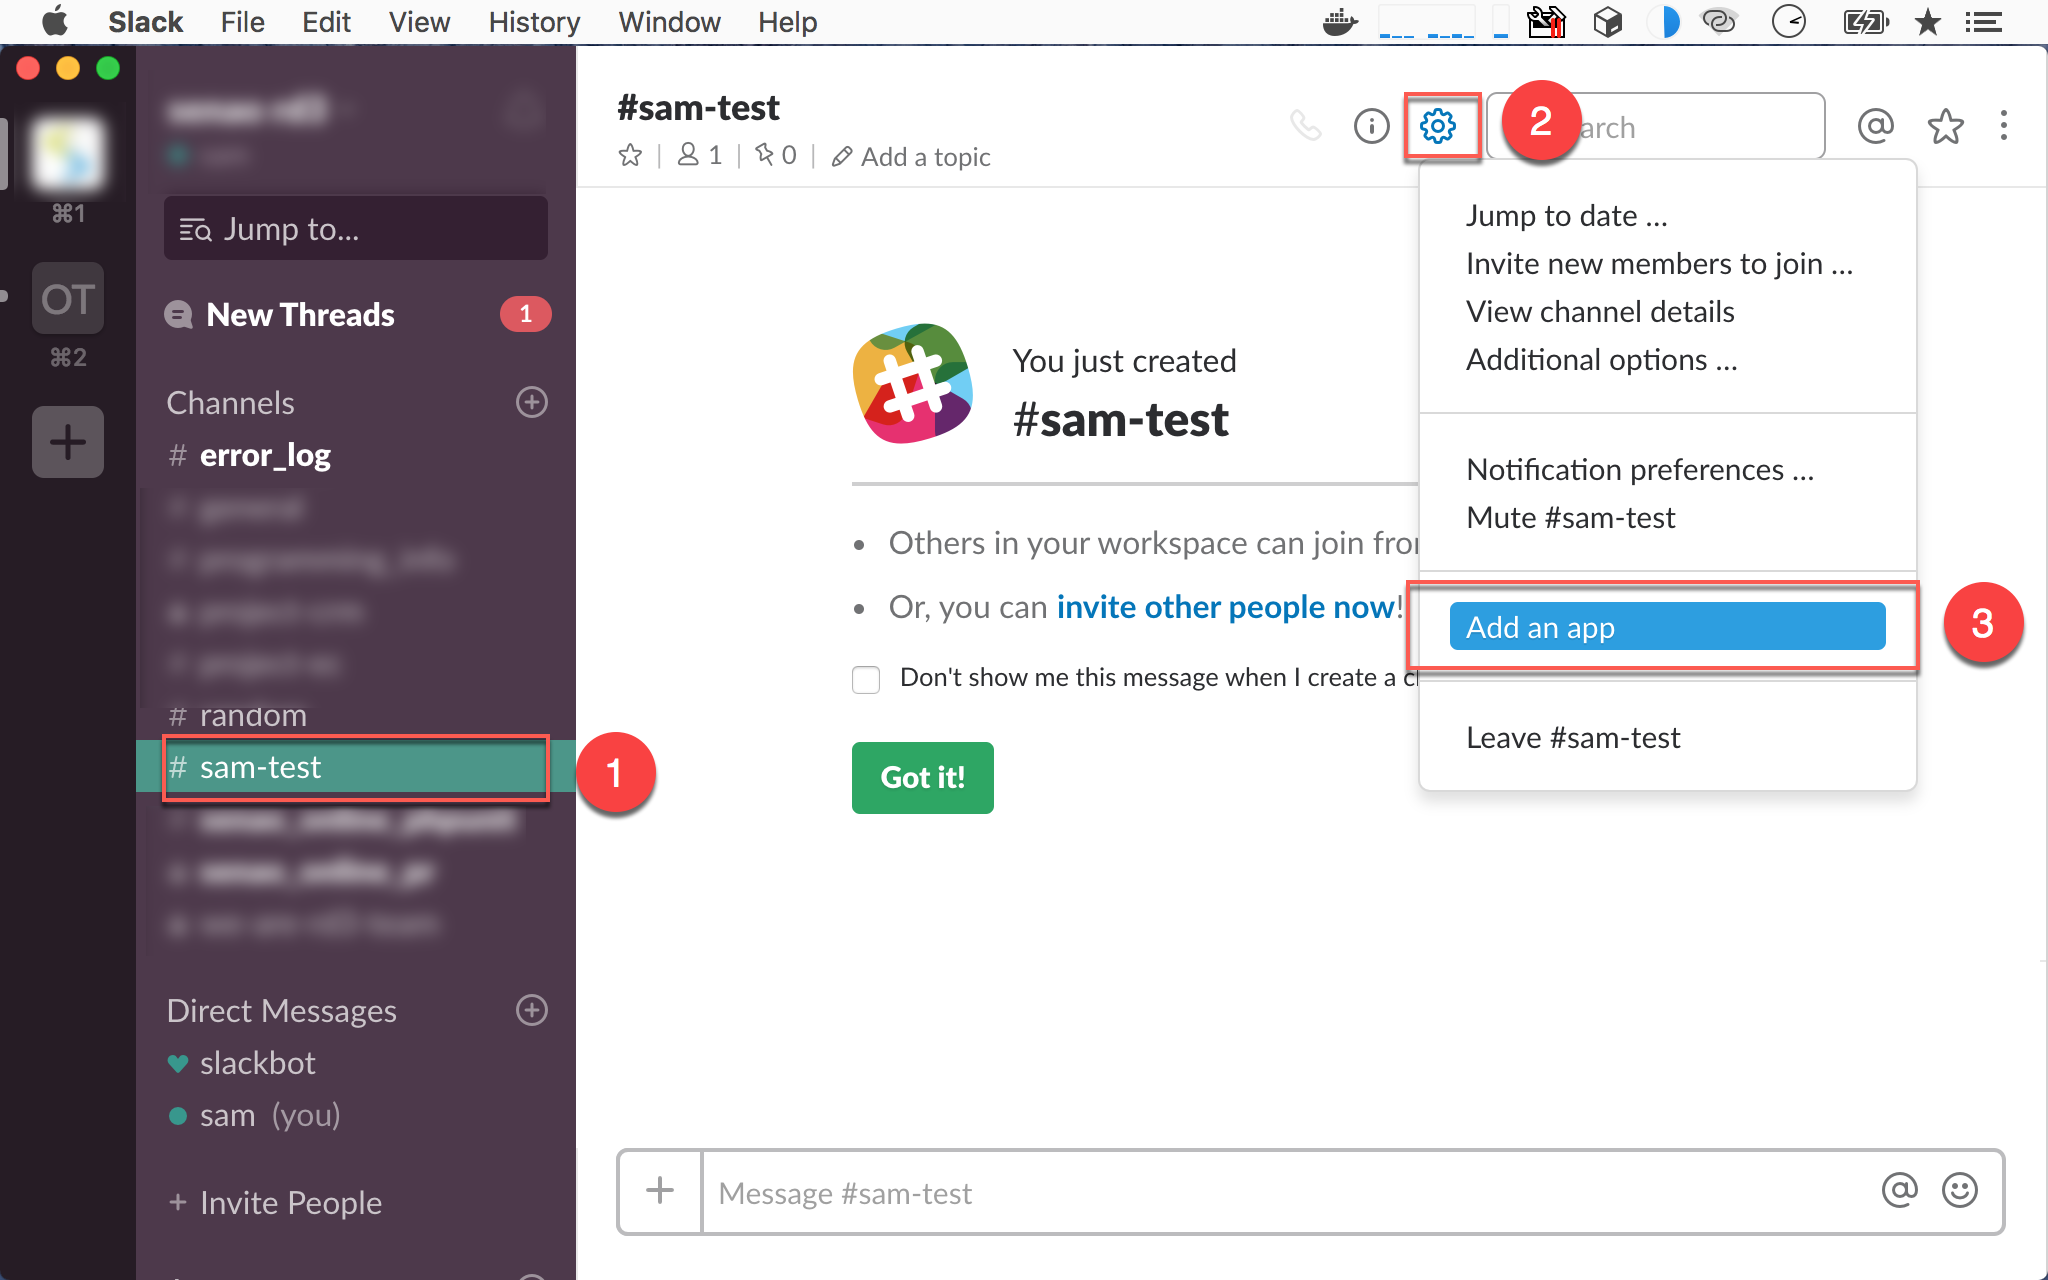
- 選擇欲設定的 channel
- 選擇右上方的
option - 選擇
Add an app
加入 Bitbucket App
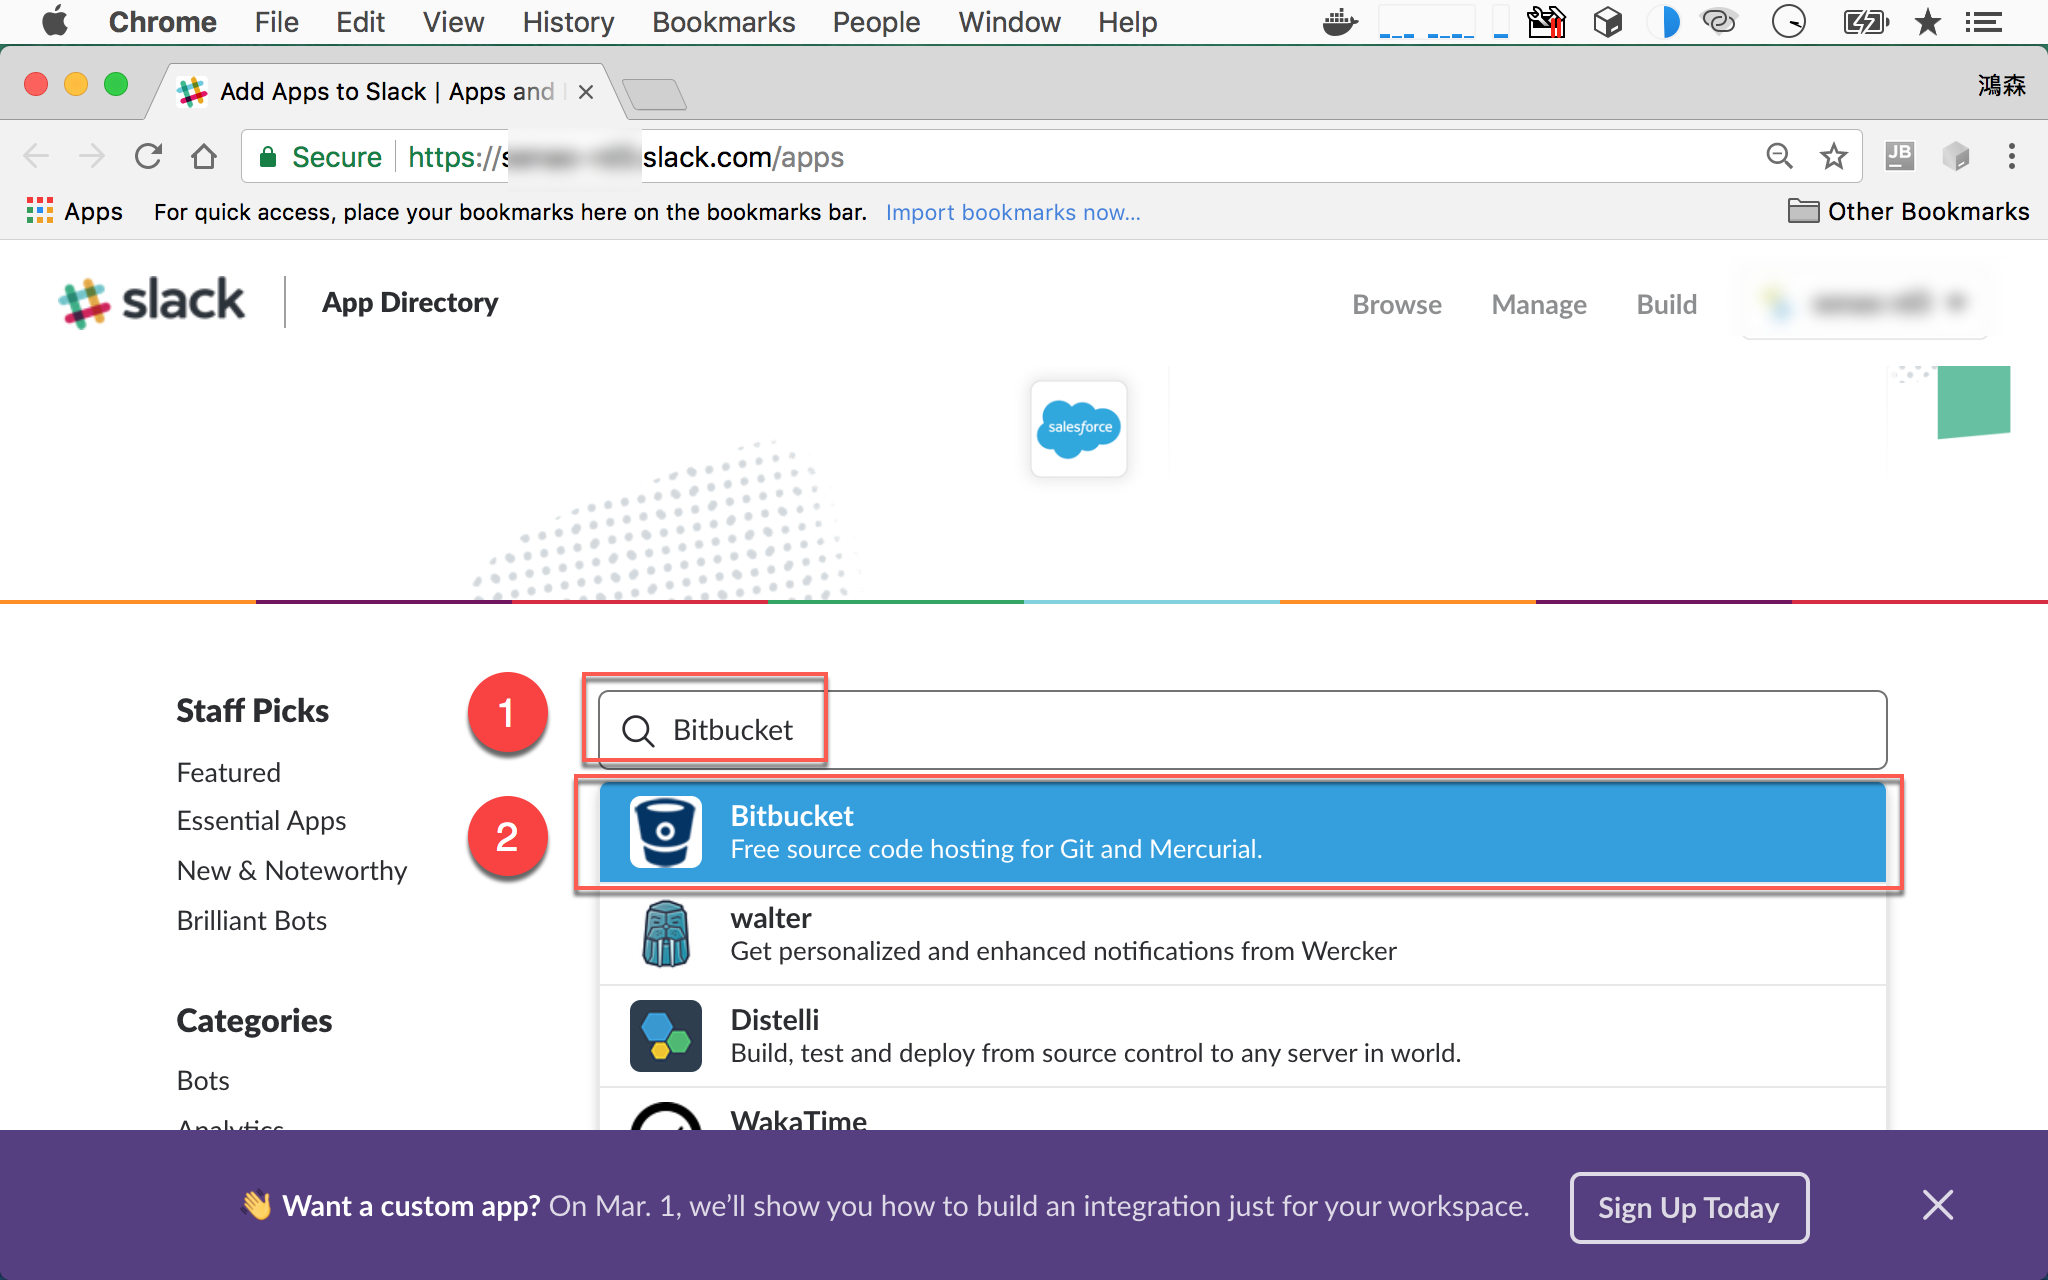
Slack 將開啟瀏覽器
- 稍微往下捲輸入
Bitbucket - 選擇
Bitbucket
新增 Configuration
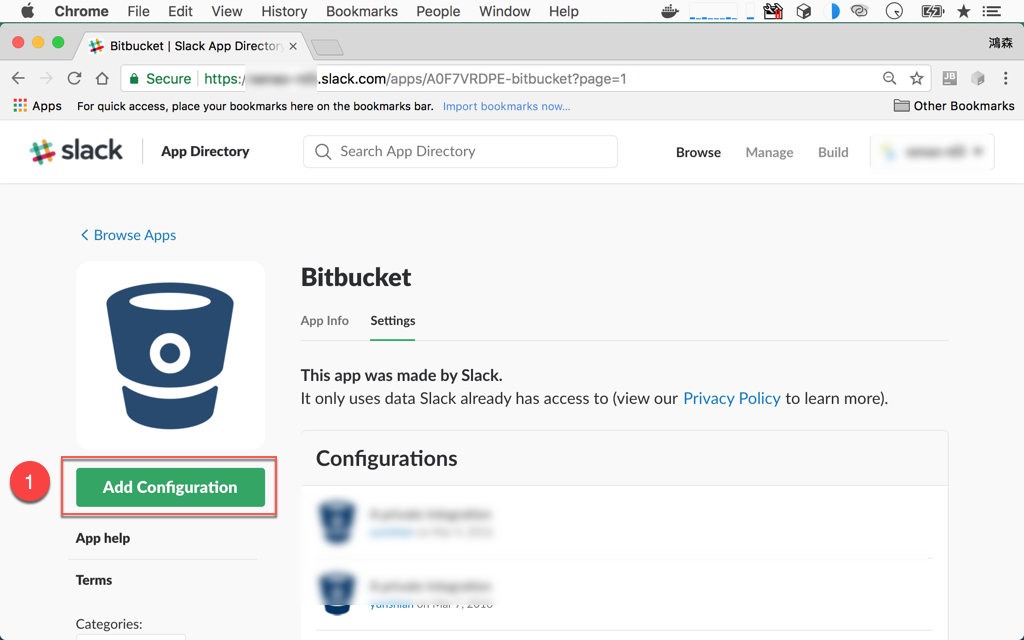
- 按
Add Configuration加入 Bitbucket
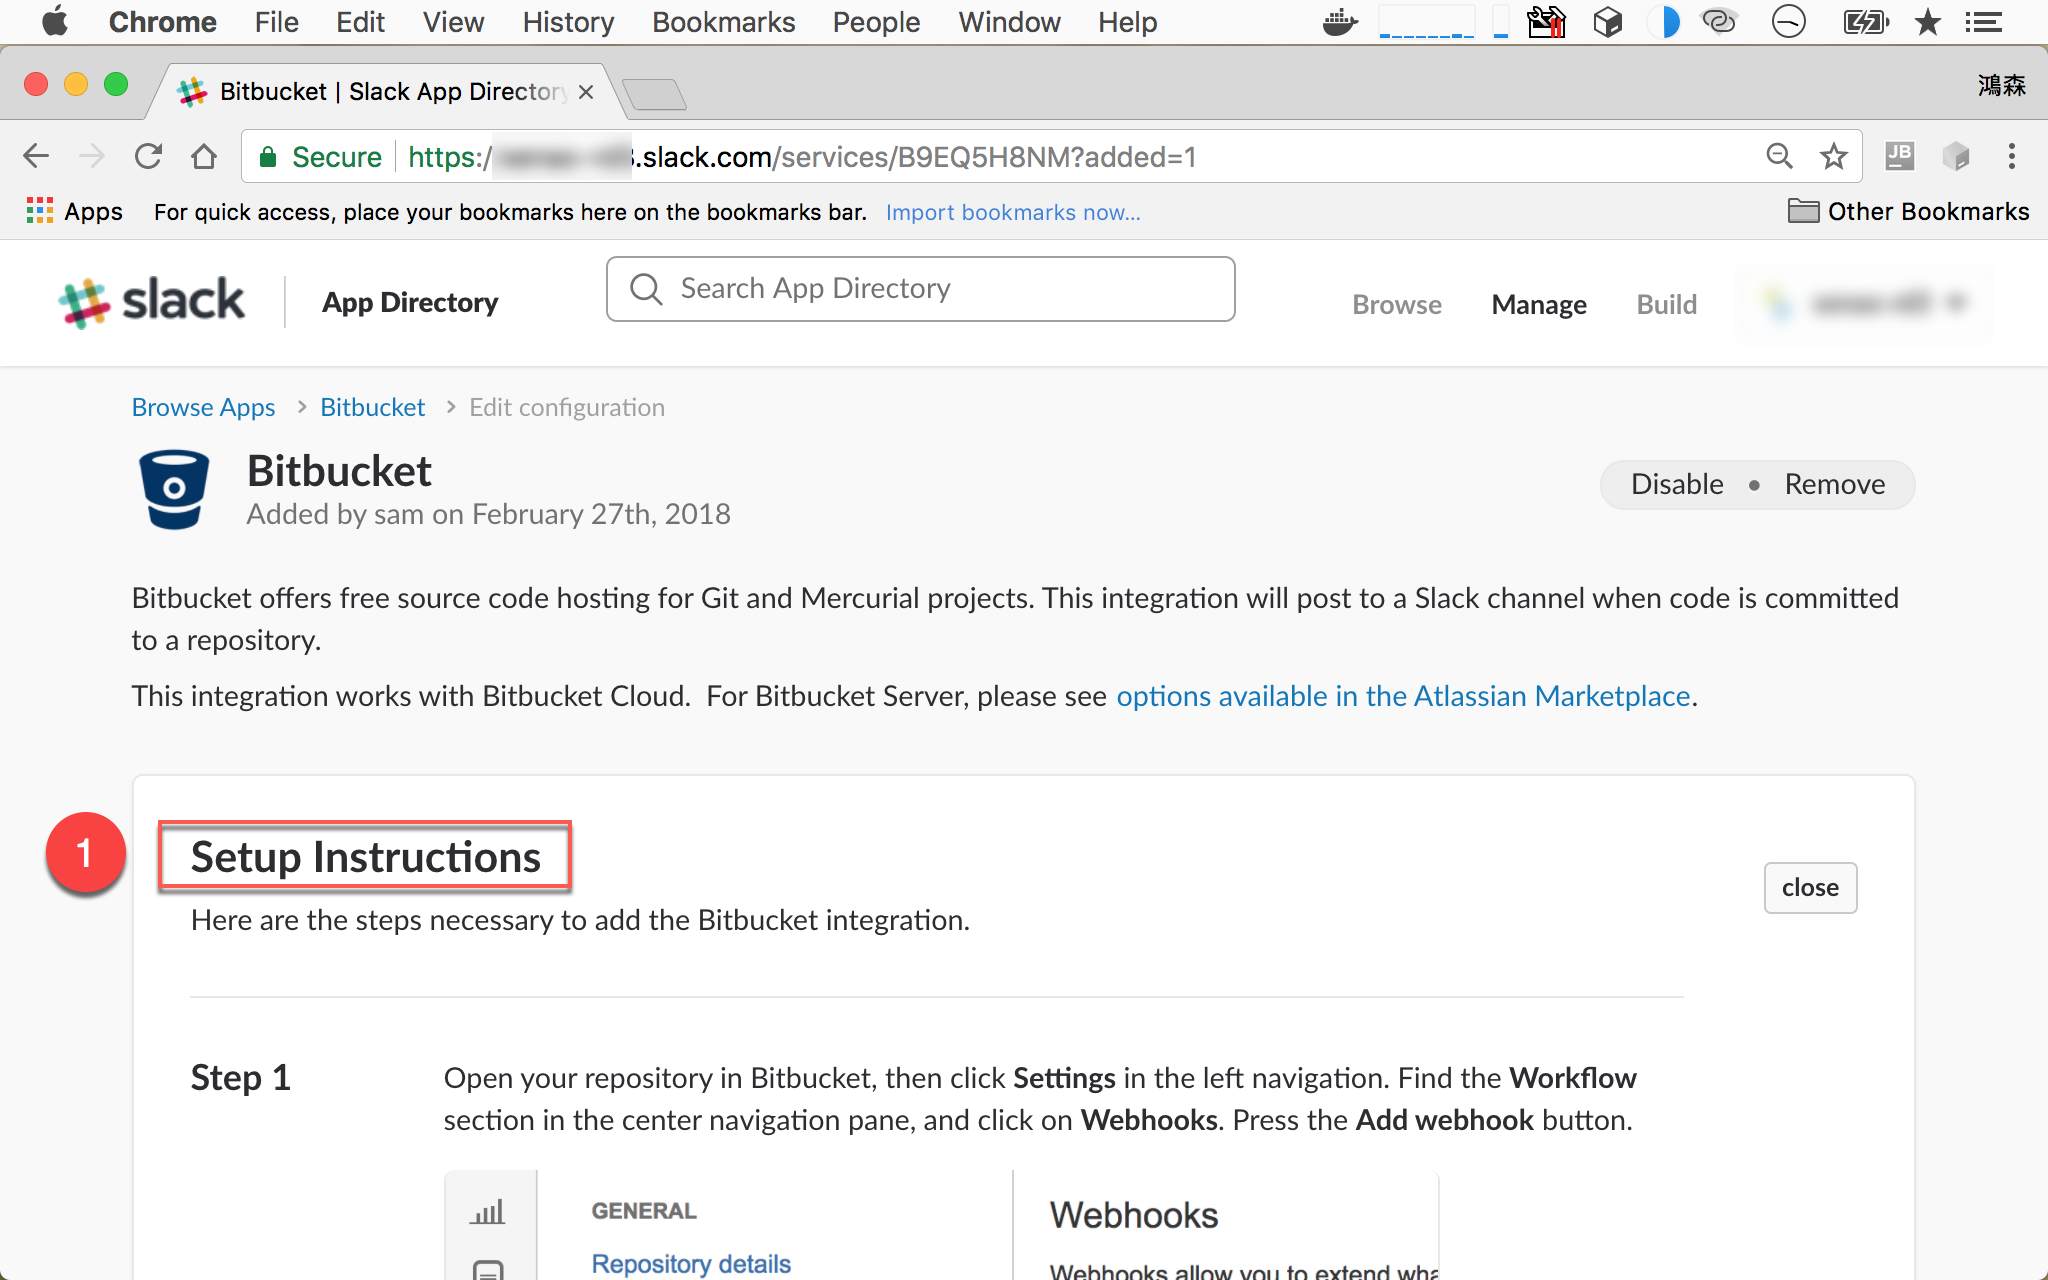
新增 Integration

- 按
Add Bitbucket Integration正式加入整合 Bitbucket
Slack 設定完成
- 介紹 Bitbucket 設定流程
Slack 部分已經設定完成,接下來是 Bitbucket 的設定
Slack 網頁先不要關閉,稍後會用到
設定 Bitbucket
新增 Webhooks
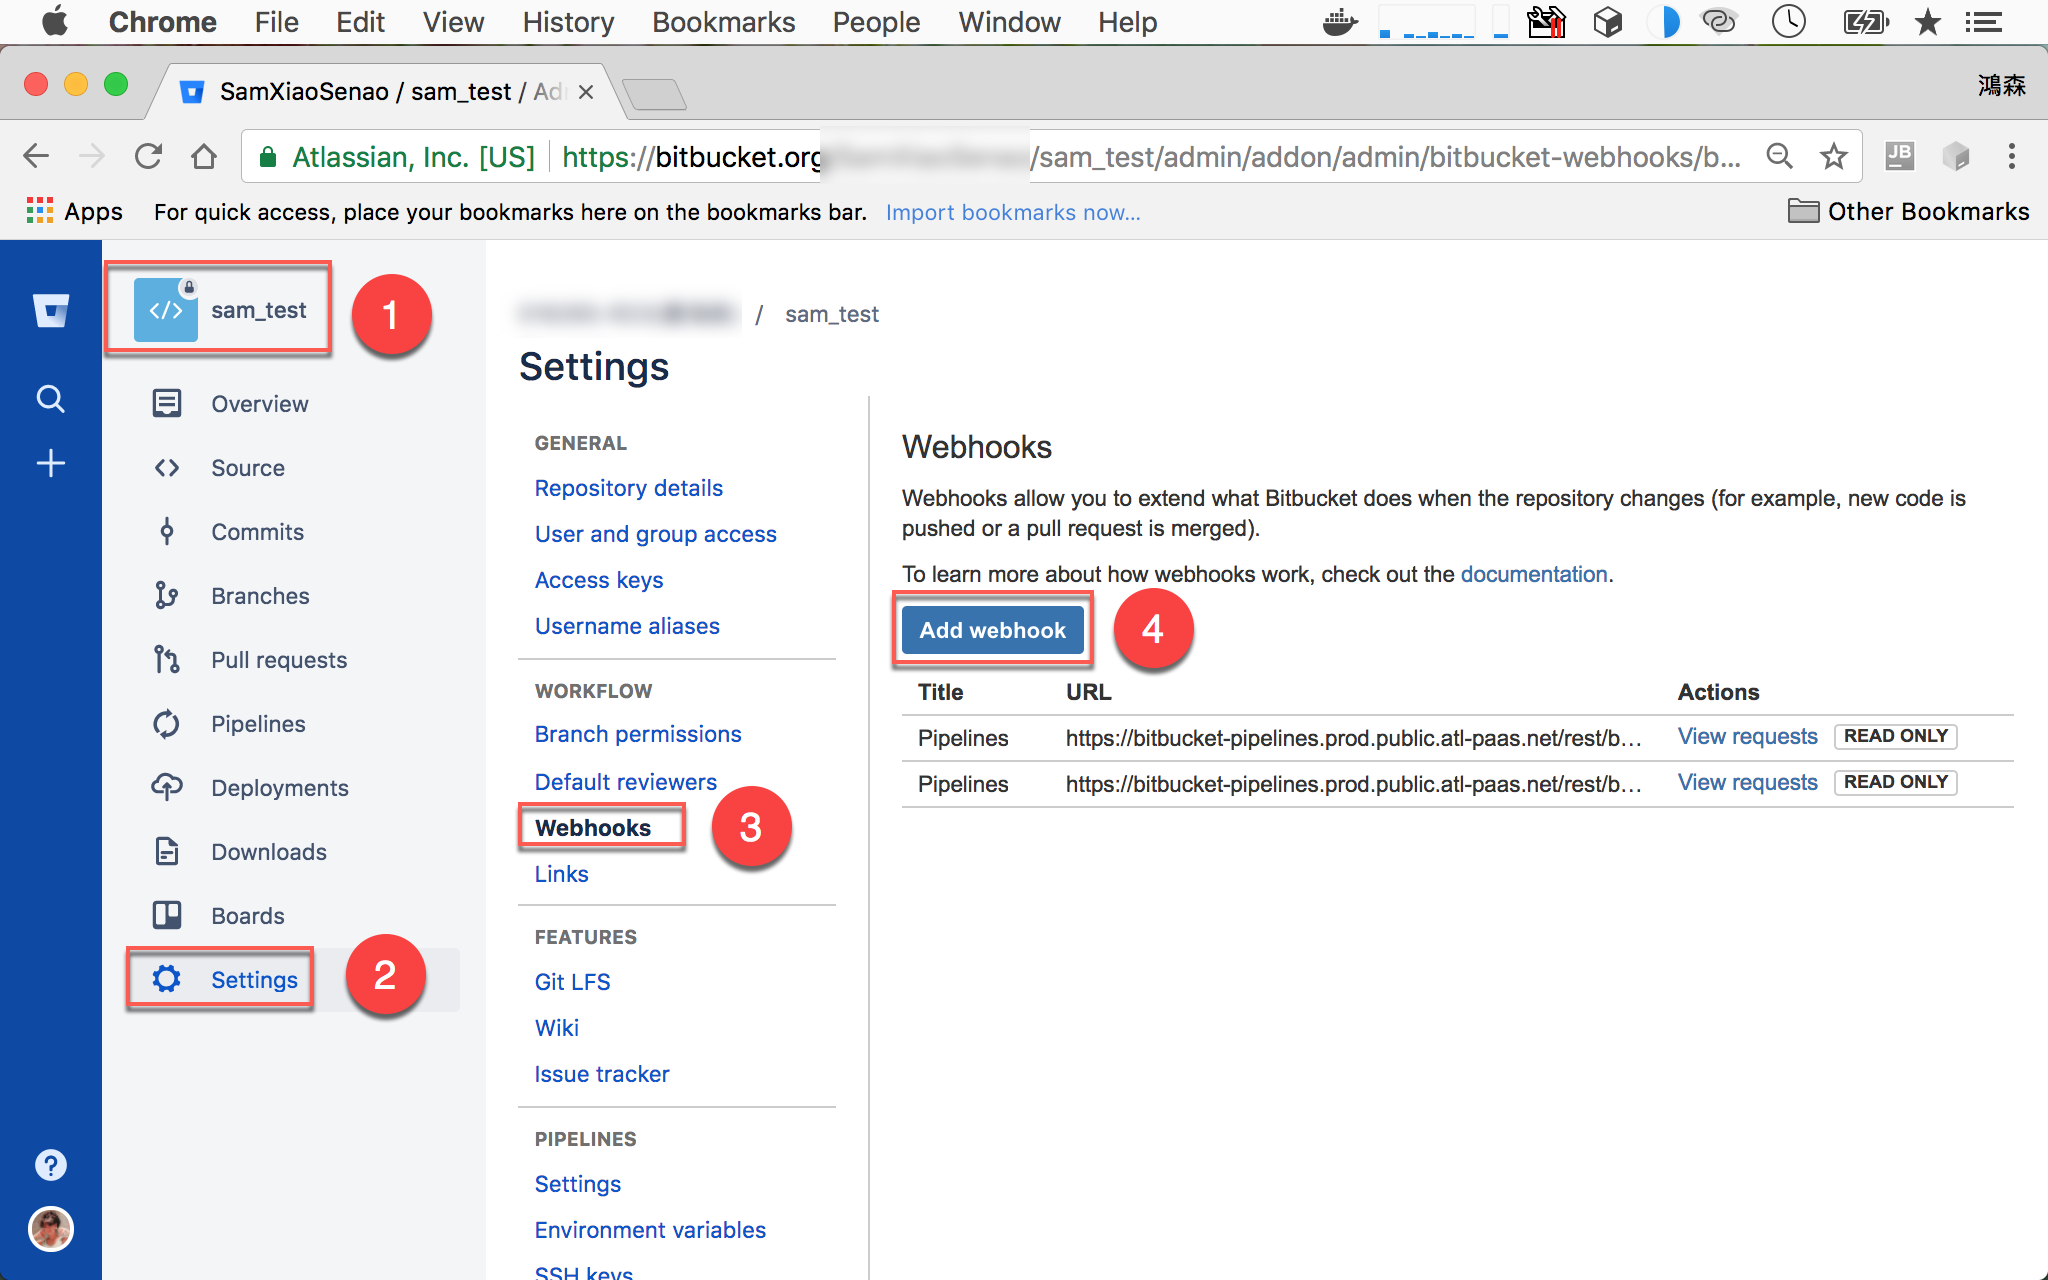
- 到 Bitbucket 選擇你要設定的 repository
- 選擇
Settings - 選擇
Webhooks - 按下
Add webhook

- Title : 依需求設定
- URL : 貼一段 Slack 所提供的 URL,至於要貼什麼呢 ? 稍後會介紹
- Triggers : 設定什麼 Bitbucket 動作要通知 Slack,預設是
Push,但也可以設定的更細 - 按
Save儲存設定
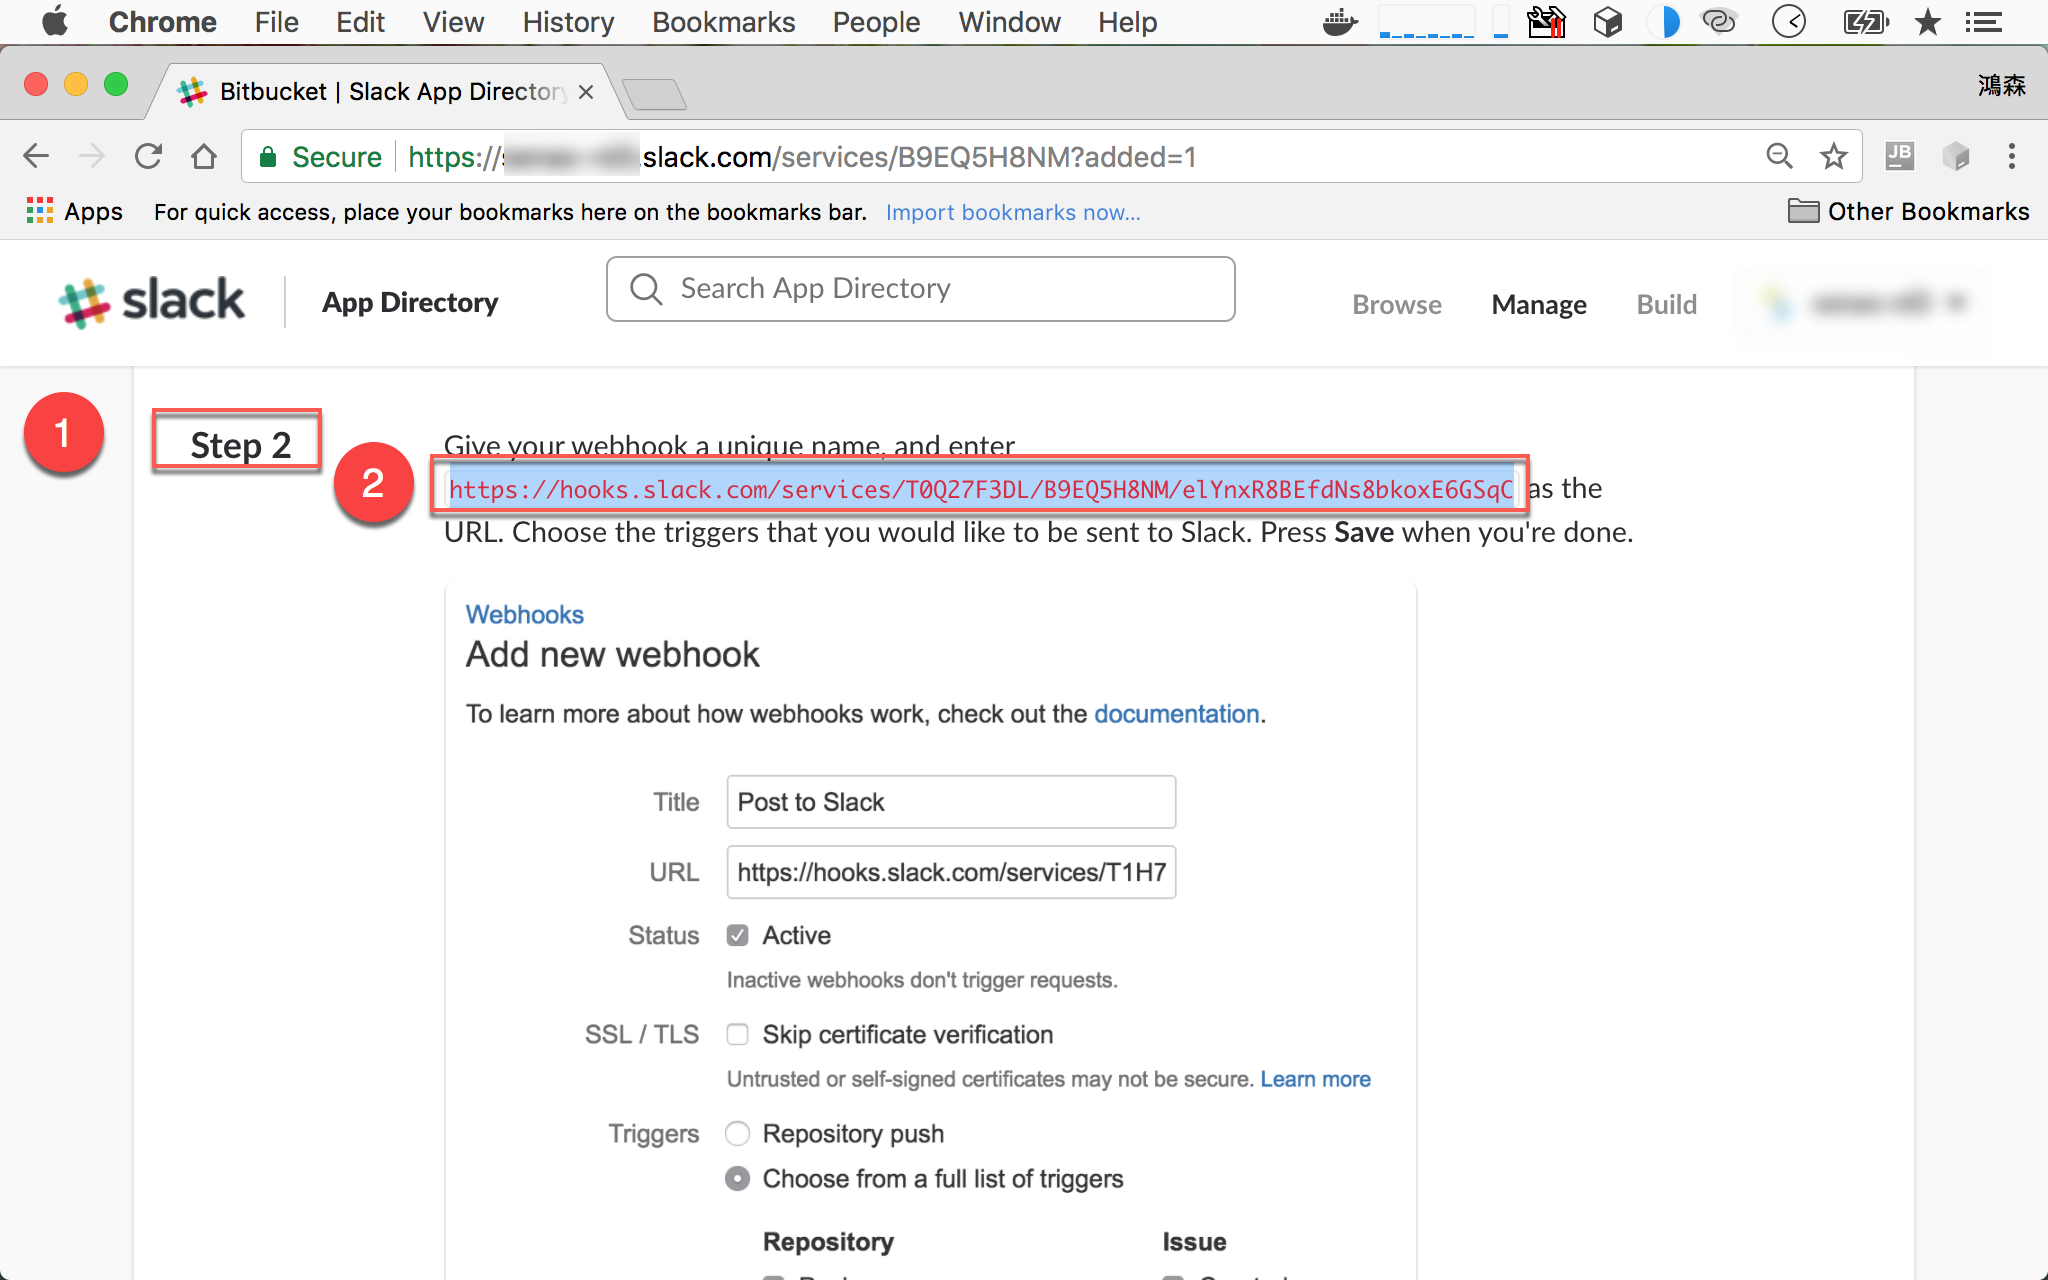
Q : URL 要設定什麼呢 ?
- 回到 Slack 最後的網頁往下捲到
Step 2 - 將
http:/hooks.slack.com……的 URL 複製下來,貼到 Bitbucket 的URL欄位

- 儲存後會看到剛剛新增的 webhook 已經出現
Slack
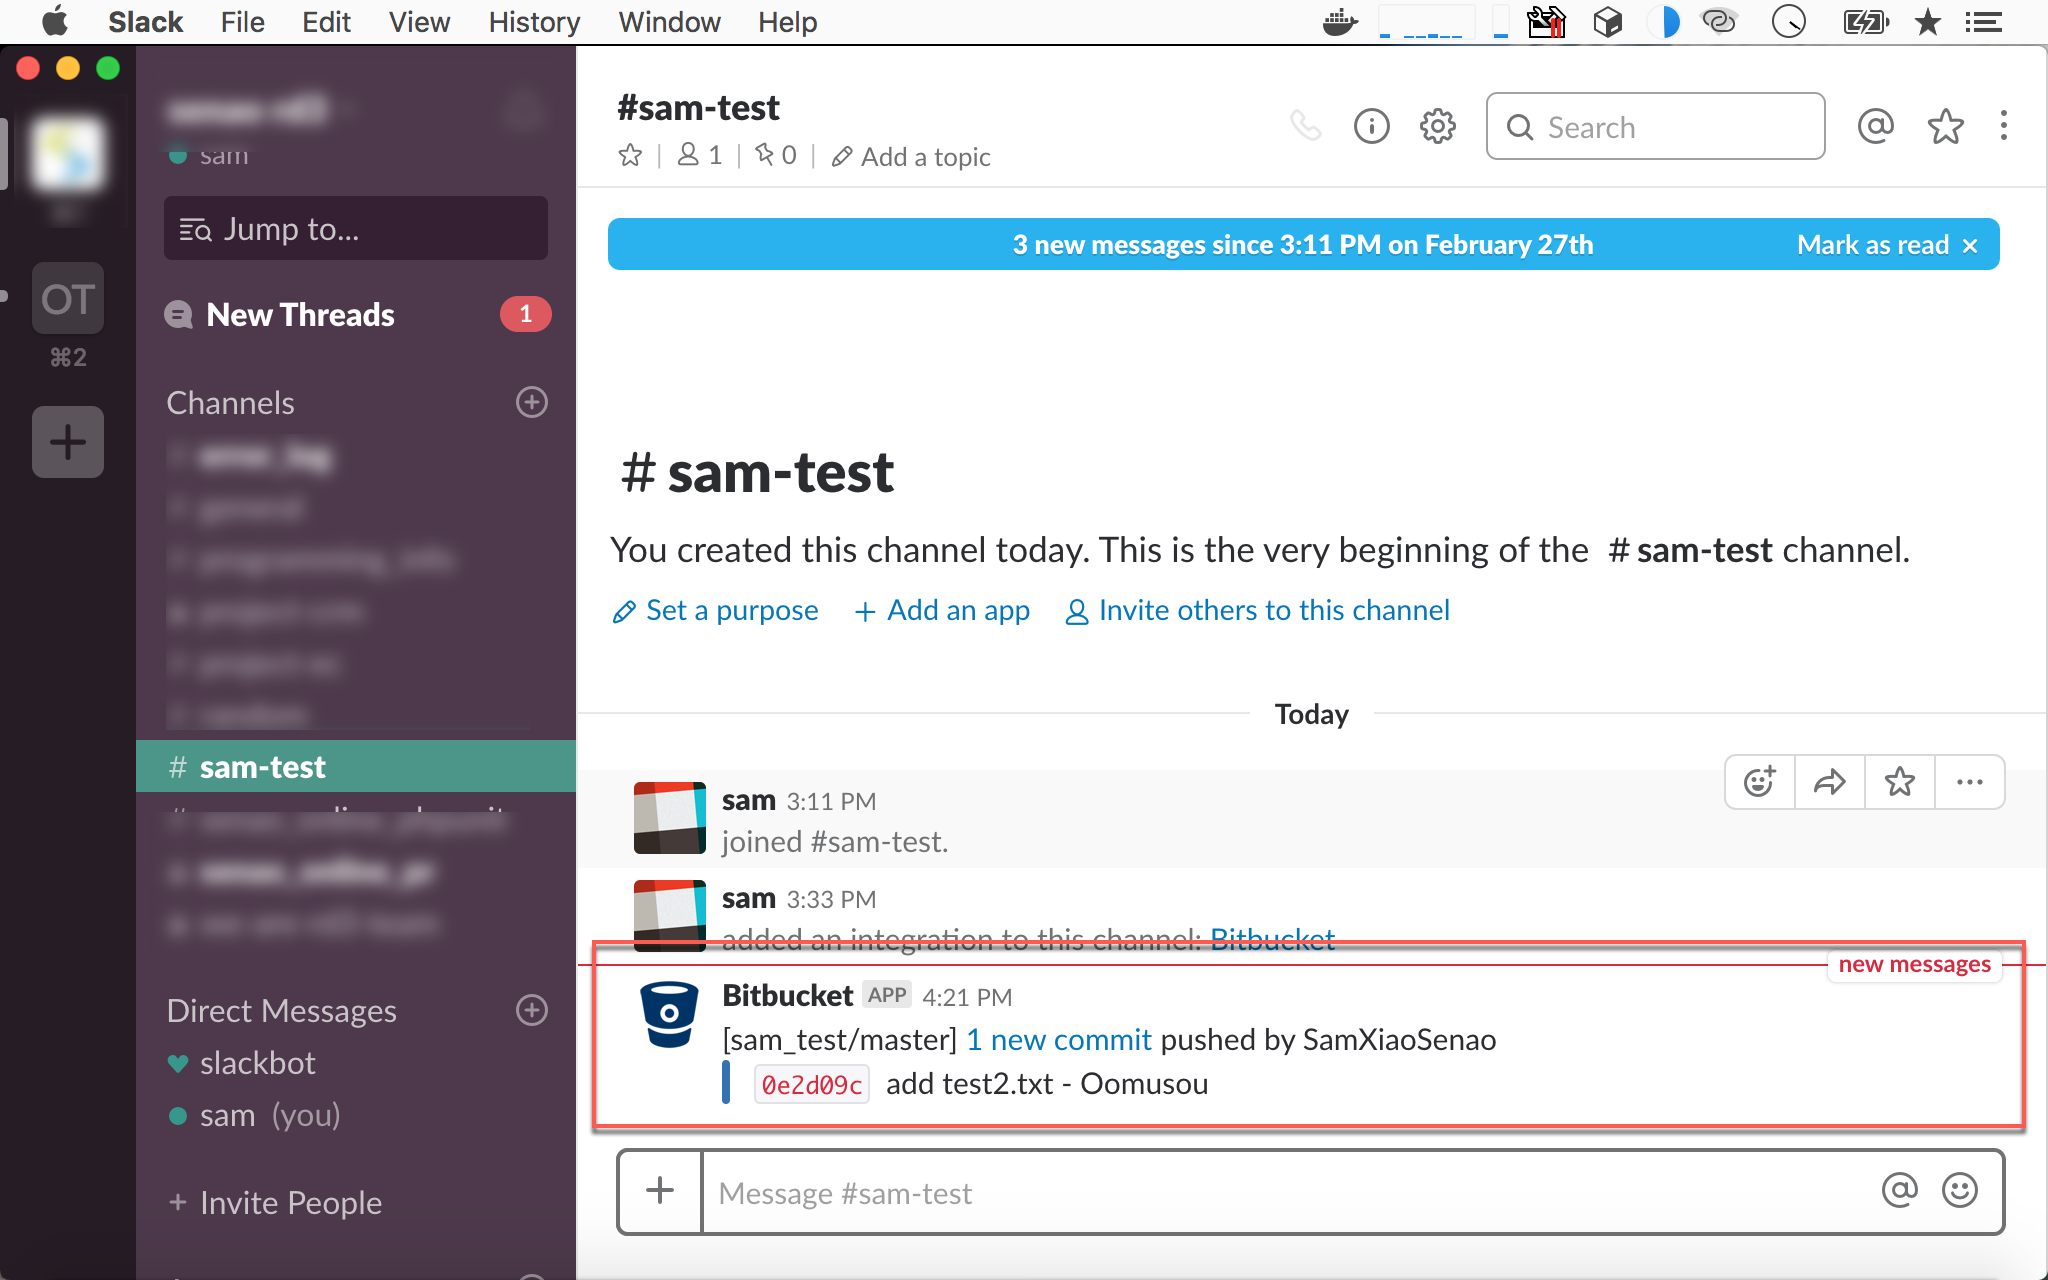
回到 Slack,當任何 push 到 GitBucket 時,channel 都會收到通知。
Conclusion
- Slack 提供了一個不錯的 CI 訊息平台,讓訊息從 Email 解放