如何使用 SonarQube 檢查 Angular 專案?
SonarQube 是一套 程式碼品質檢查工具,可以幫我們檢查 code 的 bugs、 vulenrability、code smell 與 duplication,也屬於 持續整合 重要的一環。
SonarQube 已經內建 SonarTS,可以直接對 TypeScript 進行檢查,本文將以 Angular 為例,並搭配 Jenkins 自動執行 SonarQube,將結果通知 Slack。
Version
macOS High Sierra 10.13.4
SonarQube 6.7.2 LTS
Jenkins 2.107.1
Slack 3.0.5
Angular 5.2.9
GitHub
將 Angular 專案放到 GitHub。
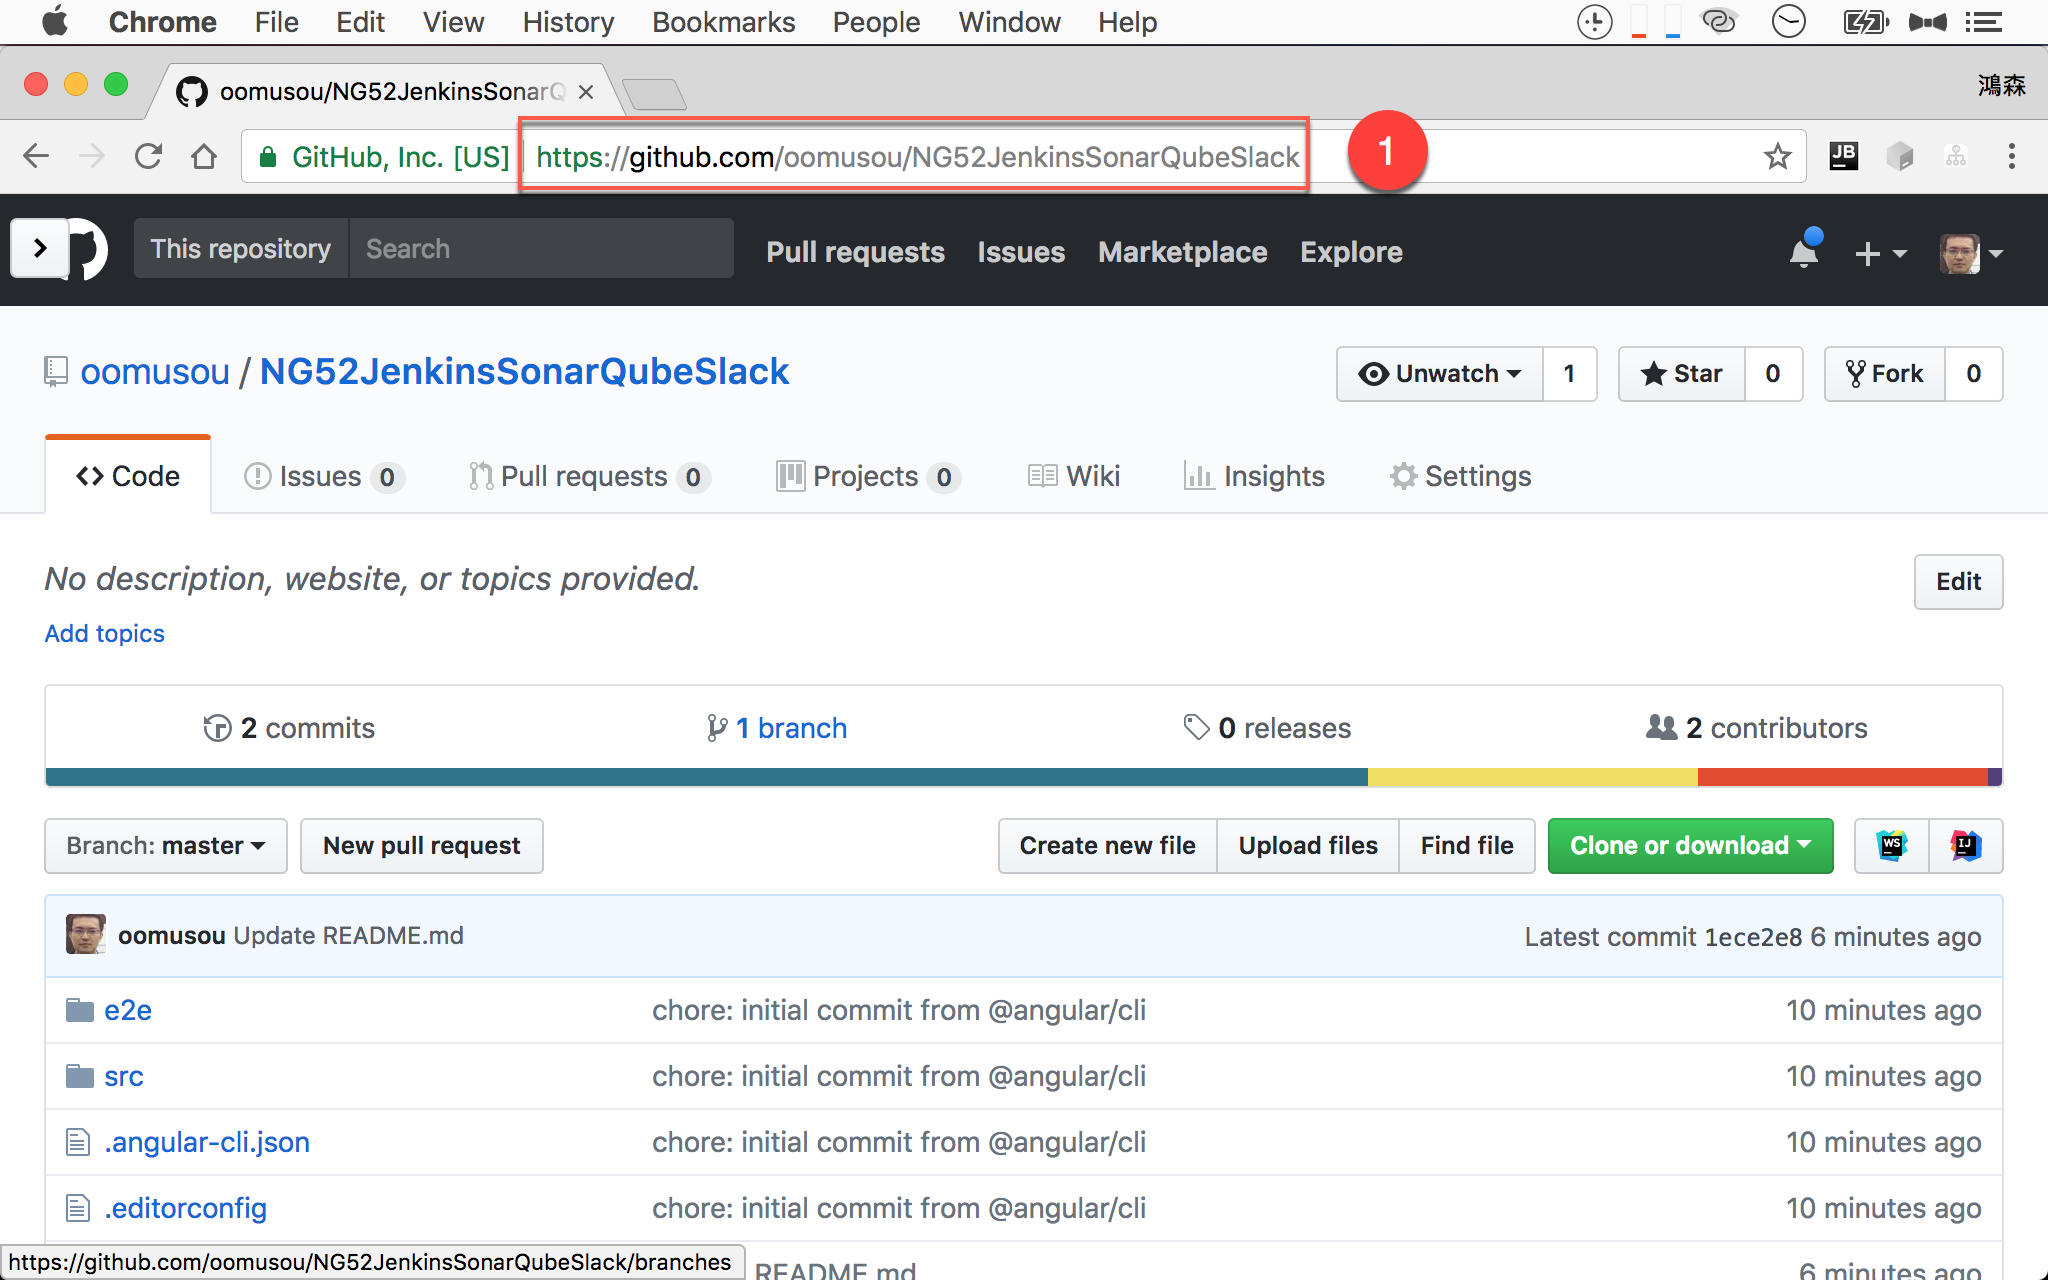
- 本文將 Angular 專案放在
https://github.com/oomusou/NG52JenkinsSonarQubeSlack
當然也可以將 git repository 放在不同的 git server,如 Bitbucket
SonarQube
安裝 SonarQube
1 | $ brew update |
使用 Homebrew 安裝 SonarQube。
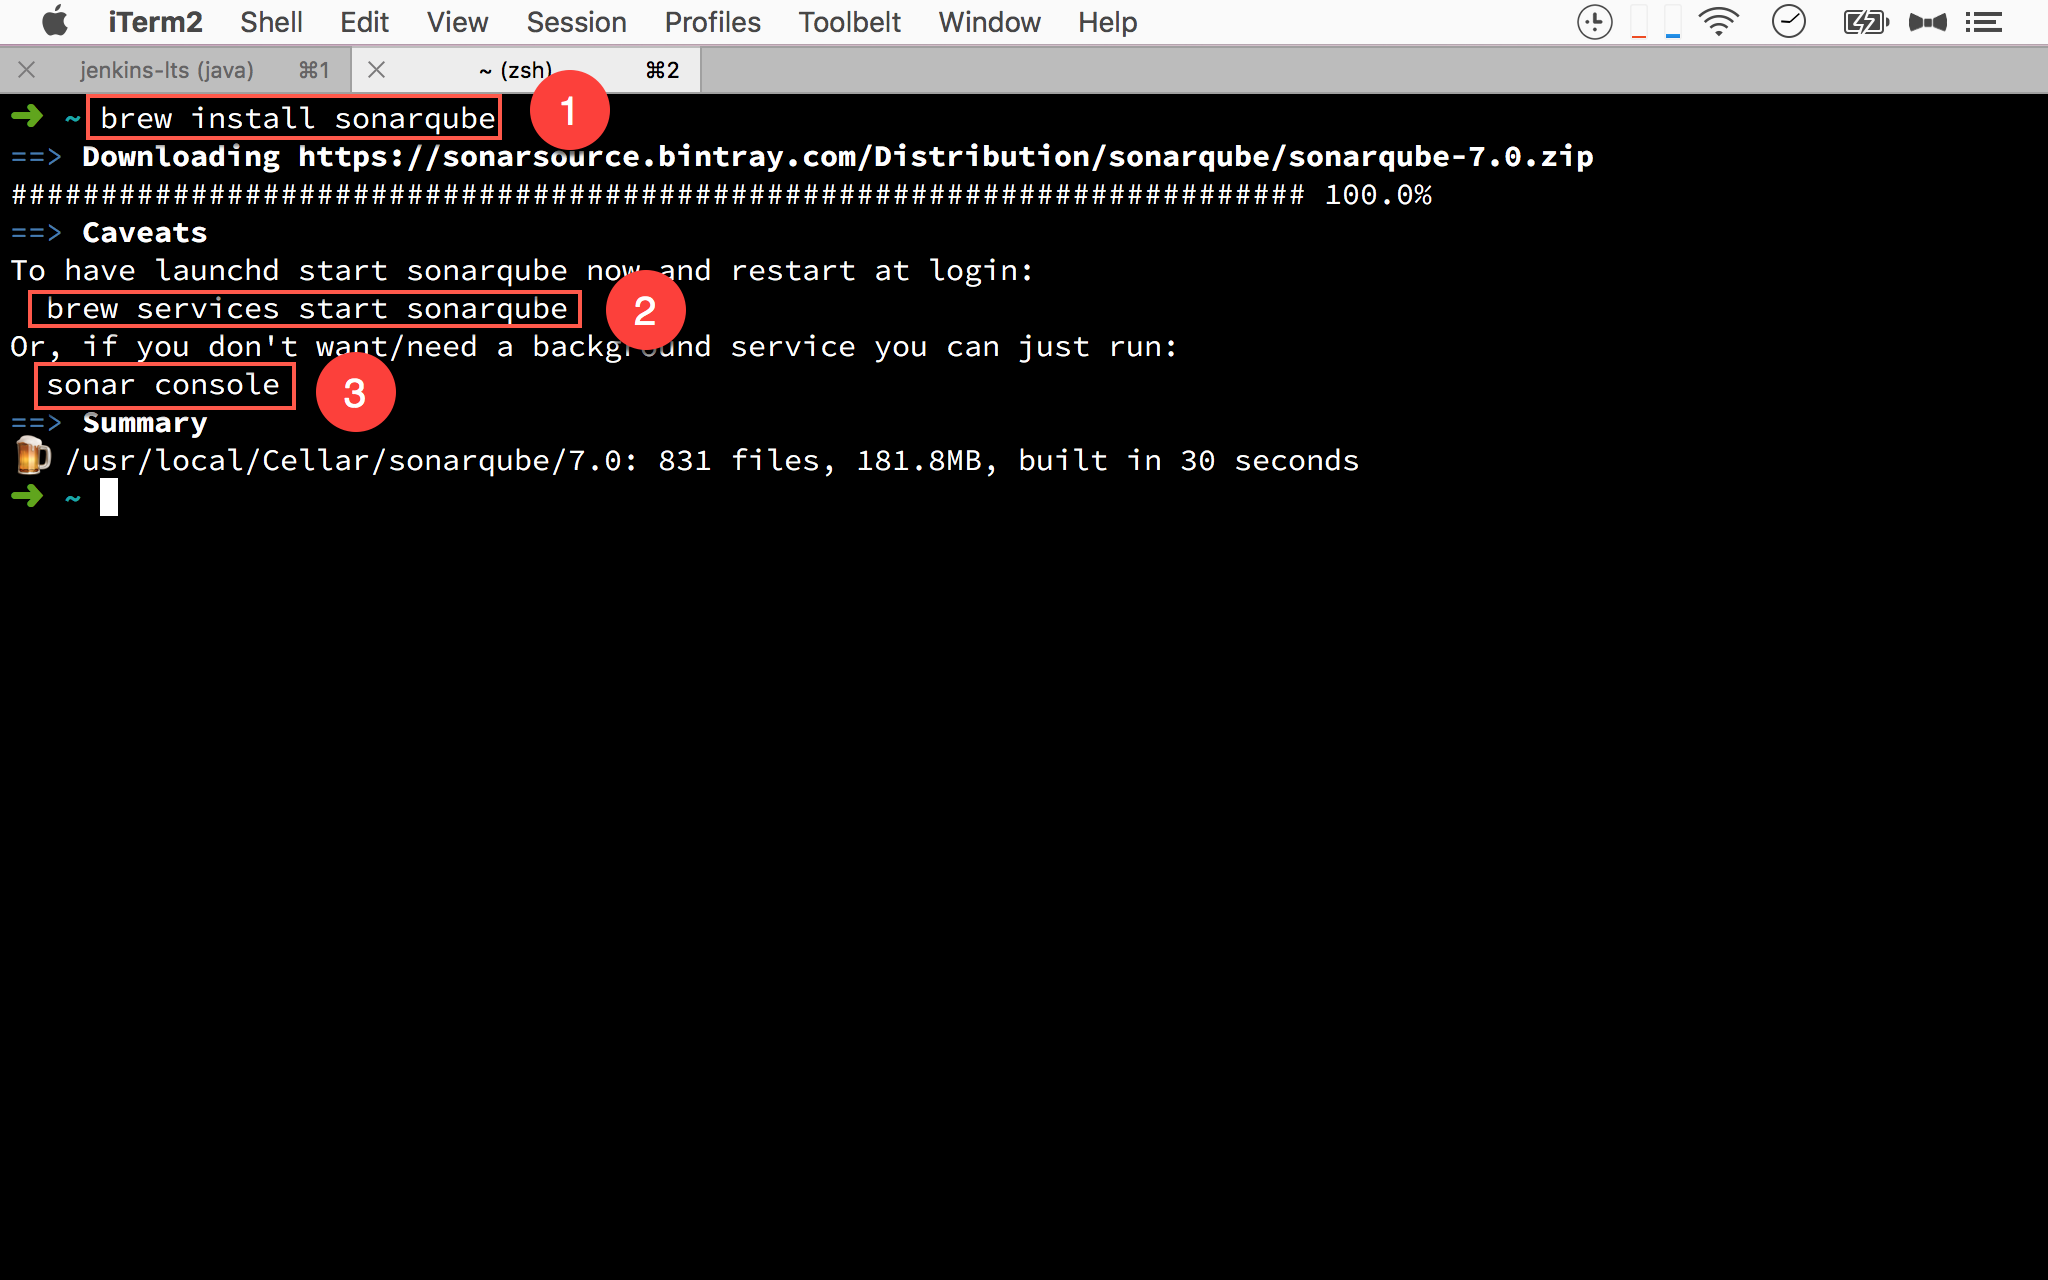
- 輸入
brew install sonarqube安裝 - 若想在每次 Mac 重開機就自動執行 SonarQube,輸入
brew services start sonarqube - 若想自行啟動 SonarQube,輸入
sonar console
啟動 SonarConsole1
$ sonar console
使用 sonar console 自行啟動 SonarQube。
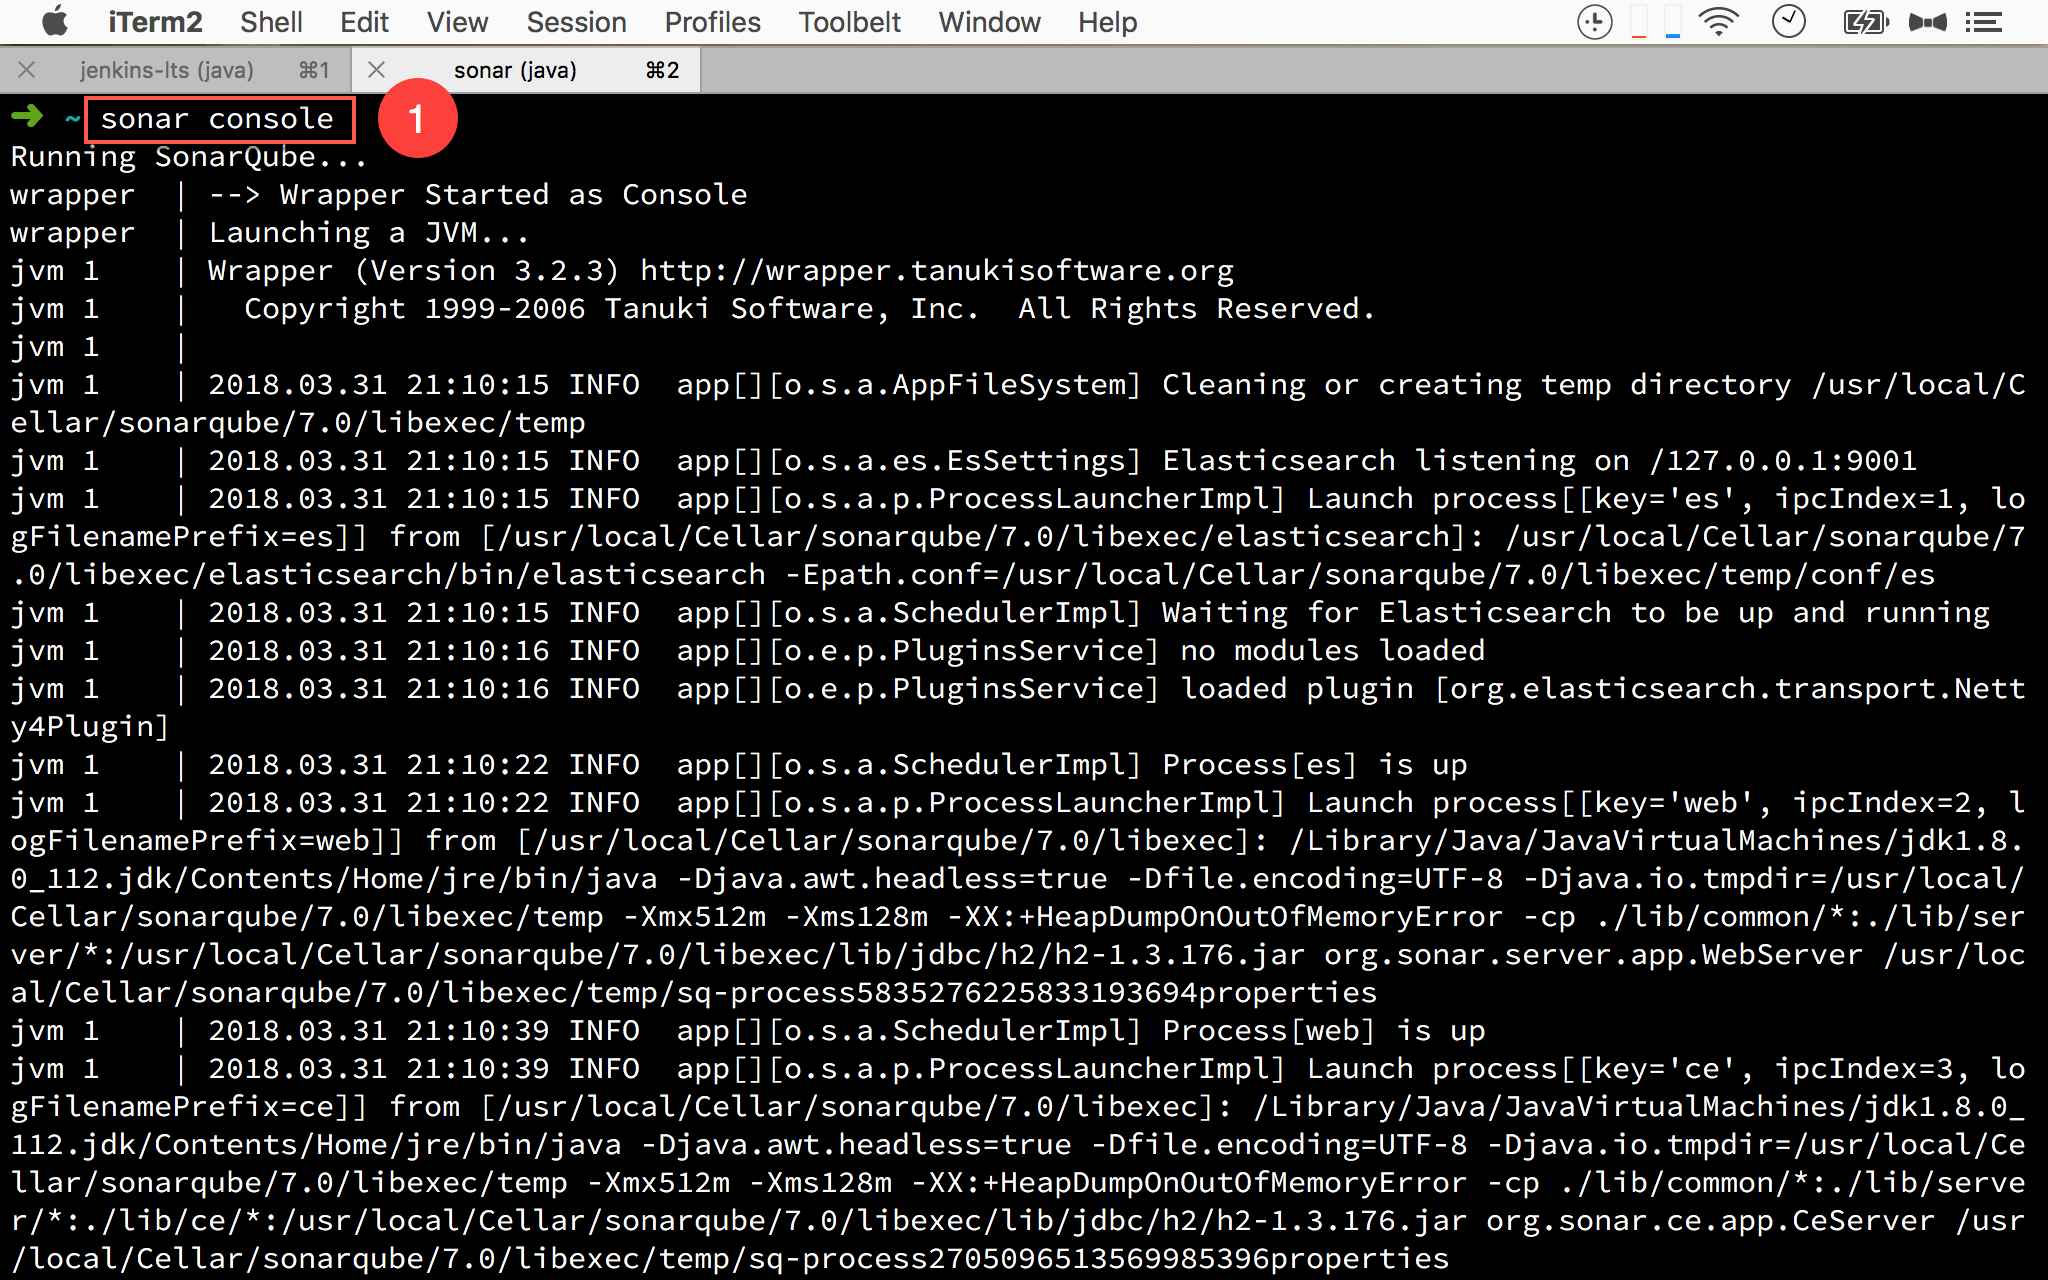
- 輸入
sonar console自行啟動 SonarQube
測試 SonarQube
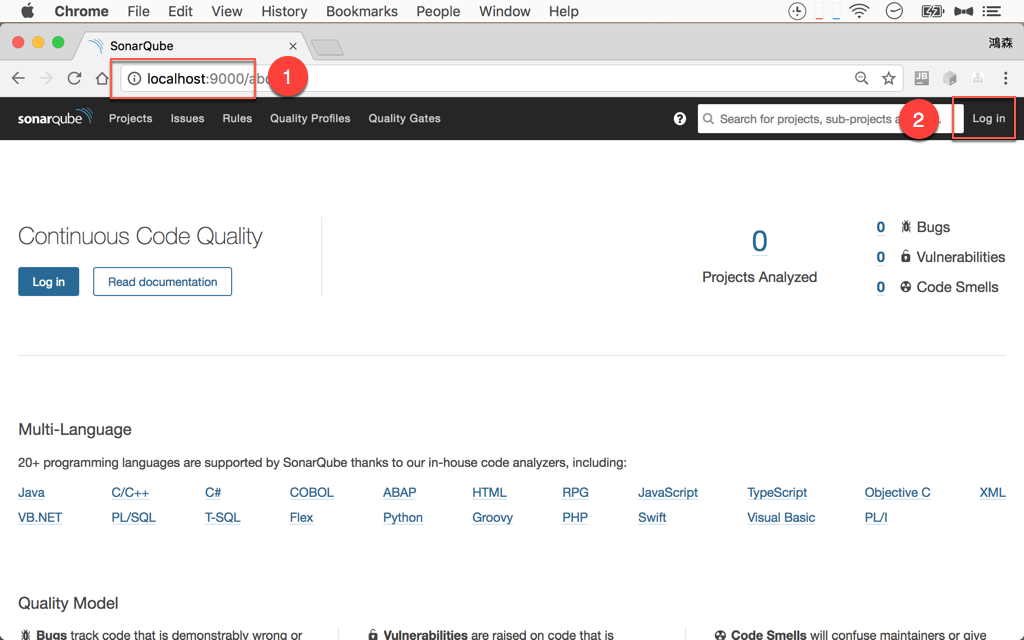
- 輸入
localhost:9000,若看到 SonarQube 首頁,則表示安裝成功 - 右上角
Log in可登入管理設定 SonarQube,預設為admin/admin
SonarQube Scanner
SonarQube 雖然已經包含 SonarTS,但必須靠 SonarQube Scanner 才能執行,預設 SonarQube 並沒有包含 Scanner,必須自行安裝。
下載 Scanner
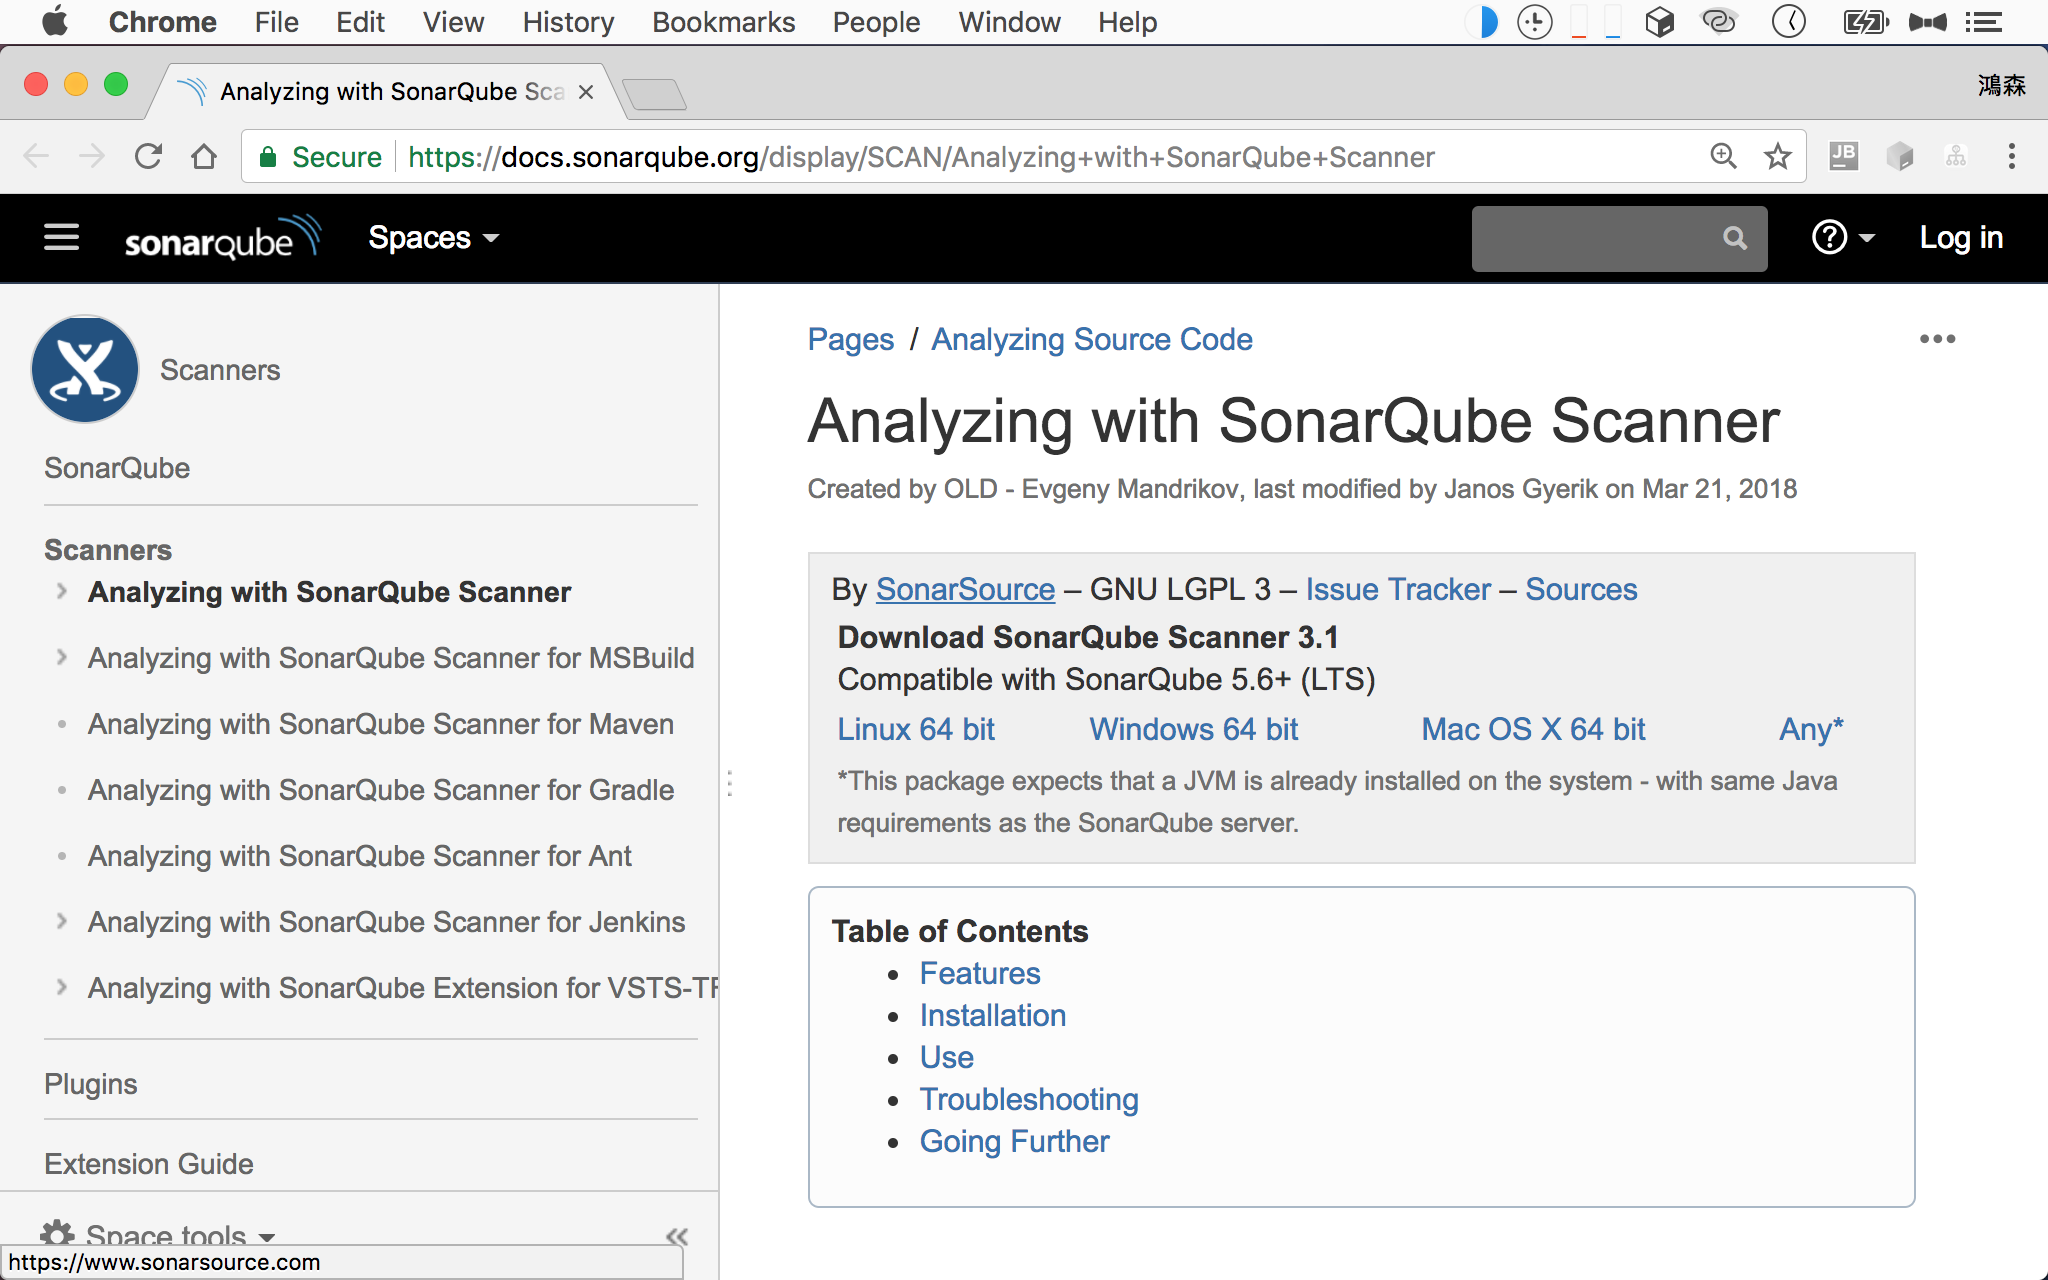
到 Analyzing with SonarQube Scanner 下載 Scanner,選擇 Mac OS X 64 bit 下載。
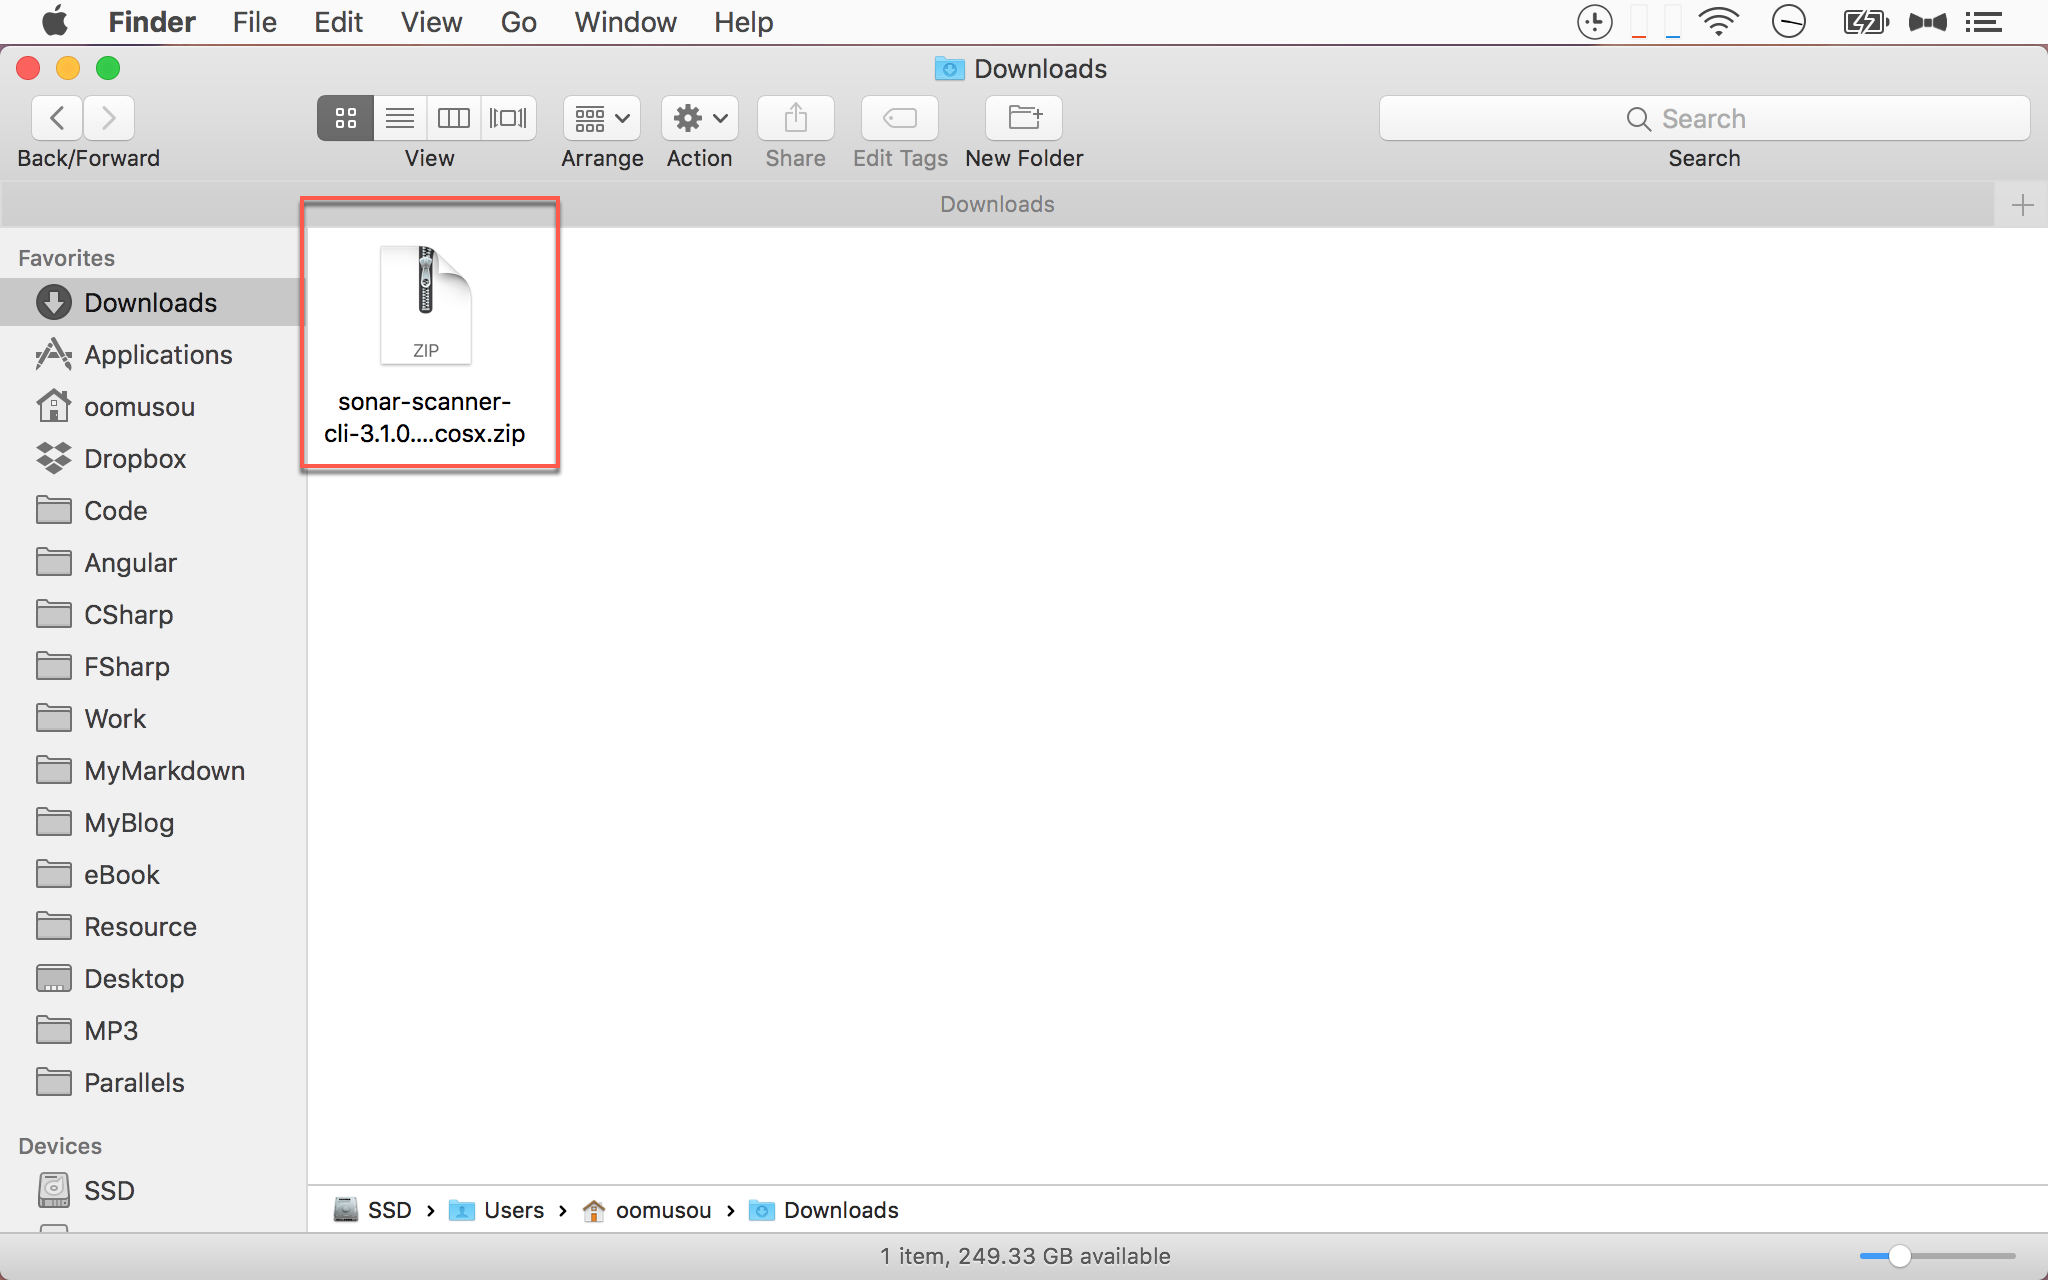
下載後為一 zip 壓縮檔,解壓縮後可安裝在任何目錄。
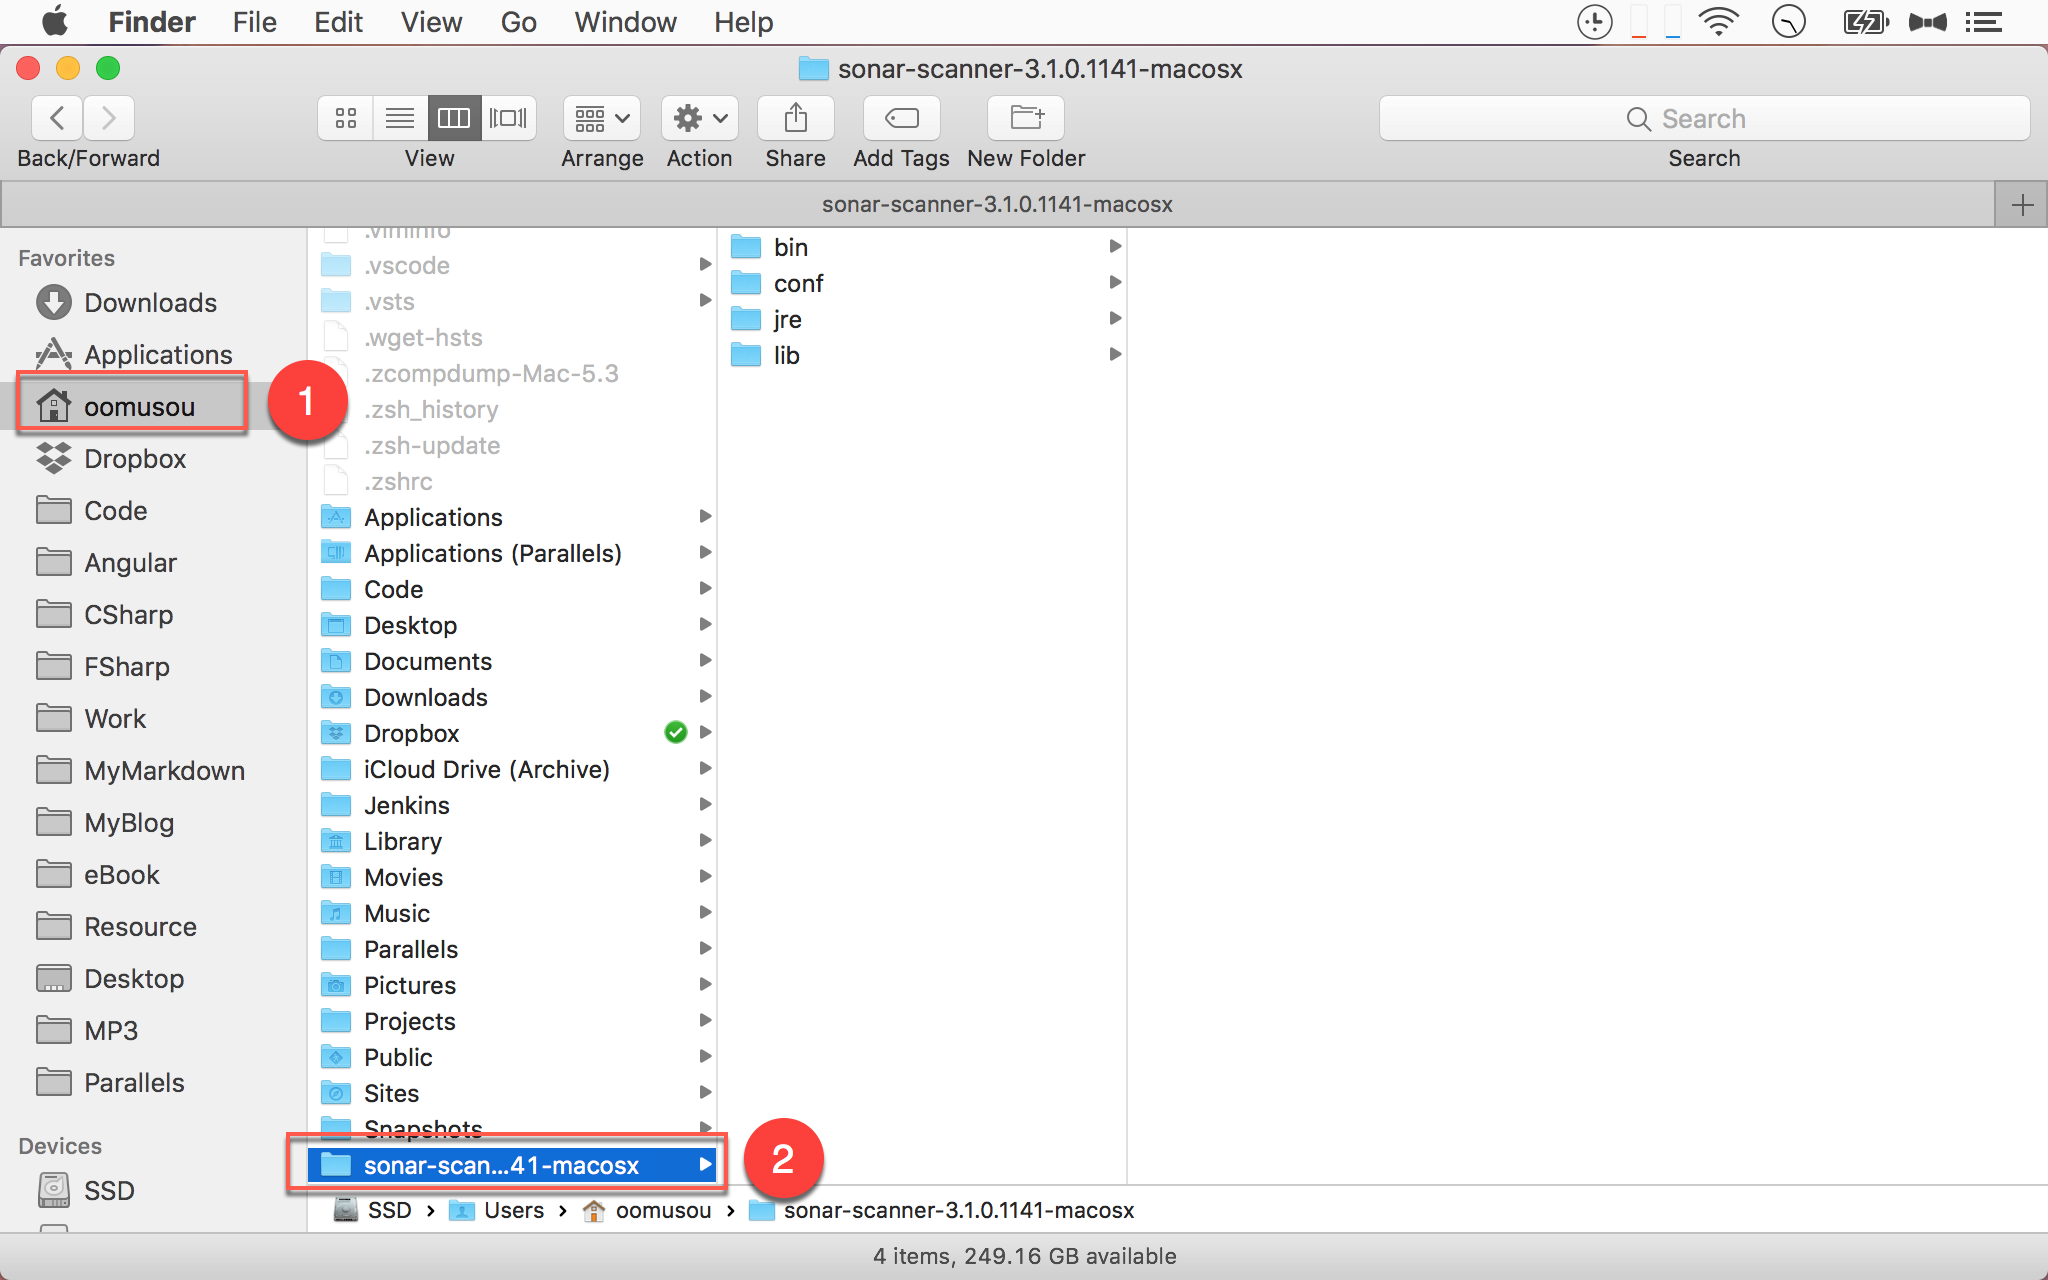
- 選擇 home directory
- 將
sonar-scanner-3.1.0.1141-macosx放在 home directory 下
設定 Server
sonar-scanner.properties
1 | #----- Default SonarQube server |
設定 SonarQube server 位址,並將 # 註解拿掉。
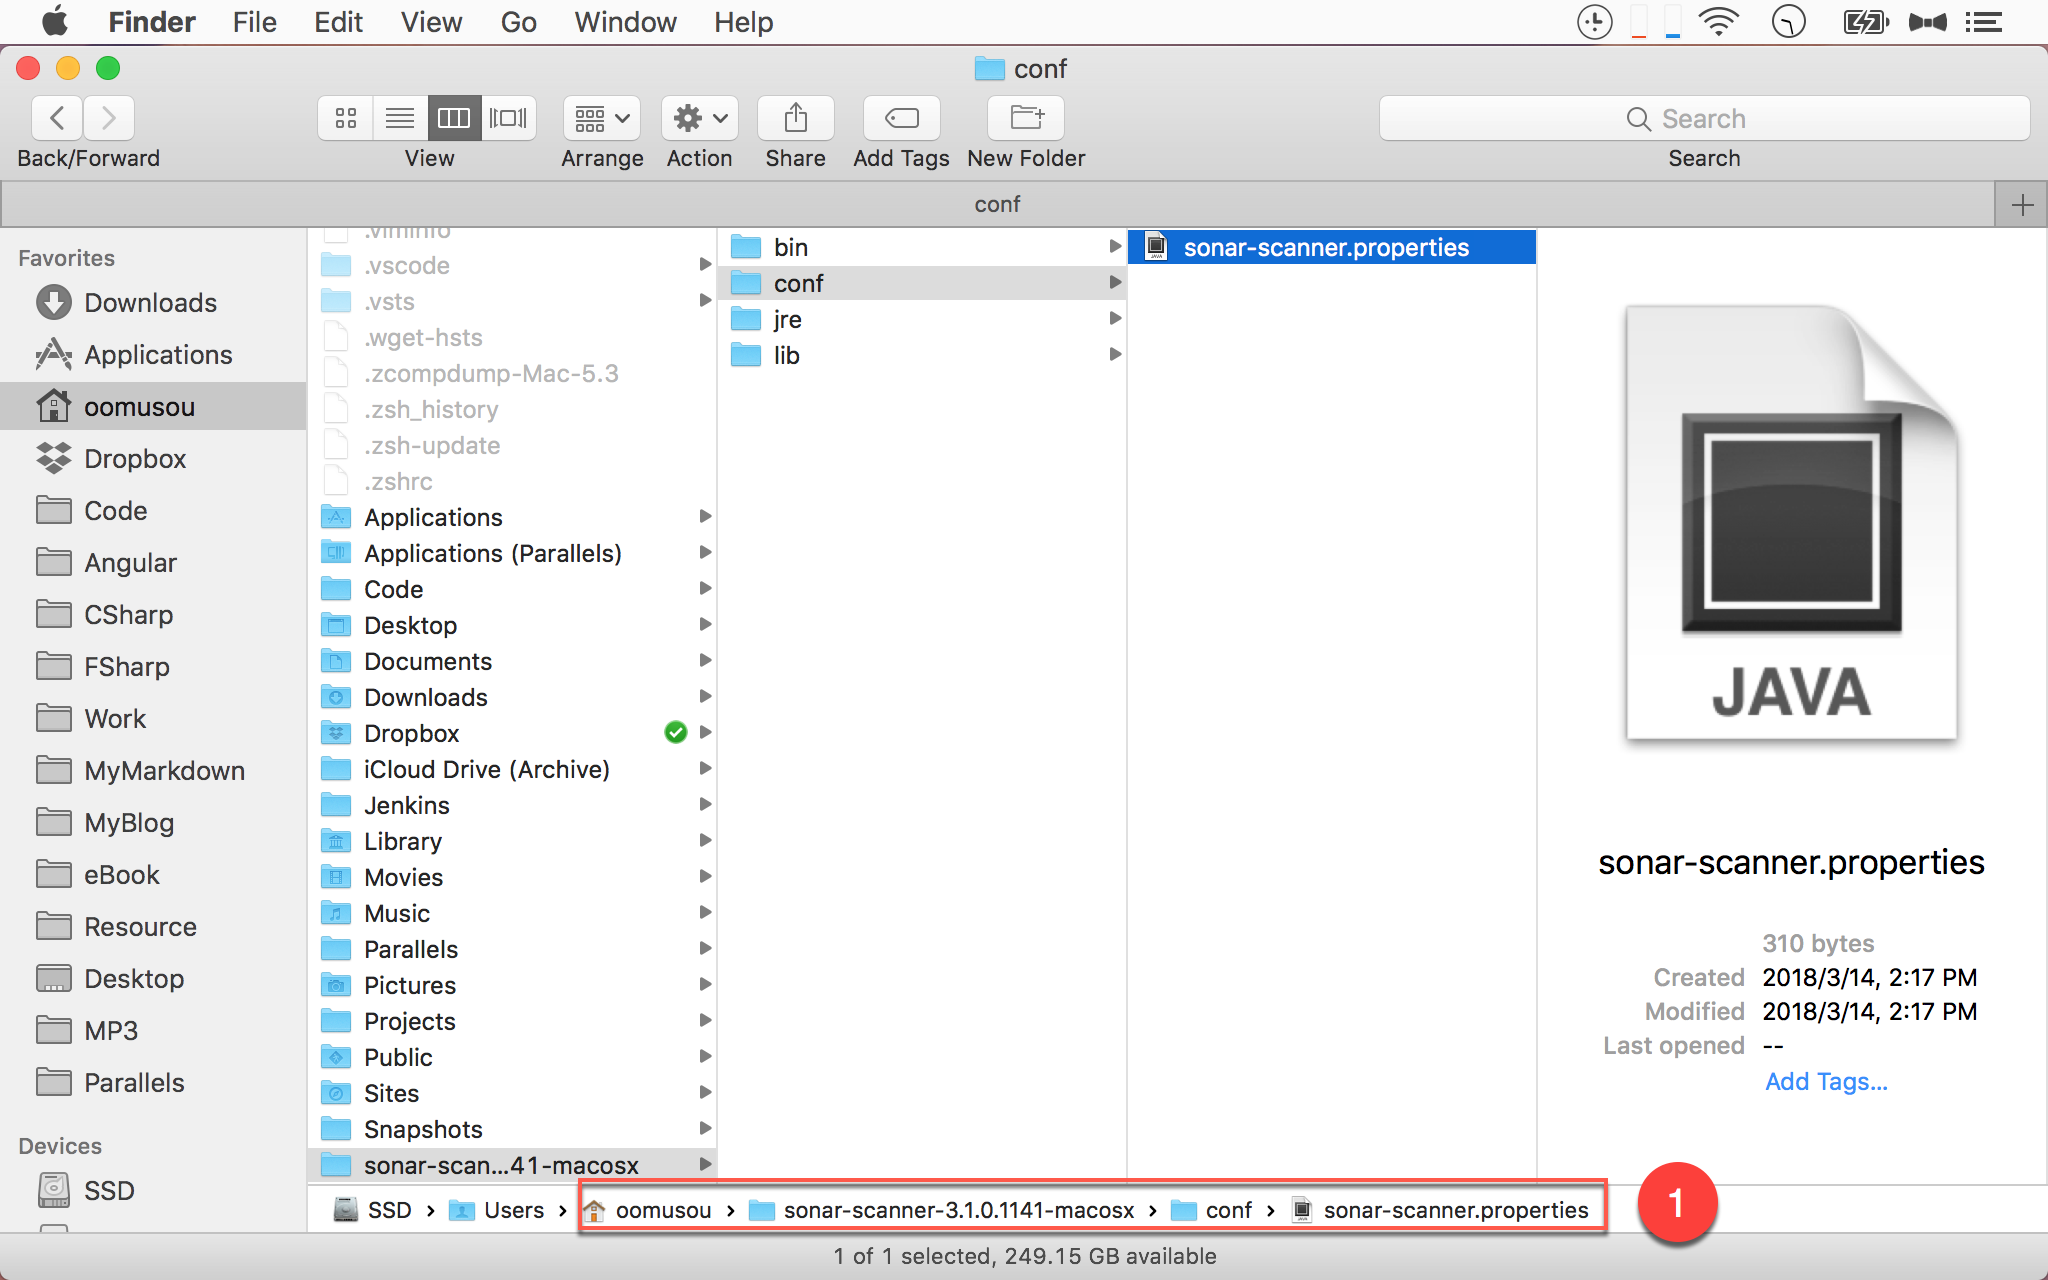
sonar-scanner.properties位於sonar-scanner-3.1.0.1141-macosx/conf/目錄下
測試 Scanner
將 SonarQube Scanner 加到 system path。
.zshrc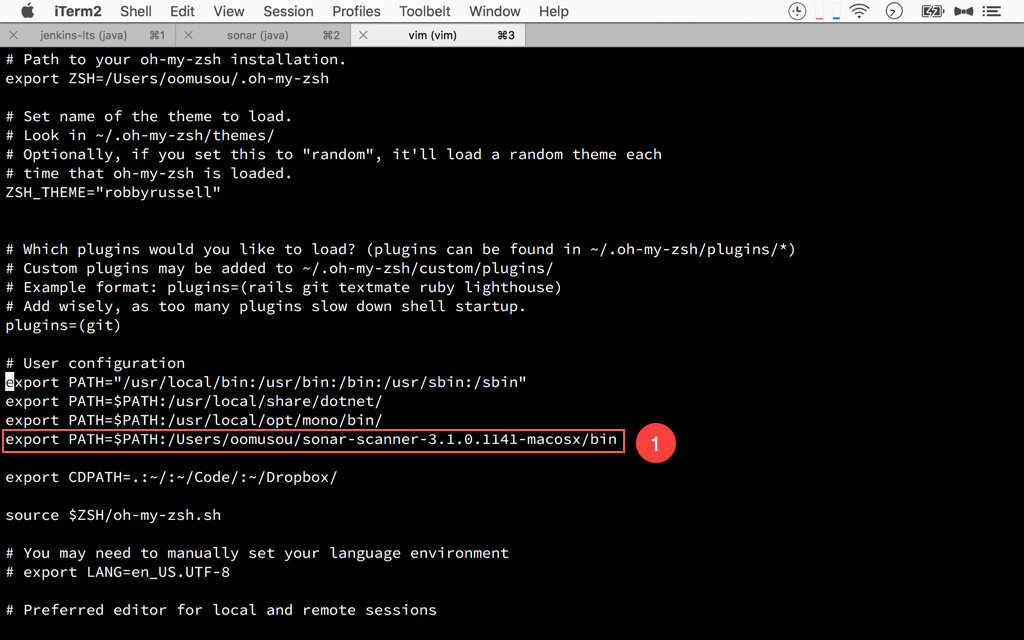
- 將
~/sonar-scanner-3.1.0.1141-macosx/bin目錄加到 system path
1 | ~/MyProject $ sonar-scanner -Dsonar.projectKey=Angular52 -Dsonar.sources=. -Dsonar.projectName=Angular52 -Dsonar.projectVersion=1.0 |
使用 sonar-scanner 對 Laravel 專案進行檢查。
- -D : 對 SonarQube 的 property 進行設定
- sonar.projectKey:SonarQube 對專案的 key,內部將以此 key 作為辨別,必須唯一
- sonar.sources:SonarQube 要檢查的目錄,因為已經在專案目錄下,
.即為目前目錄 - sonar.projectName:在 SonarQube 網頁上顯示的名稱
- sonar.projectVersion:在 SonarQube 網頁上顯示的版本編號
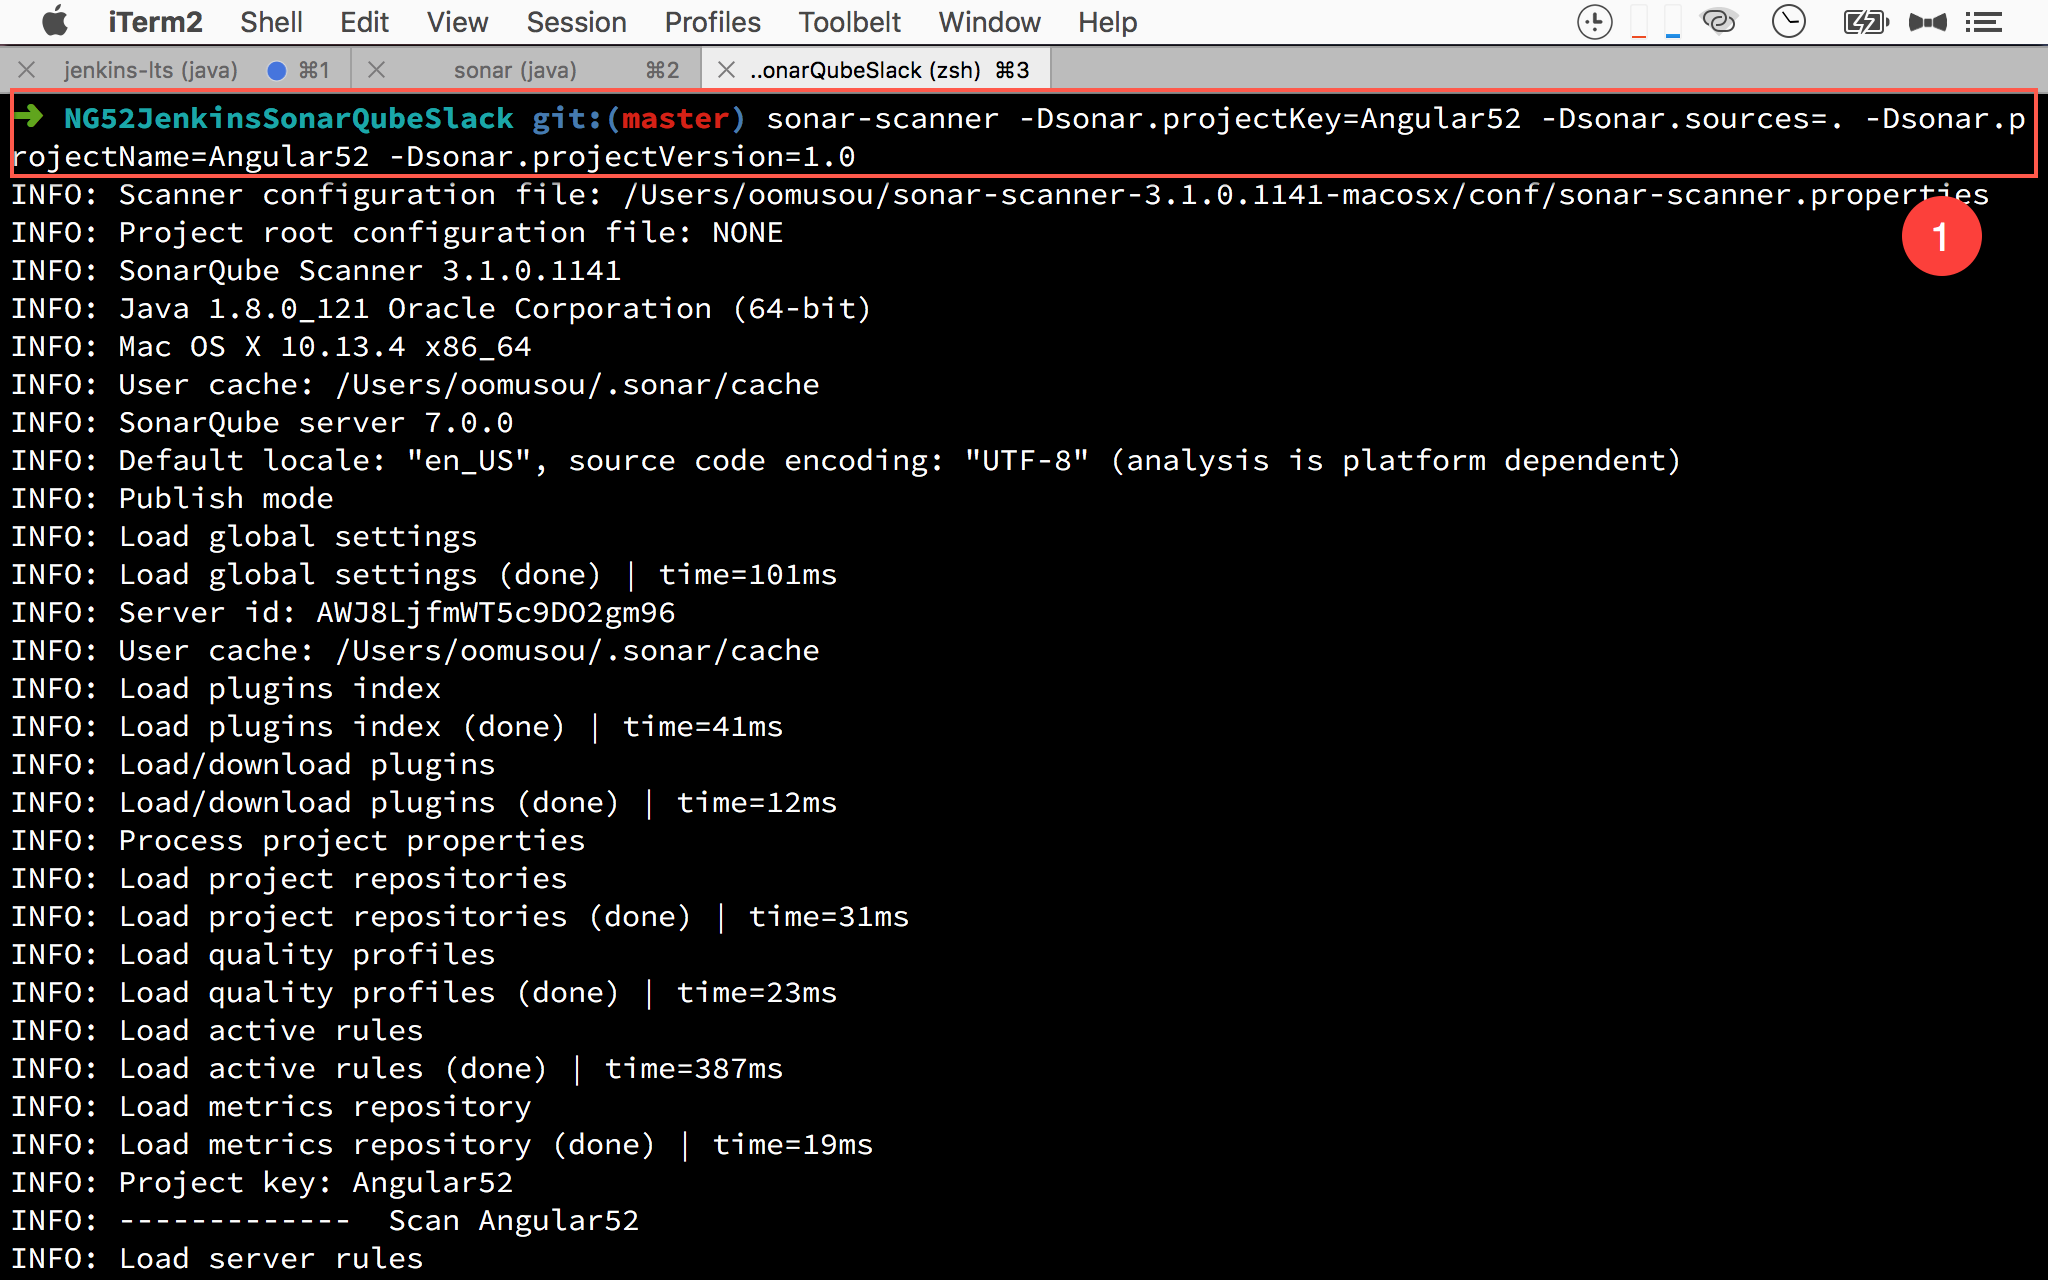
- 在專案目錄下輸入
sonar-scanner檢查 TypeScript
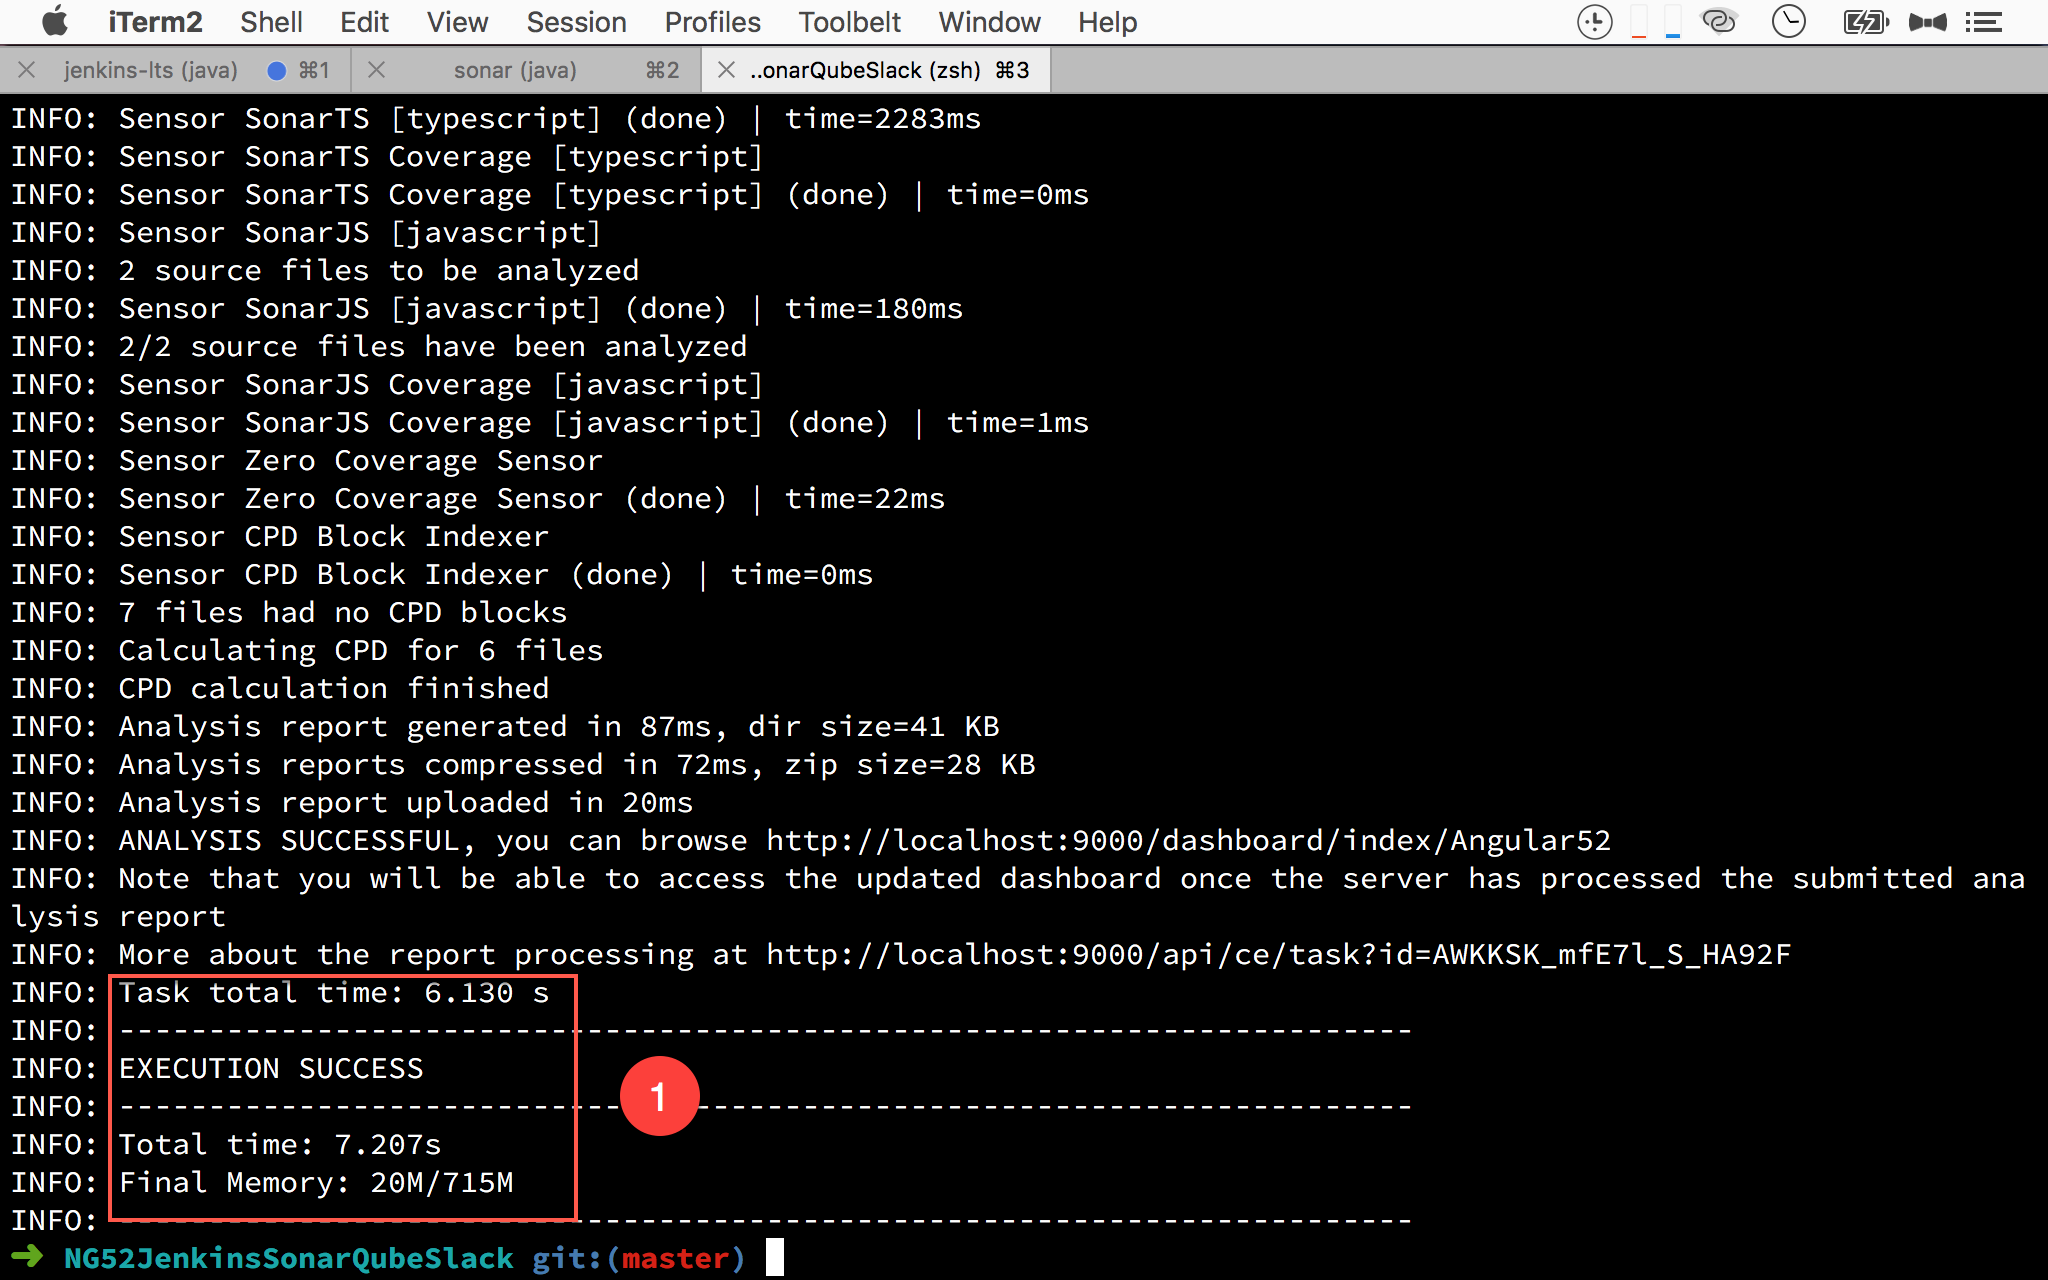
- 若能看到
EXECUTION SUCCESS,則表示 SonarQube Scanner 安裝成功
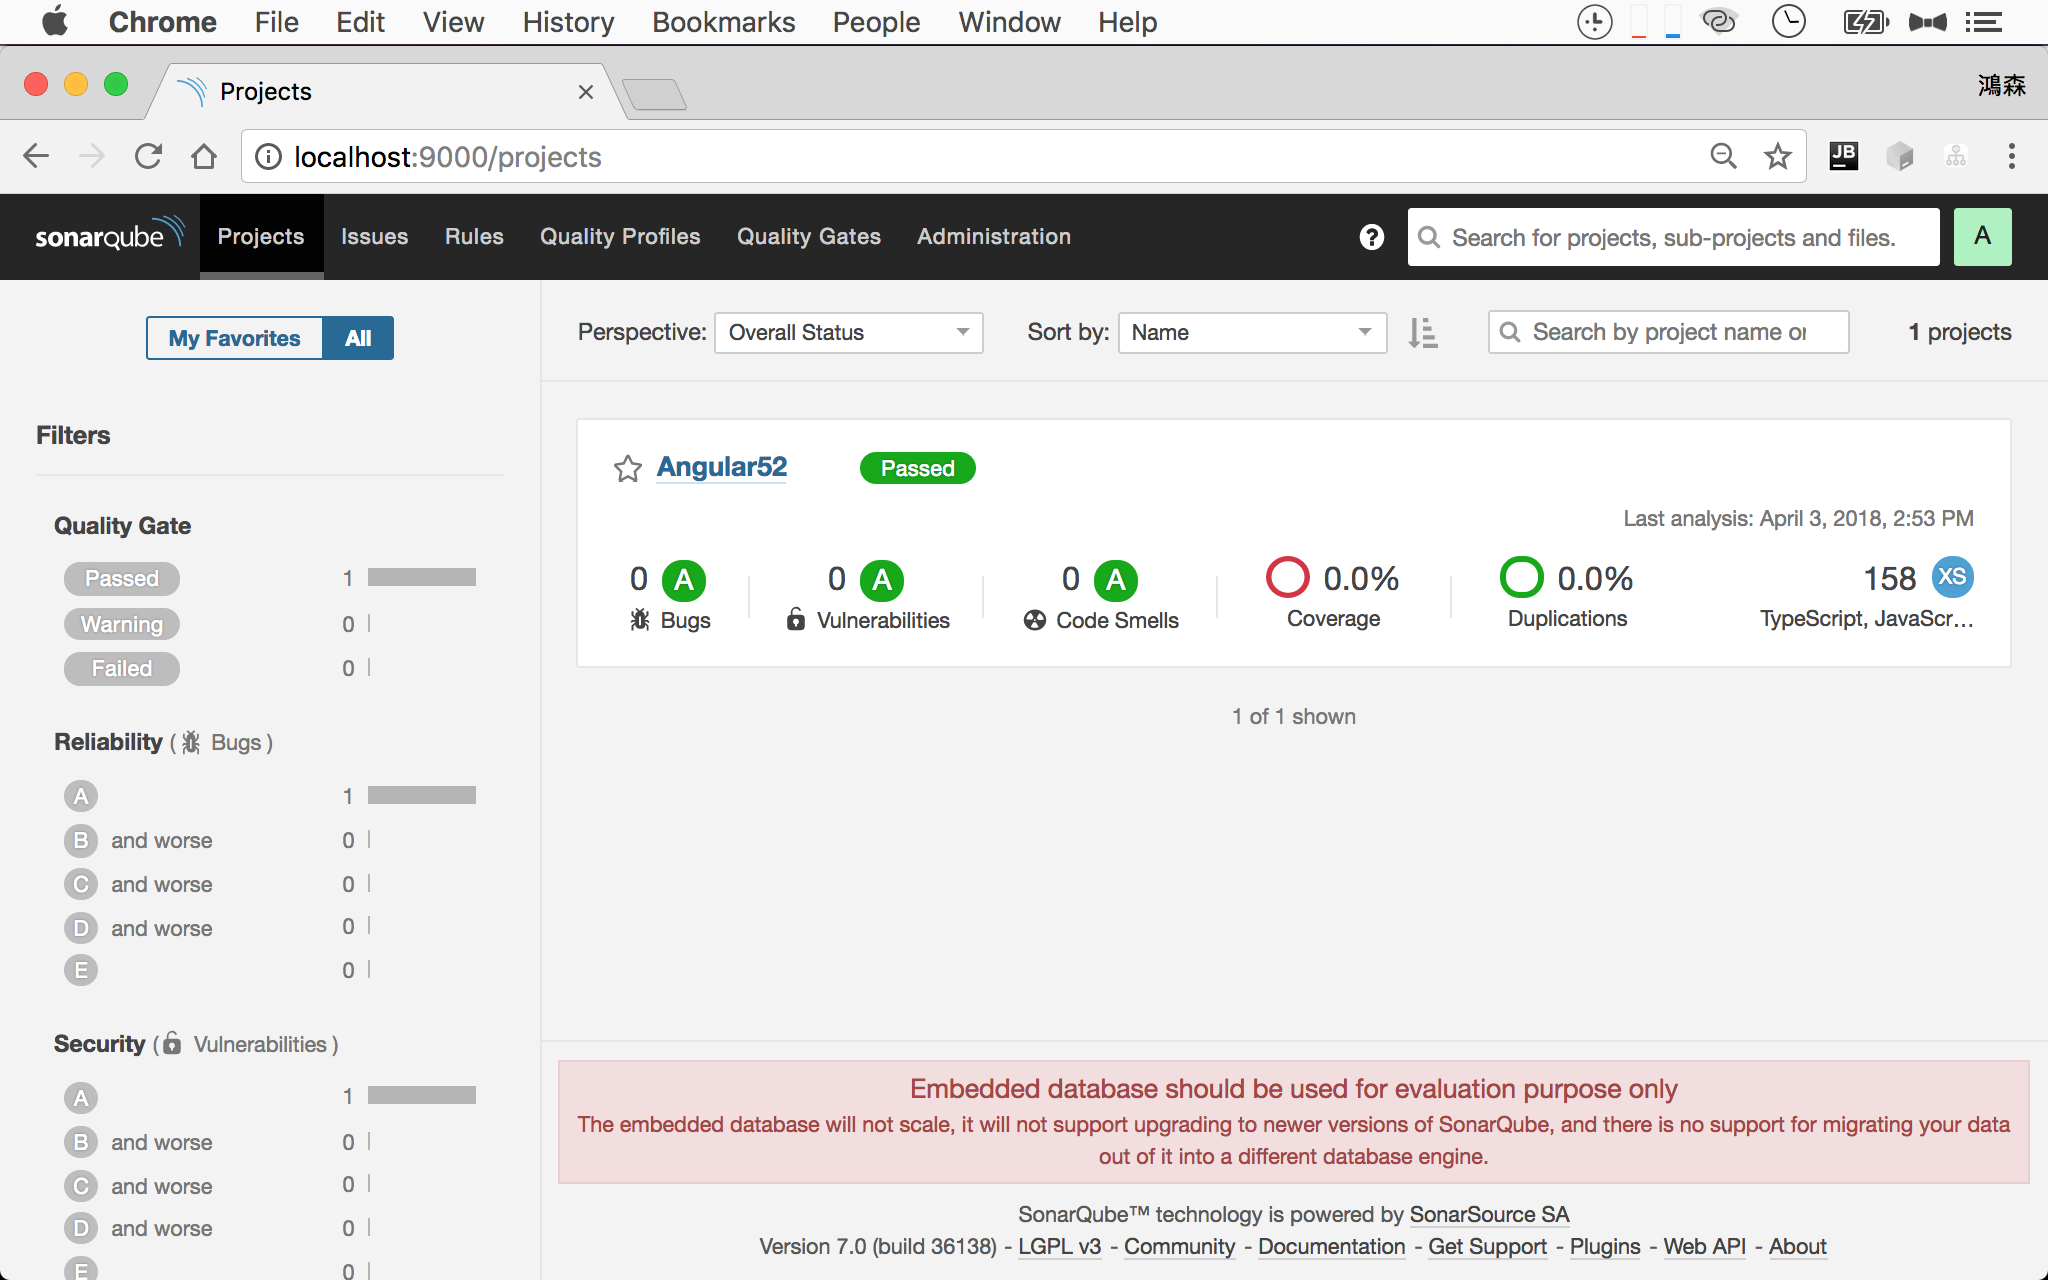
進入 SonarQube 網頁,就可看到 Angular52 專案已經出現 SonarQube。
到目前為止,SonarQube 對 TypeScript 的檢查已經完成,就算只將 SonarQube 裝在本機,也對 TypeScript 程式碼品質的檢查有很大的幫助。
若每次 SonarQube 檢查完,都能將結果送到 Slack,讓 Slack 成為實質的 持續整合 中心,那就太好了。
Q:Angular 專案有
node_modules目錄,不需如 Lavavel 專案去排除vendor目錄嗎?
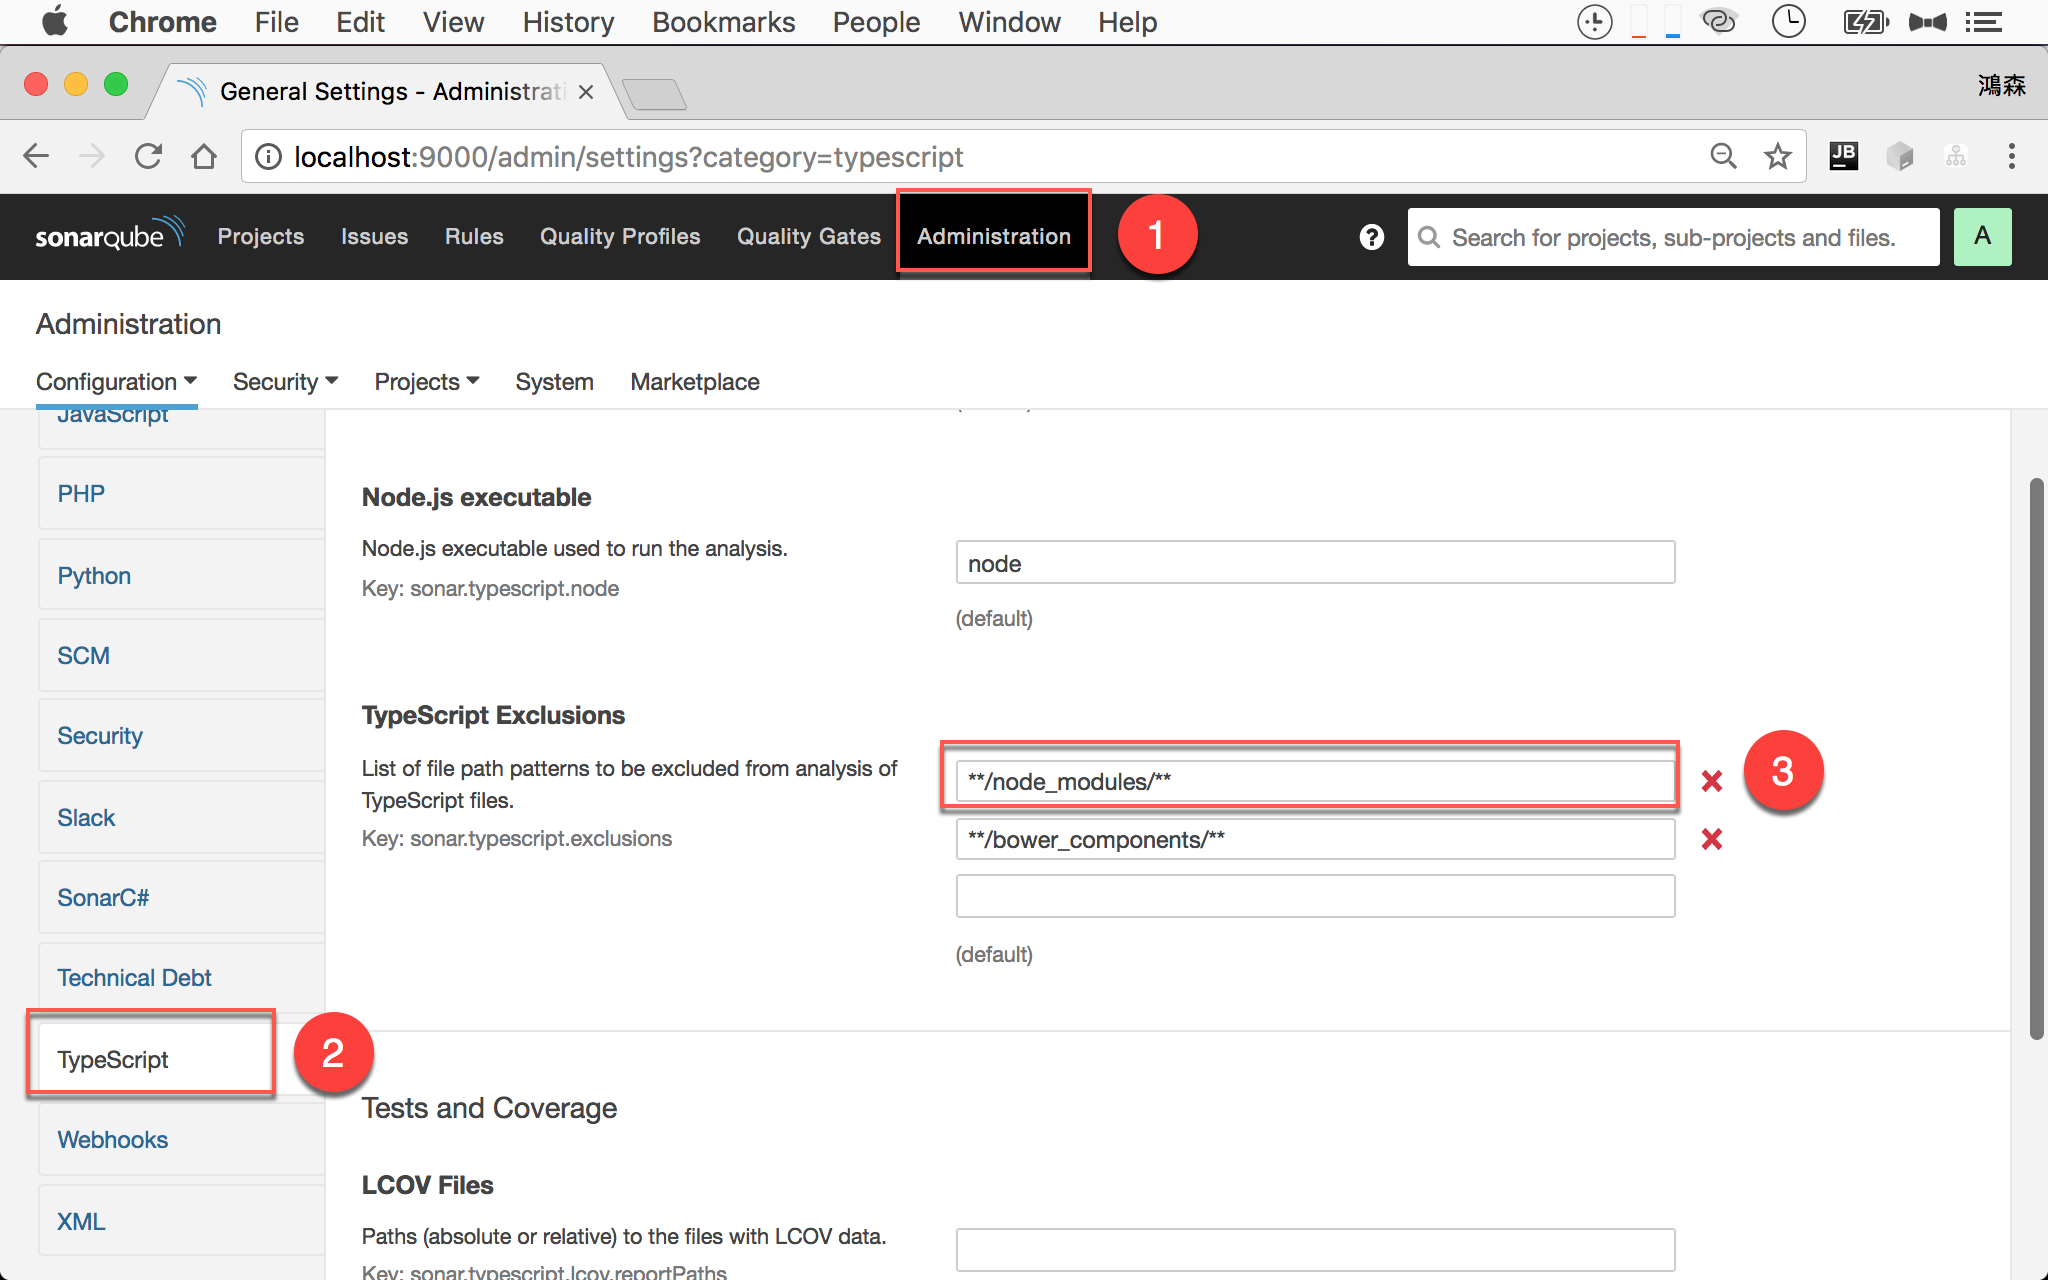
Administration -> TypeScript
預設已經排除了 node_modules,所以不須在 sonar-scanner 下特別指定。
Slack
新增 Channel
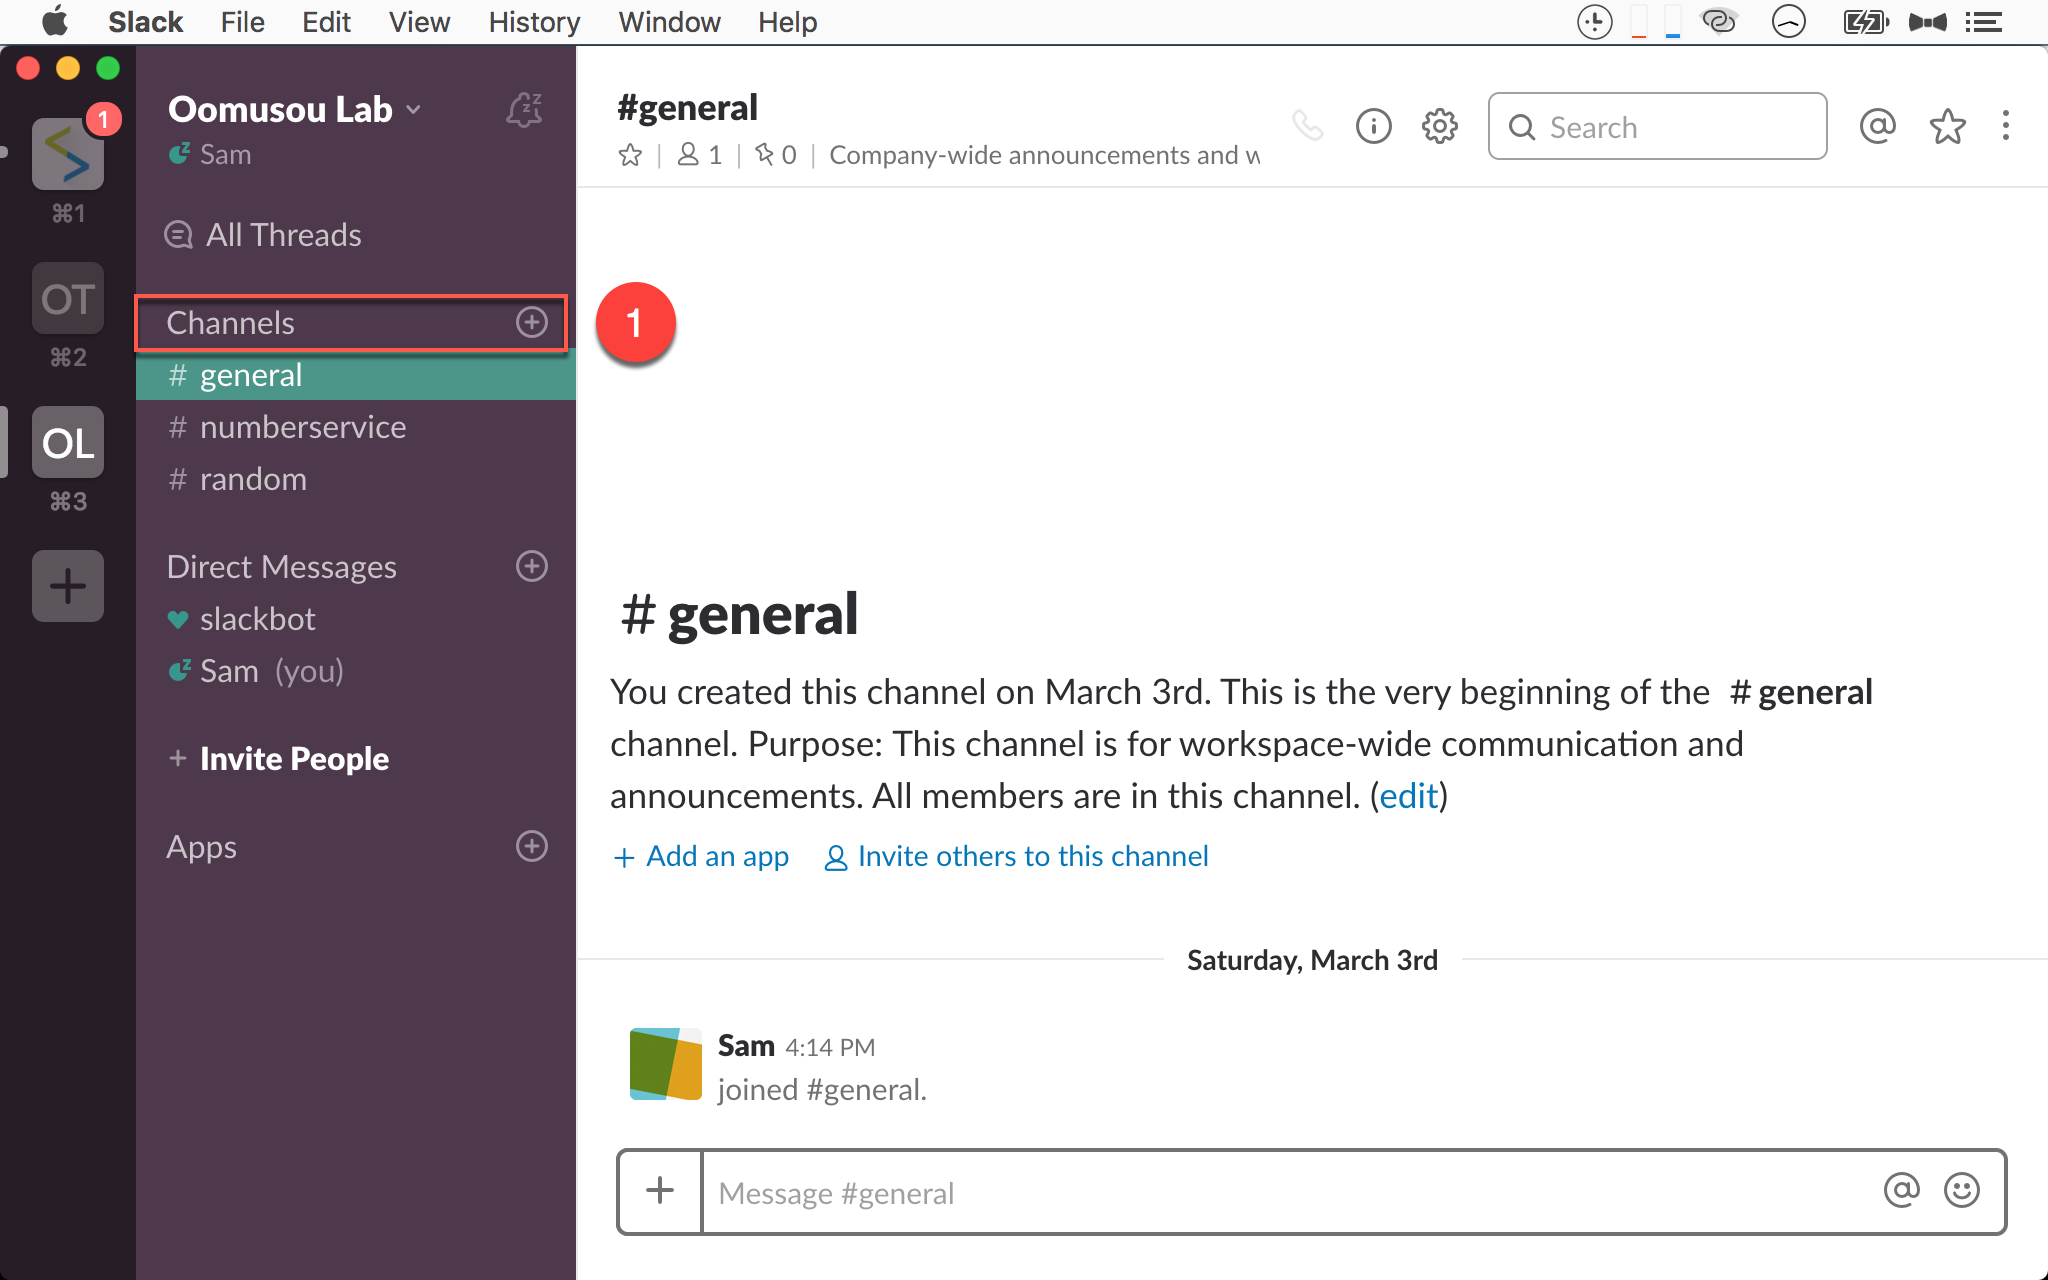
- 按下
Channels右側的+新增 channel
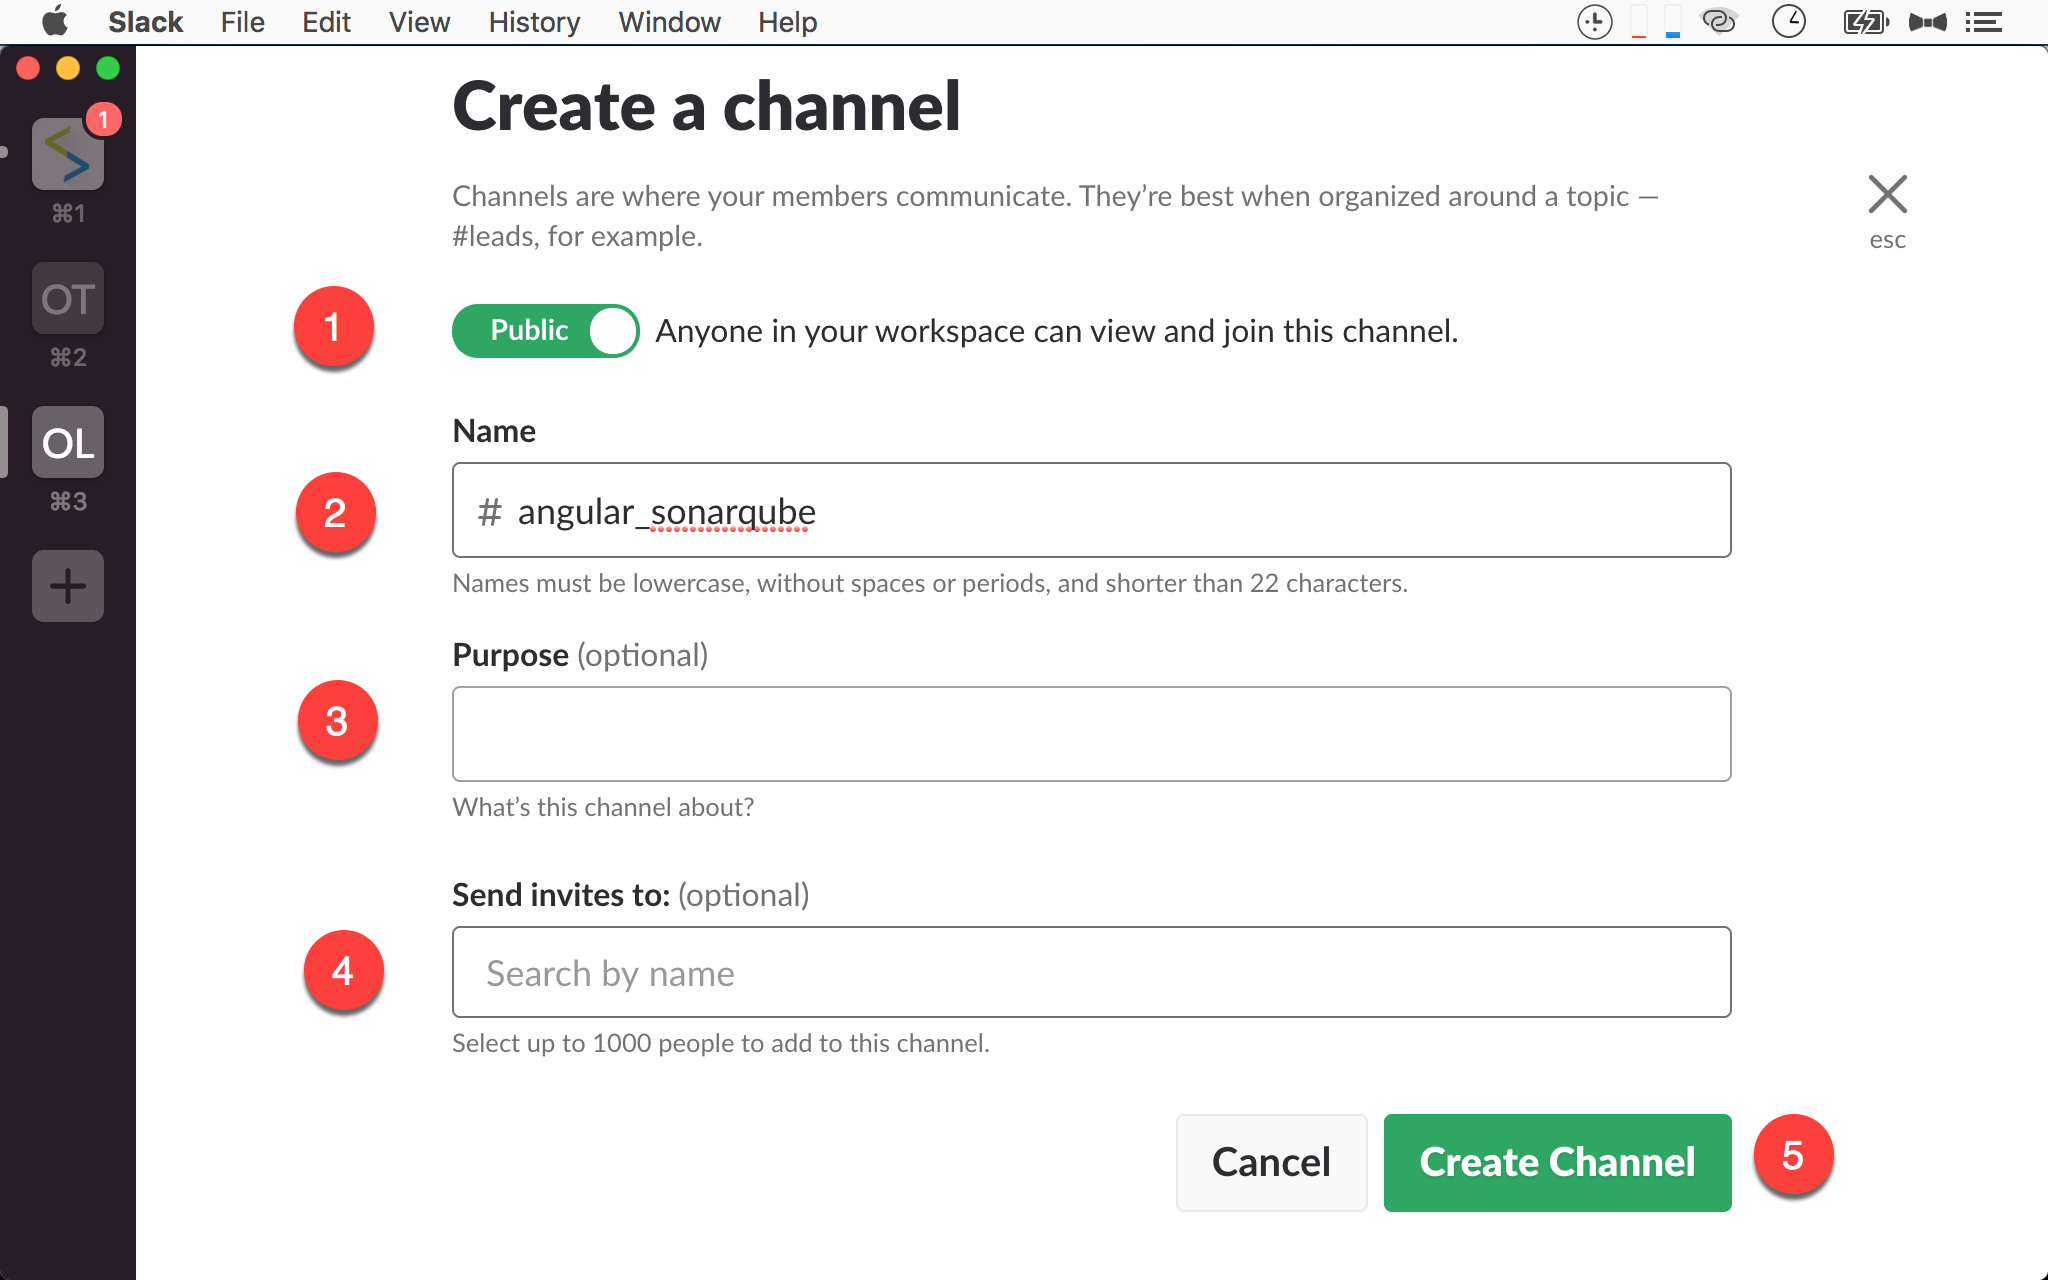
- Privacy : 設定為
Public或Privatechannel - Name : 設定 channel 名稱
- Purpose : channel 的功能描述,可以不輸入
- Send invites to : 設定 channel 成員,可以稍後再設定
- 按
Create Channel開始建立 channel
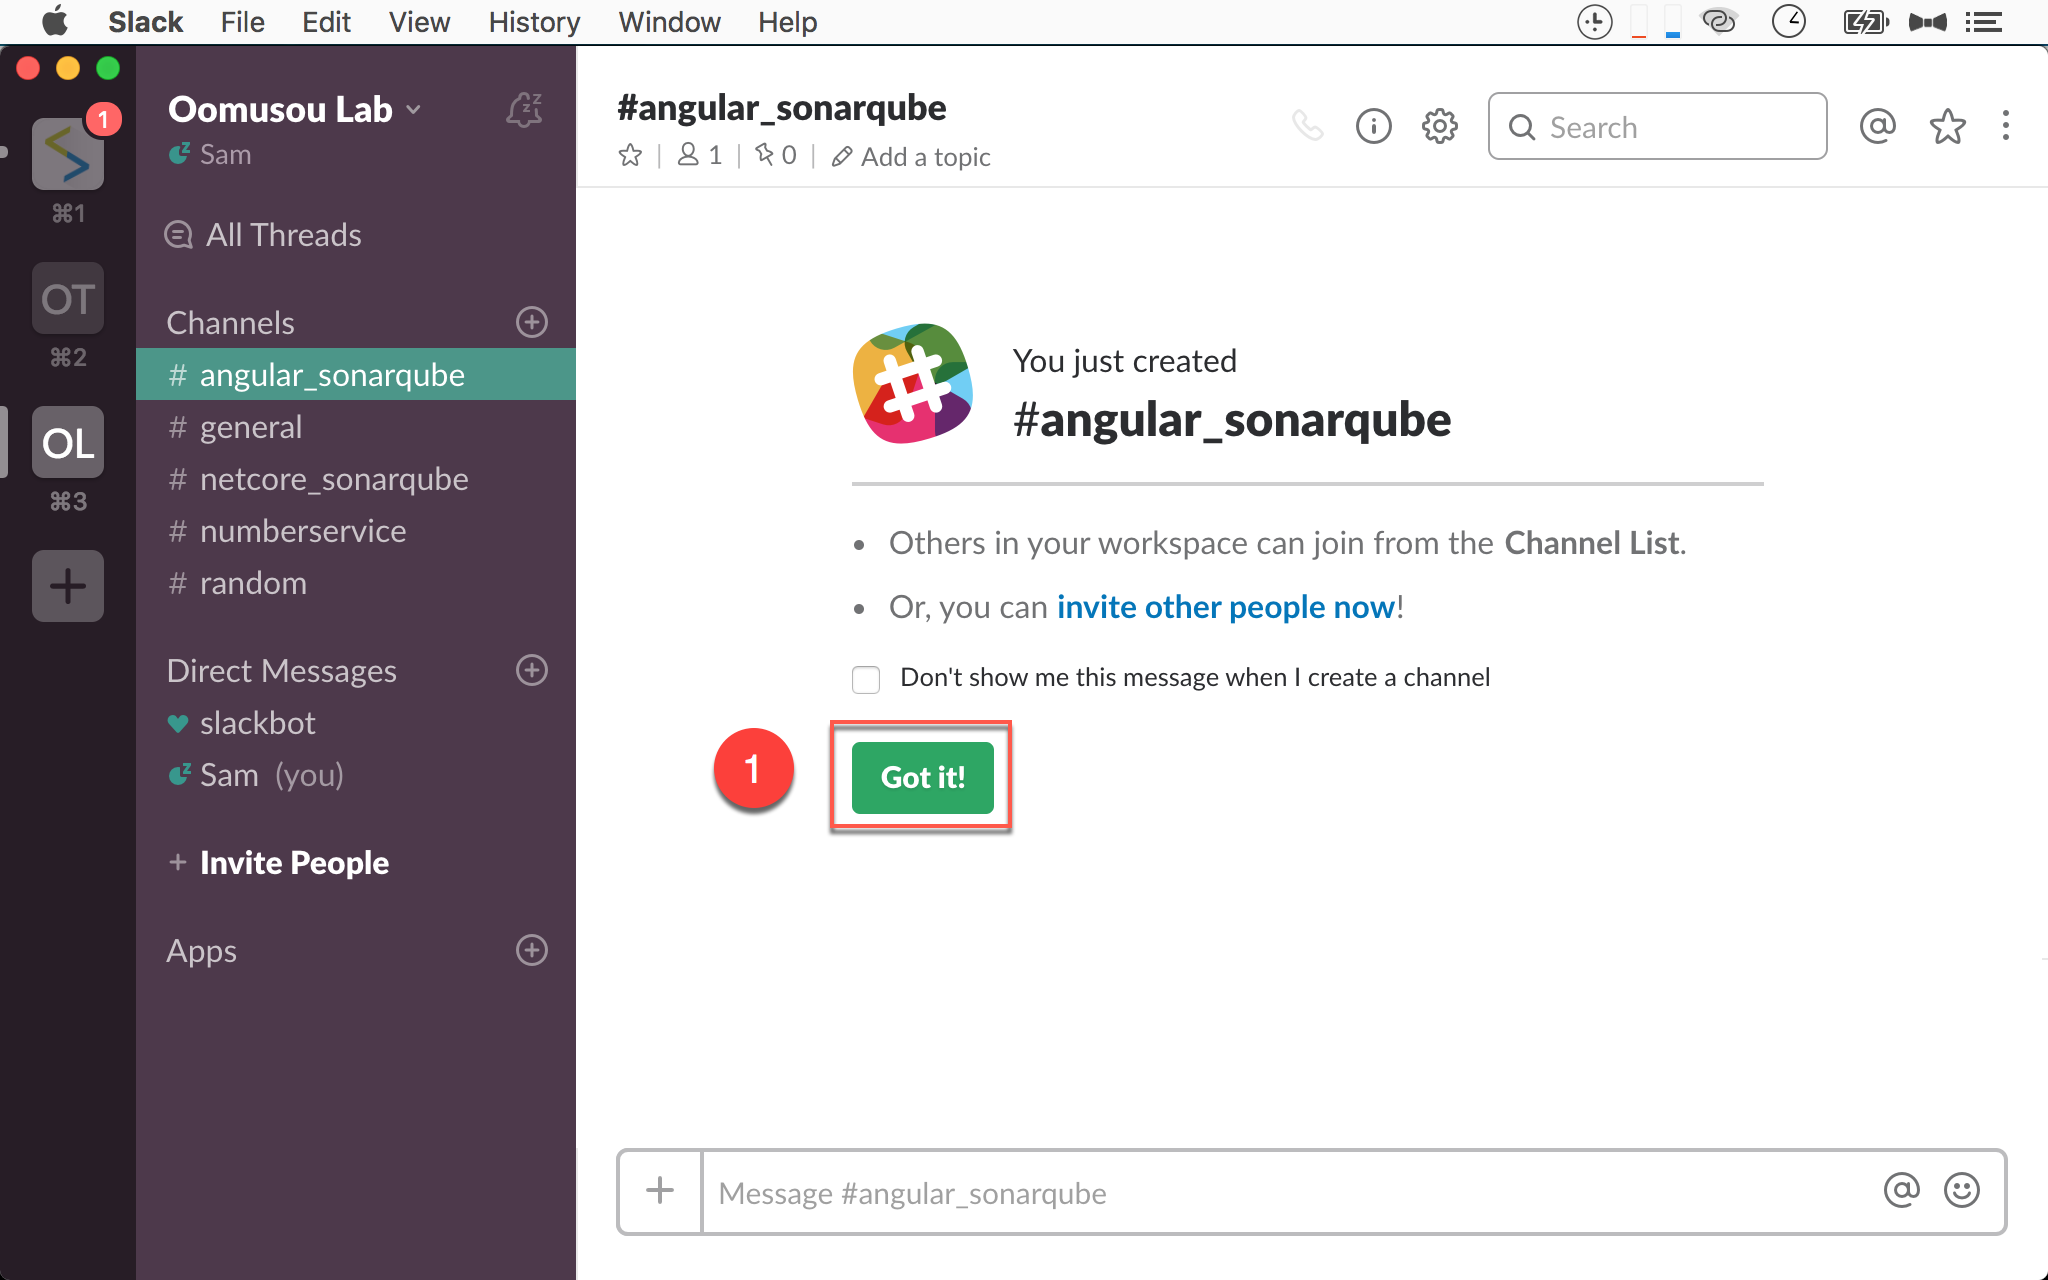
- 按
Got It!進入 channel
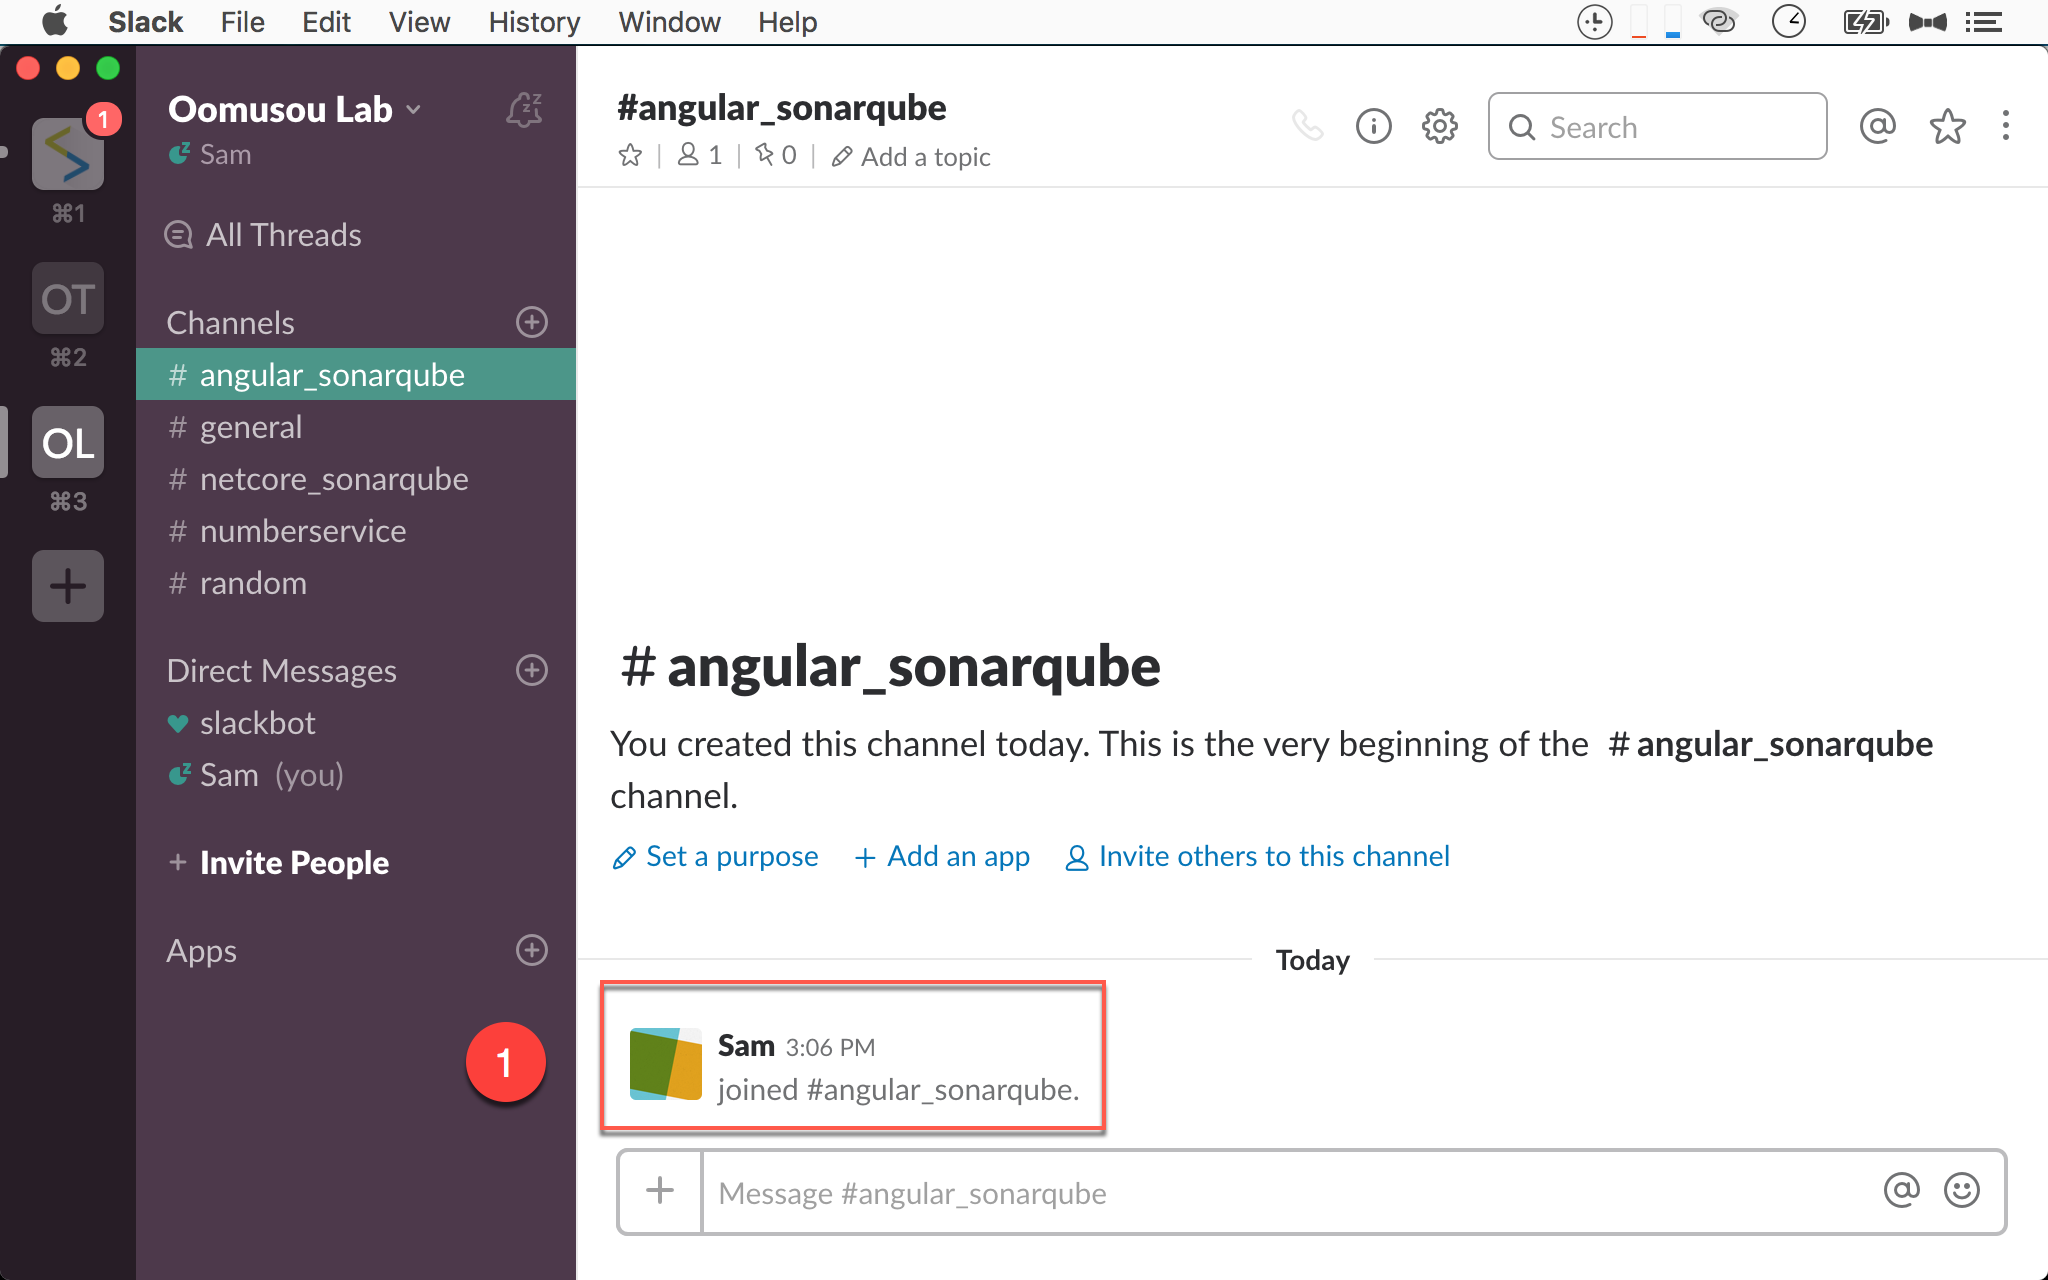
- 正式進入 channel,將來 SonarQube 訊息會傳進此 channel
新增 Notification
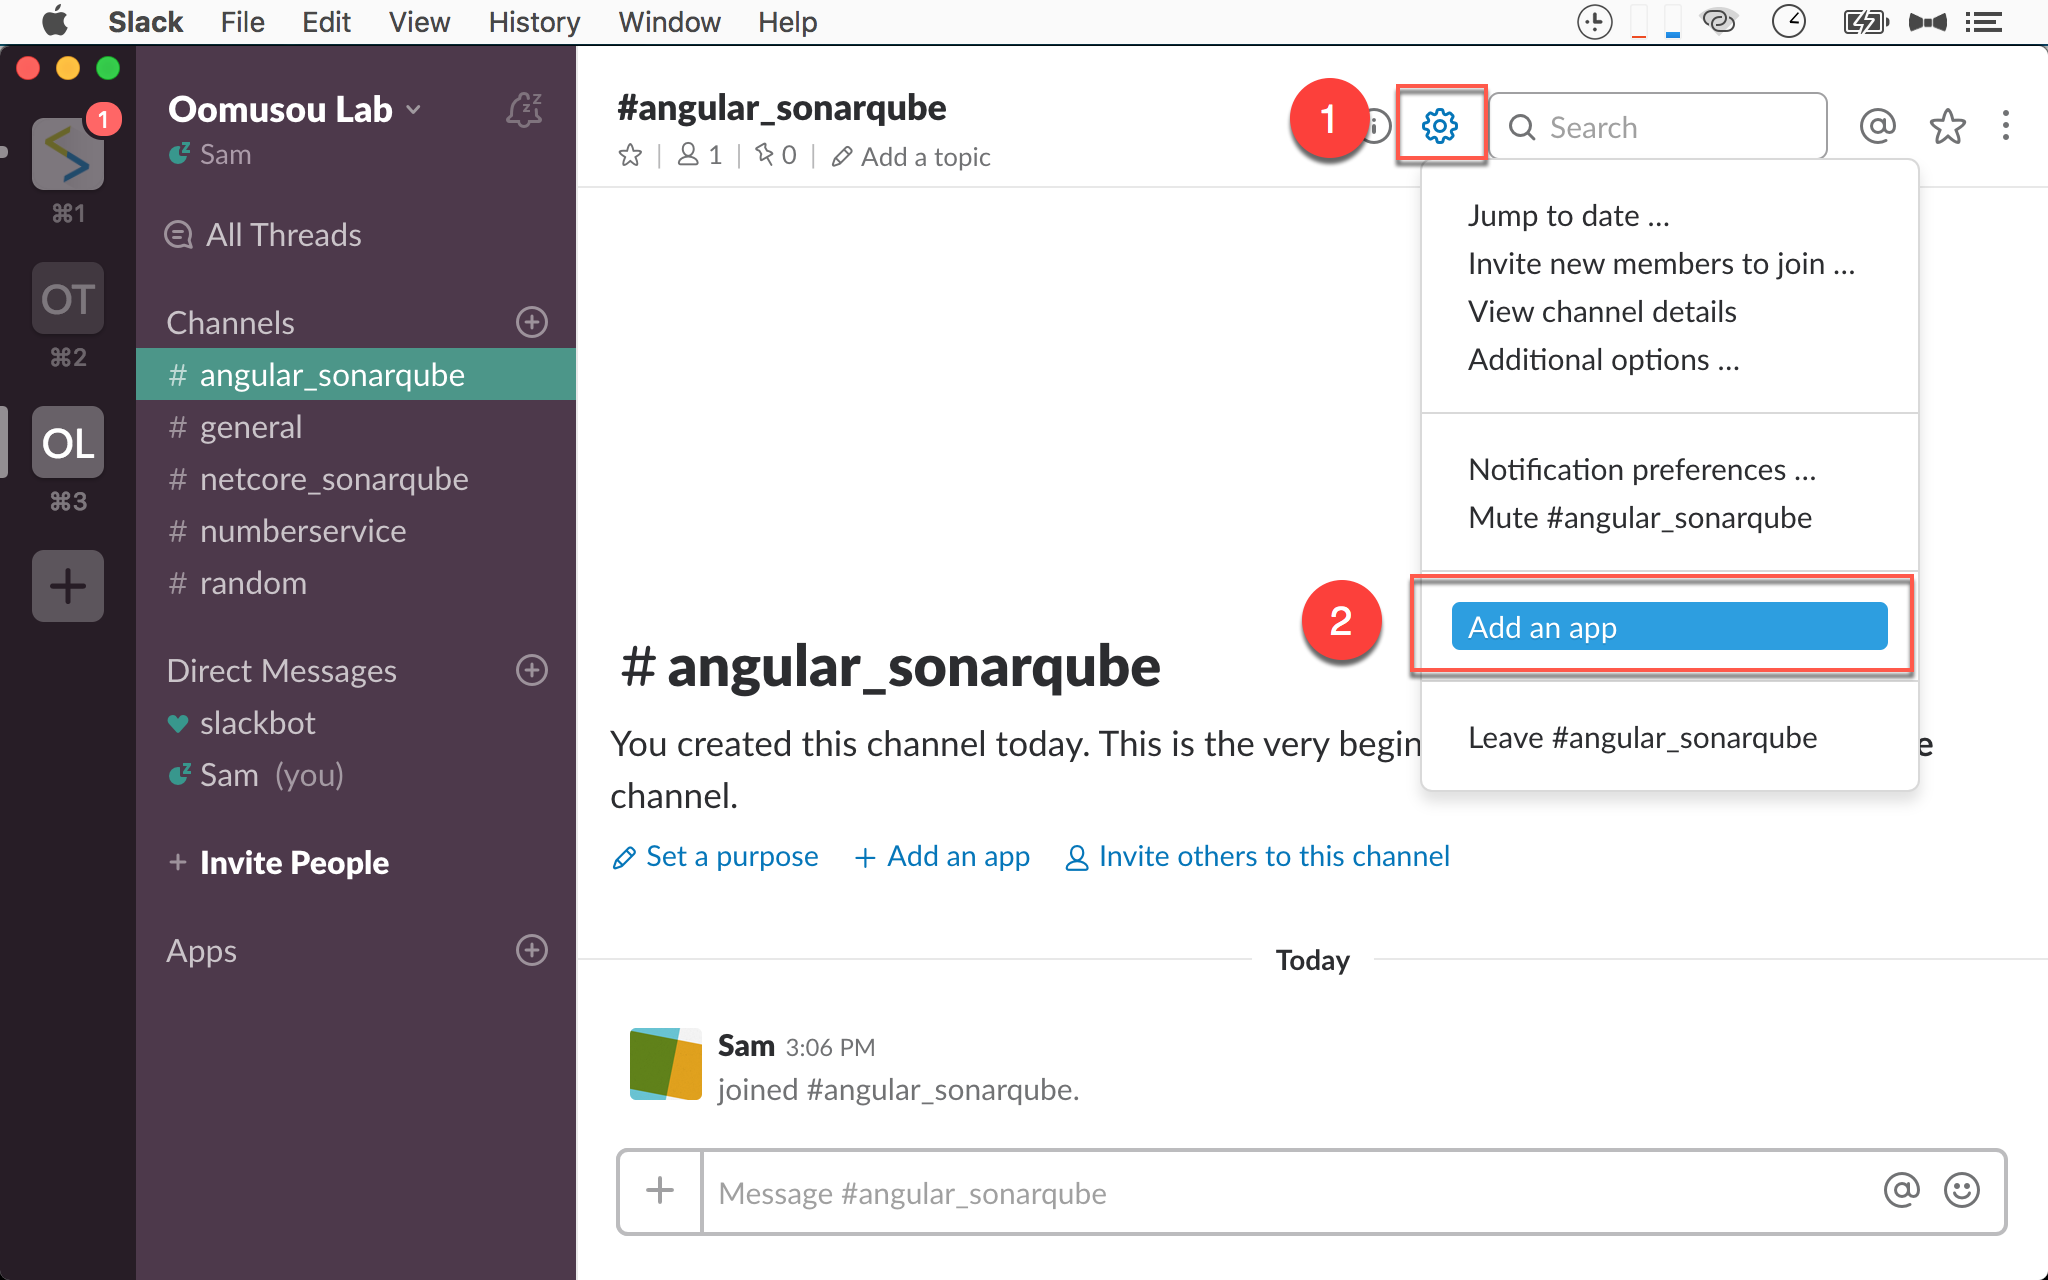
- 選擇右上方的
option - 選擇
Add an app
新增 Incoming WebHooks
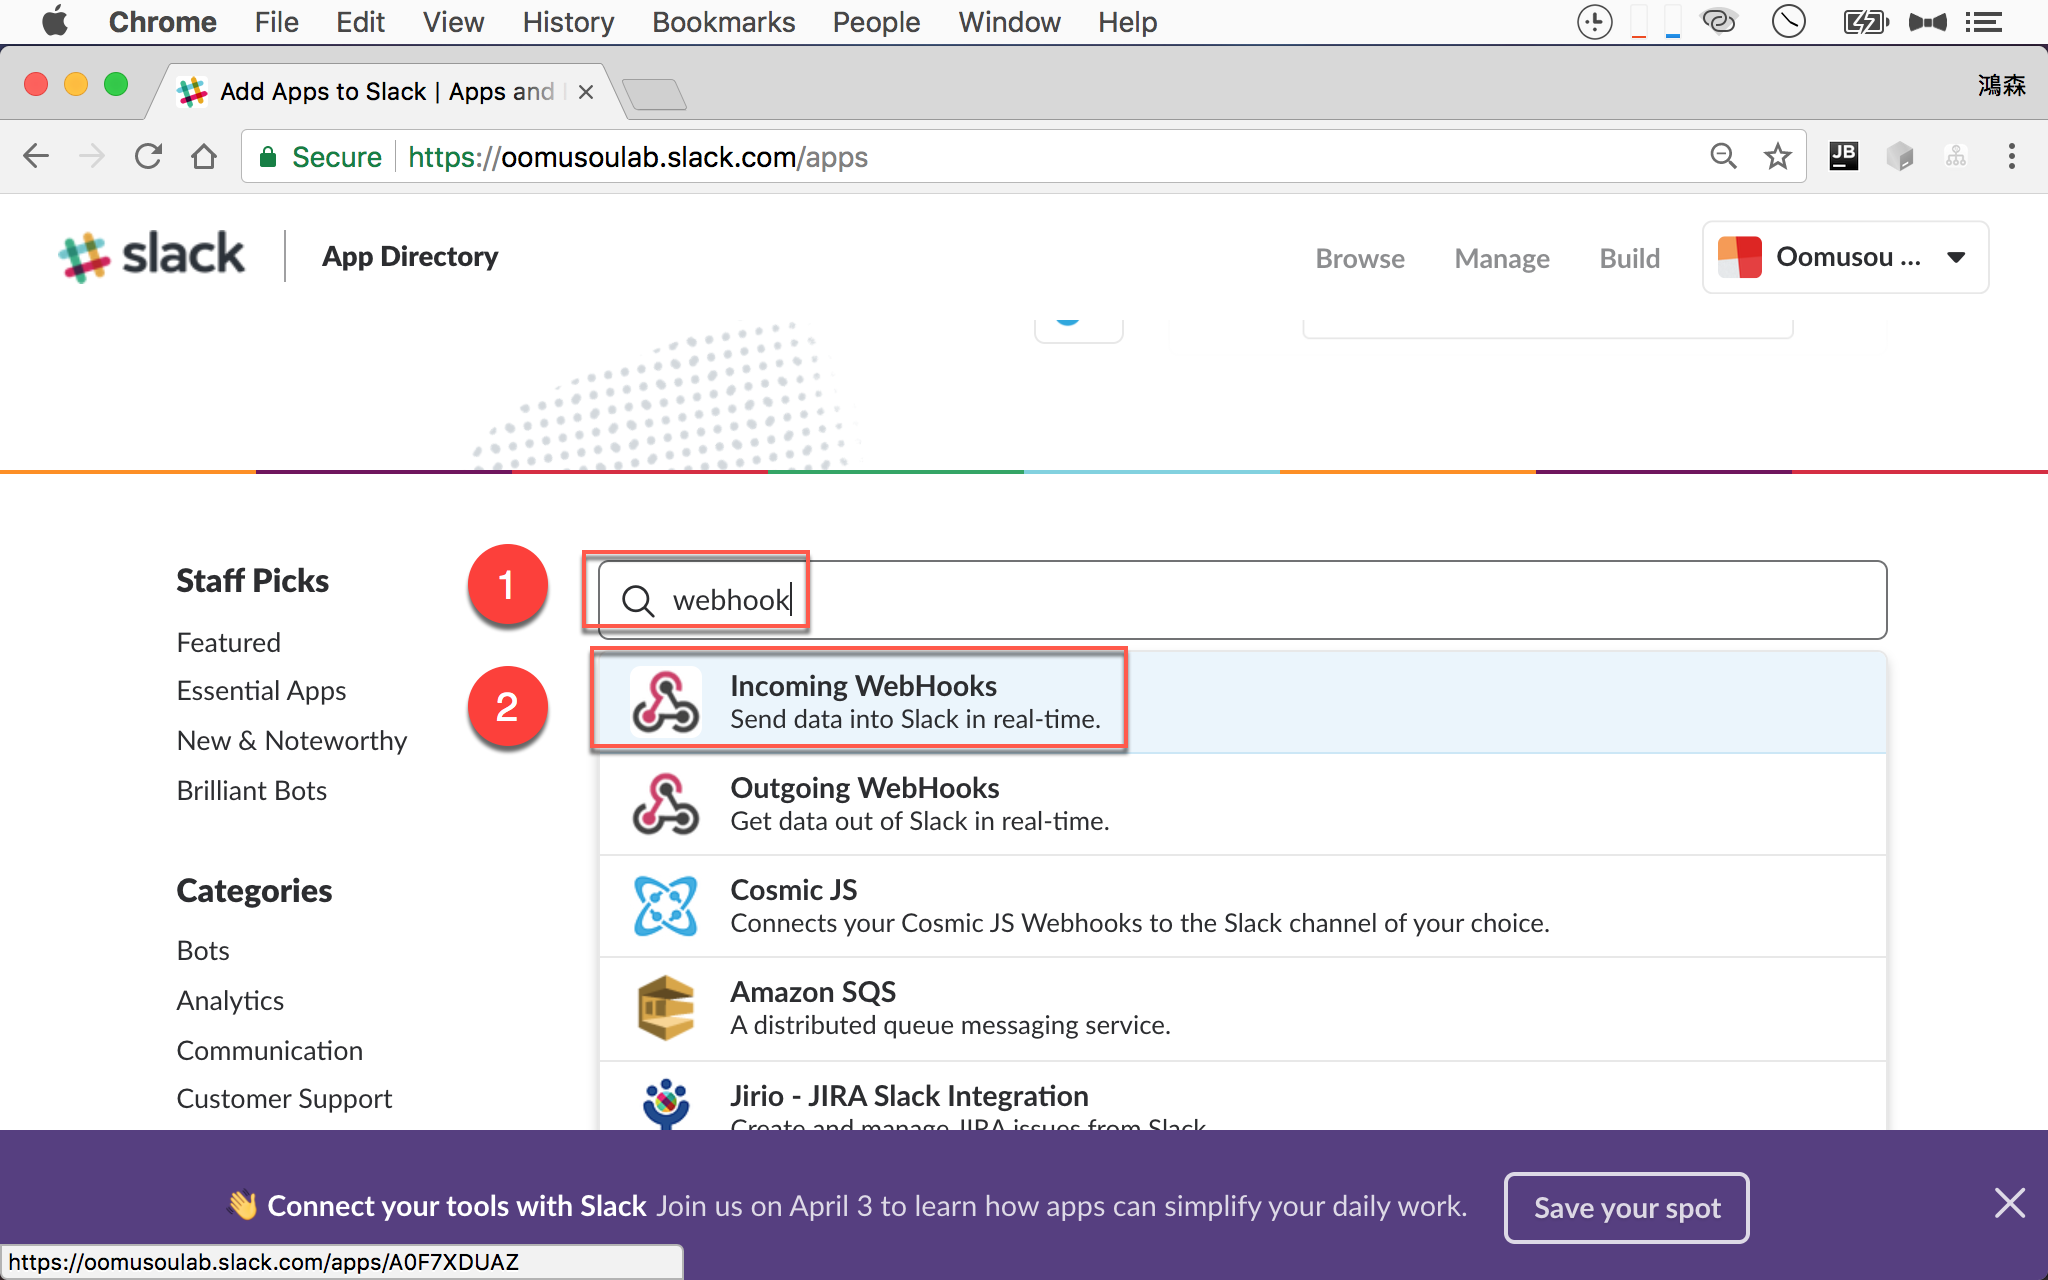
Slack 將開啟瀏覽器
- 稍微往下捲輸入
webhook - 選擇
Incoming WebHooks
新增 Configuration
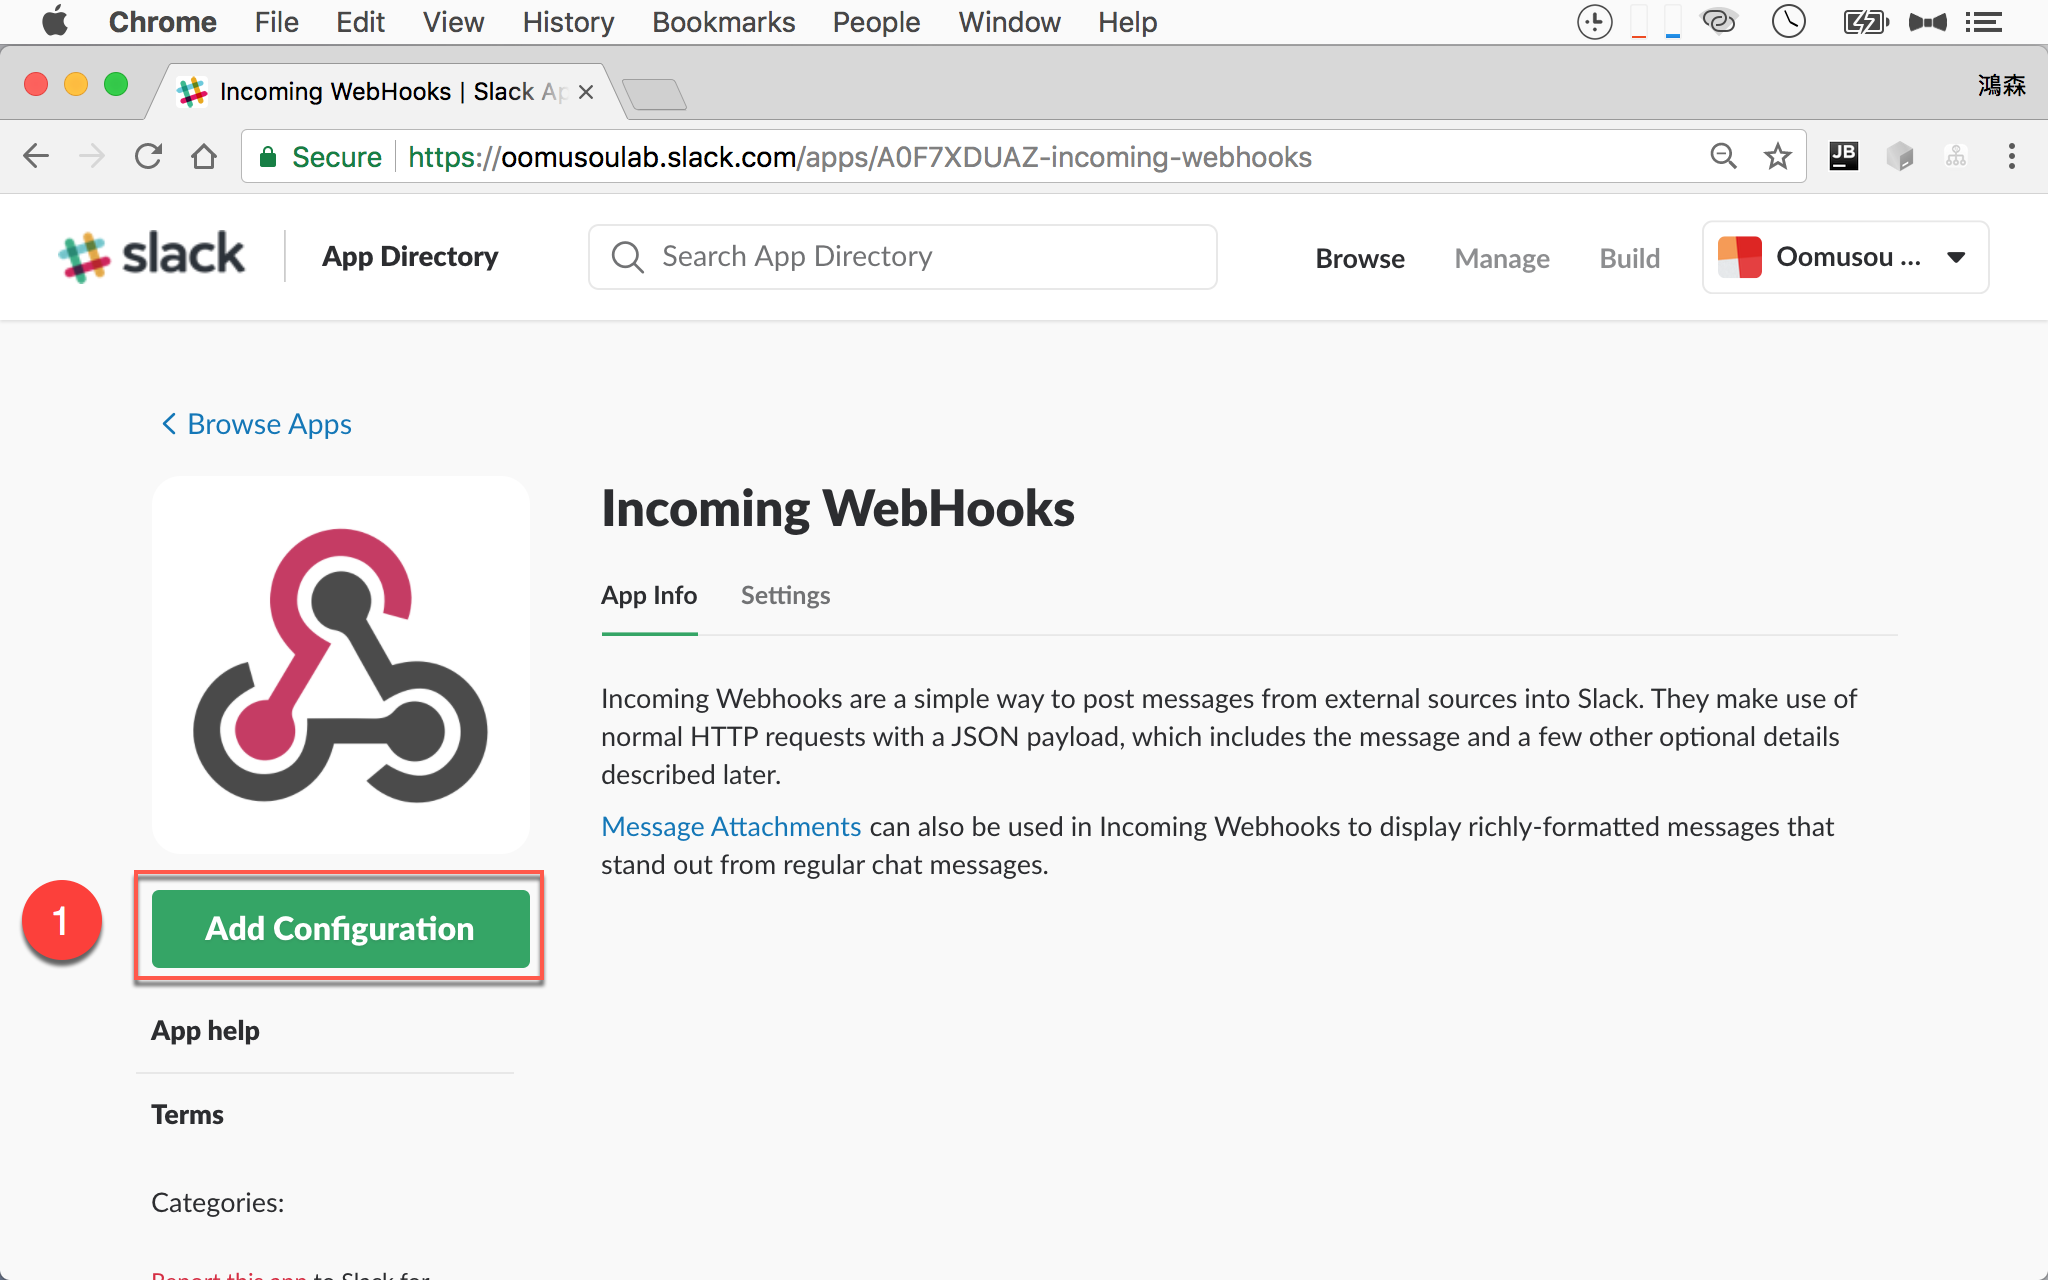
- 按
Add Configuration加入 Jenkins CI
新增 Integration
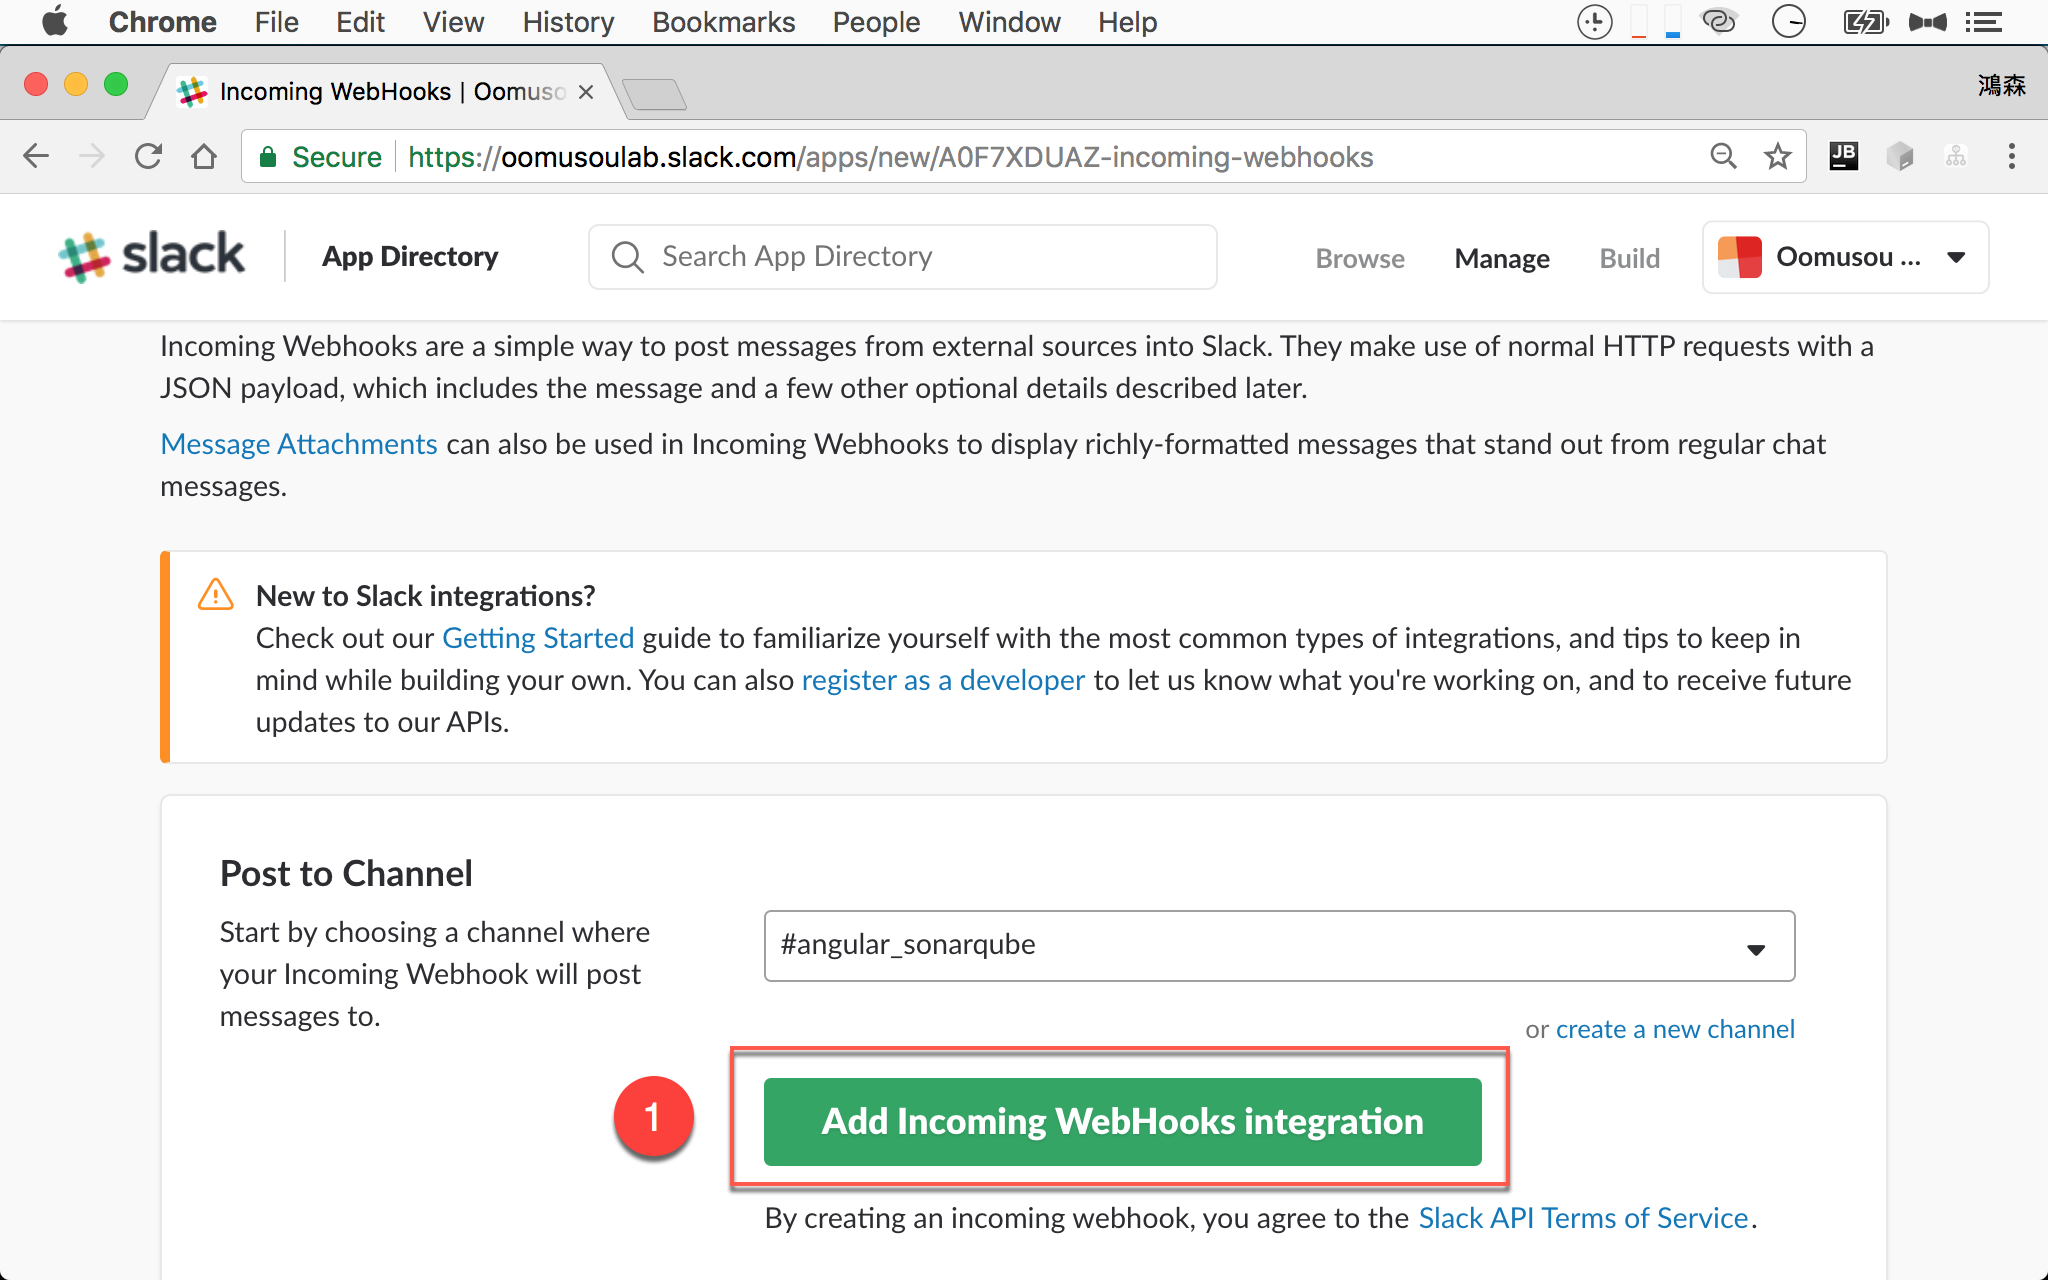
- 按
Add Incoming WebHooks Integration正式加入整合
Slack 設定完成
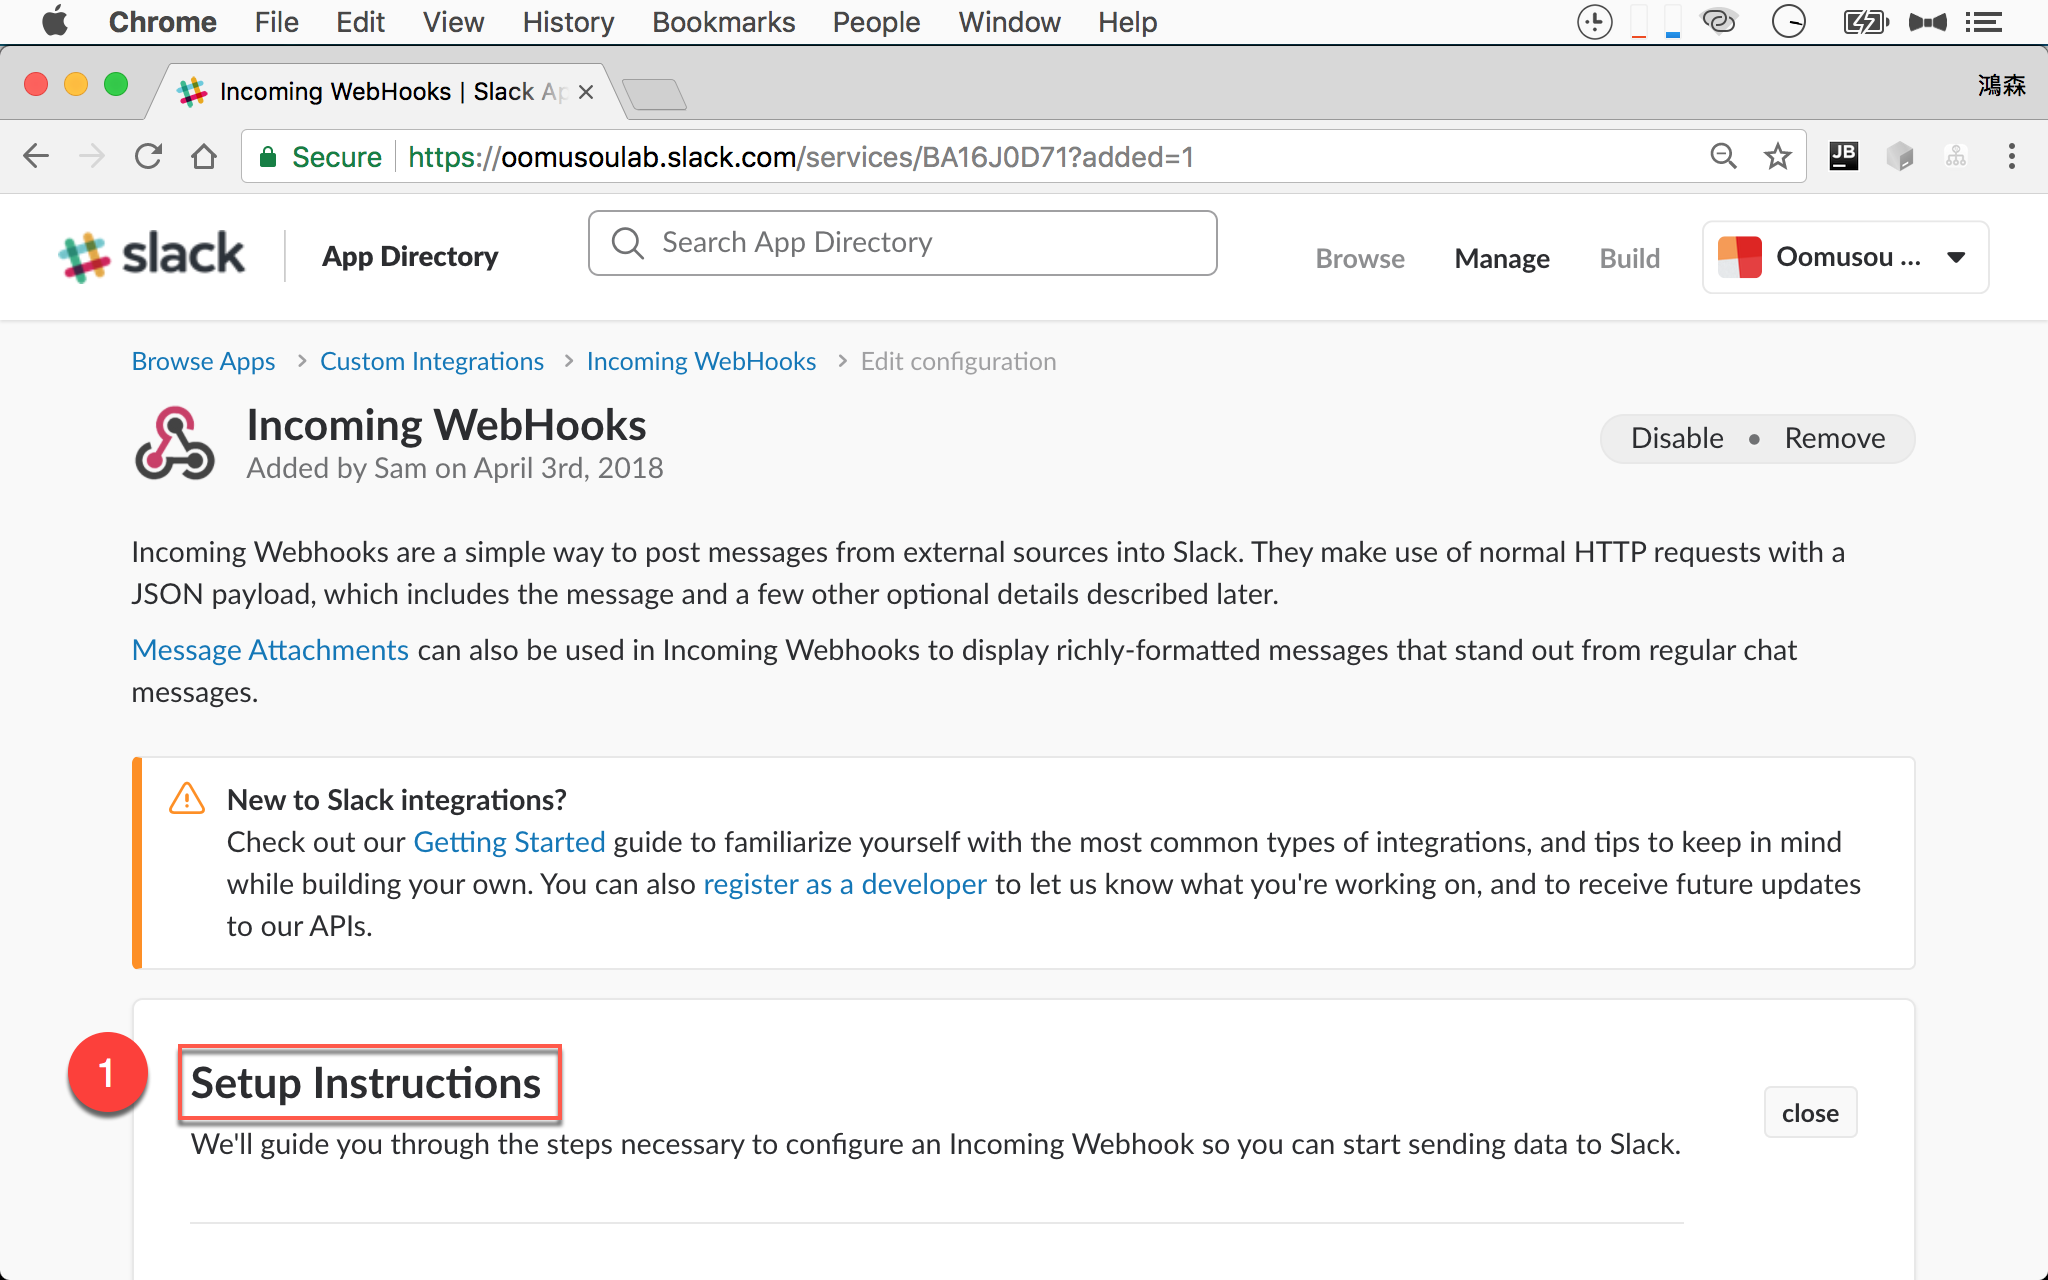
- 介紹 SonarQube 設定流程
Slack 部分已經設定完成,接下來是 SonarQube 的設定
Slack 網頁先不要關閉,稍後會用到
SonarQube Slack Notifier
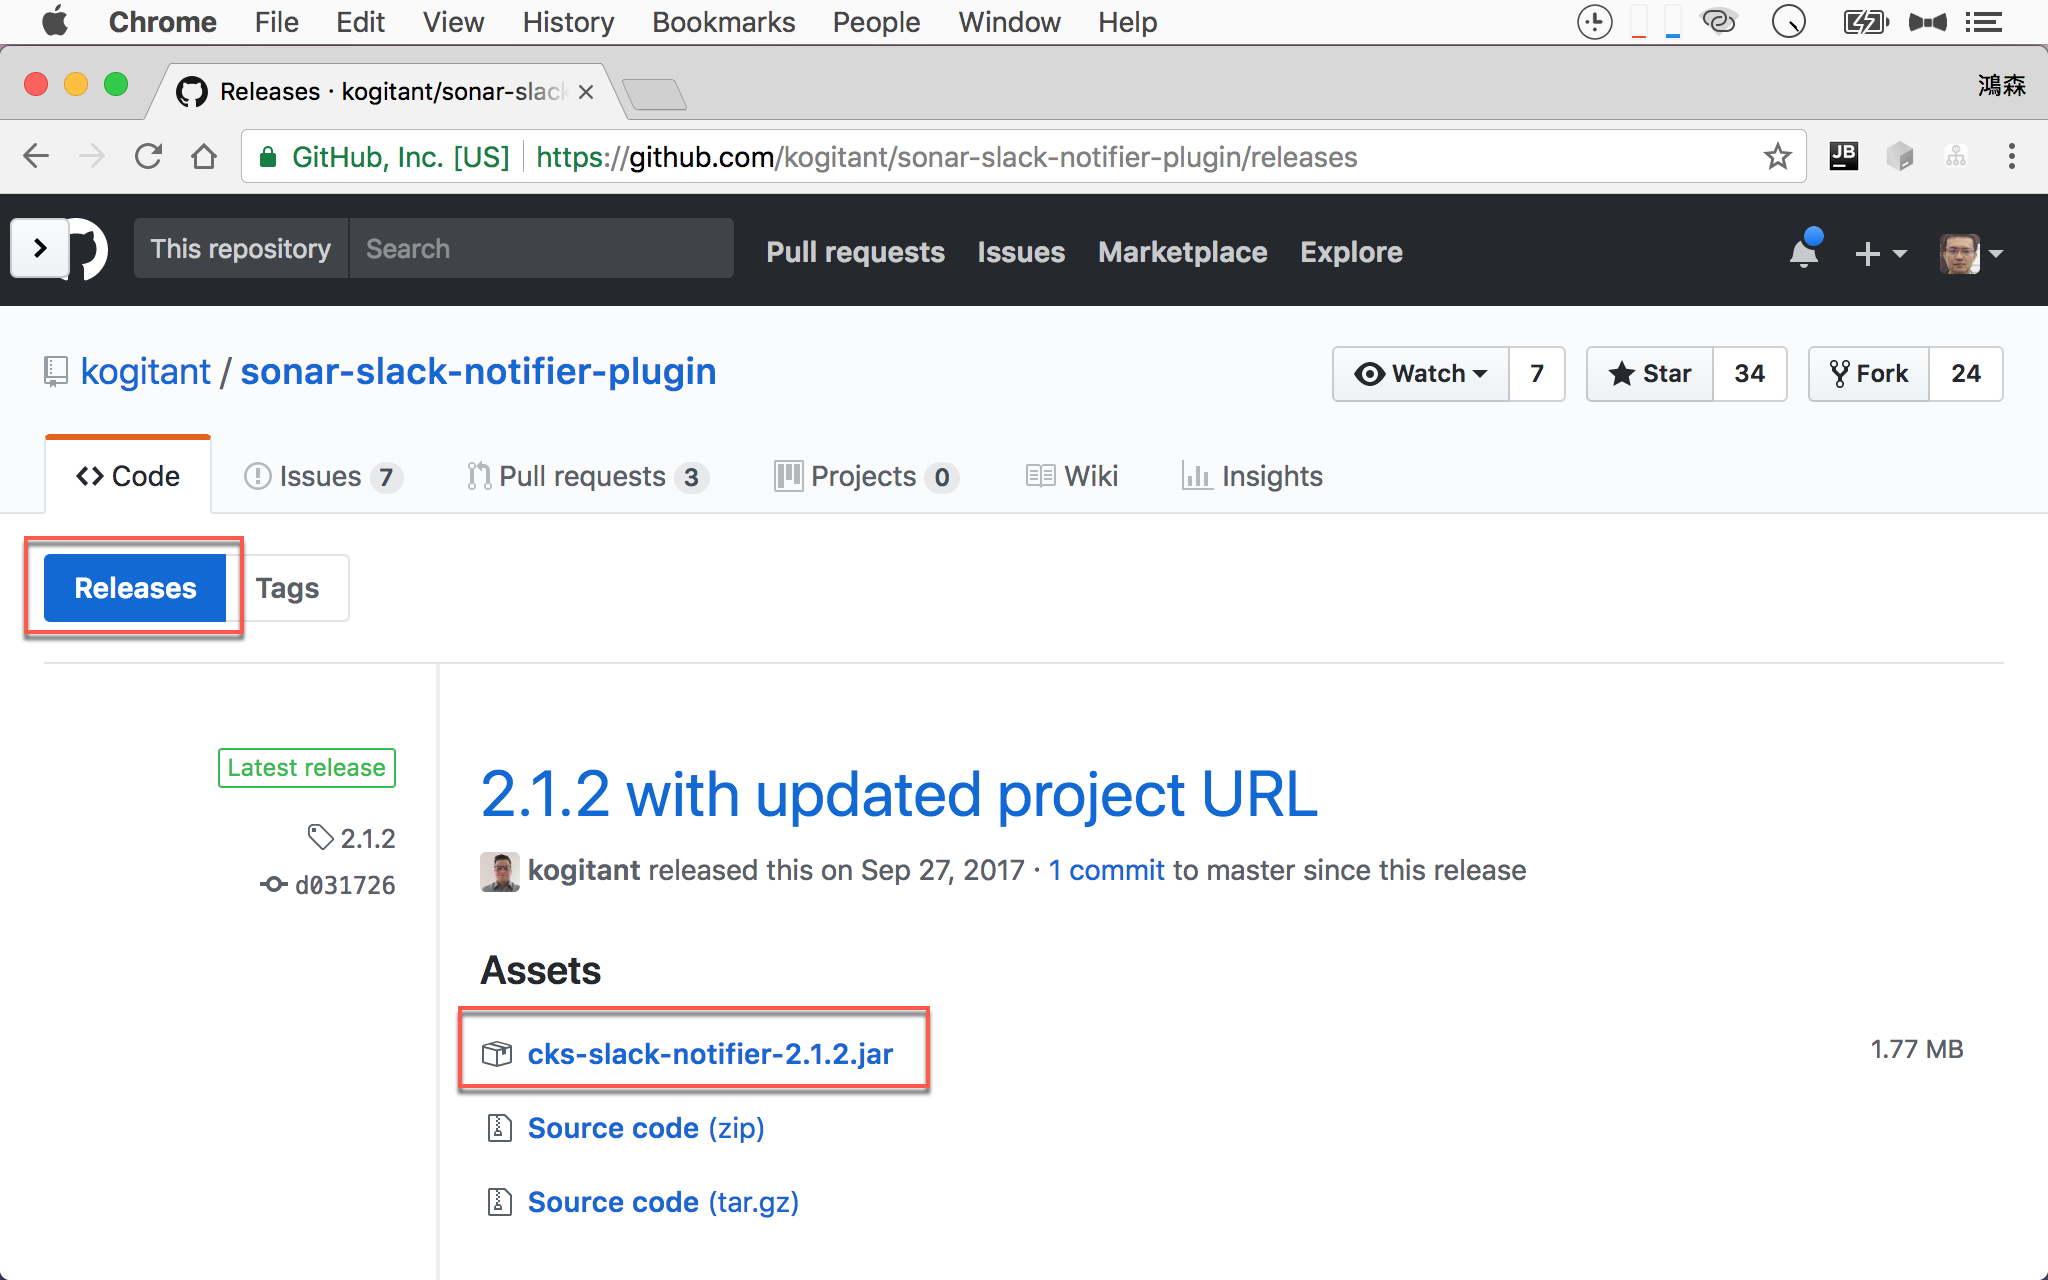
SonarQube 預設並沒有辦法直接對 Slack 發出 notification,必須另外安裝 CKS Sonar Slack Notifier Plugin。
下載 Plugin
安裝 Plugin
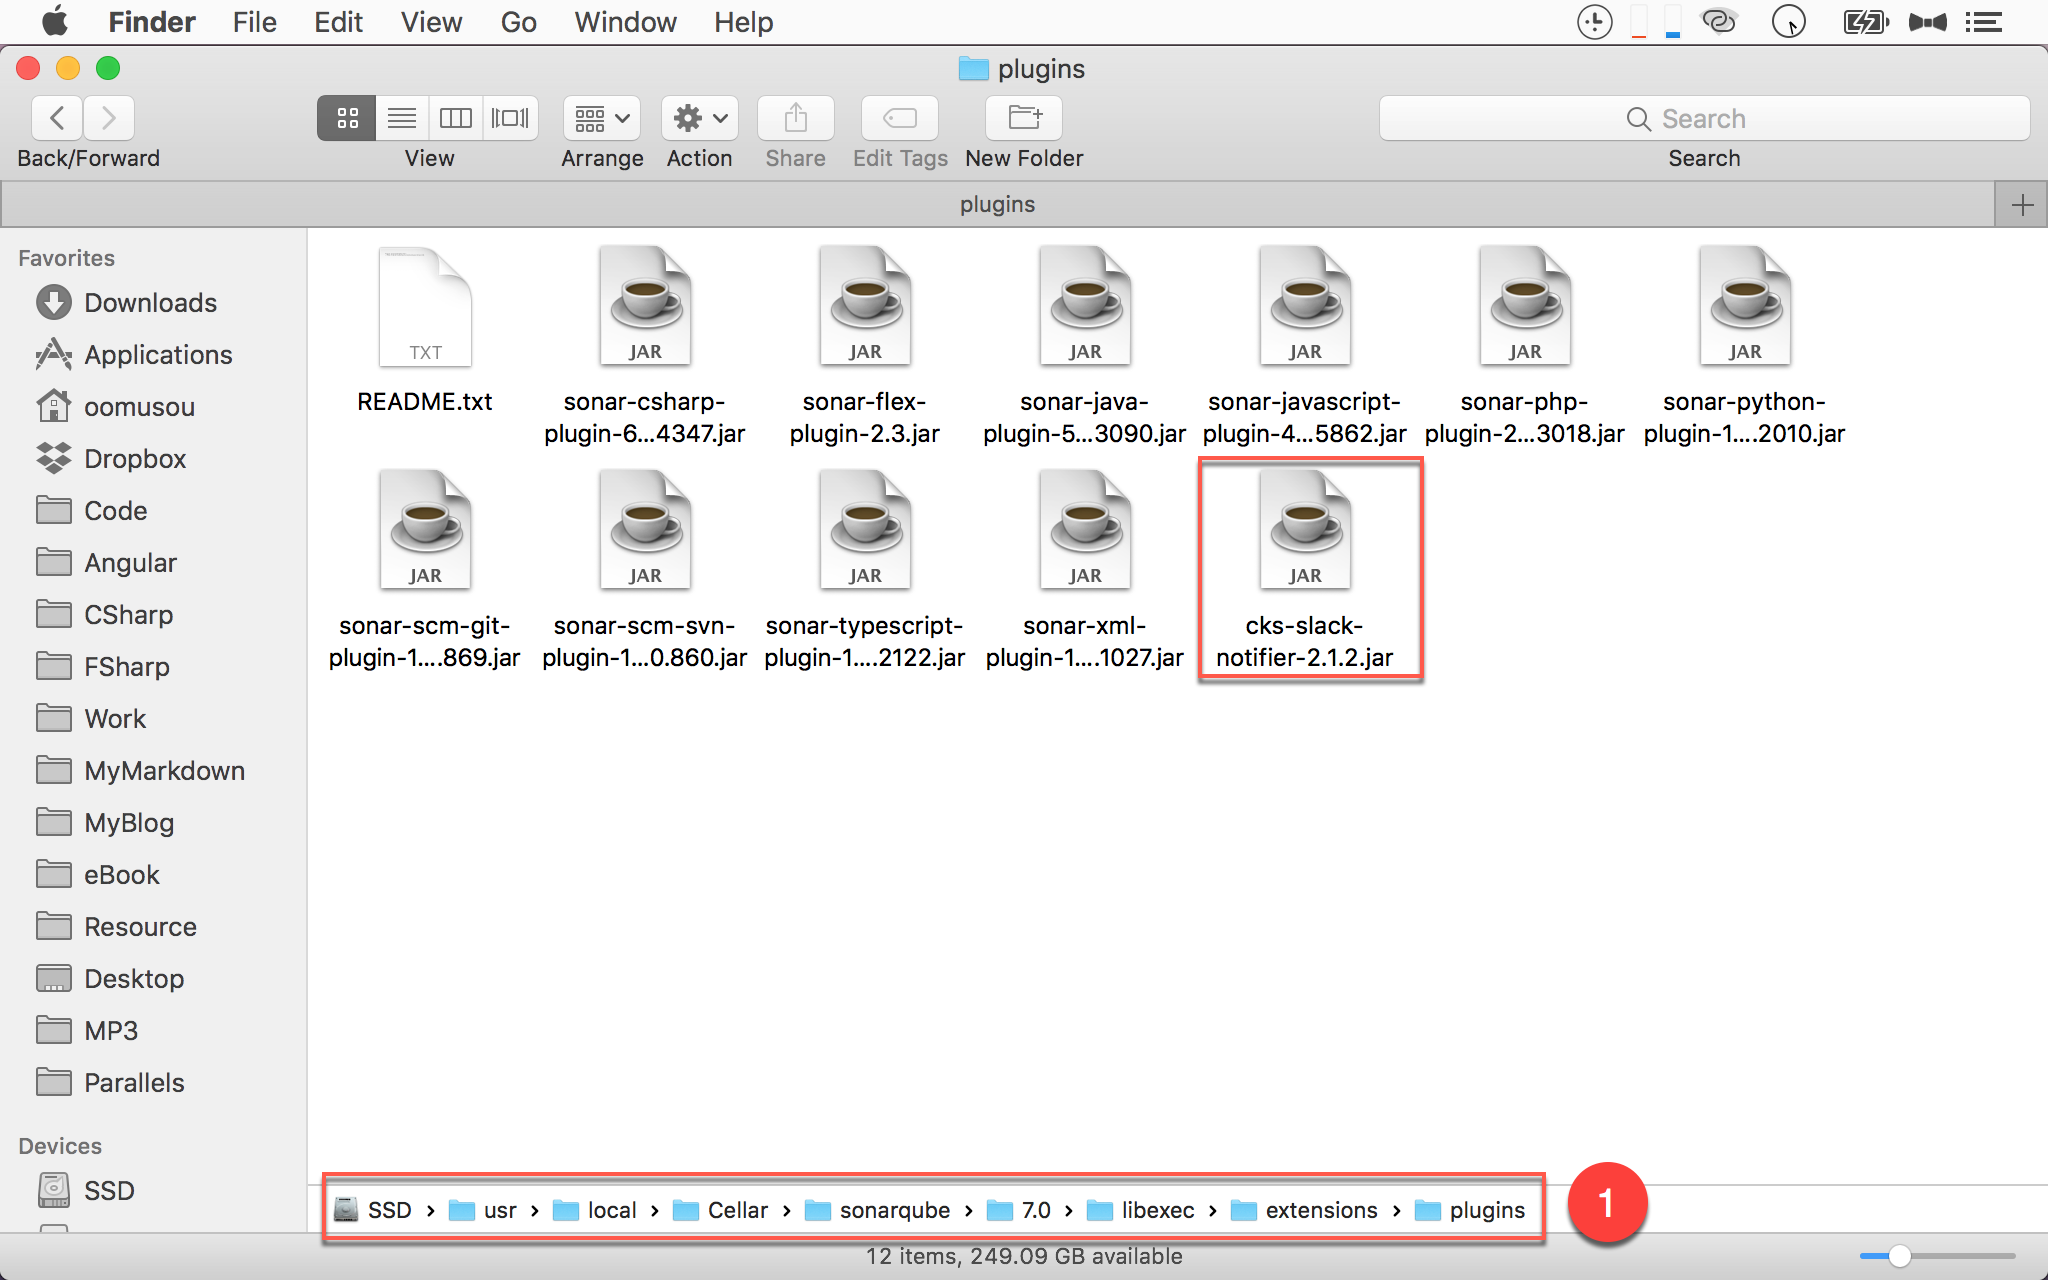
將 cks-slack-notifier-2.1.2.jar 複製到 /usr/local/Cellar/sonarqube/7.0/libexec/extensions/plugins 目錄下。
因為 Homebrew 會將 app 安裝在
/usr/local/Cellar/目錄下
設定 Plugin
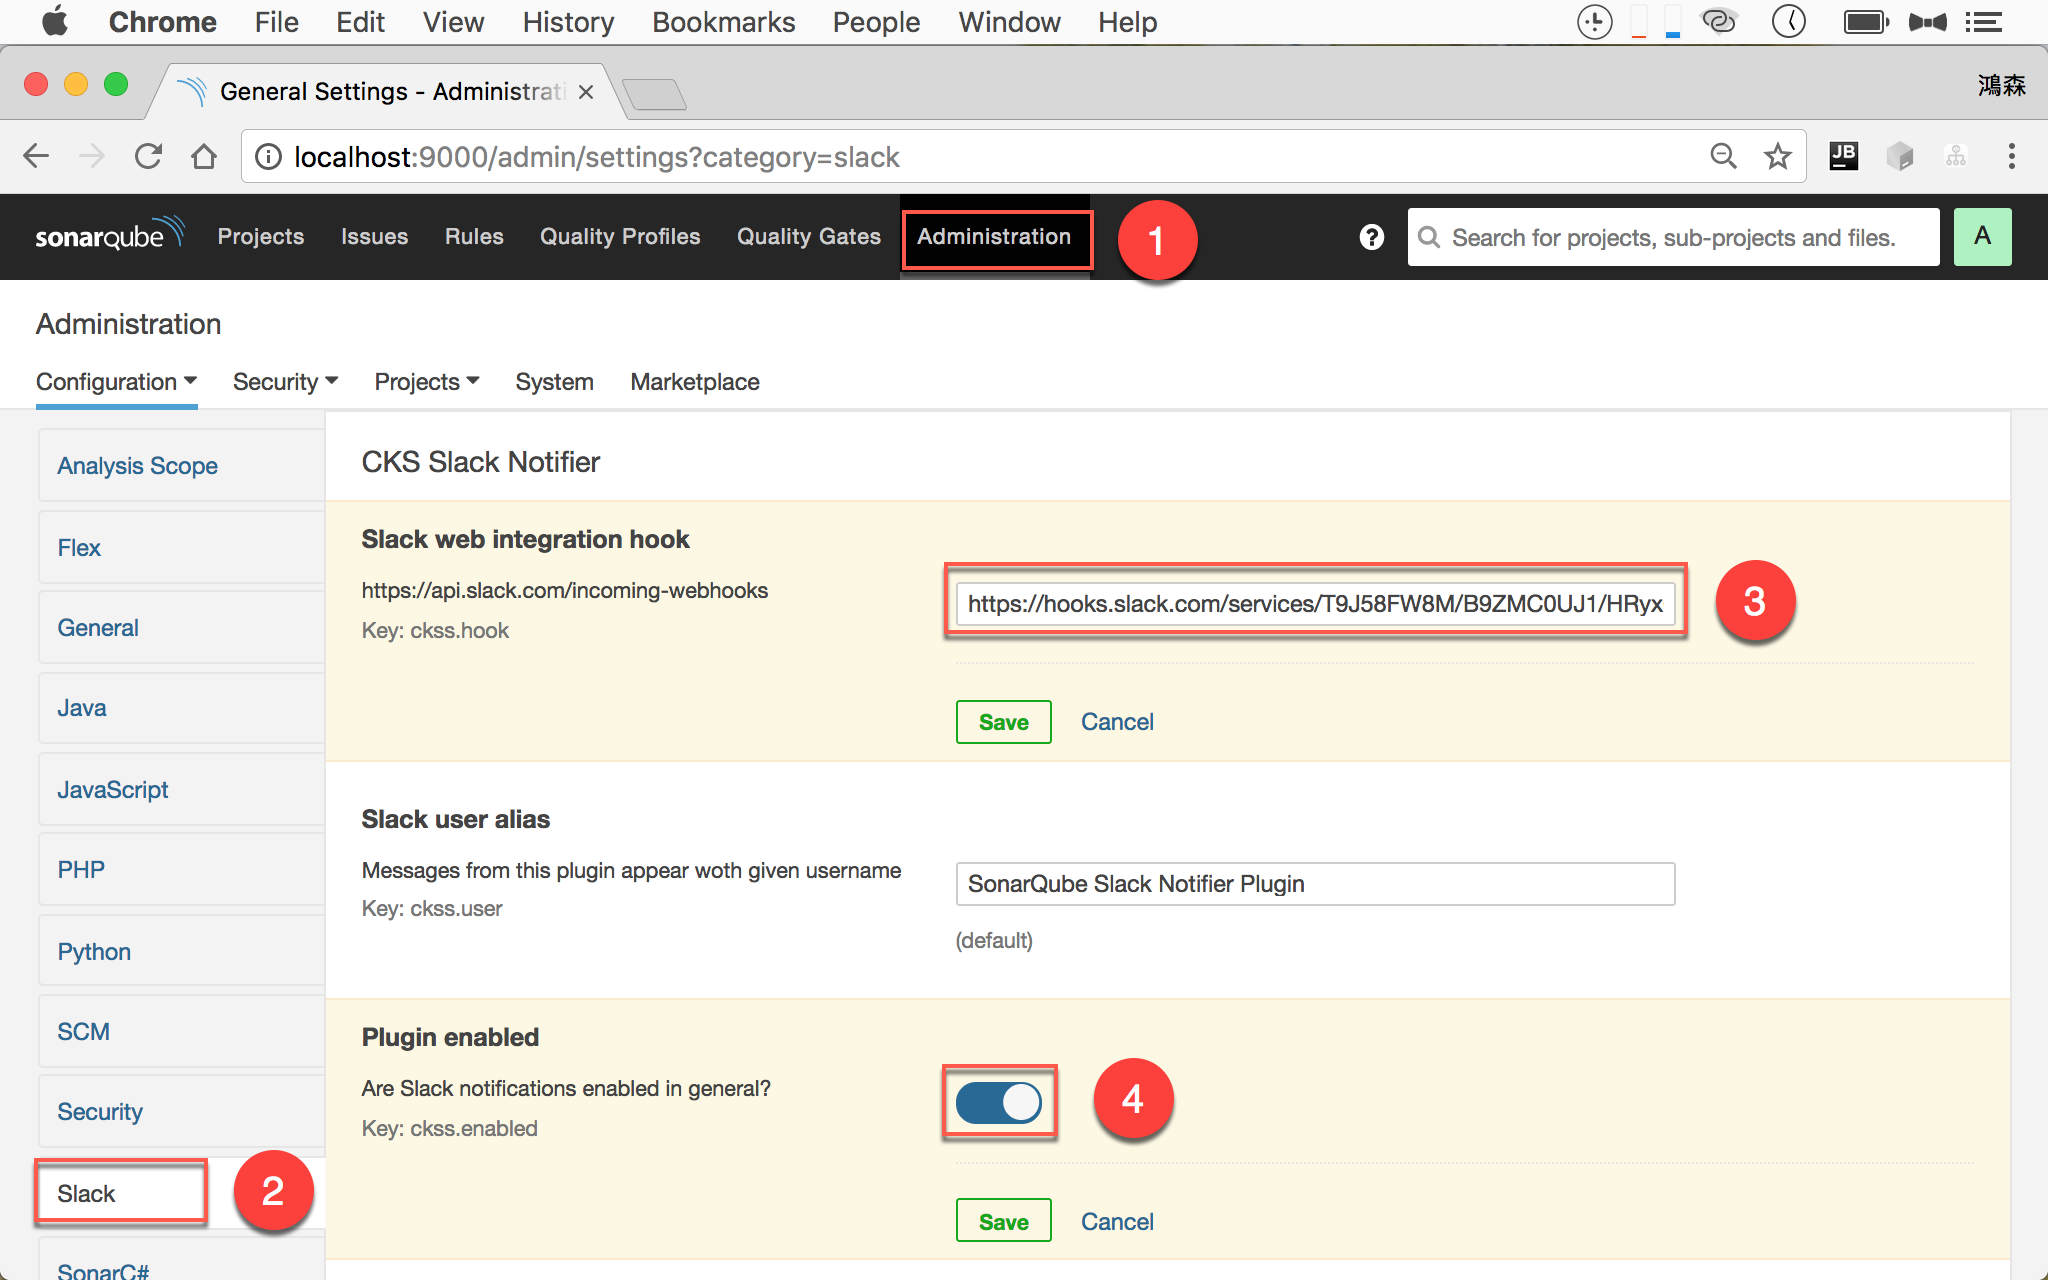
重新啟動 SonarQube:
Administration -> Slack
- 在
Administration下會發現多了Slack - 選擇
Slack - Slack web integration hook:設定
Slack web integration hook - Plugin enabled:
enable
Q:
Slack web integration hook該填什麼呢?
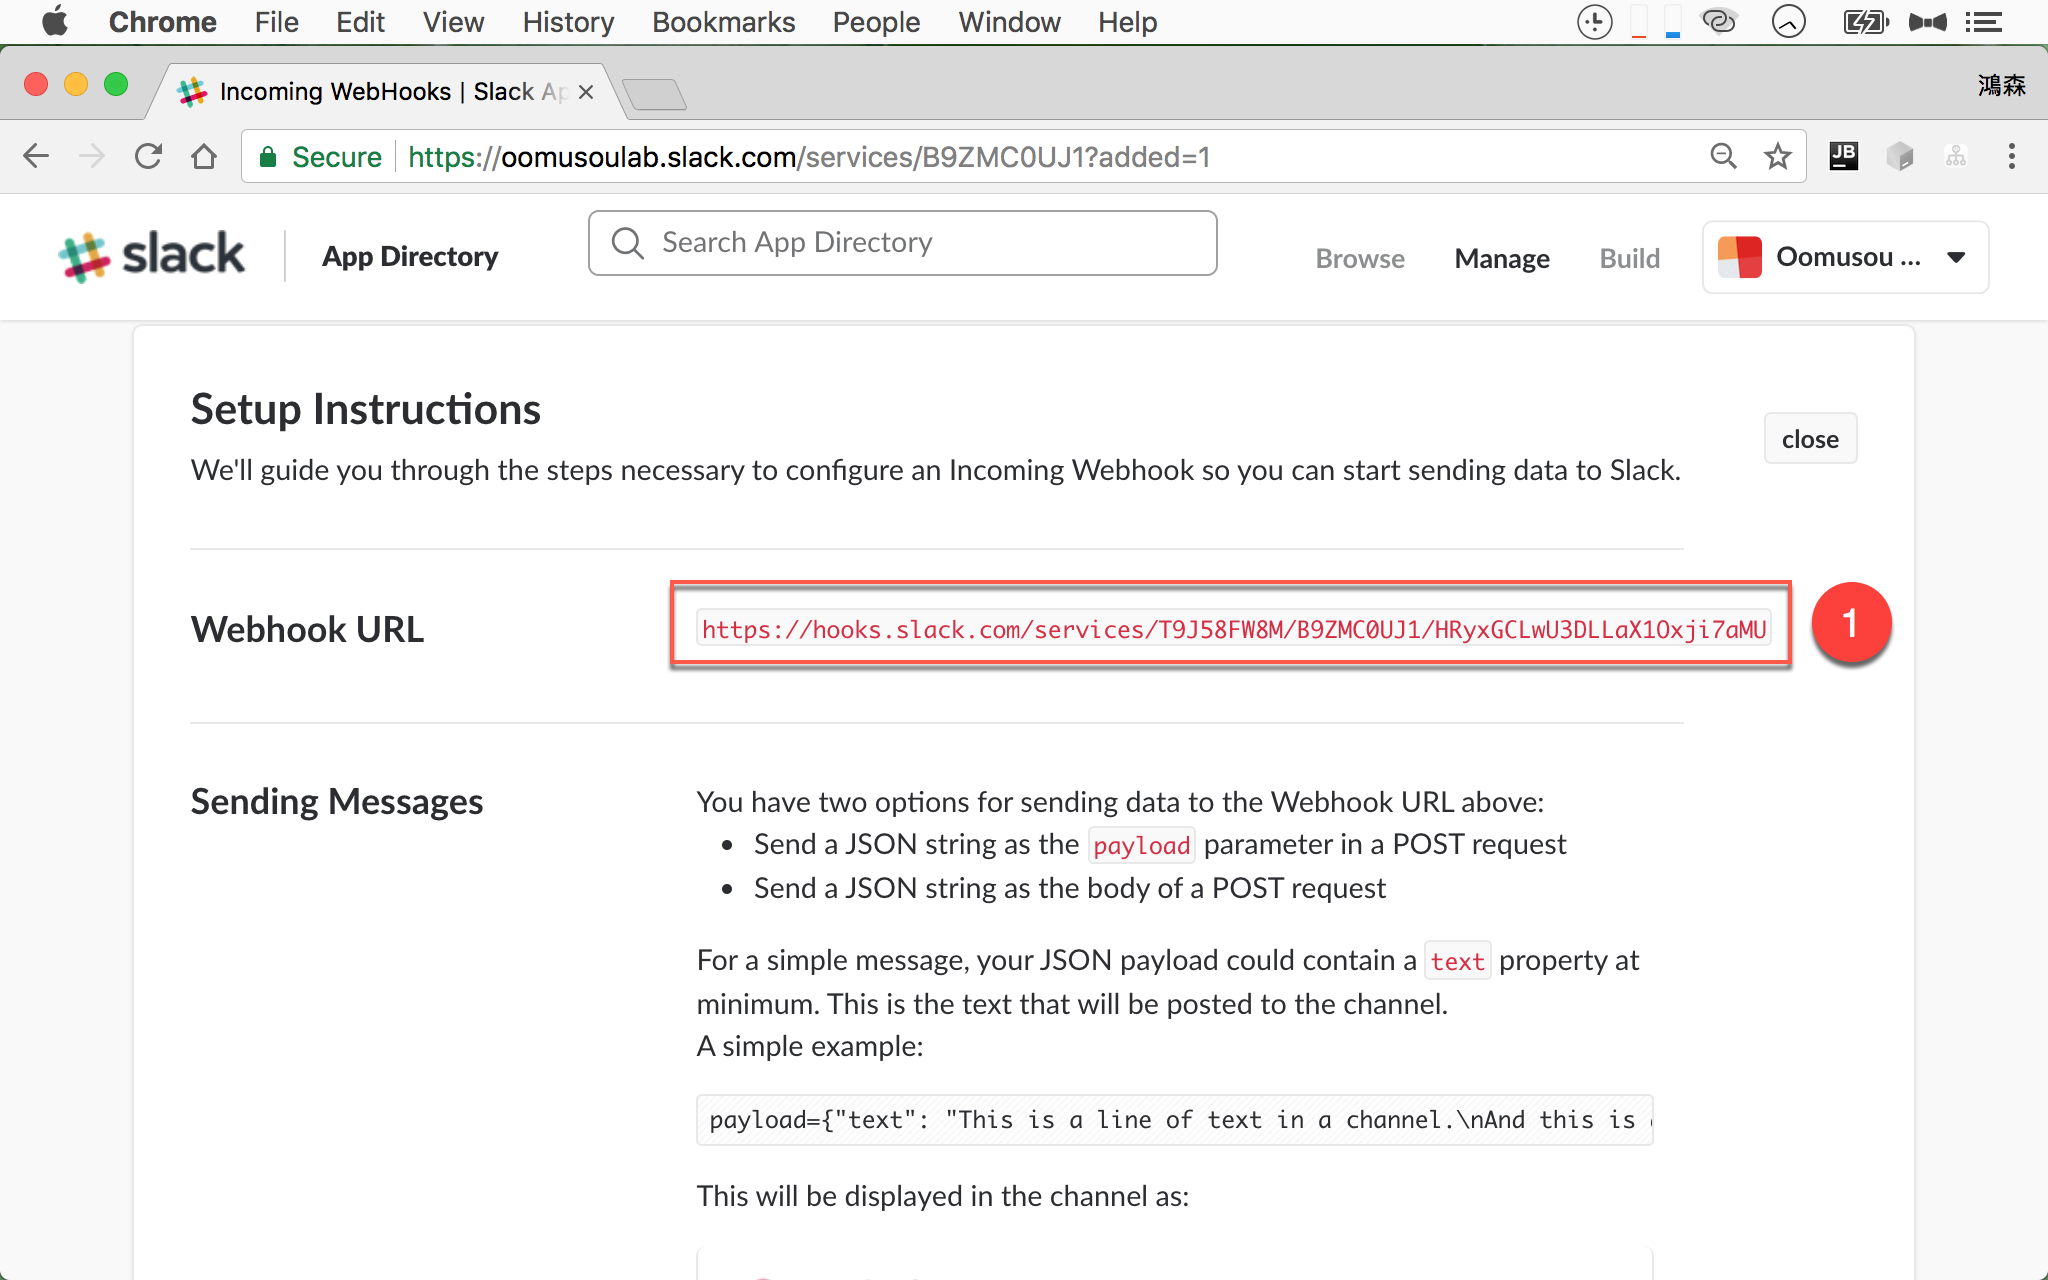
回到 Slack 最後的網頁往下捲到 Webhook URL
- 將
Webhook URL的一長串 URL 複製,貼到 SonarQube 的Slack web integration hook
最後按 Save 存檔。
設定 Project 與 Channel
雖然已經設定了 SonarQube 的 Webhook URL,但還要繼續設定 project 與所對應的 Slack channel,才會正式開啟 notification。
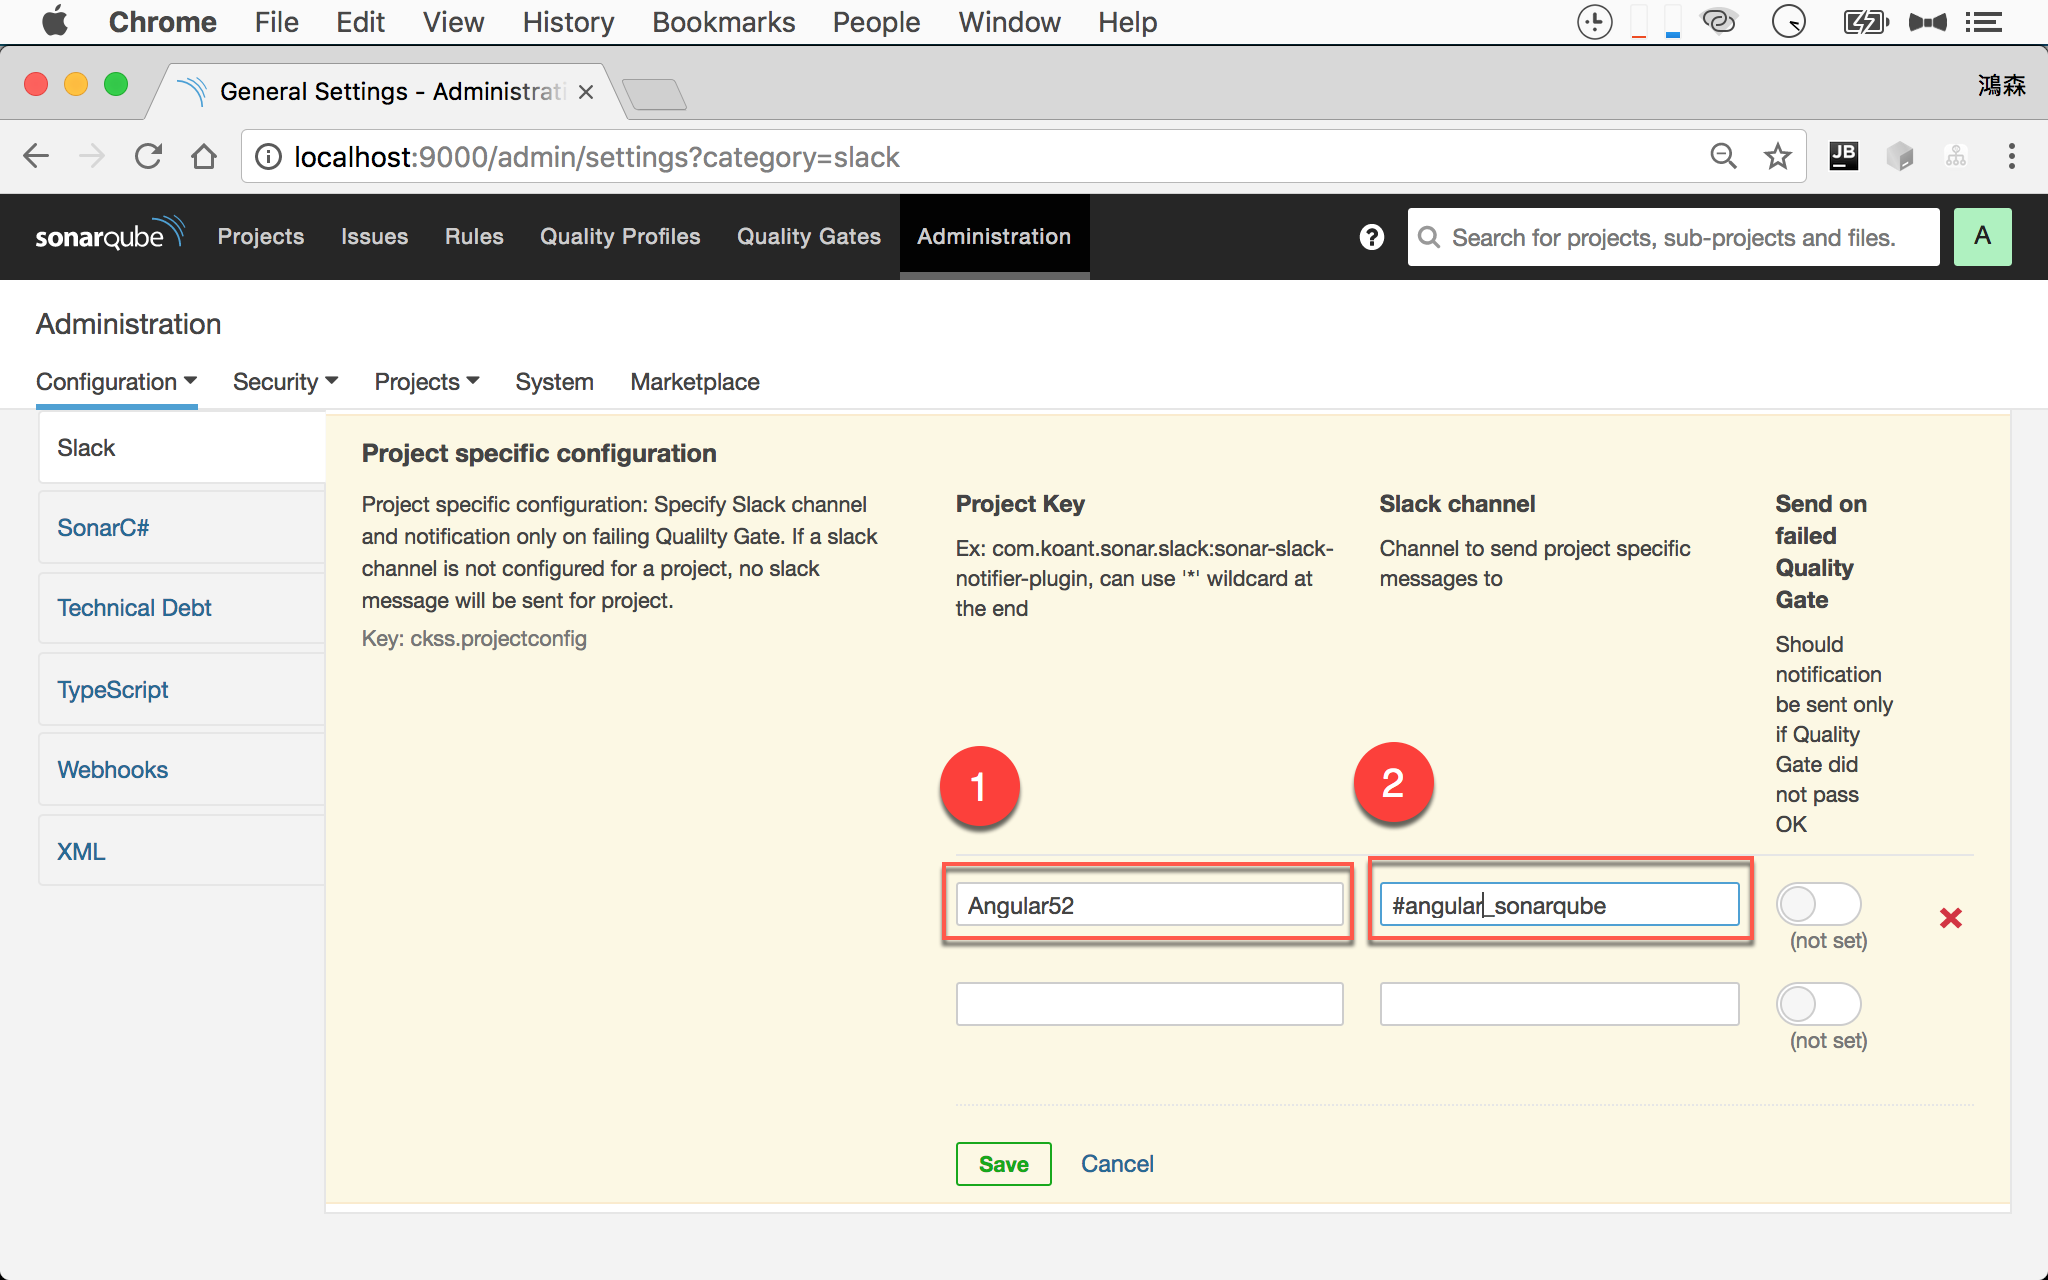
- Project Key: 設定 SonarQube 的 project key
- Slack channel:設定所要通知 Slack channel
最後按 Save 存檔。
測試 Plugin
1 | ~/MyProject $ sonar-scanner -Dsonar.projectKey=Angular52 -Dsonar.sources=. -Dsonar.projectName=Angular52 -Dsonar.projectVersion=1.0 |
重新執行 sonar-scanner。
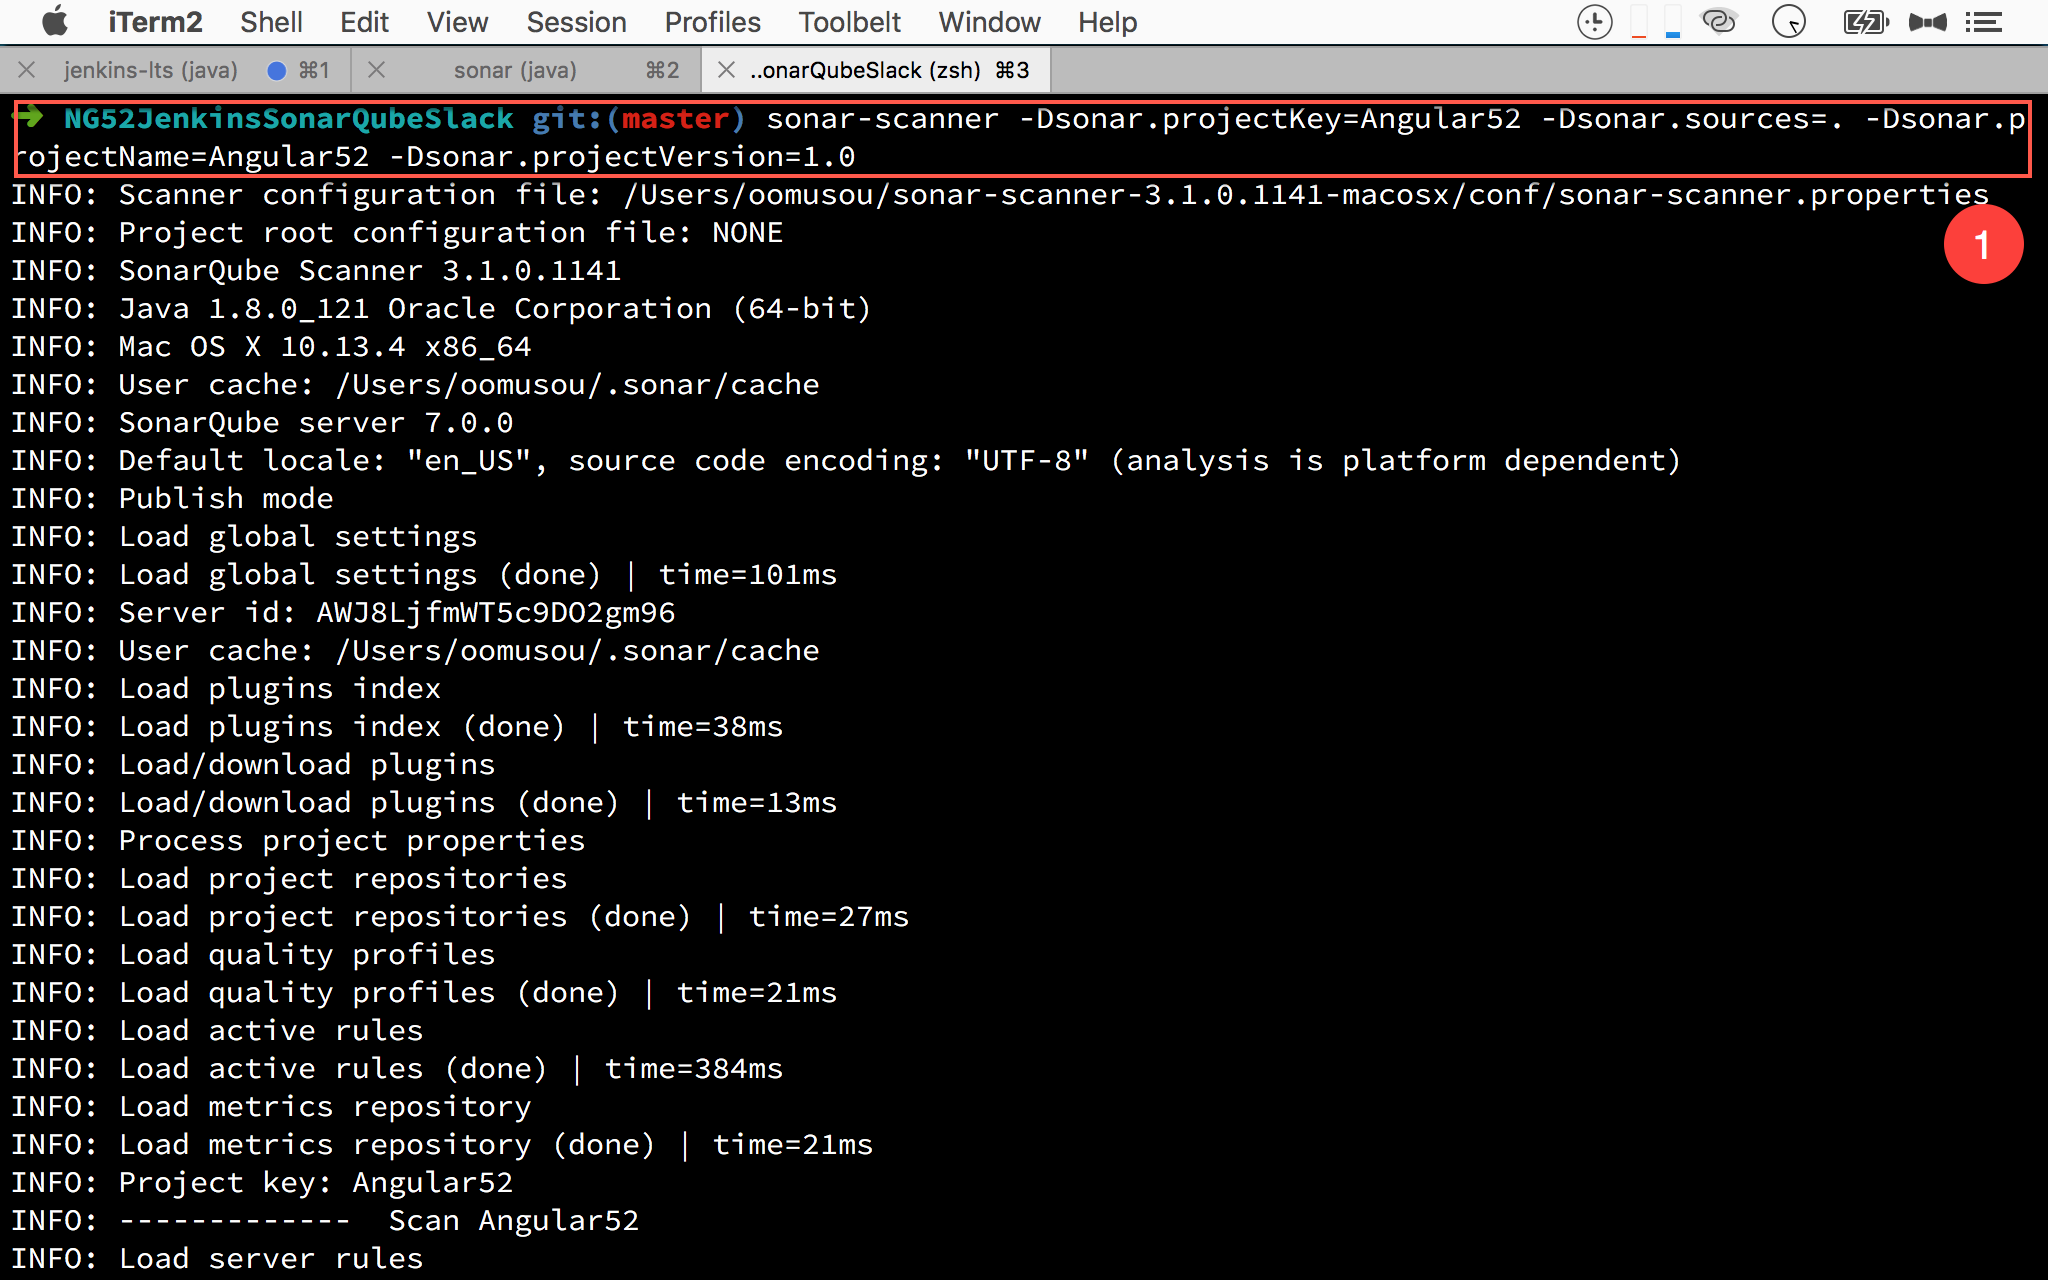
- 重新在專案目錄下輸入
sonar-scanner檢查 TypeScript
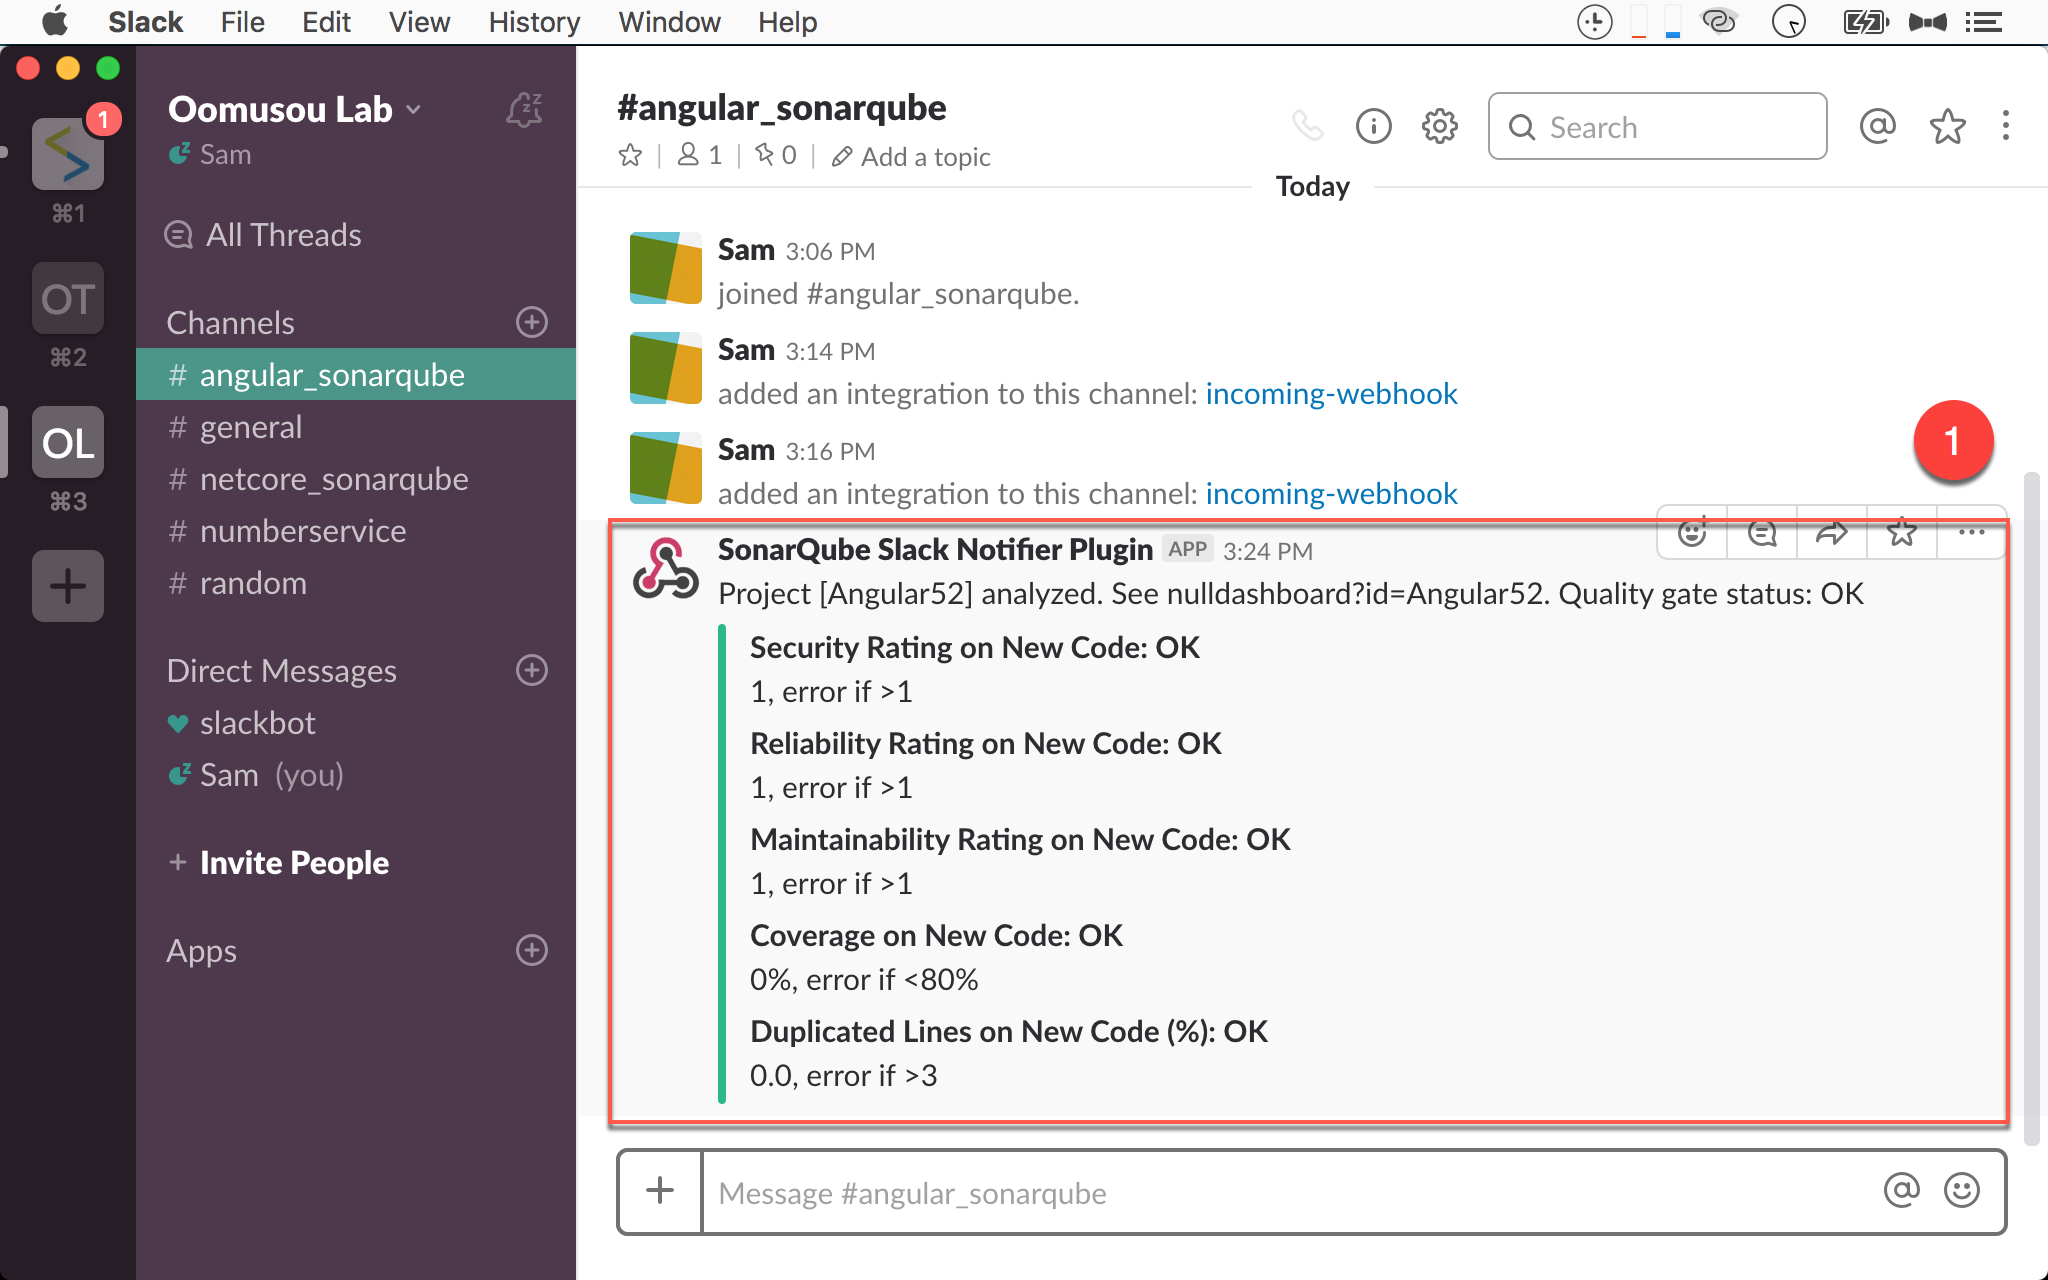
- Slack 會收到 SonarQube 檢查的結果
實務上 SonarQube 還會與其他 CI server 合作,接下來將以 Jenkins 為例,介紹如何以 Jenkins 自動化 SonarQube。
Jenkins
安裝 Jenkins
1 | $ brew install jenkins-lts |
使用 Homebrew 安裝 Jenkins。
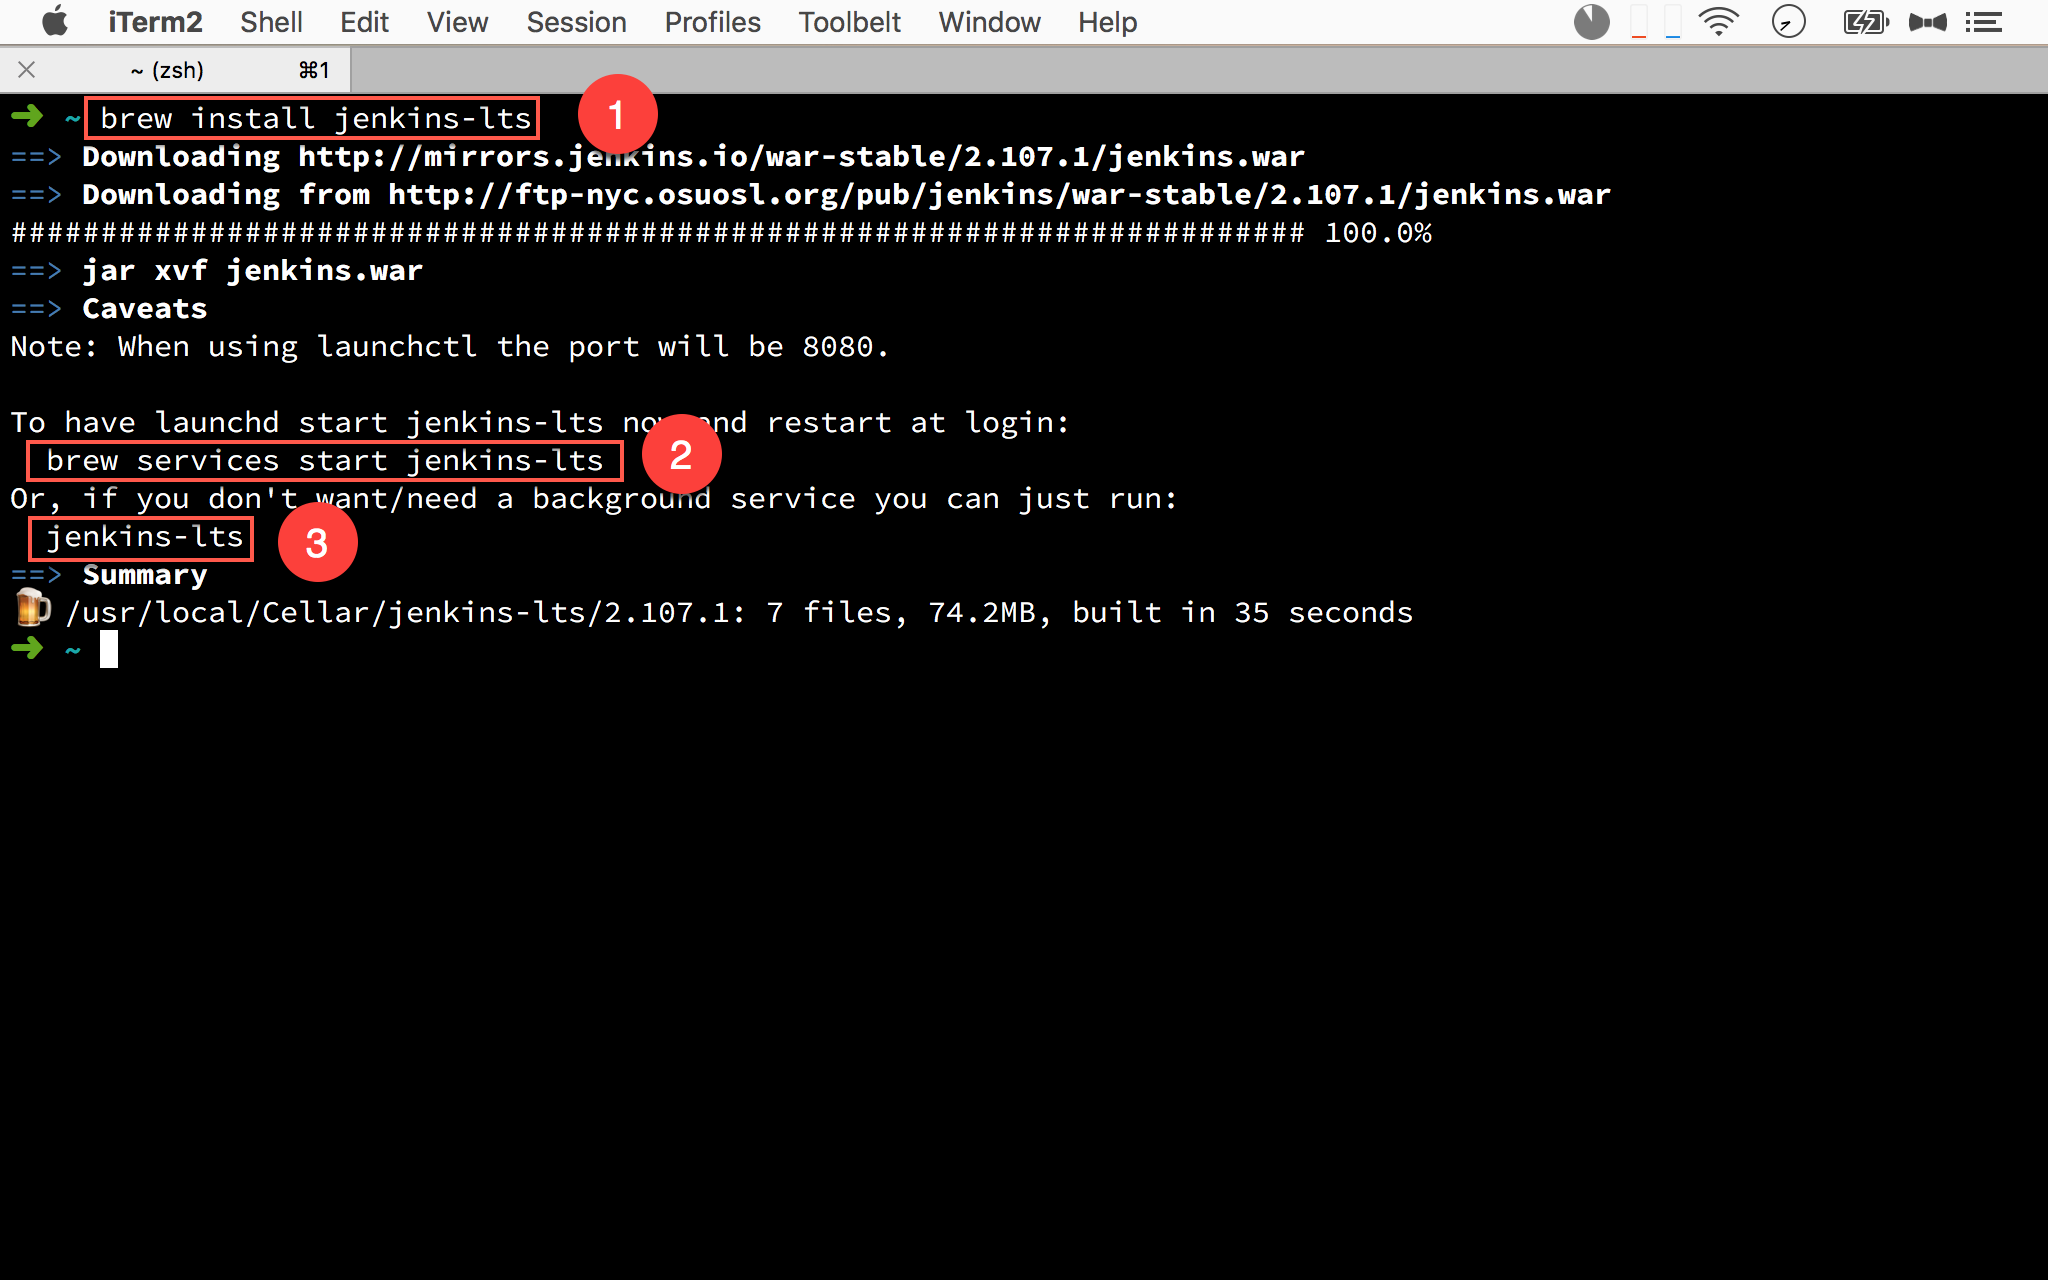
- 輸入
brew install jenkins-lts安裝 - 若想在每次 Mac 重開機就自動執行 Jenkins,輸入
brew services start jenkins-lts - 若想自行啟動 Jenkins,輸入
jenkins-lts
啟動 Jenkins
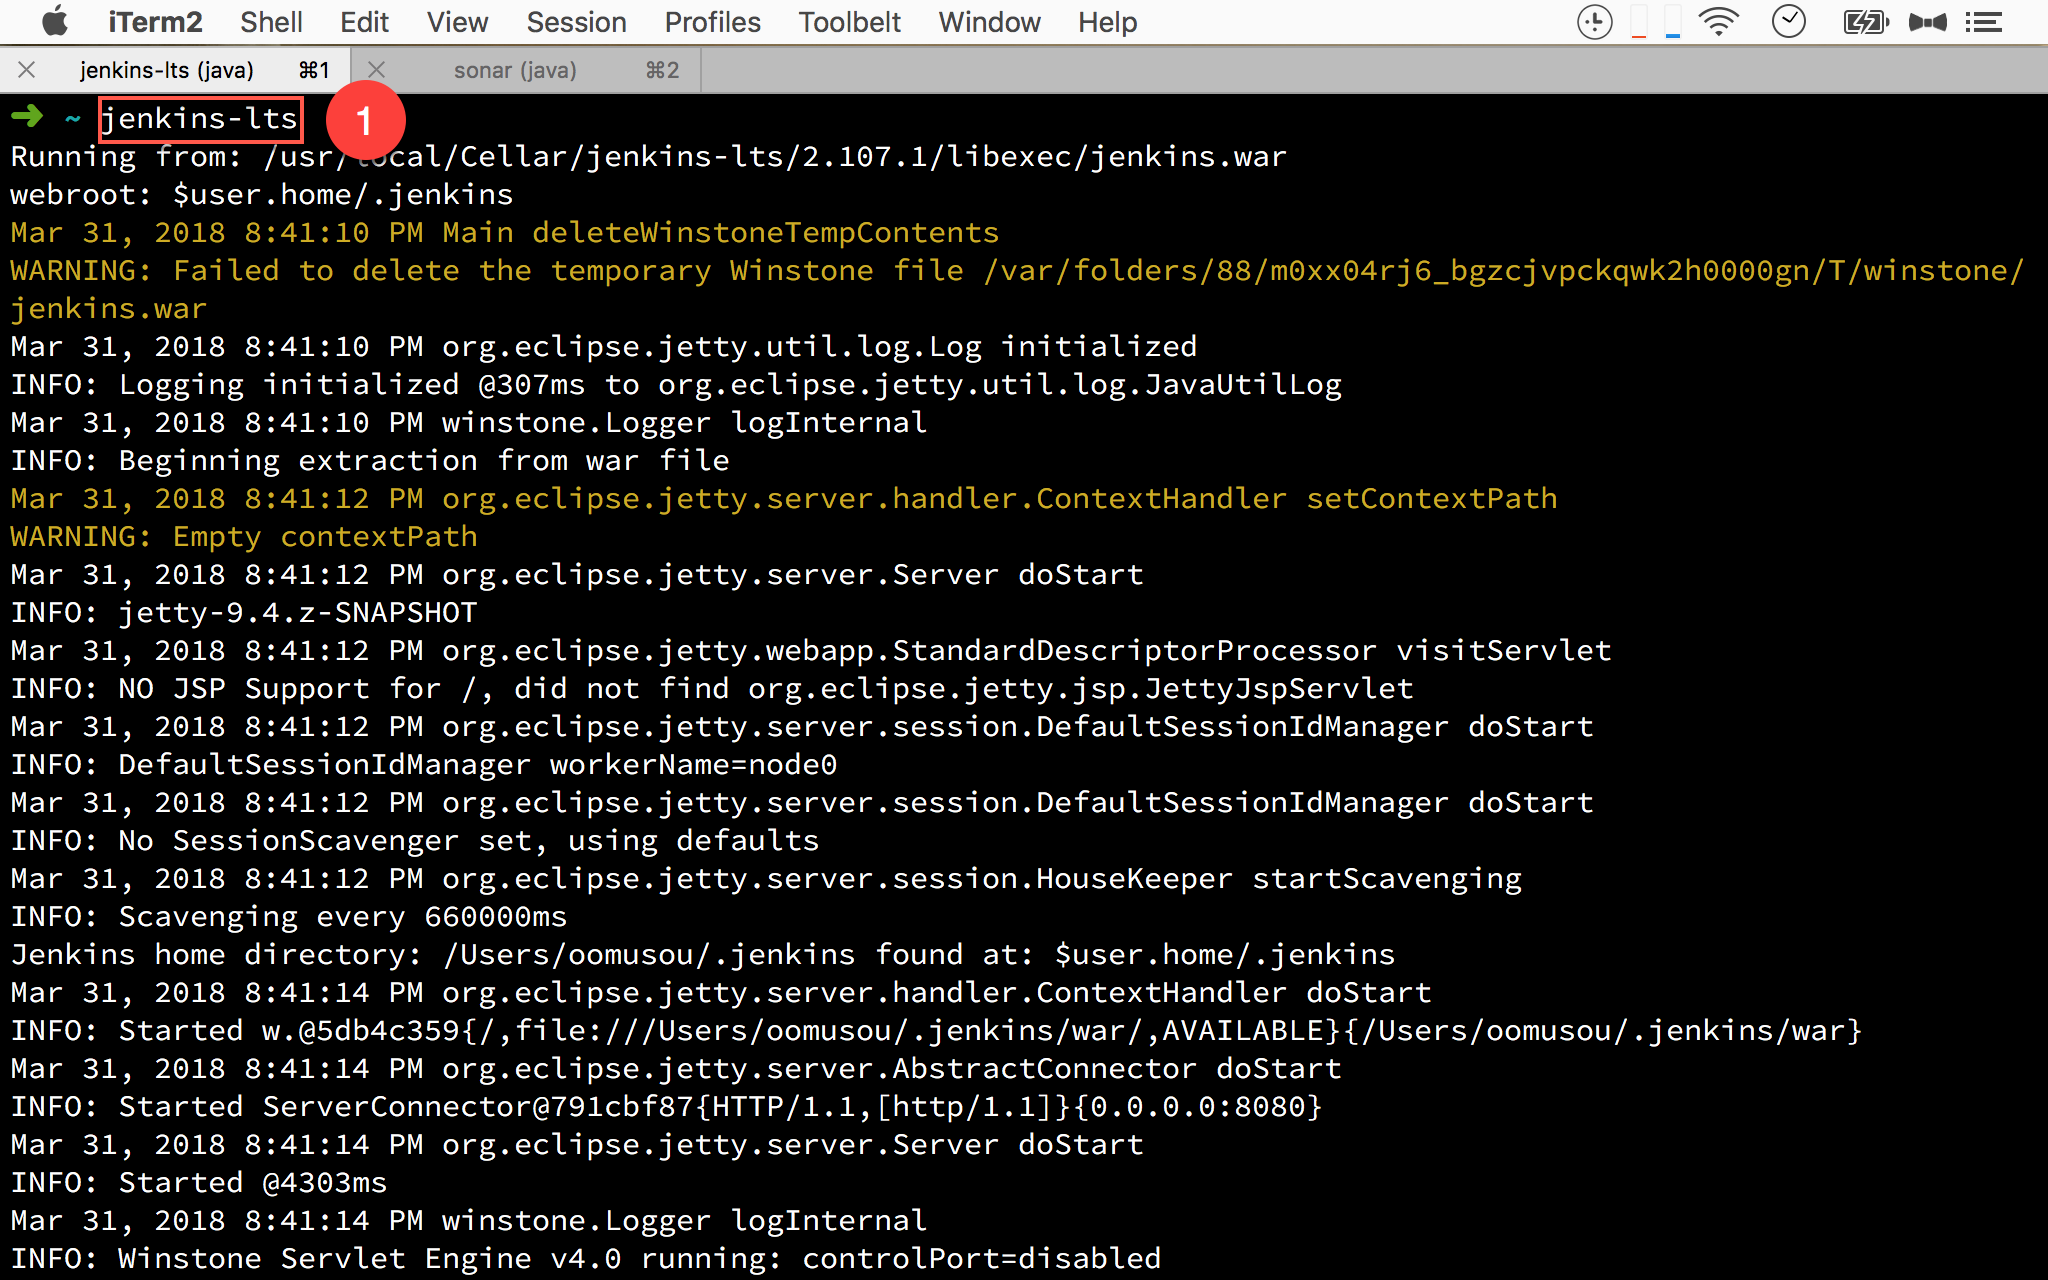
1 | $ jenkins-lts |
使用 jenkins-lts 自行啟動 Jenkins。
Unlock Jenkins
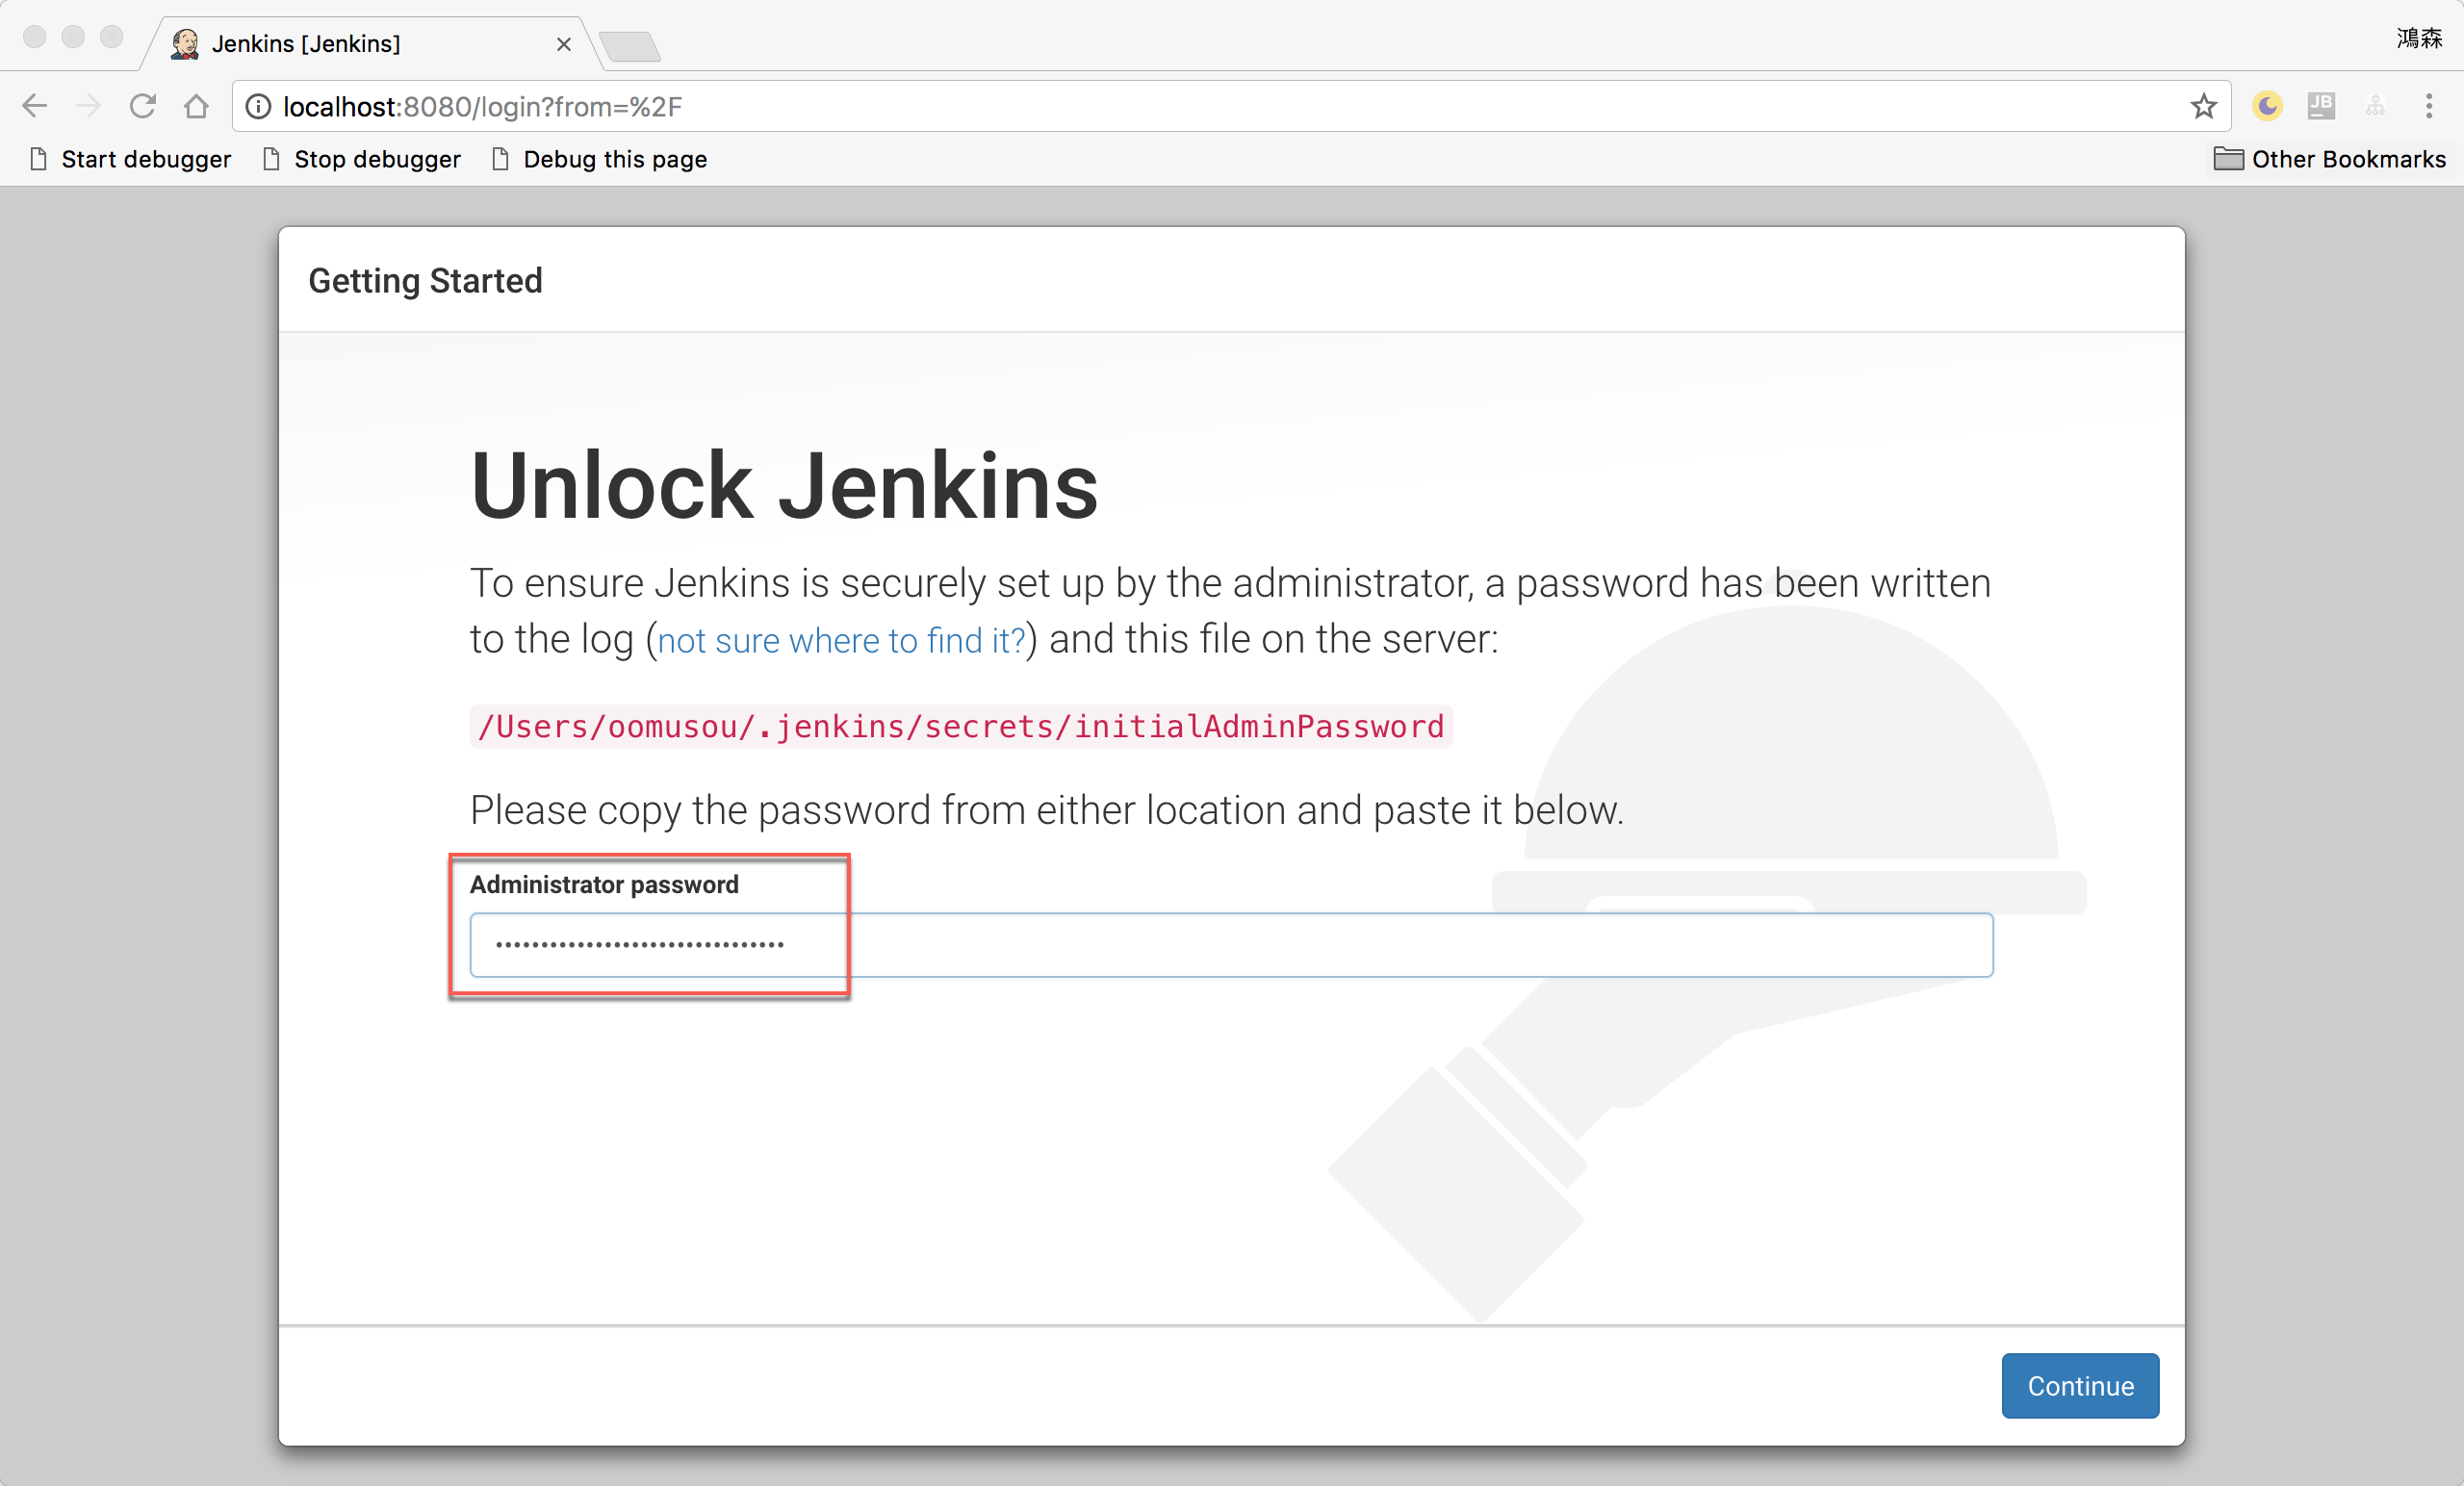
- 輸入
localhost:8080,看到 Unlock Jenkins,開始設定 Jenkins - 預設密碼放在
./jenkins/secrets/initialAdminPassword
Customize Jenkins
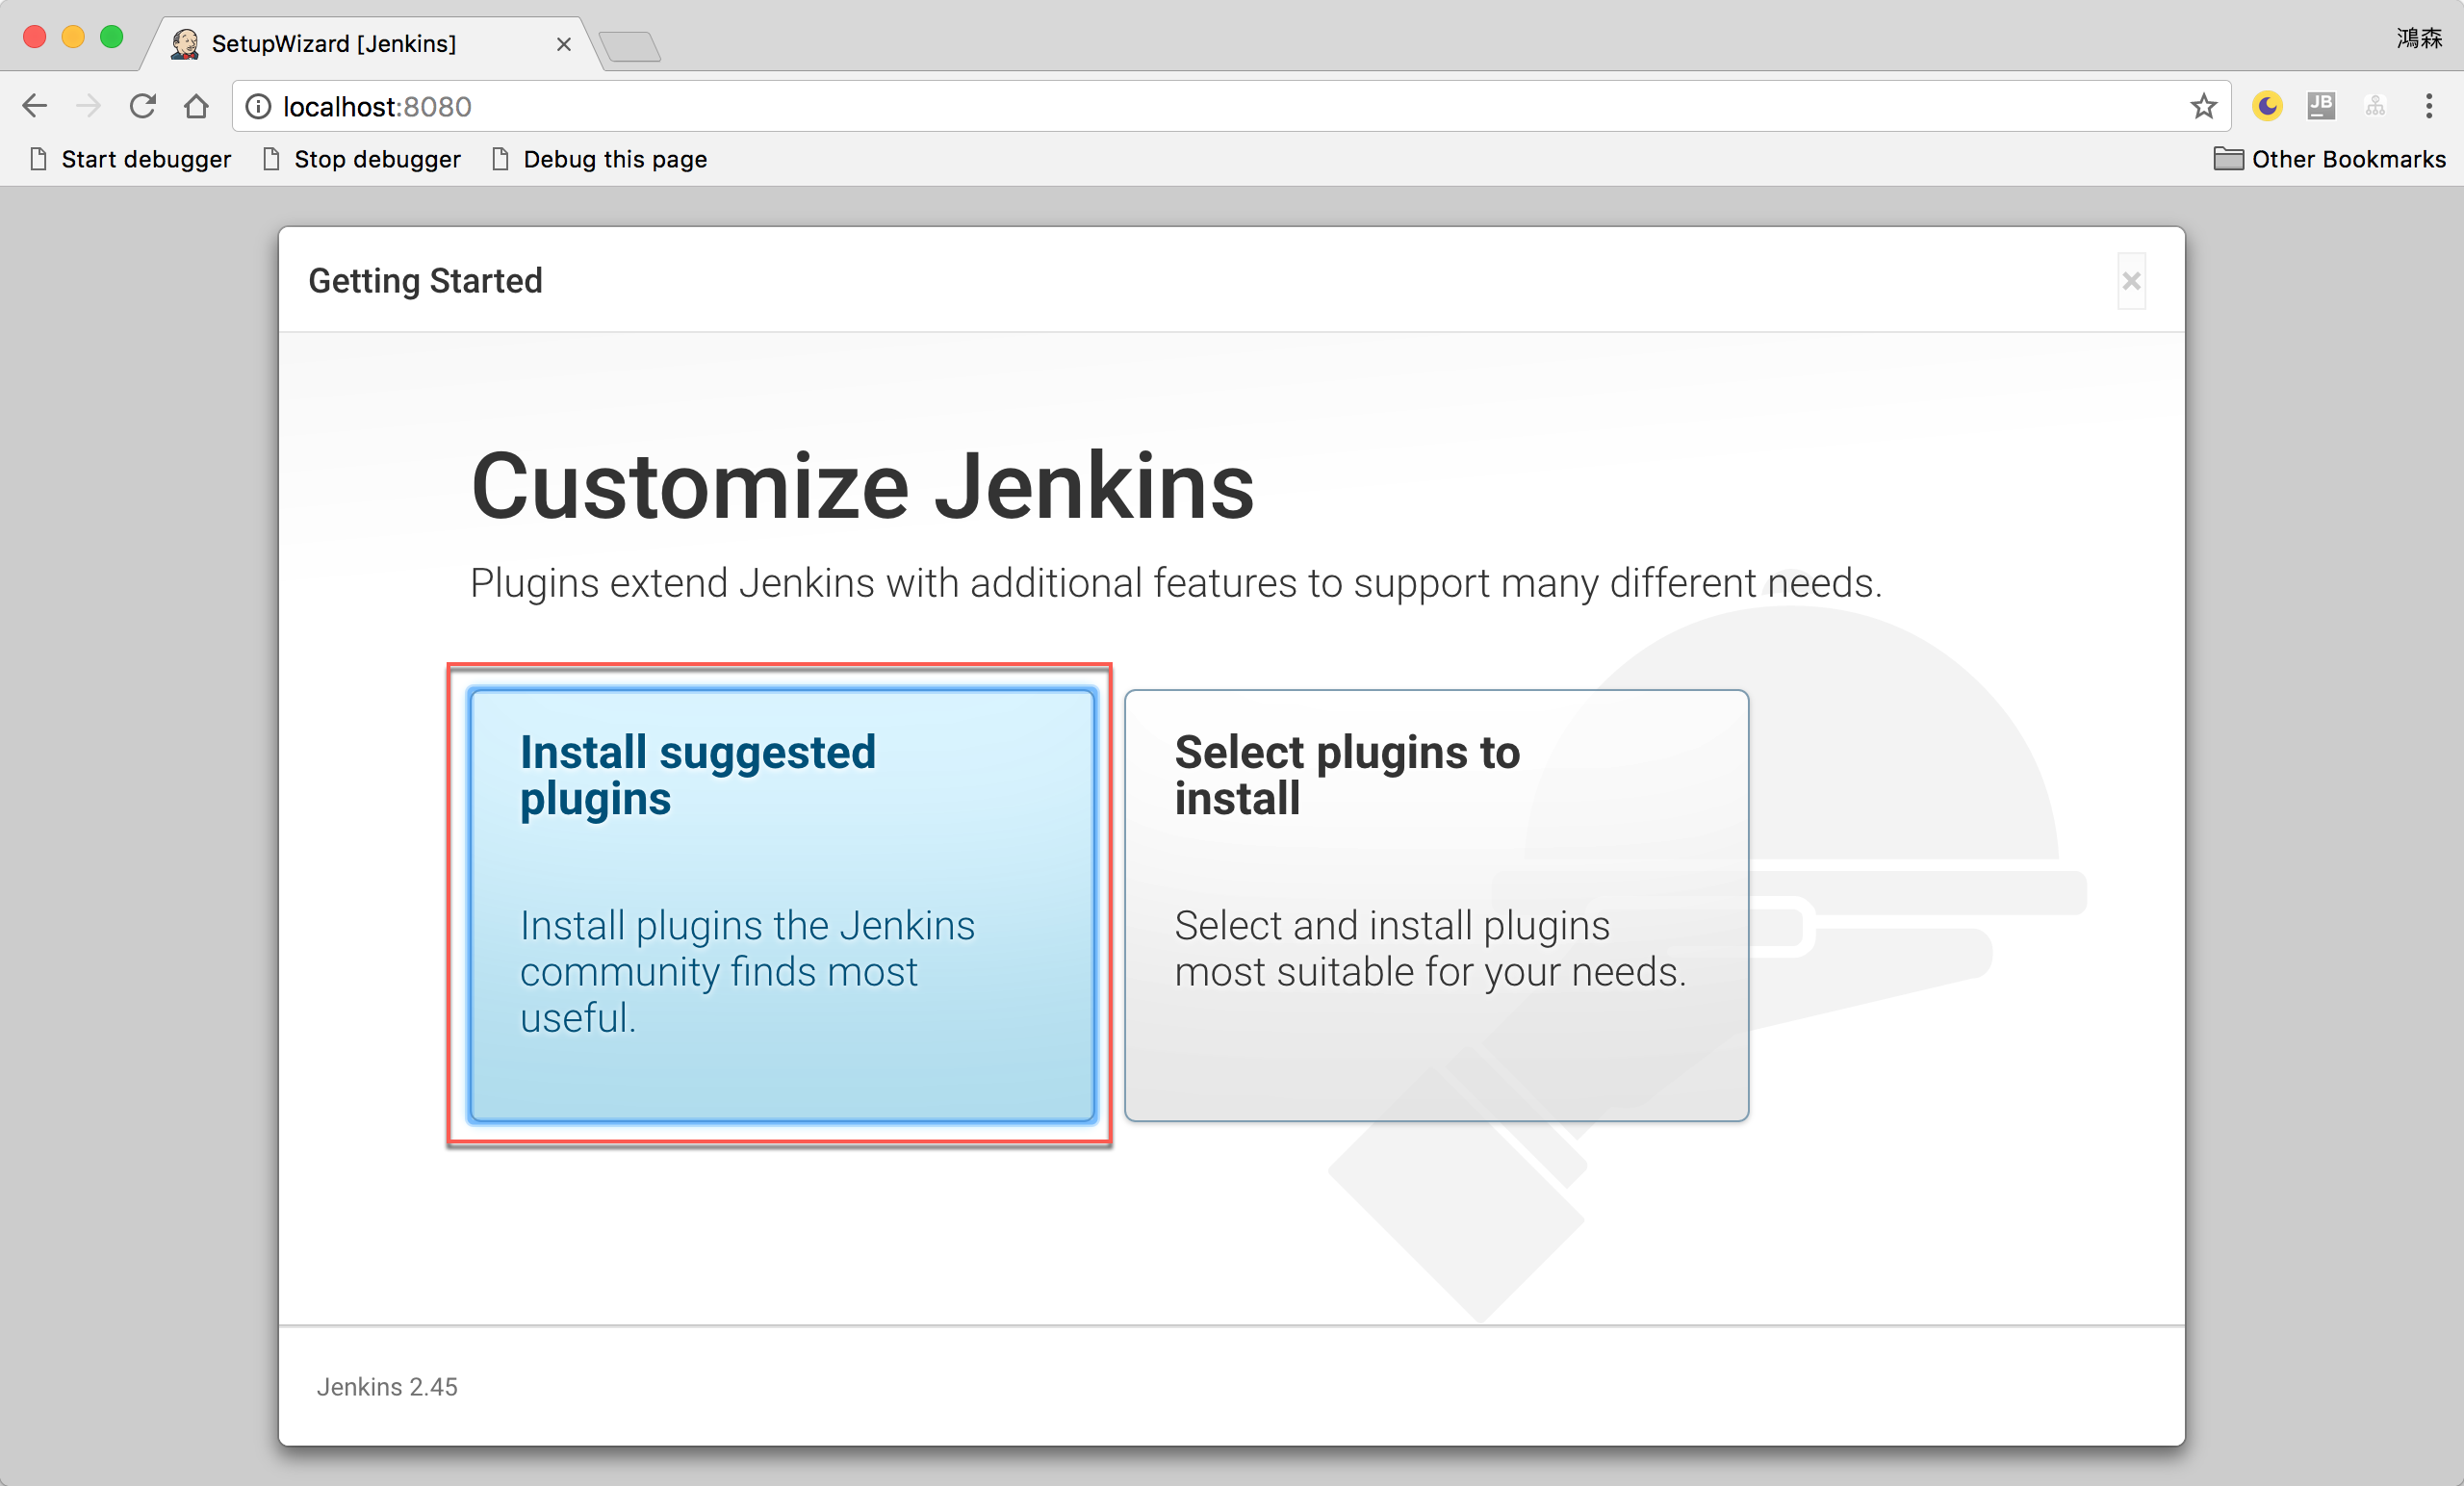
- 選擇
Install suggested plugins即可
Getting Started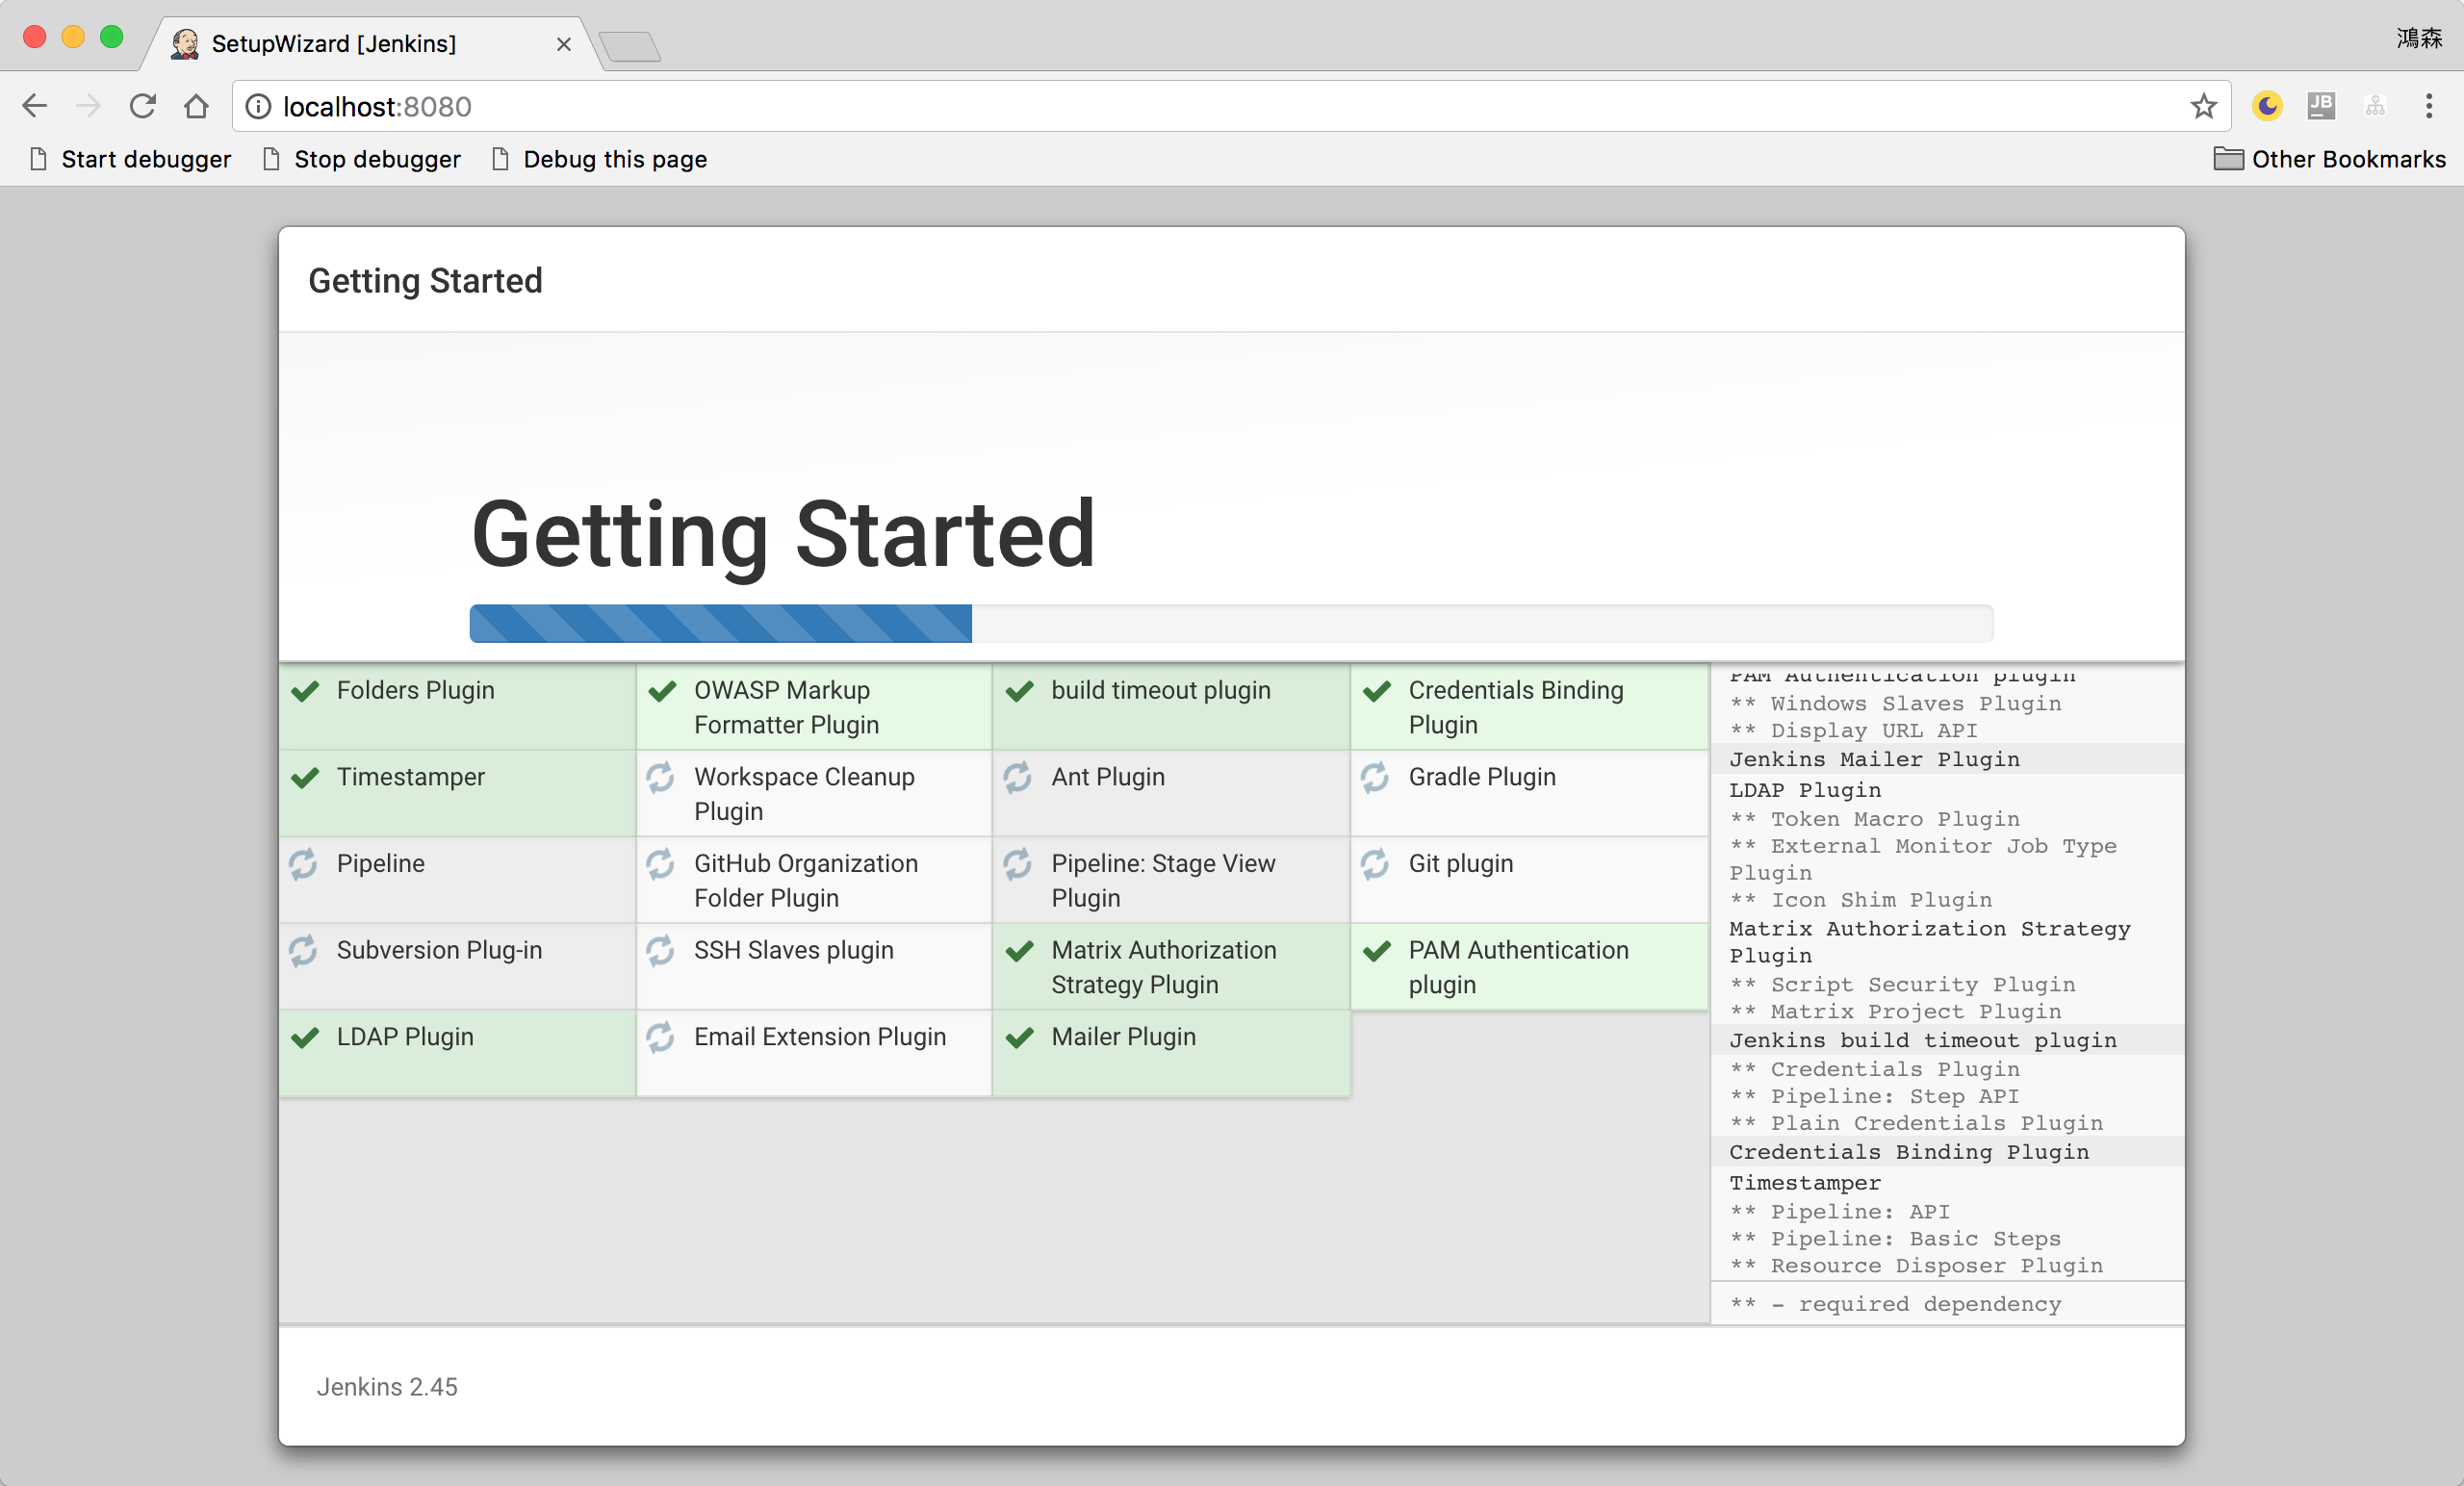
安裝 default plugin 中。
Create Admin User
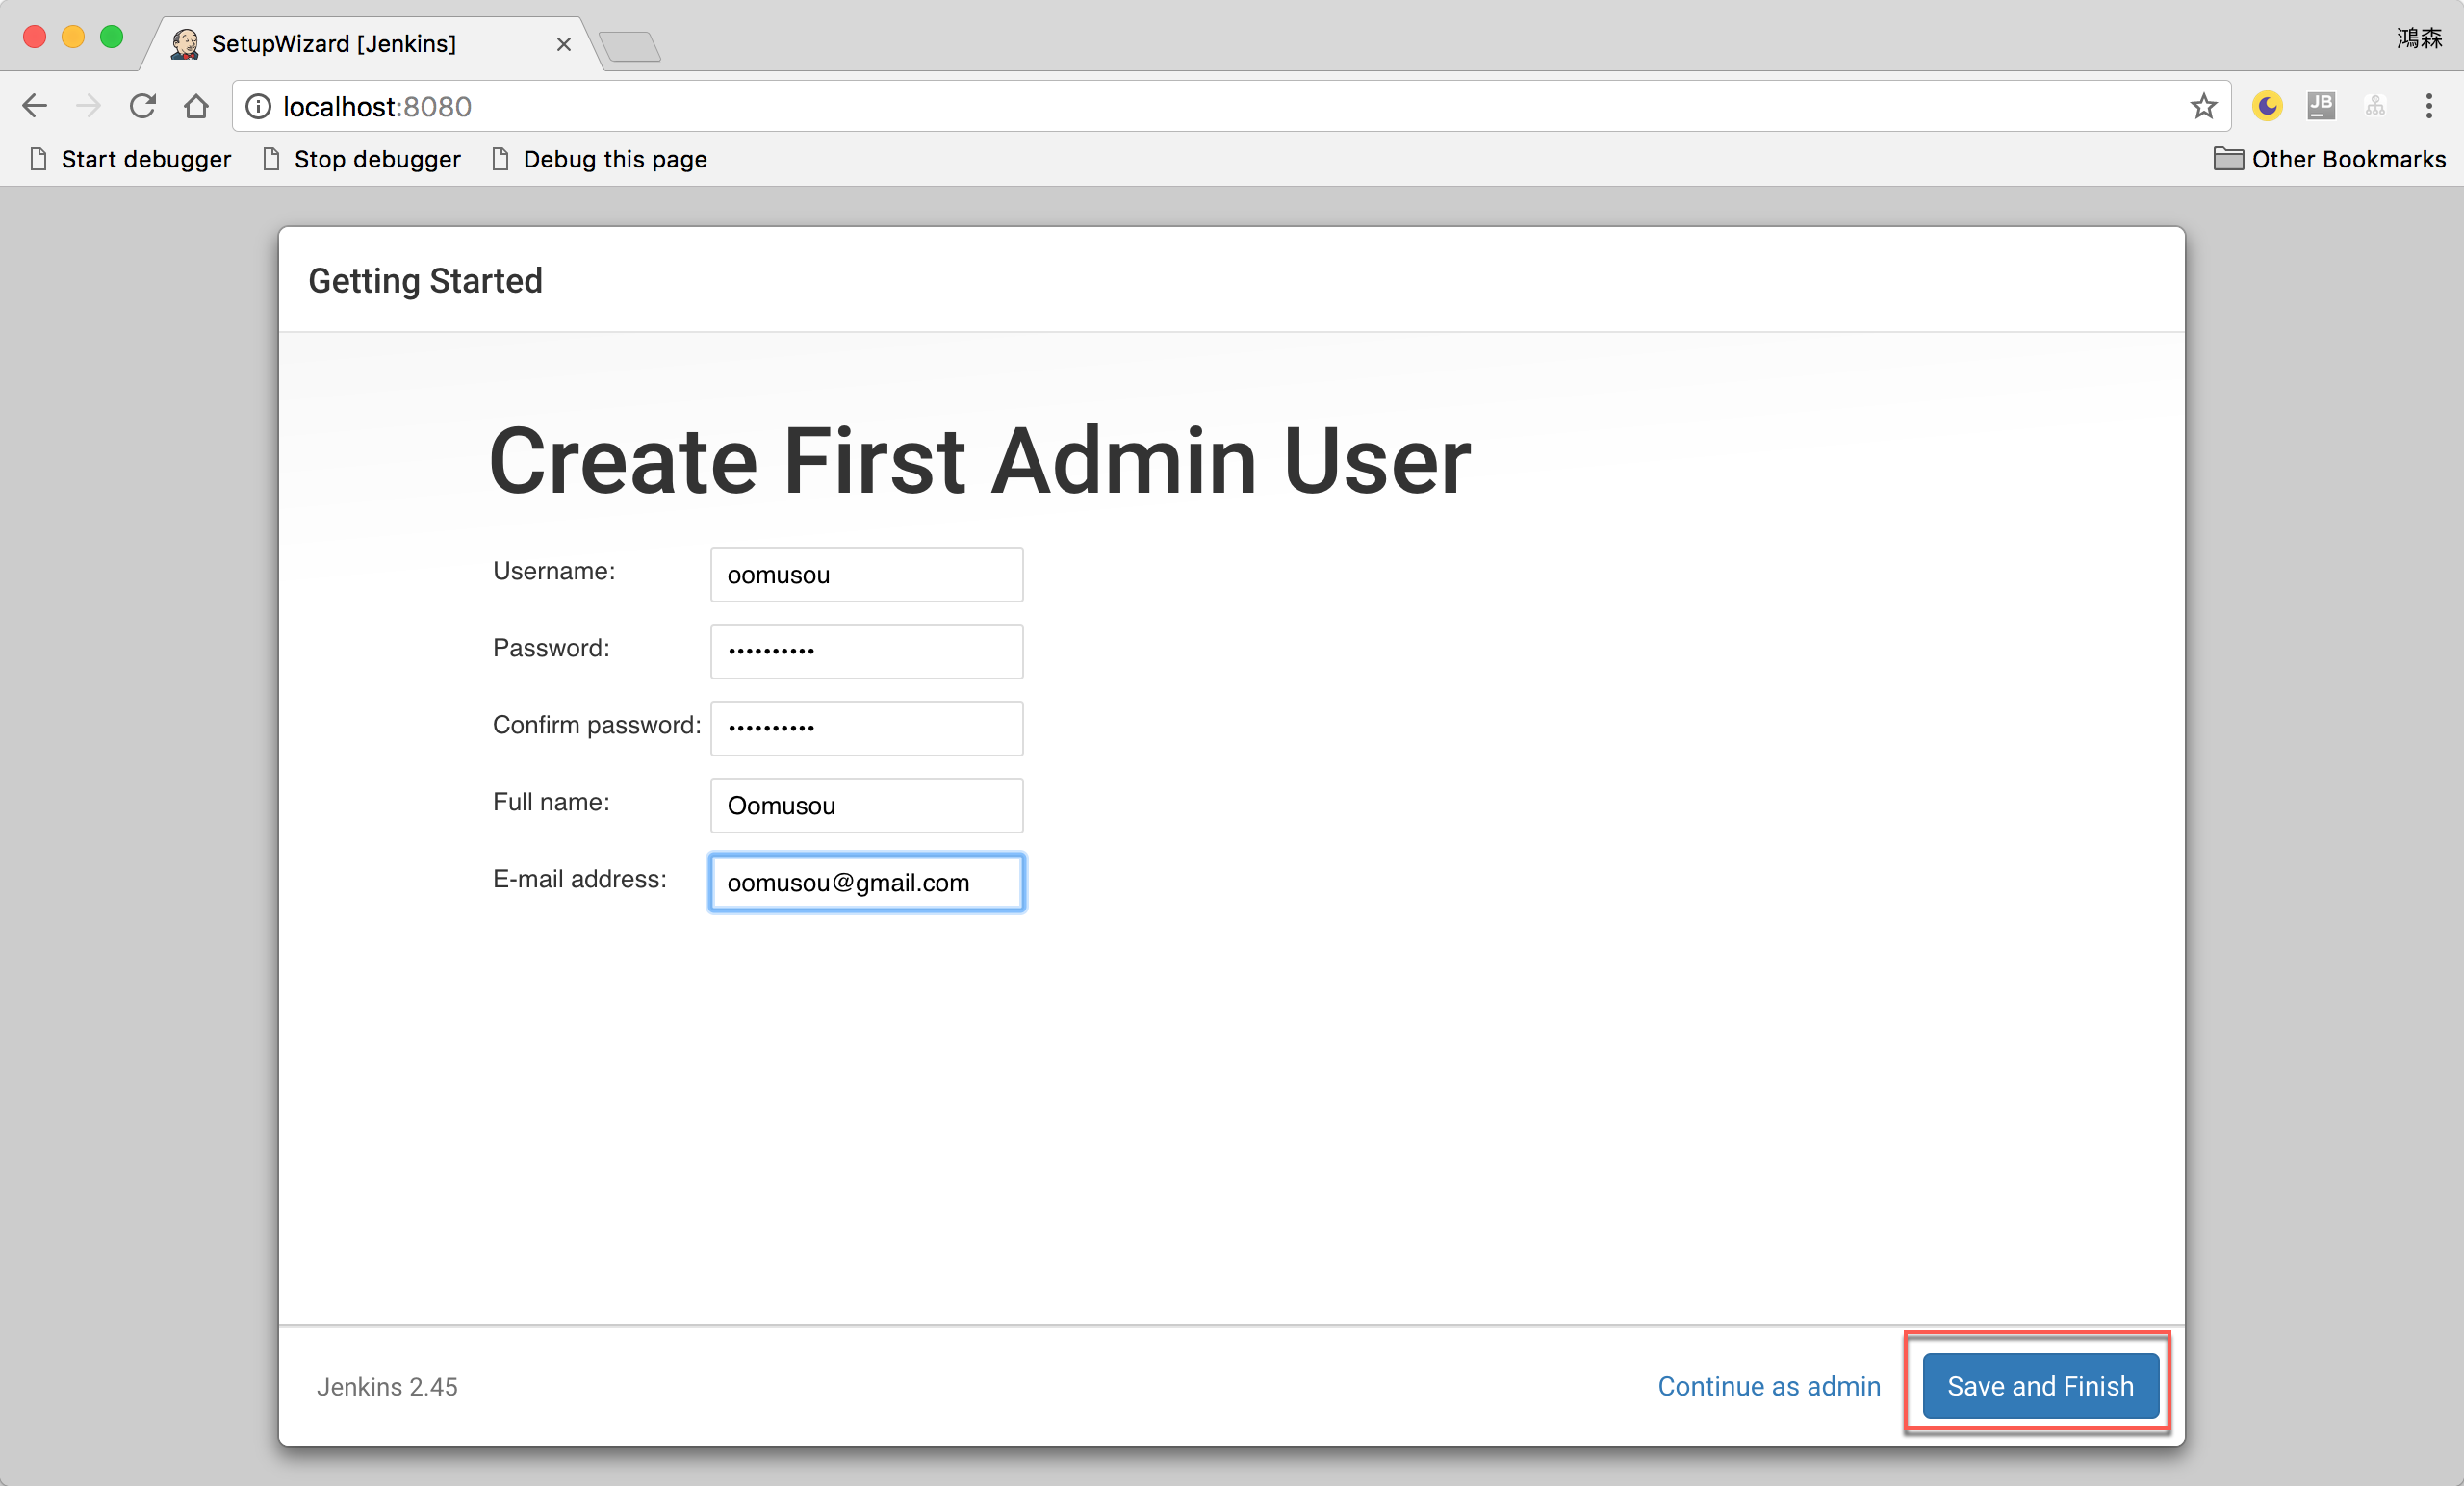
- 建立管理者帳號
Jenkins is Ready
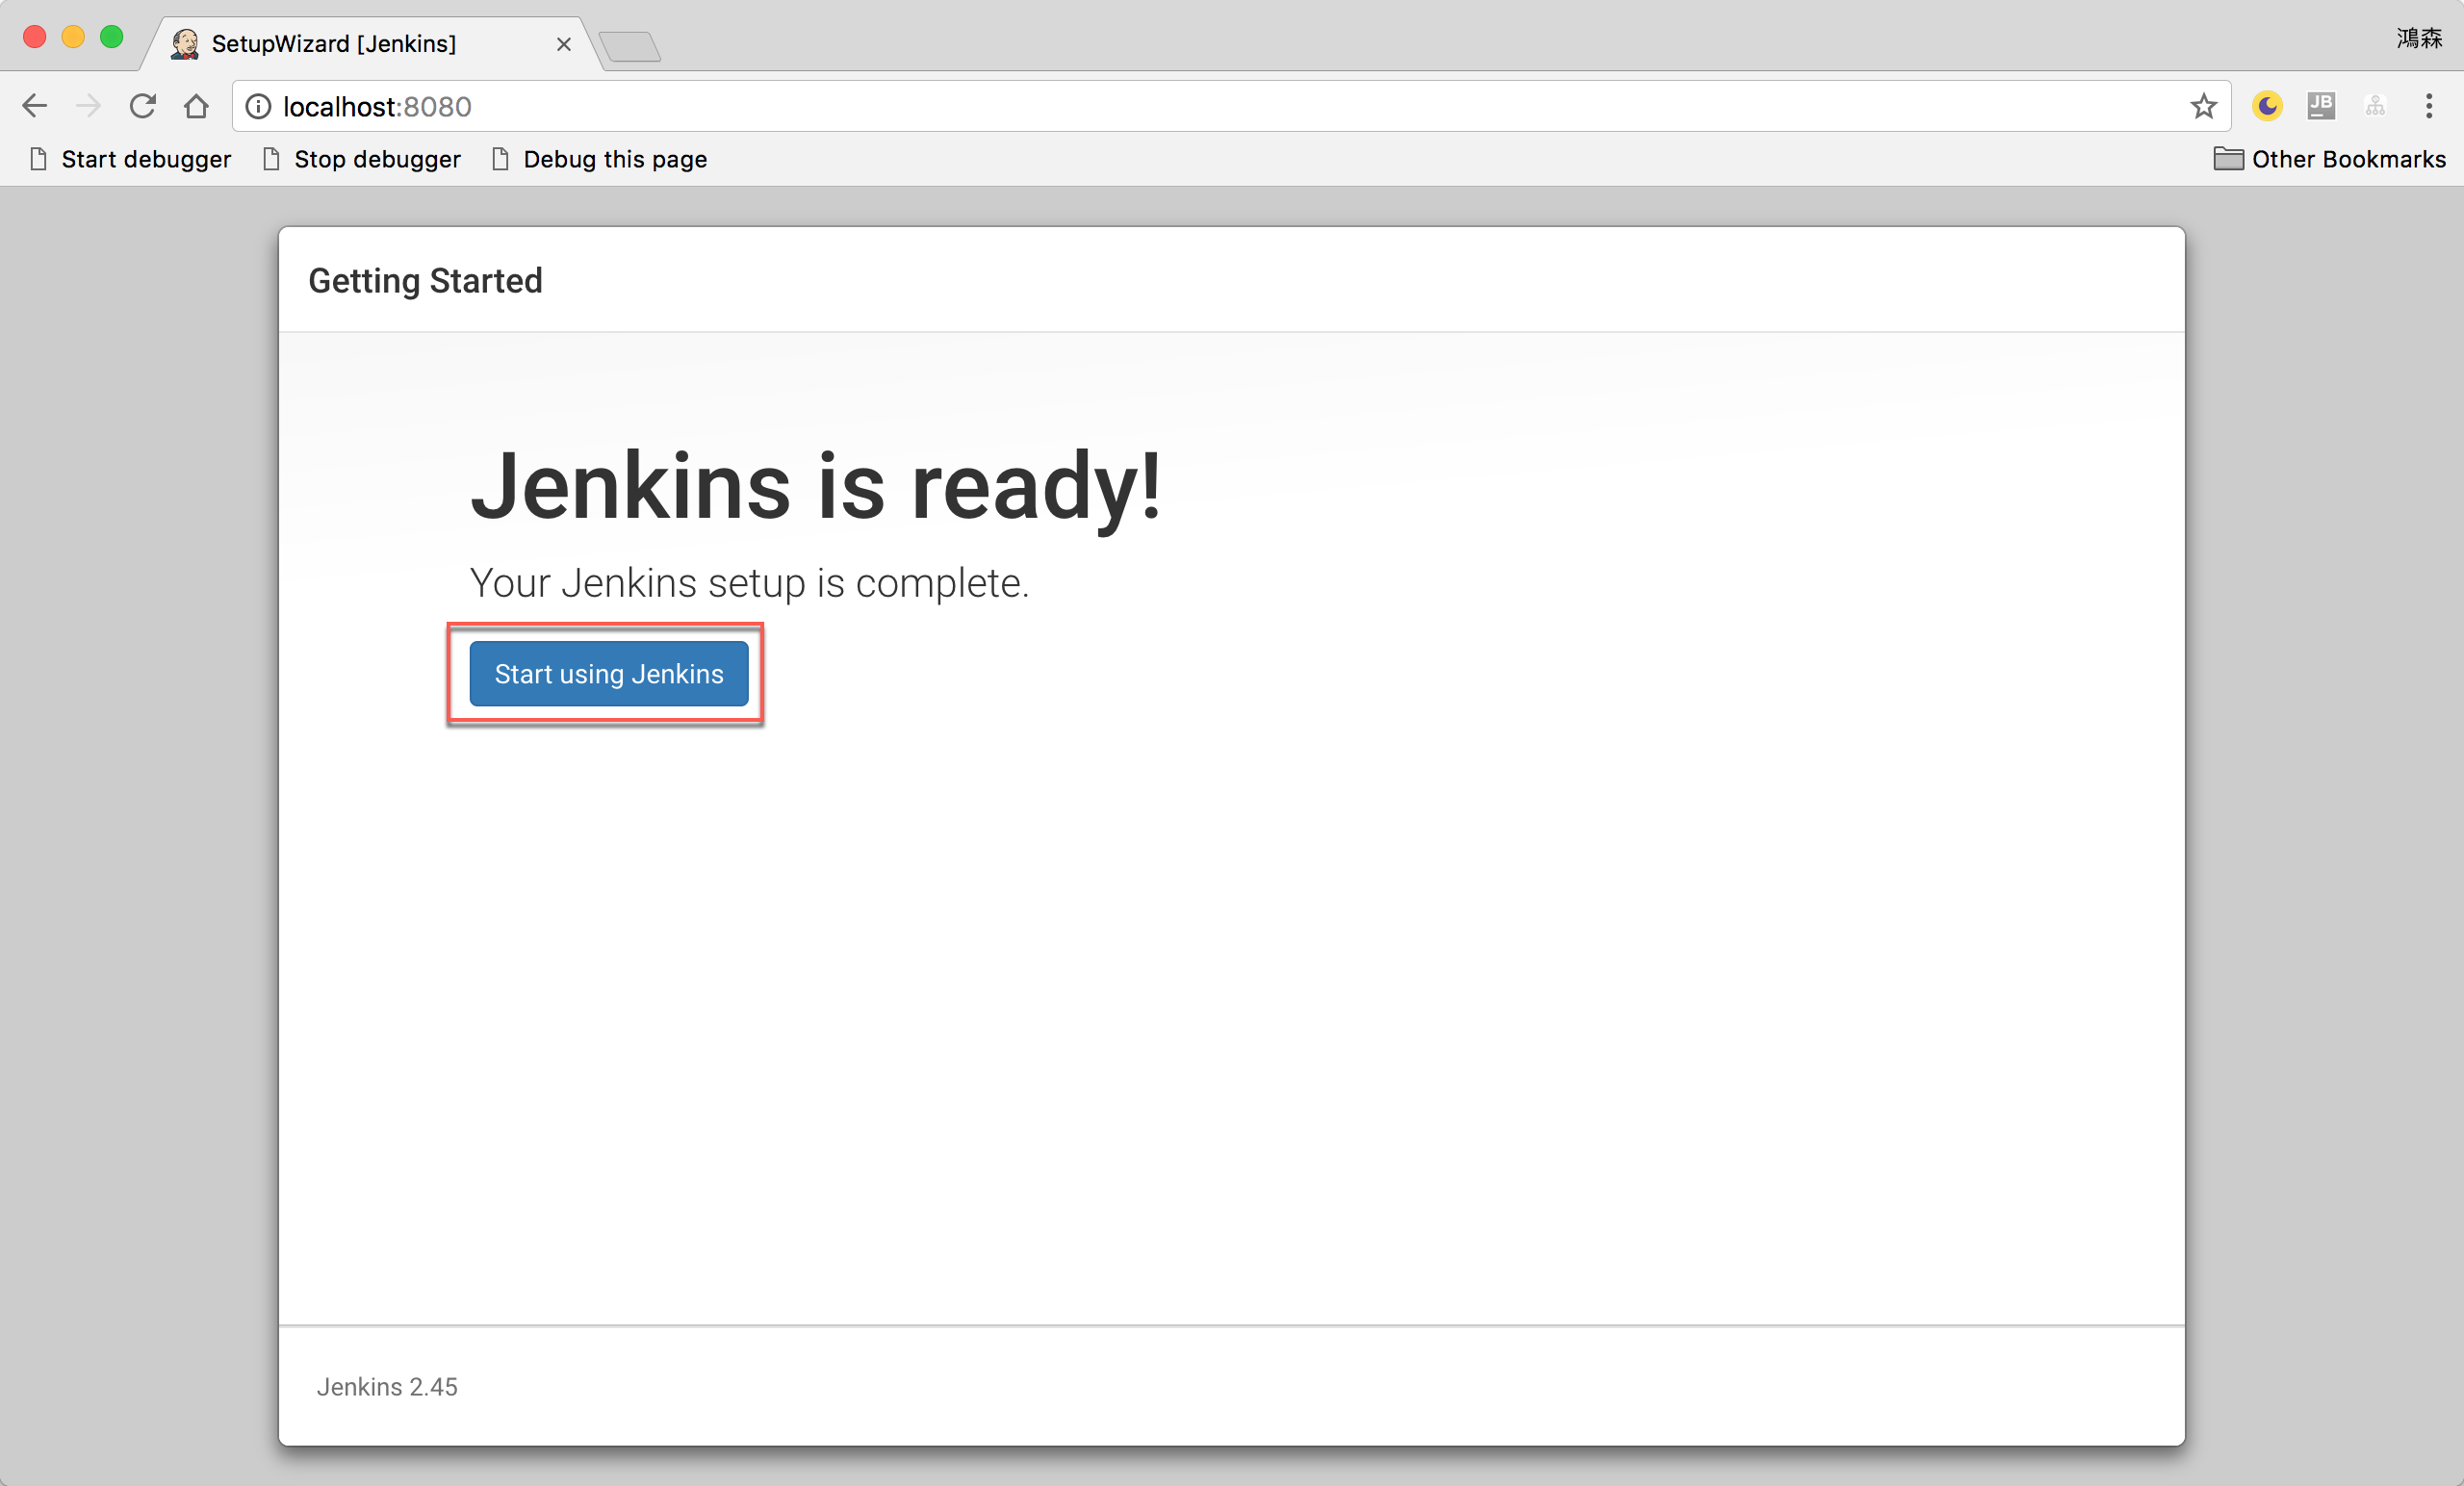
- Jenkins 安裝完成,按
Start using jenkins開始使用 Jenkins
Welcome to Jenkins
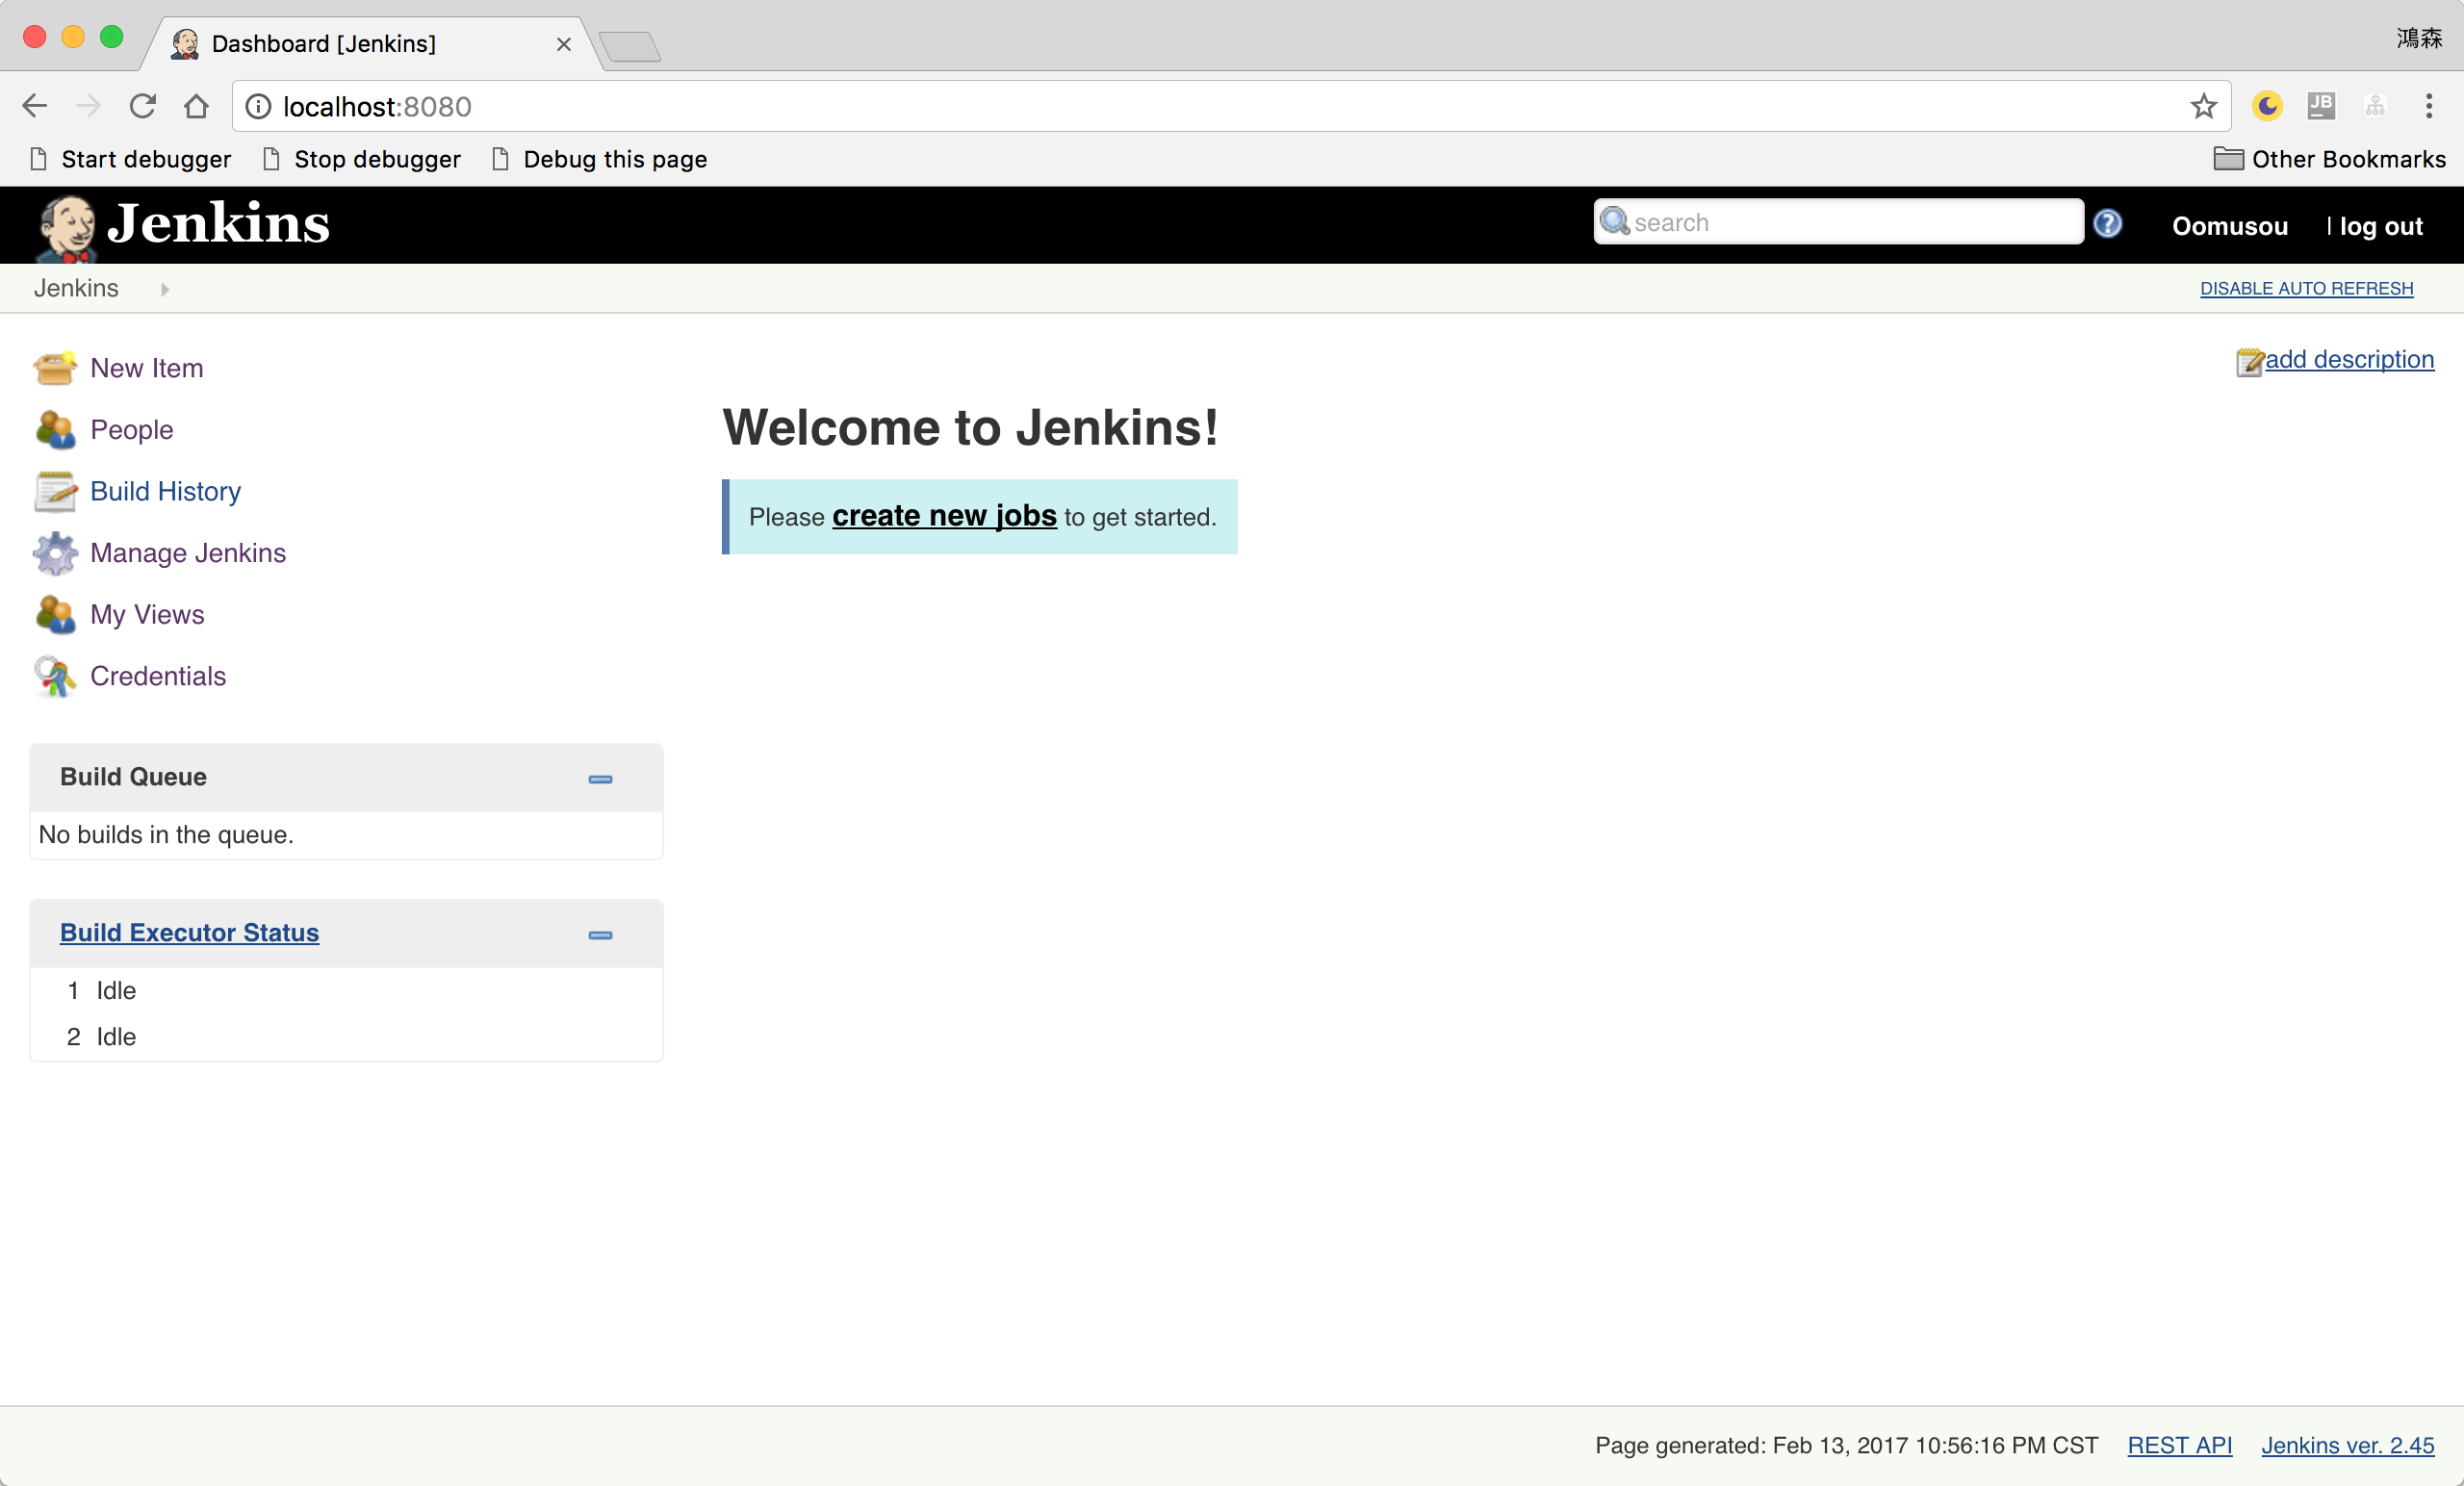
- 進入 Jenkins 管理介面,如此 Jenkins 已經設定成功
SonarQube Scanner for Jenkins
要讓 Jenkins 能自動執行 SonarQube Scanner,必須另外安裝 plugin。
安裝 SonarQube Scanner for Jenkins
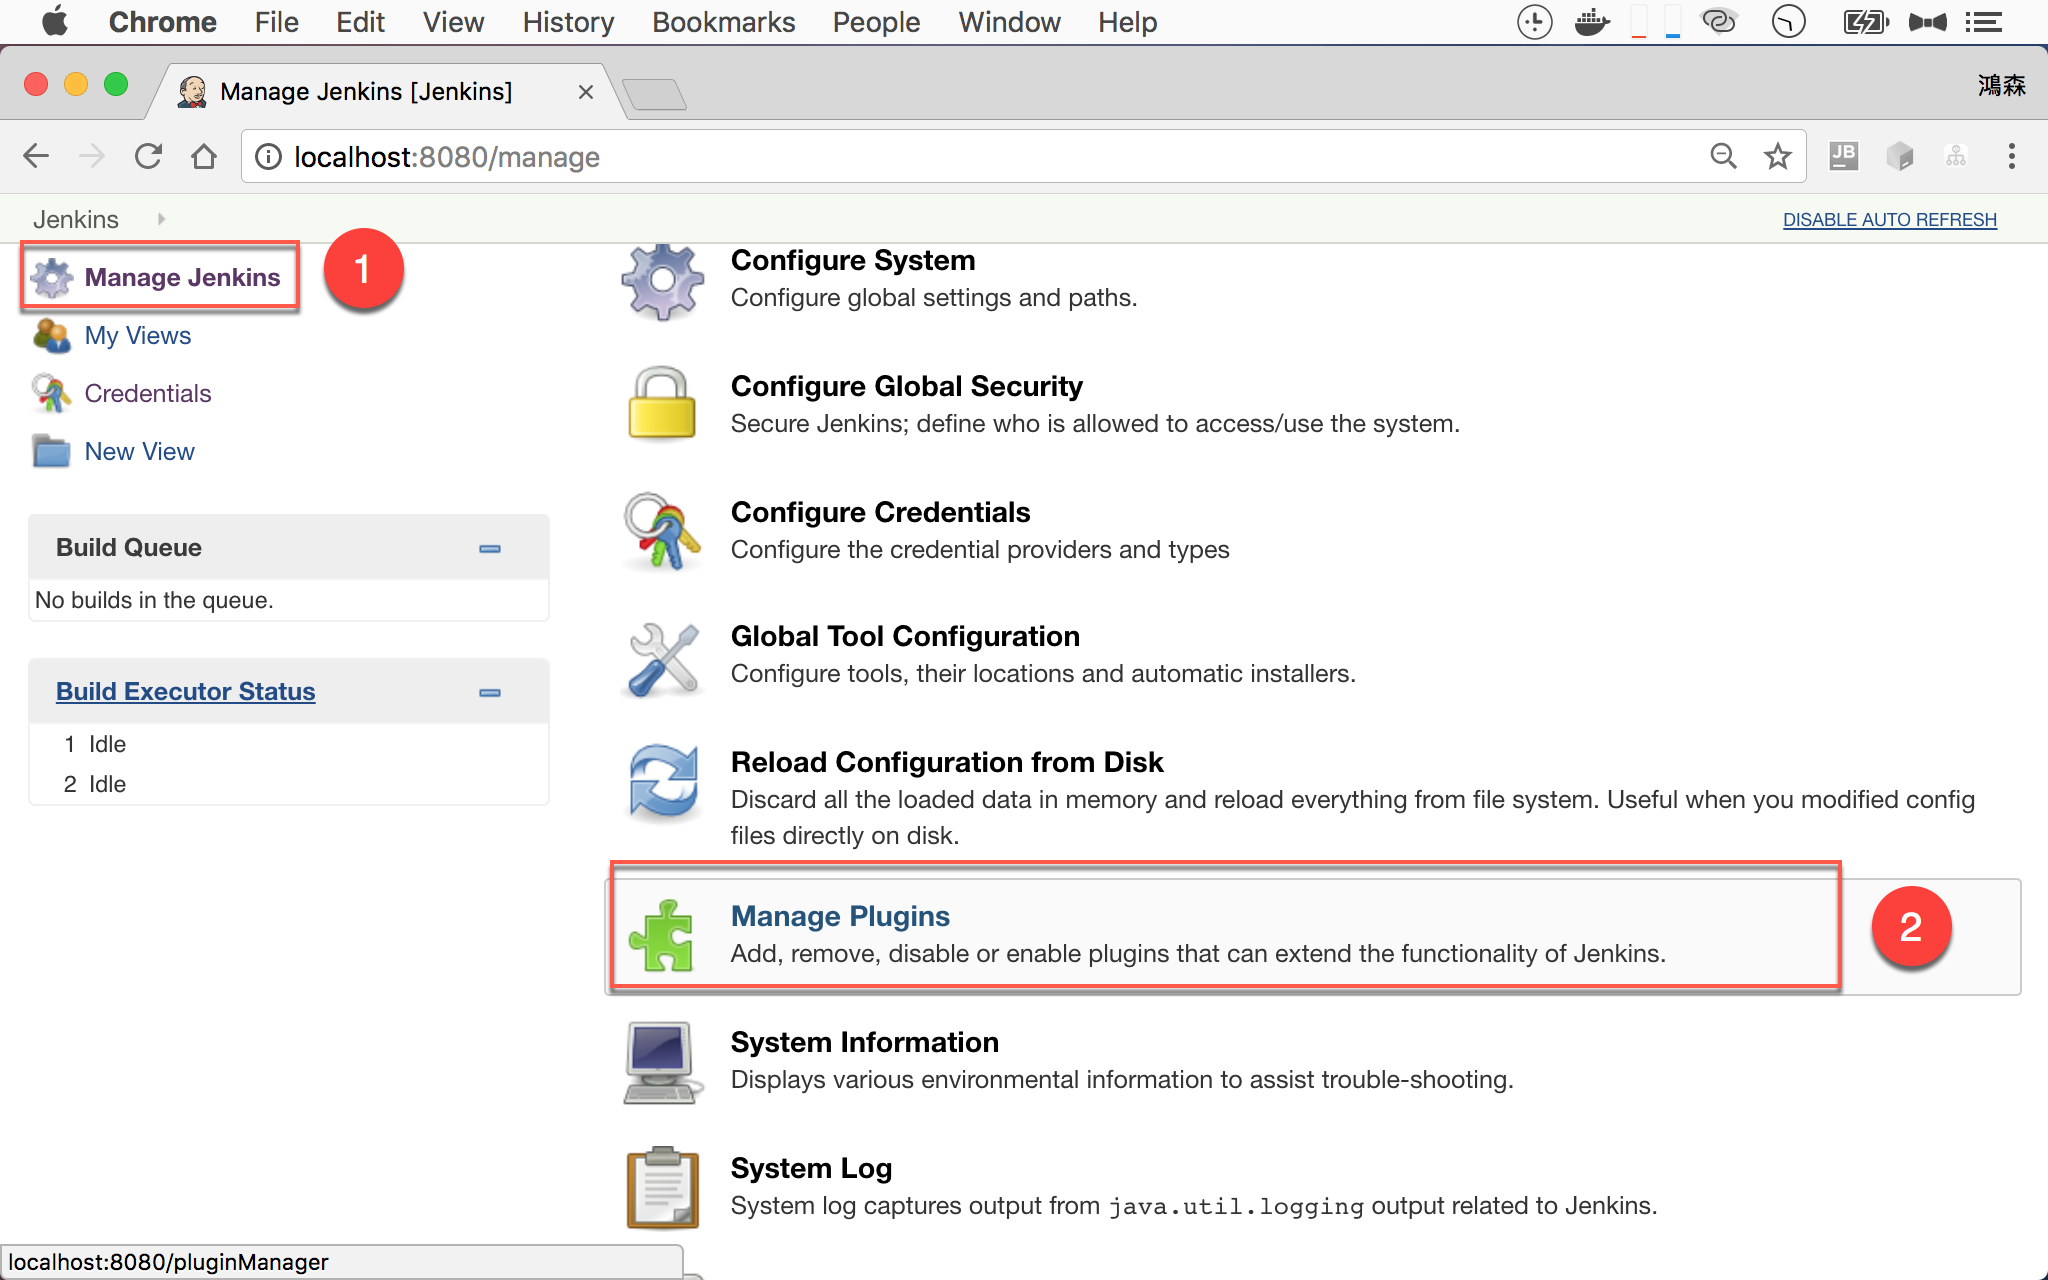
- 左側選擇
Manage Jenkins - 右側選擇
Manage Plugins
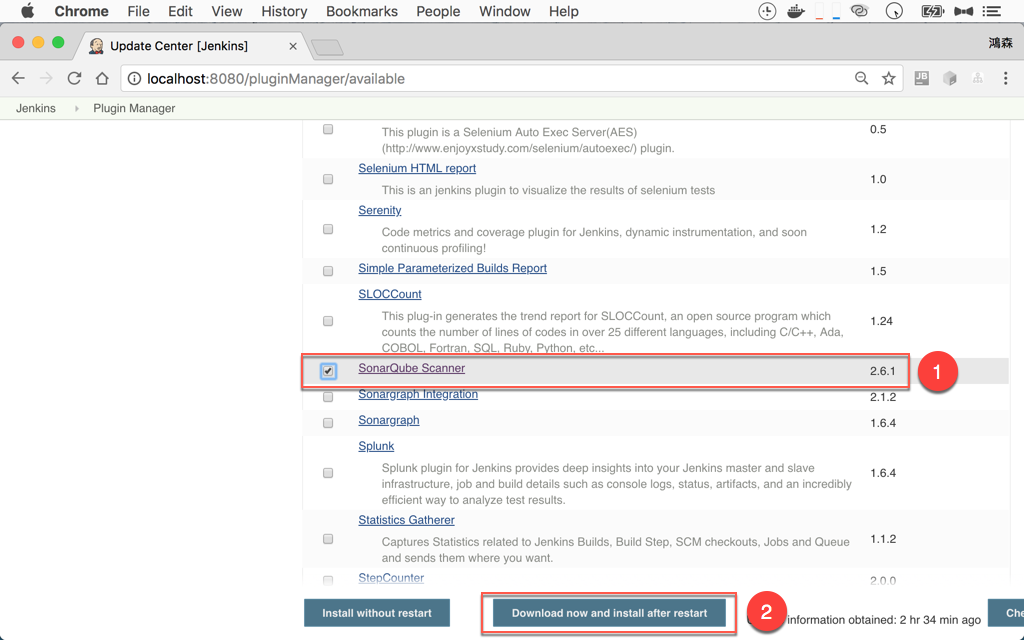
- 選擇
SonarQube Scanner - 按
Download now and install after restart
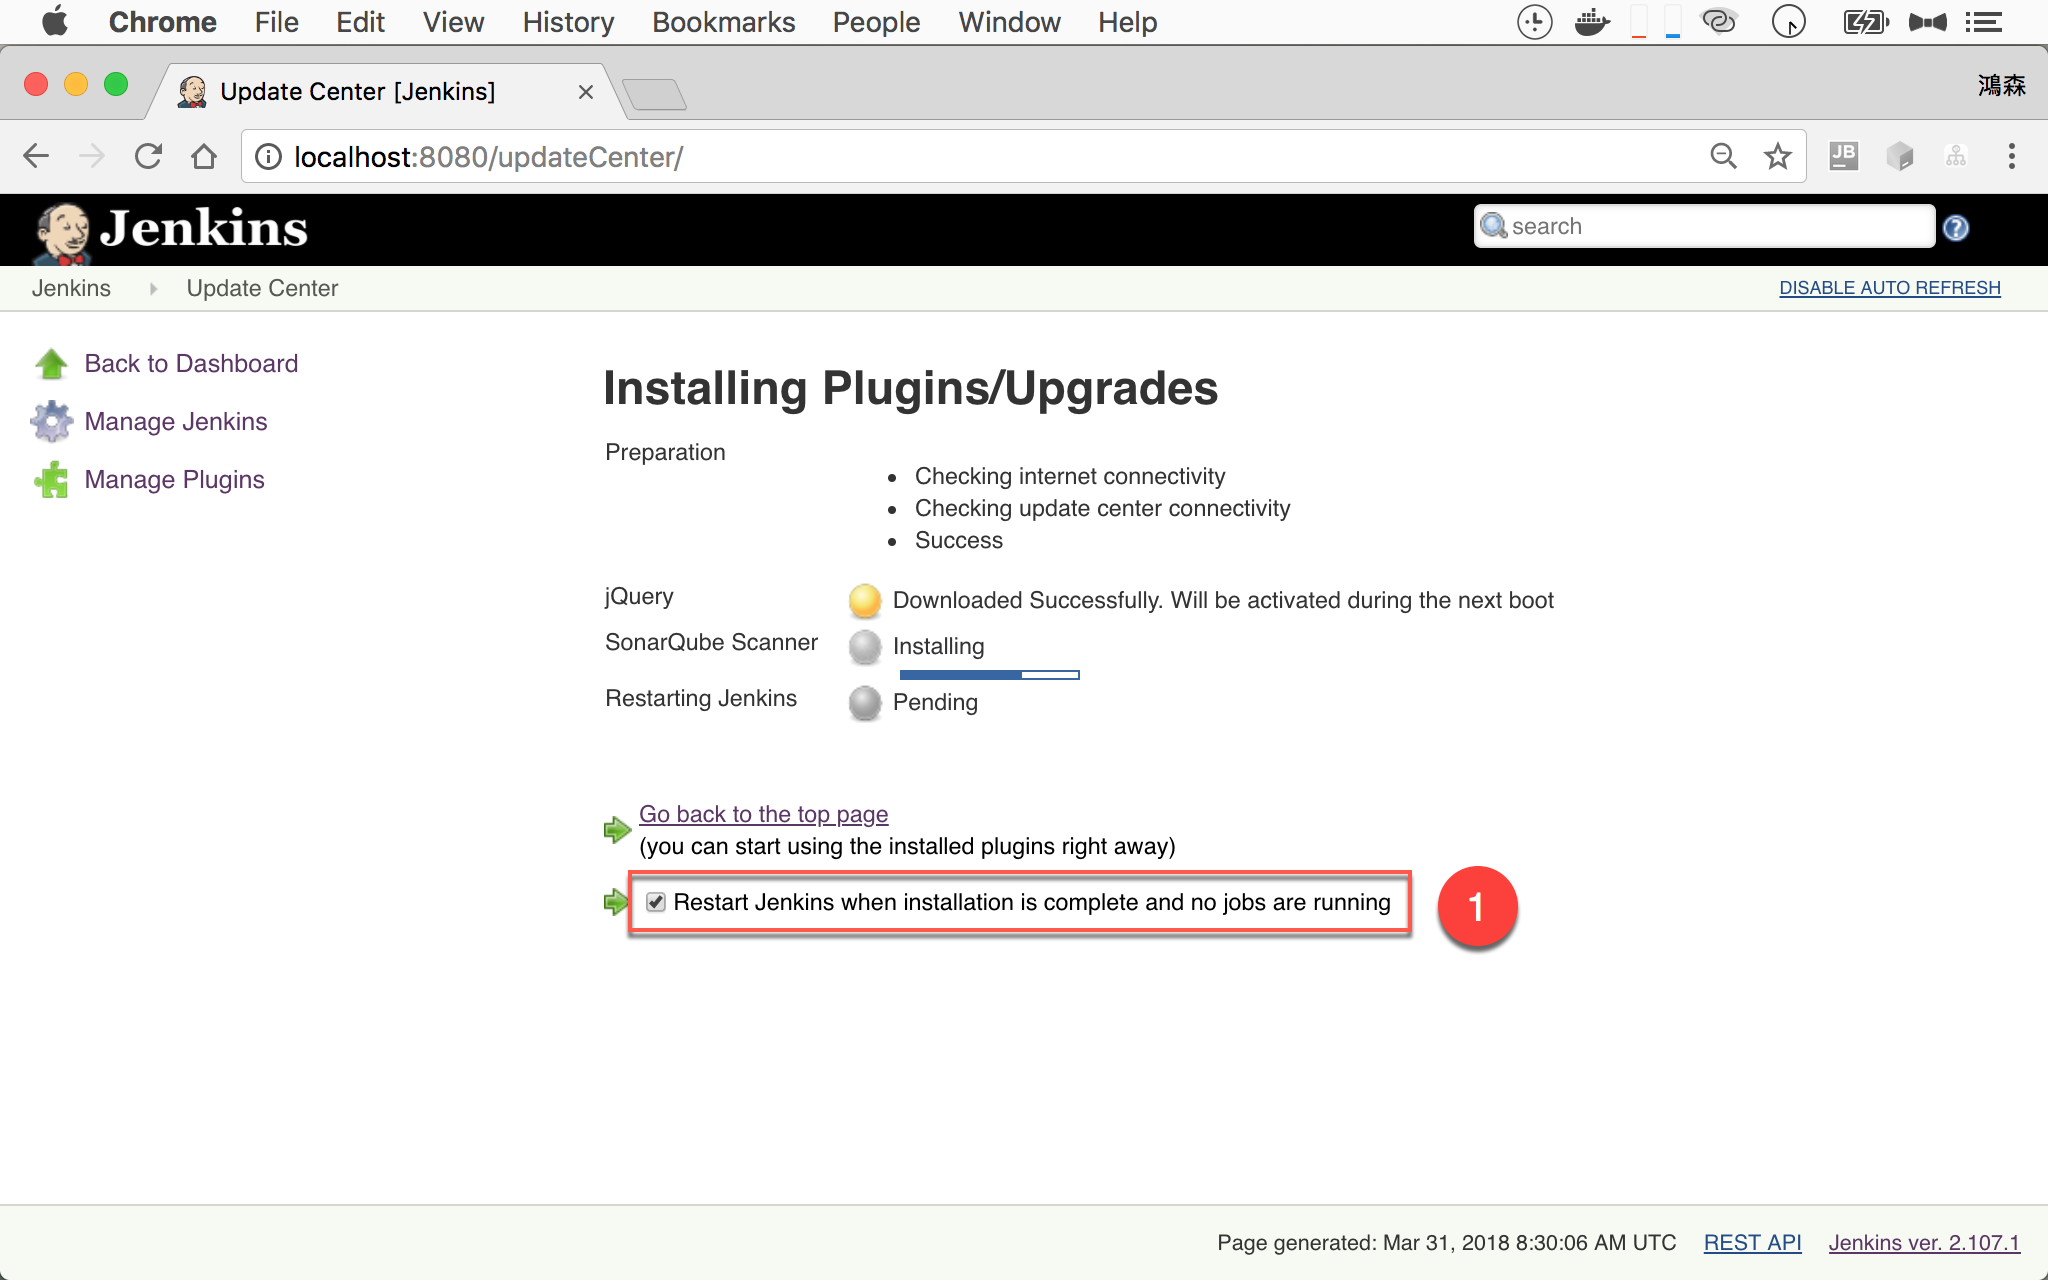
安裝 plugin 中。
- 將
Restart Jenkins when installation is complete and no jobs are running打勾
設定 SonarQube 環境變數
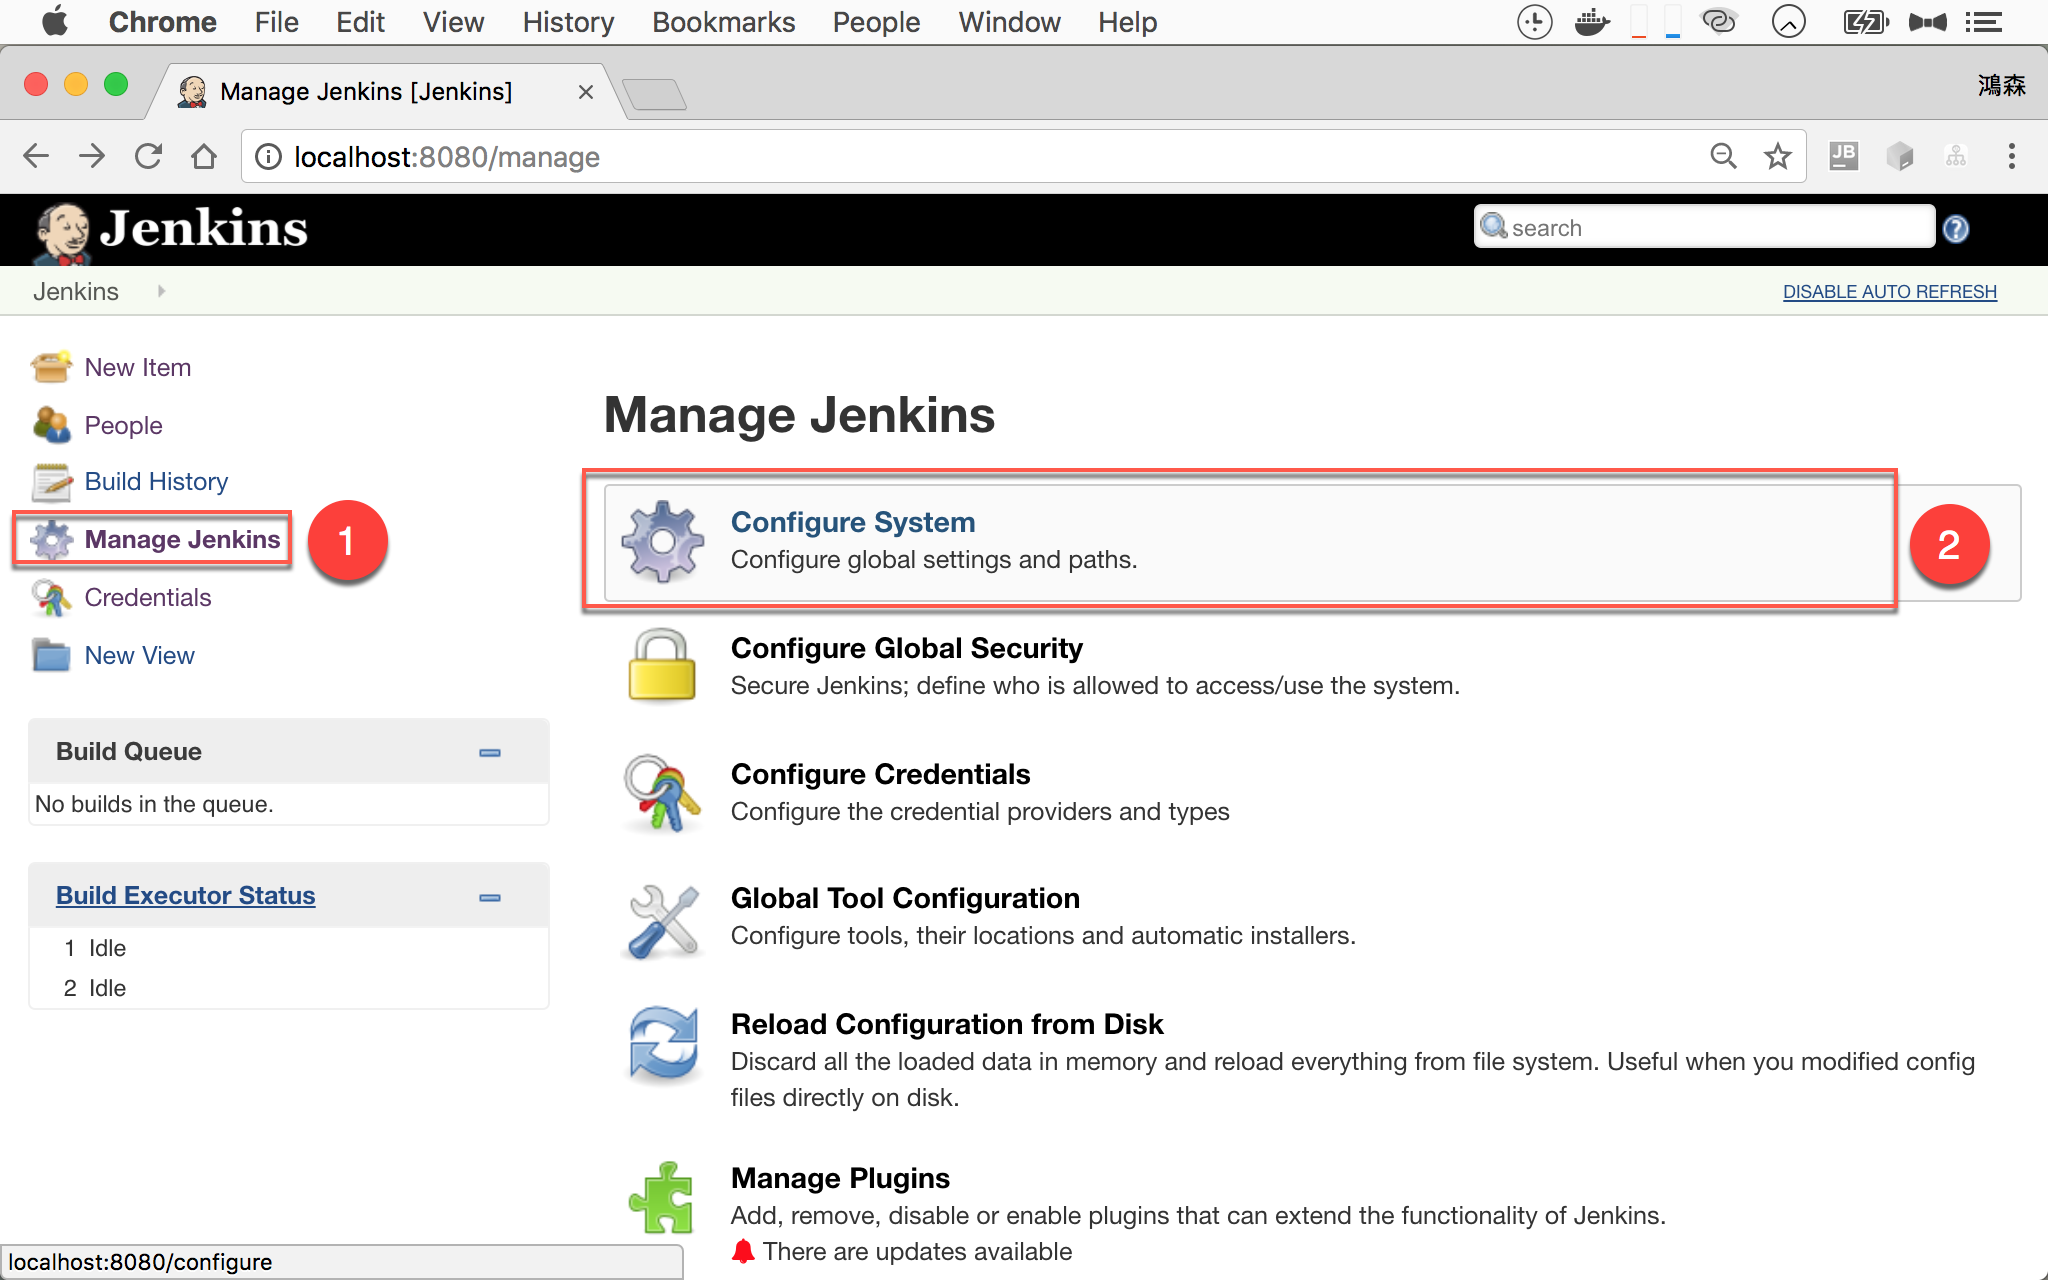
- 左側選擇
Manage Jenkins - 右側選擇
Configure System
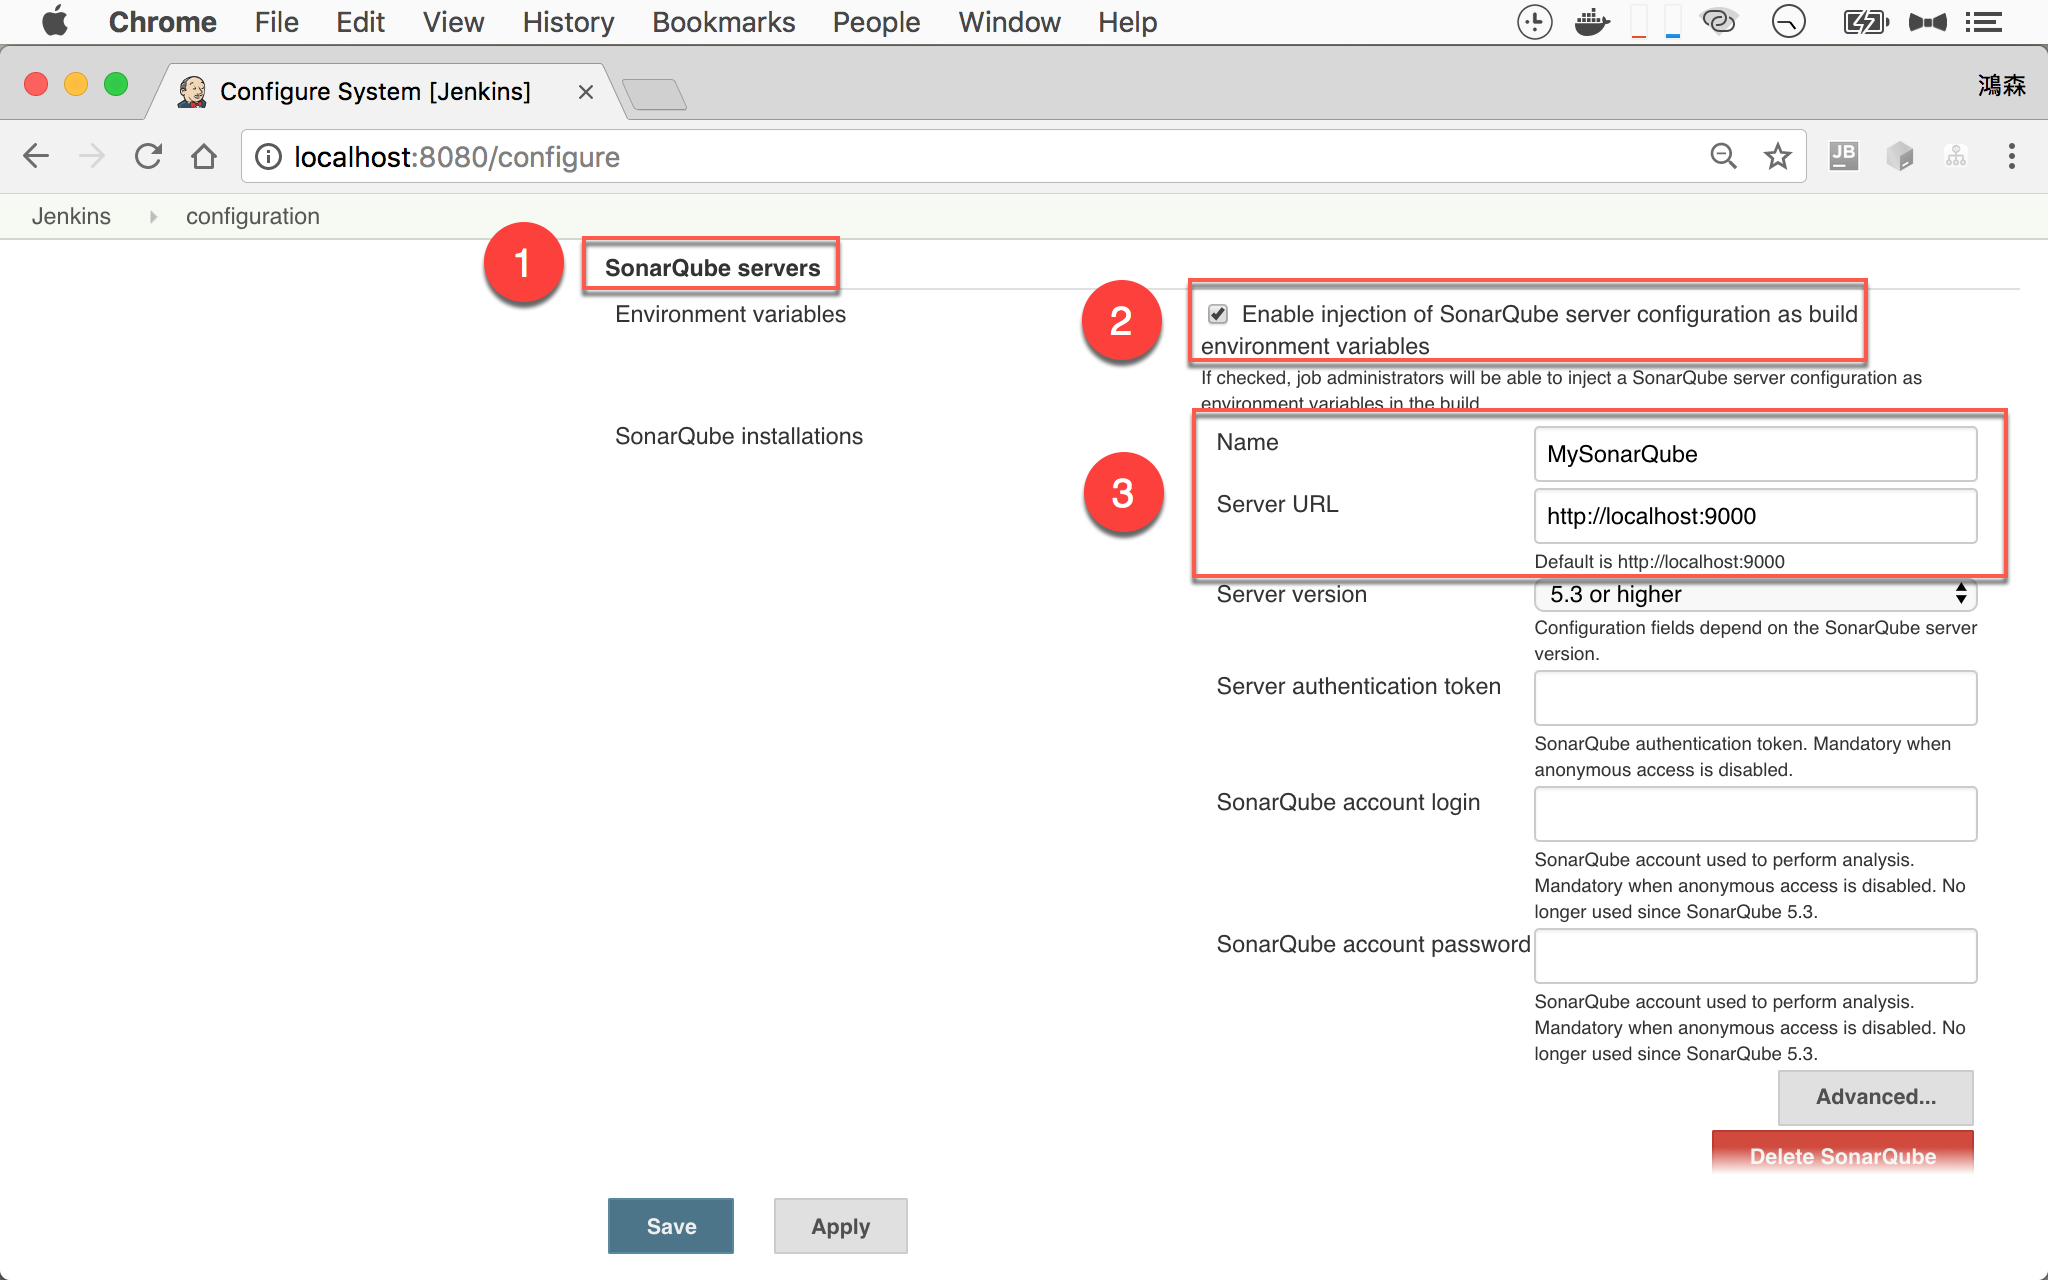
- 找到
SonarQube servers區段 - 將
Enable injection of SonarQube server configuration as build environment variables打勾 - 設定 SonarQube server 名稱與網址
最後按 Apply 與 Save 儲存設定。
設定 SonarQube Scanner 環境變數
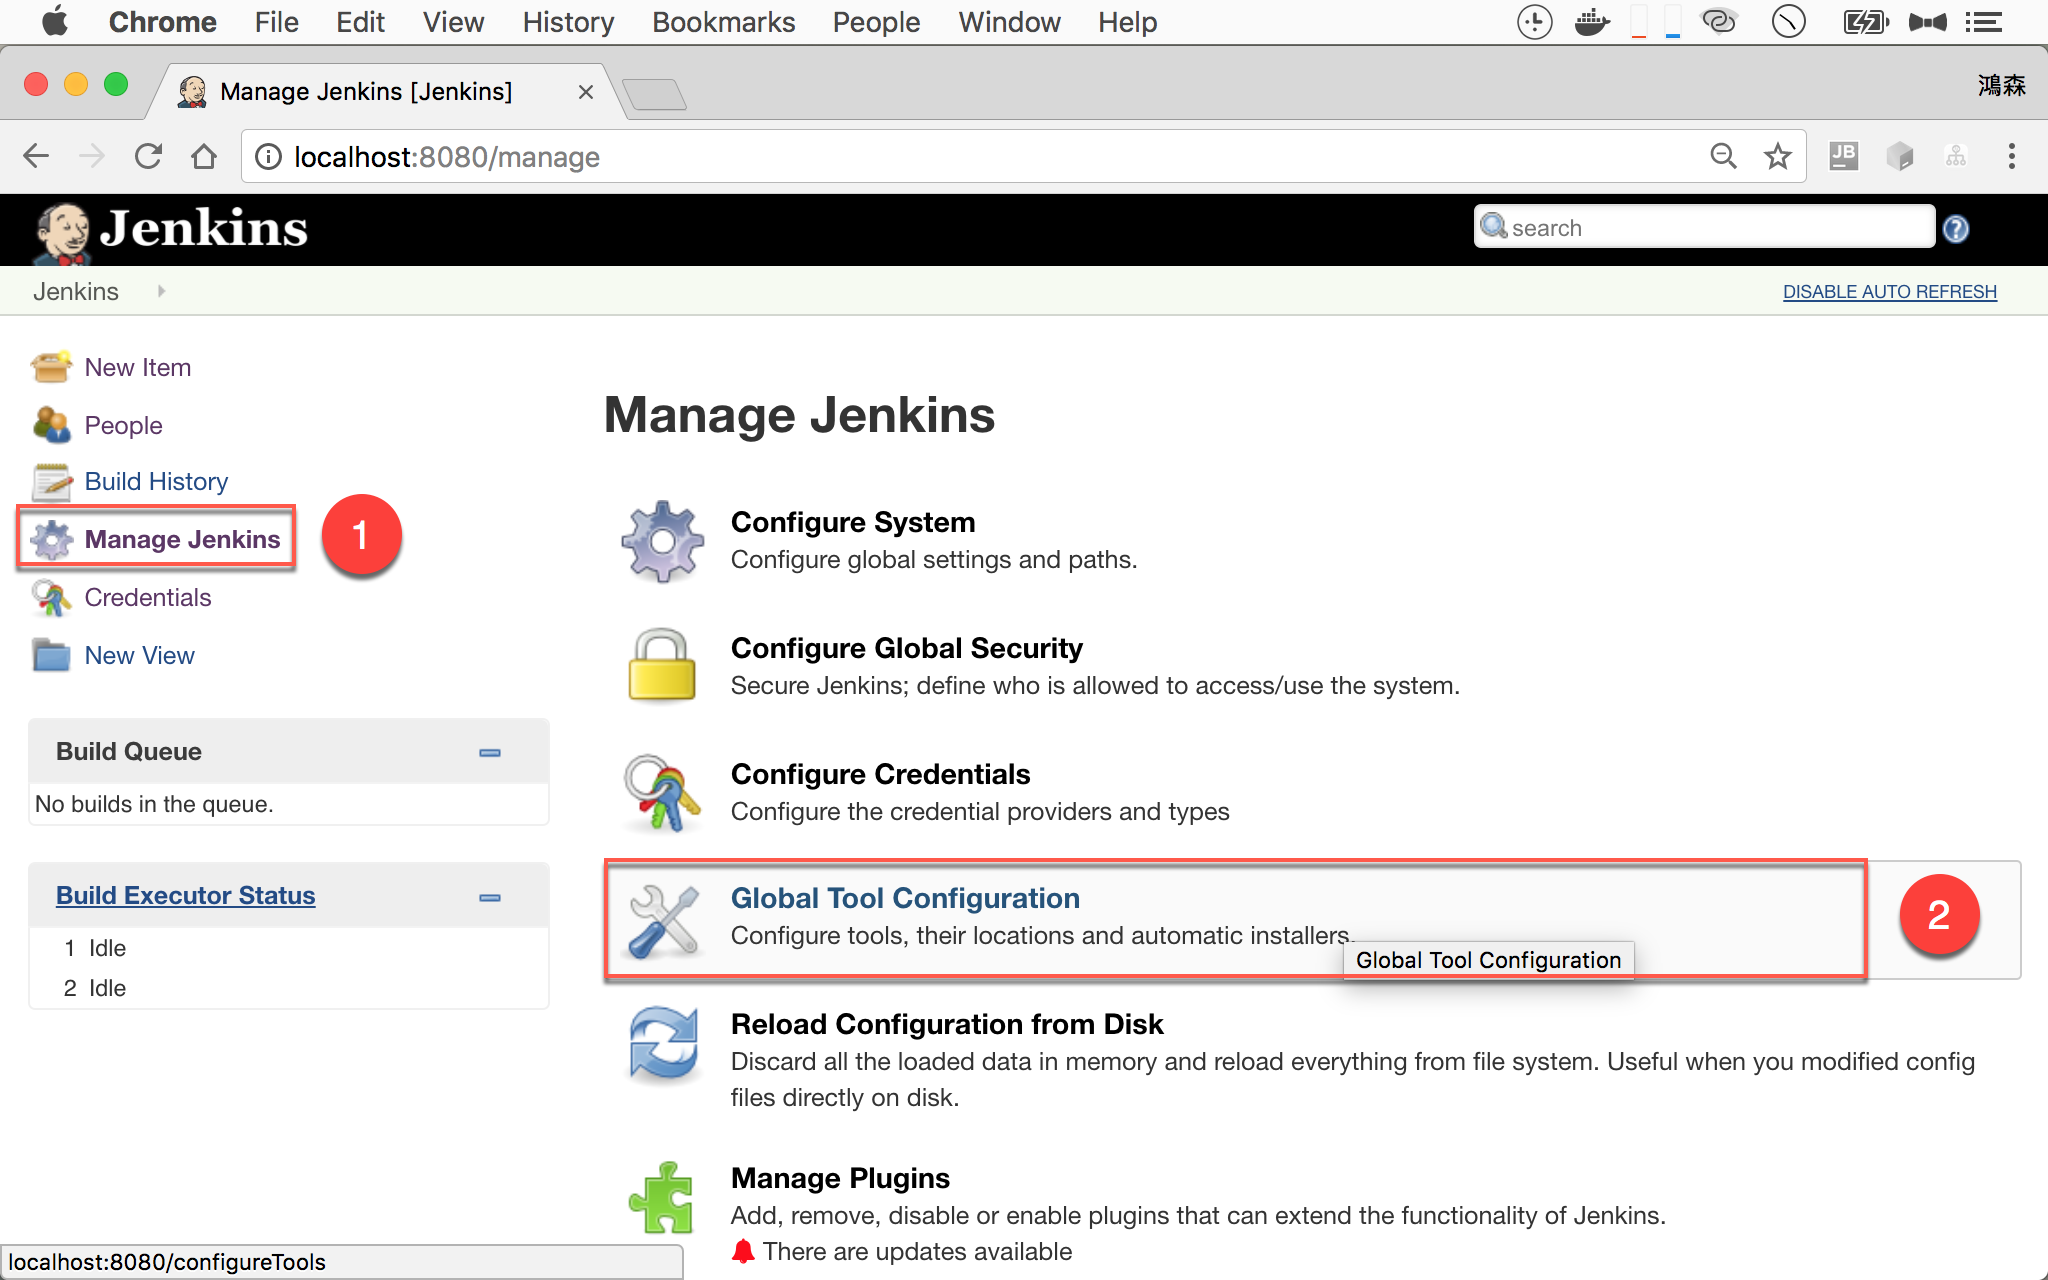
- 左側選擇
Manage Jenkins - 右側選擇
Global Tool Configuration
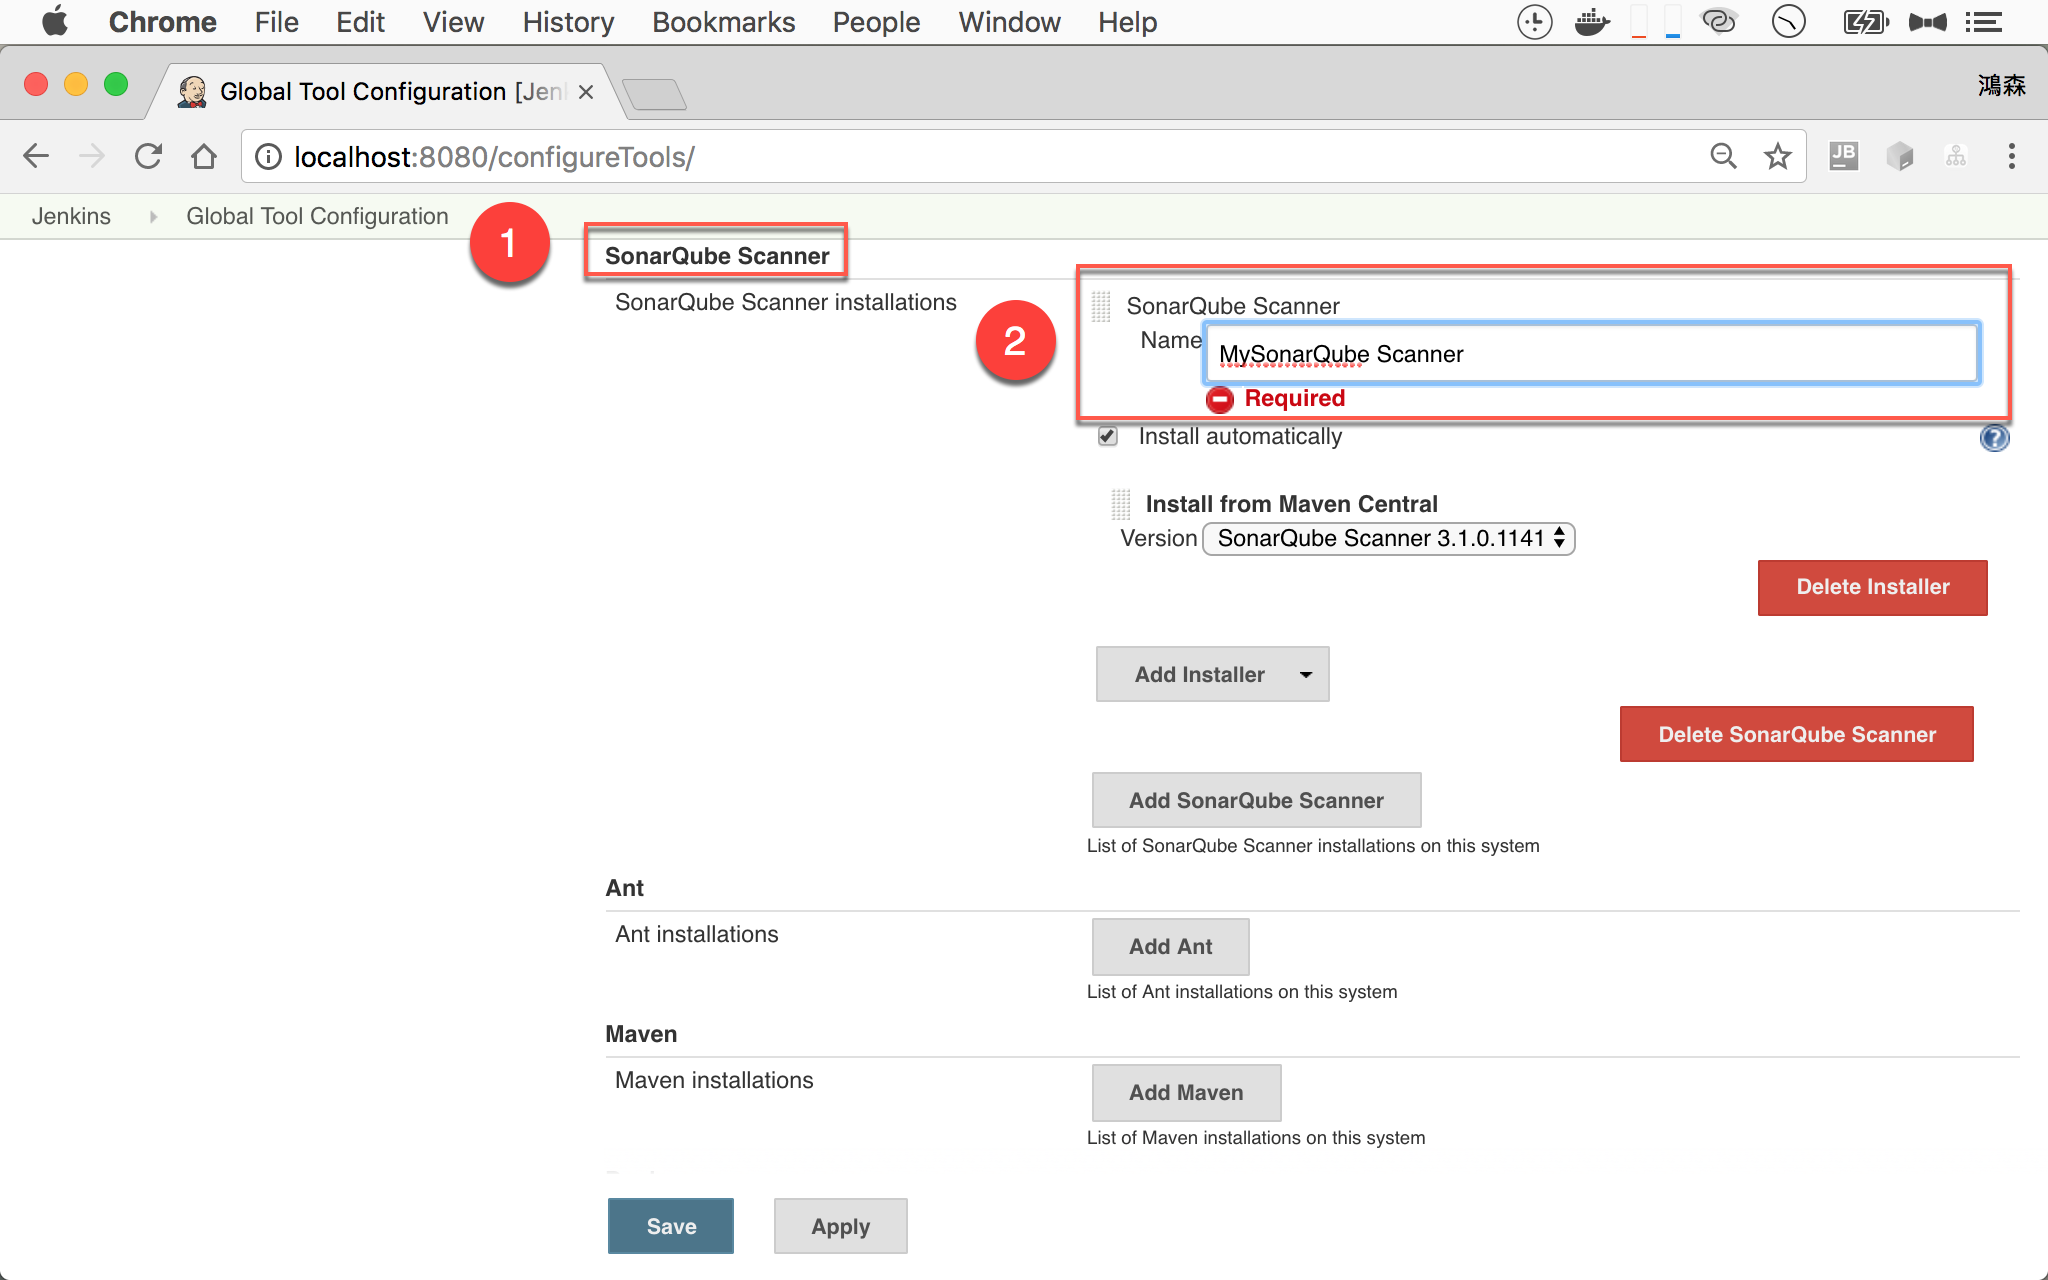
- 找到
SonarQube Scanner區段 - 設定 SonarQube Scanner 名稱
最後按 Apply 與 Save 儲存設定。
Jenkins Job
Source Code Management
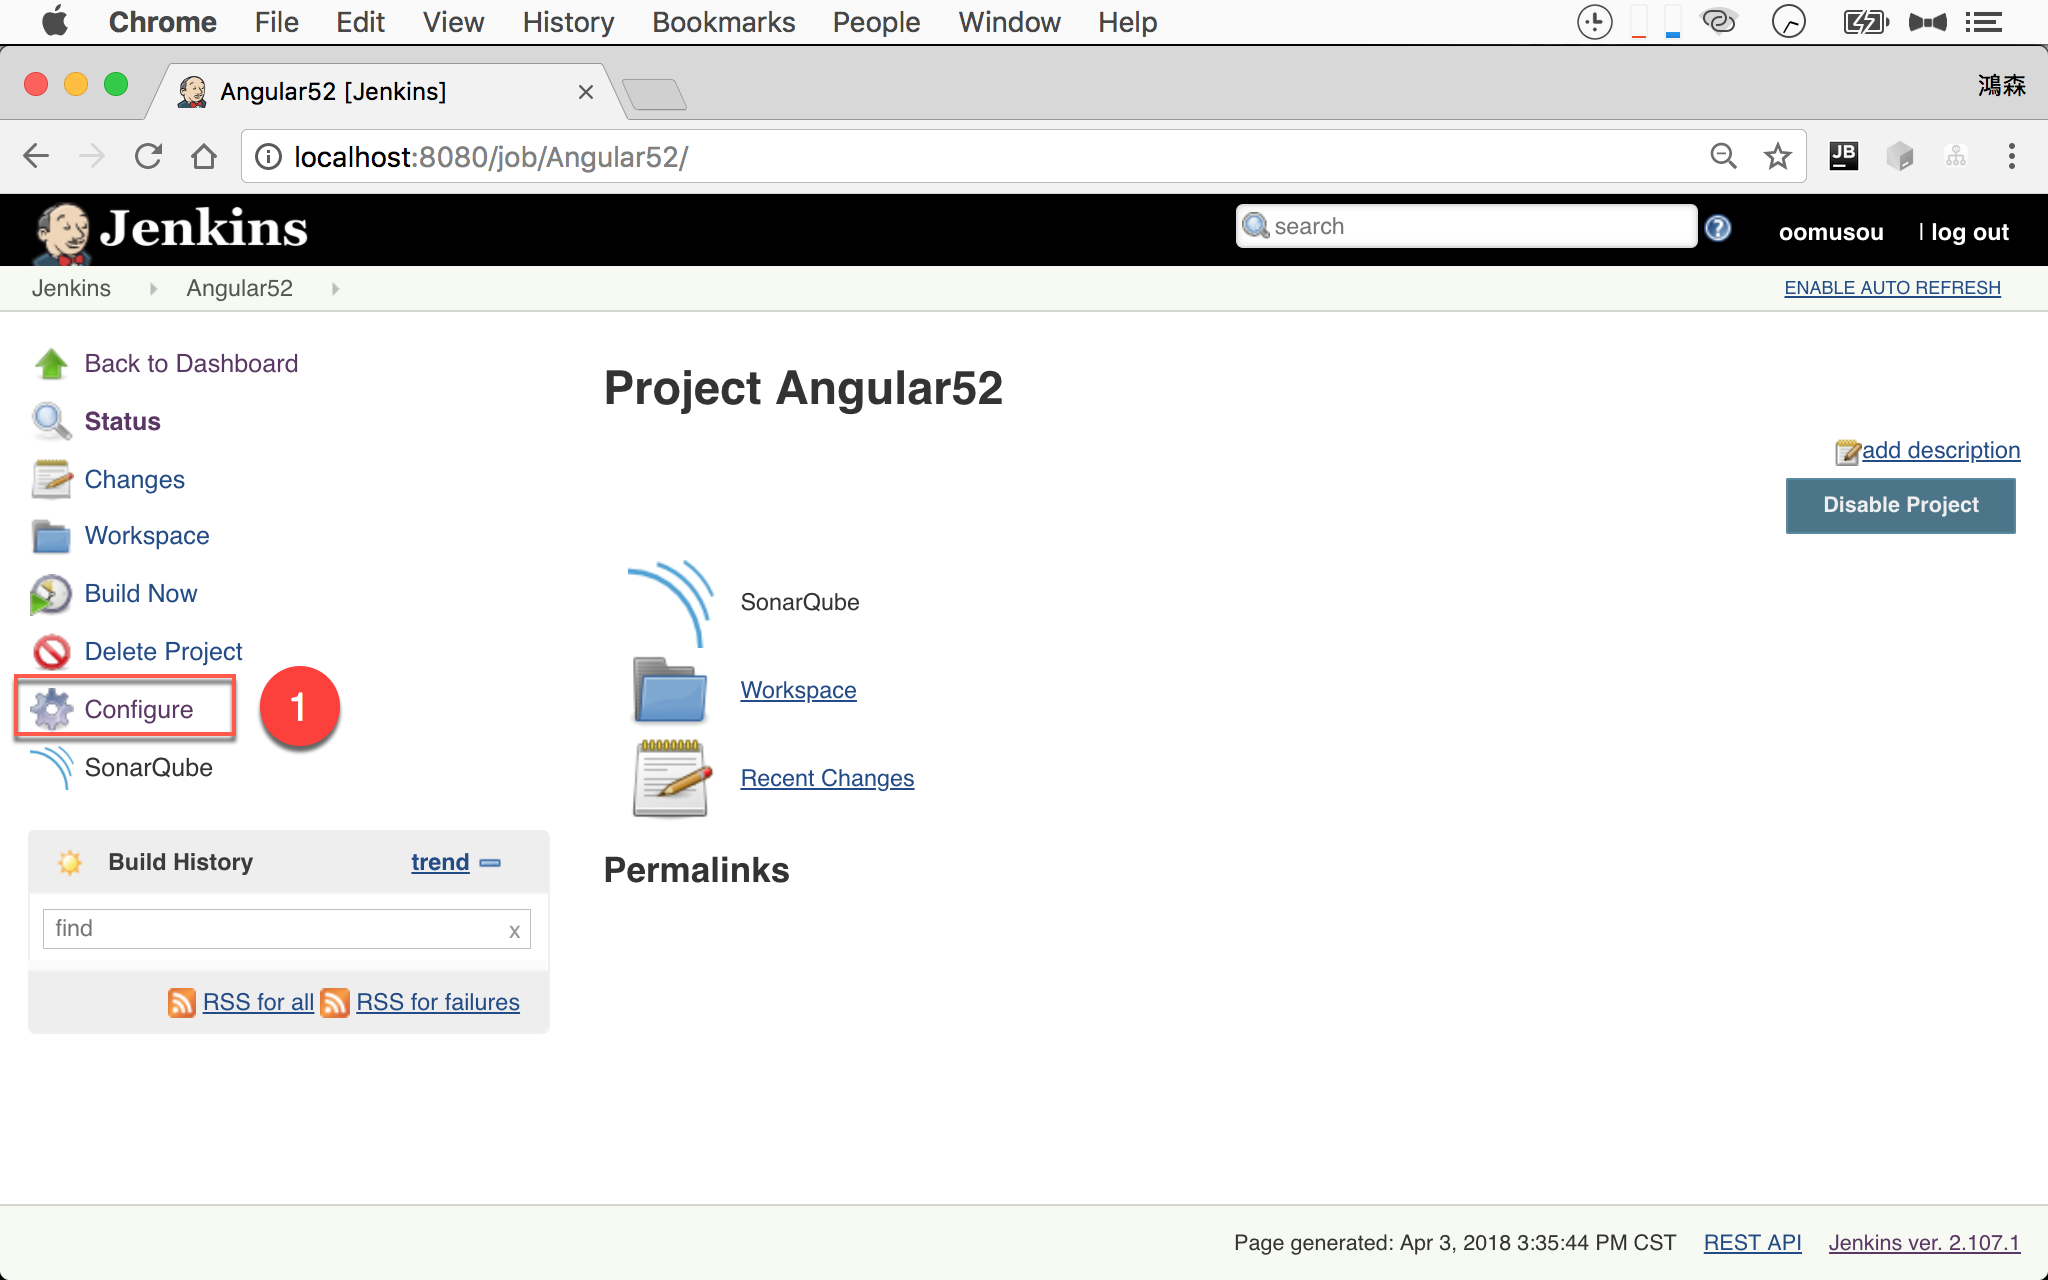
- 選擇 Job,按左側
Configure
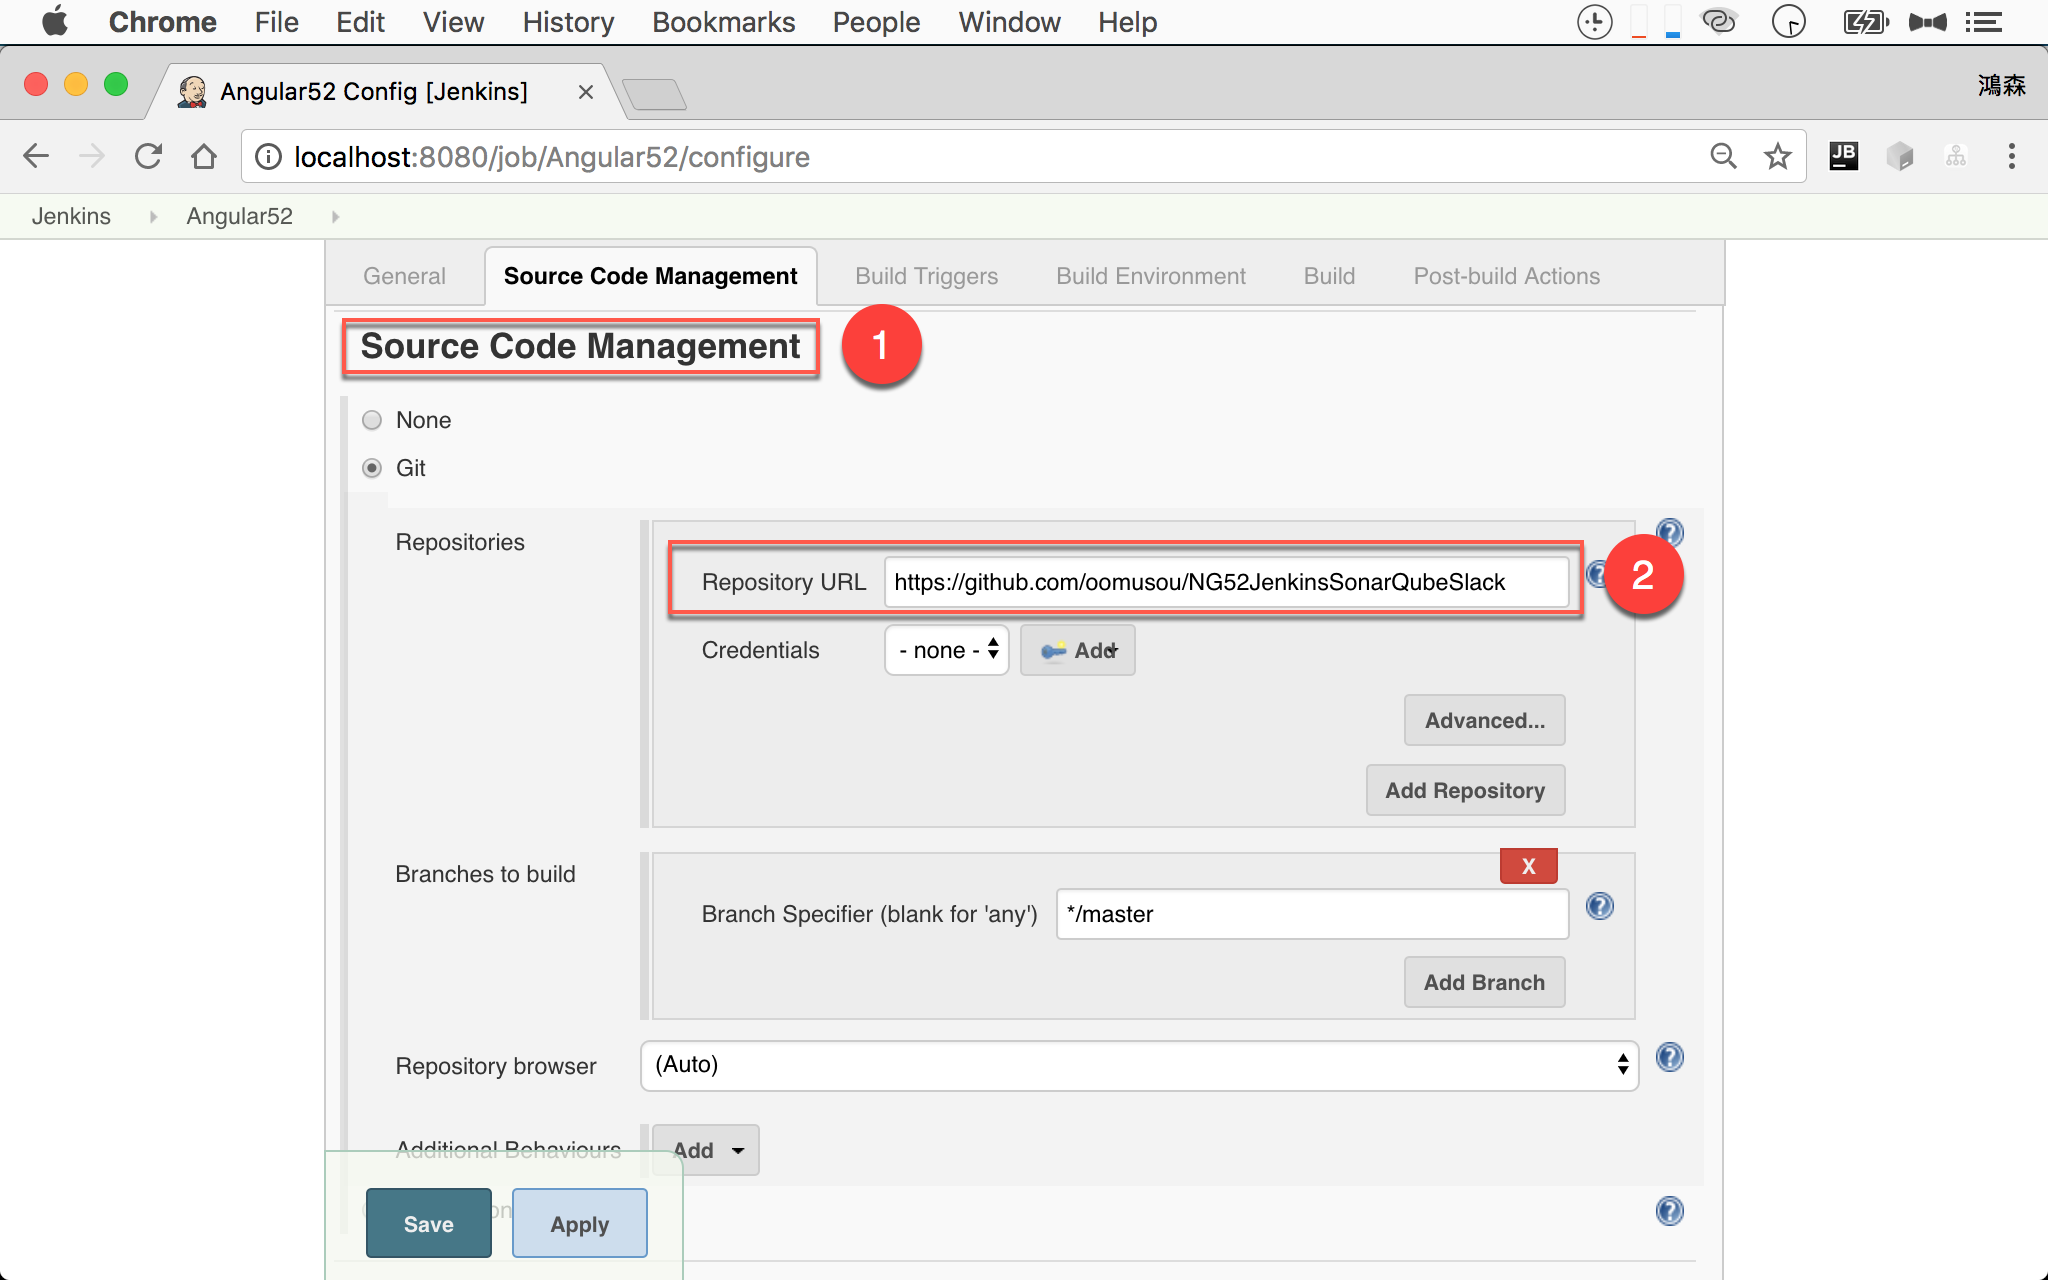
- 找到
Source Code Management區段 - 將 Git 的
Repository URL設定到https://github.com/oomusou/NG52JenkinsSonarQubeSlack
Build
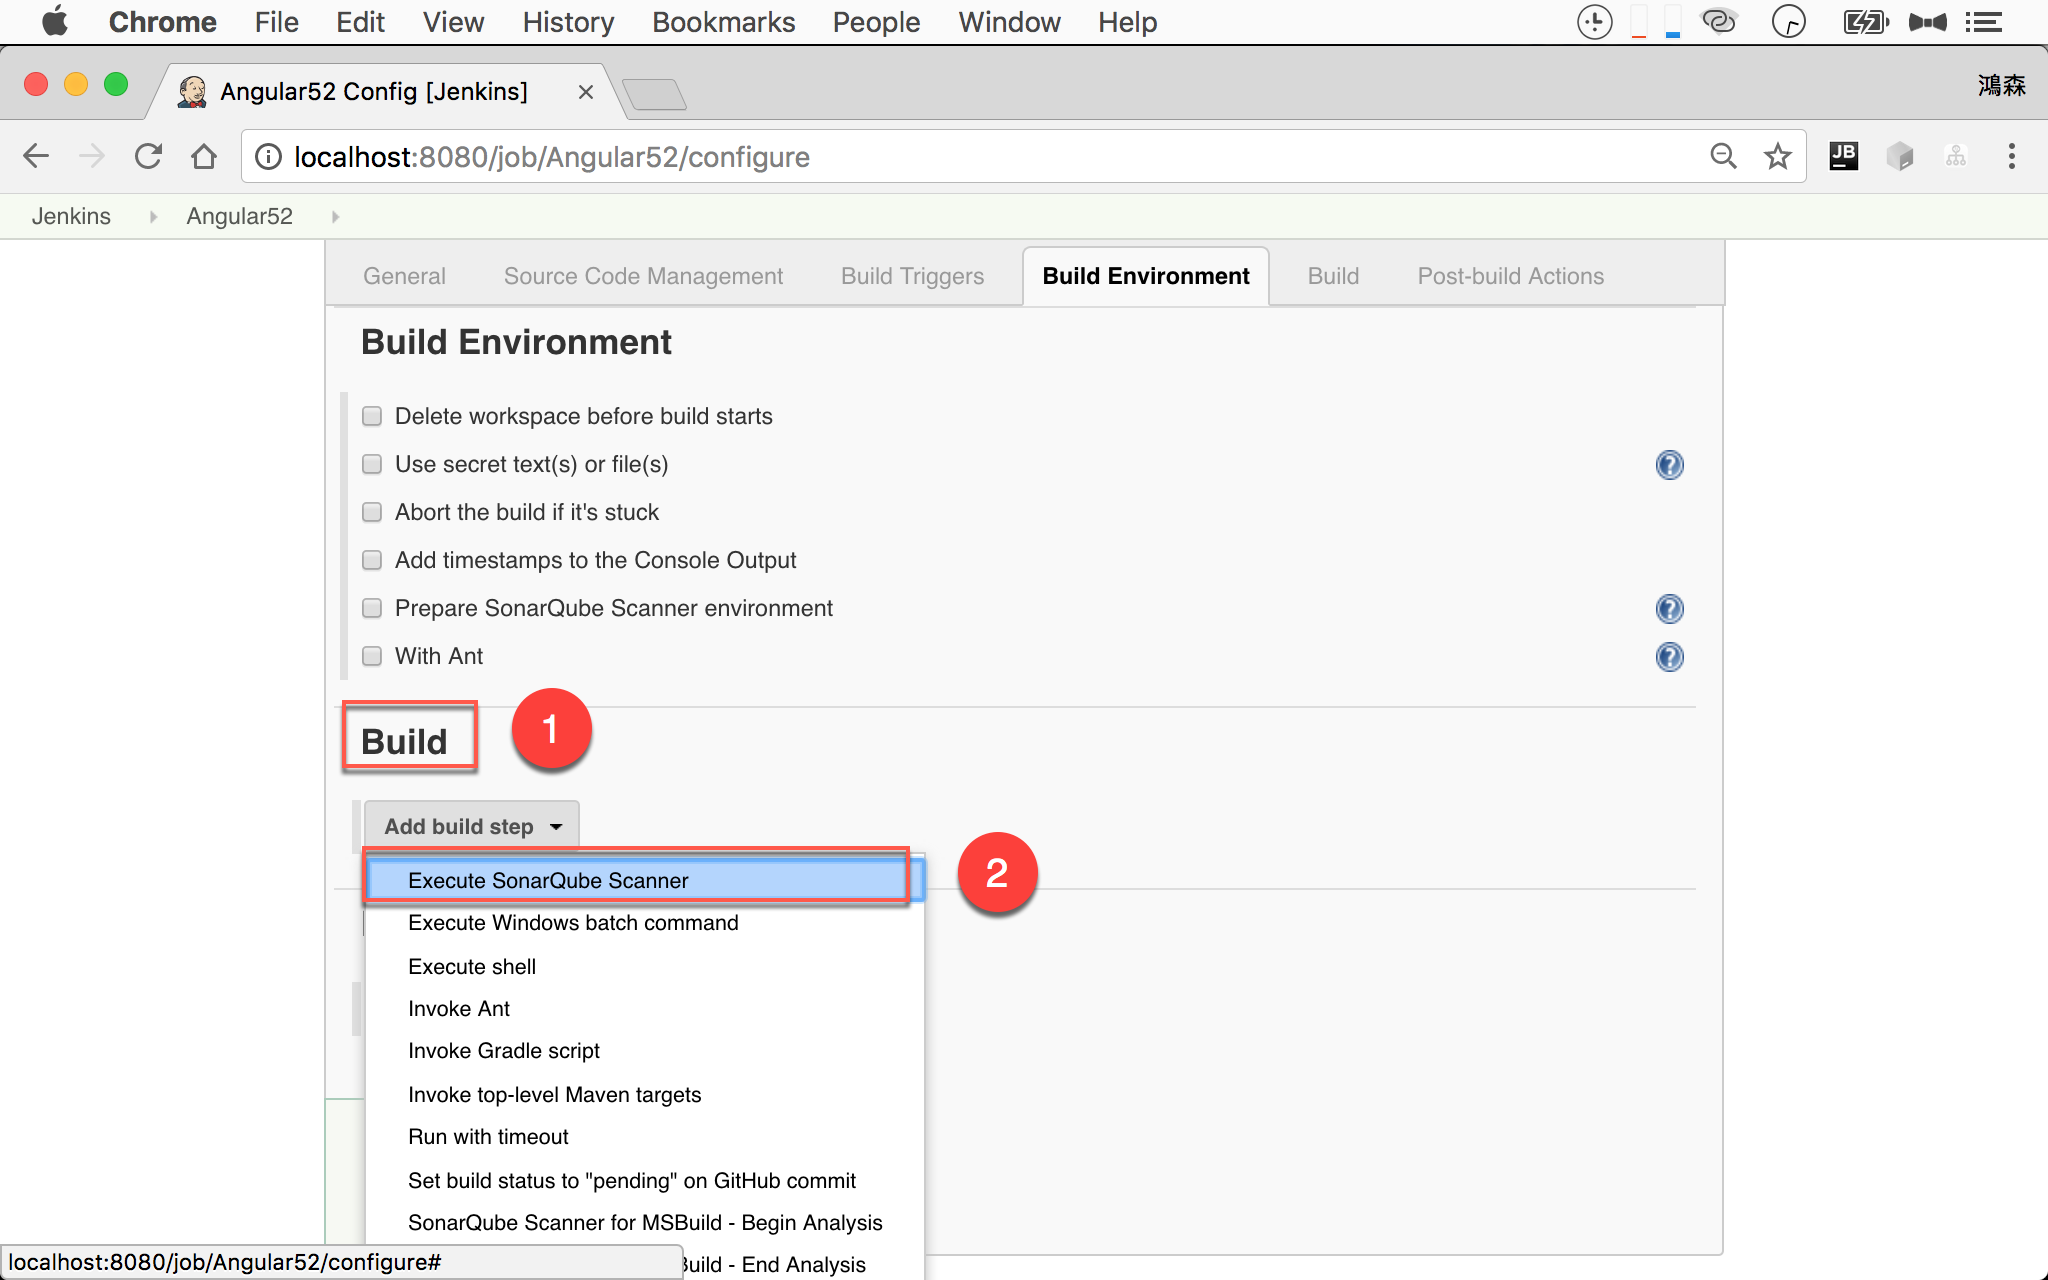
- 找到
Build區段 - 在
Add build step選擇Execute SonarQube Scanner
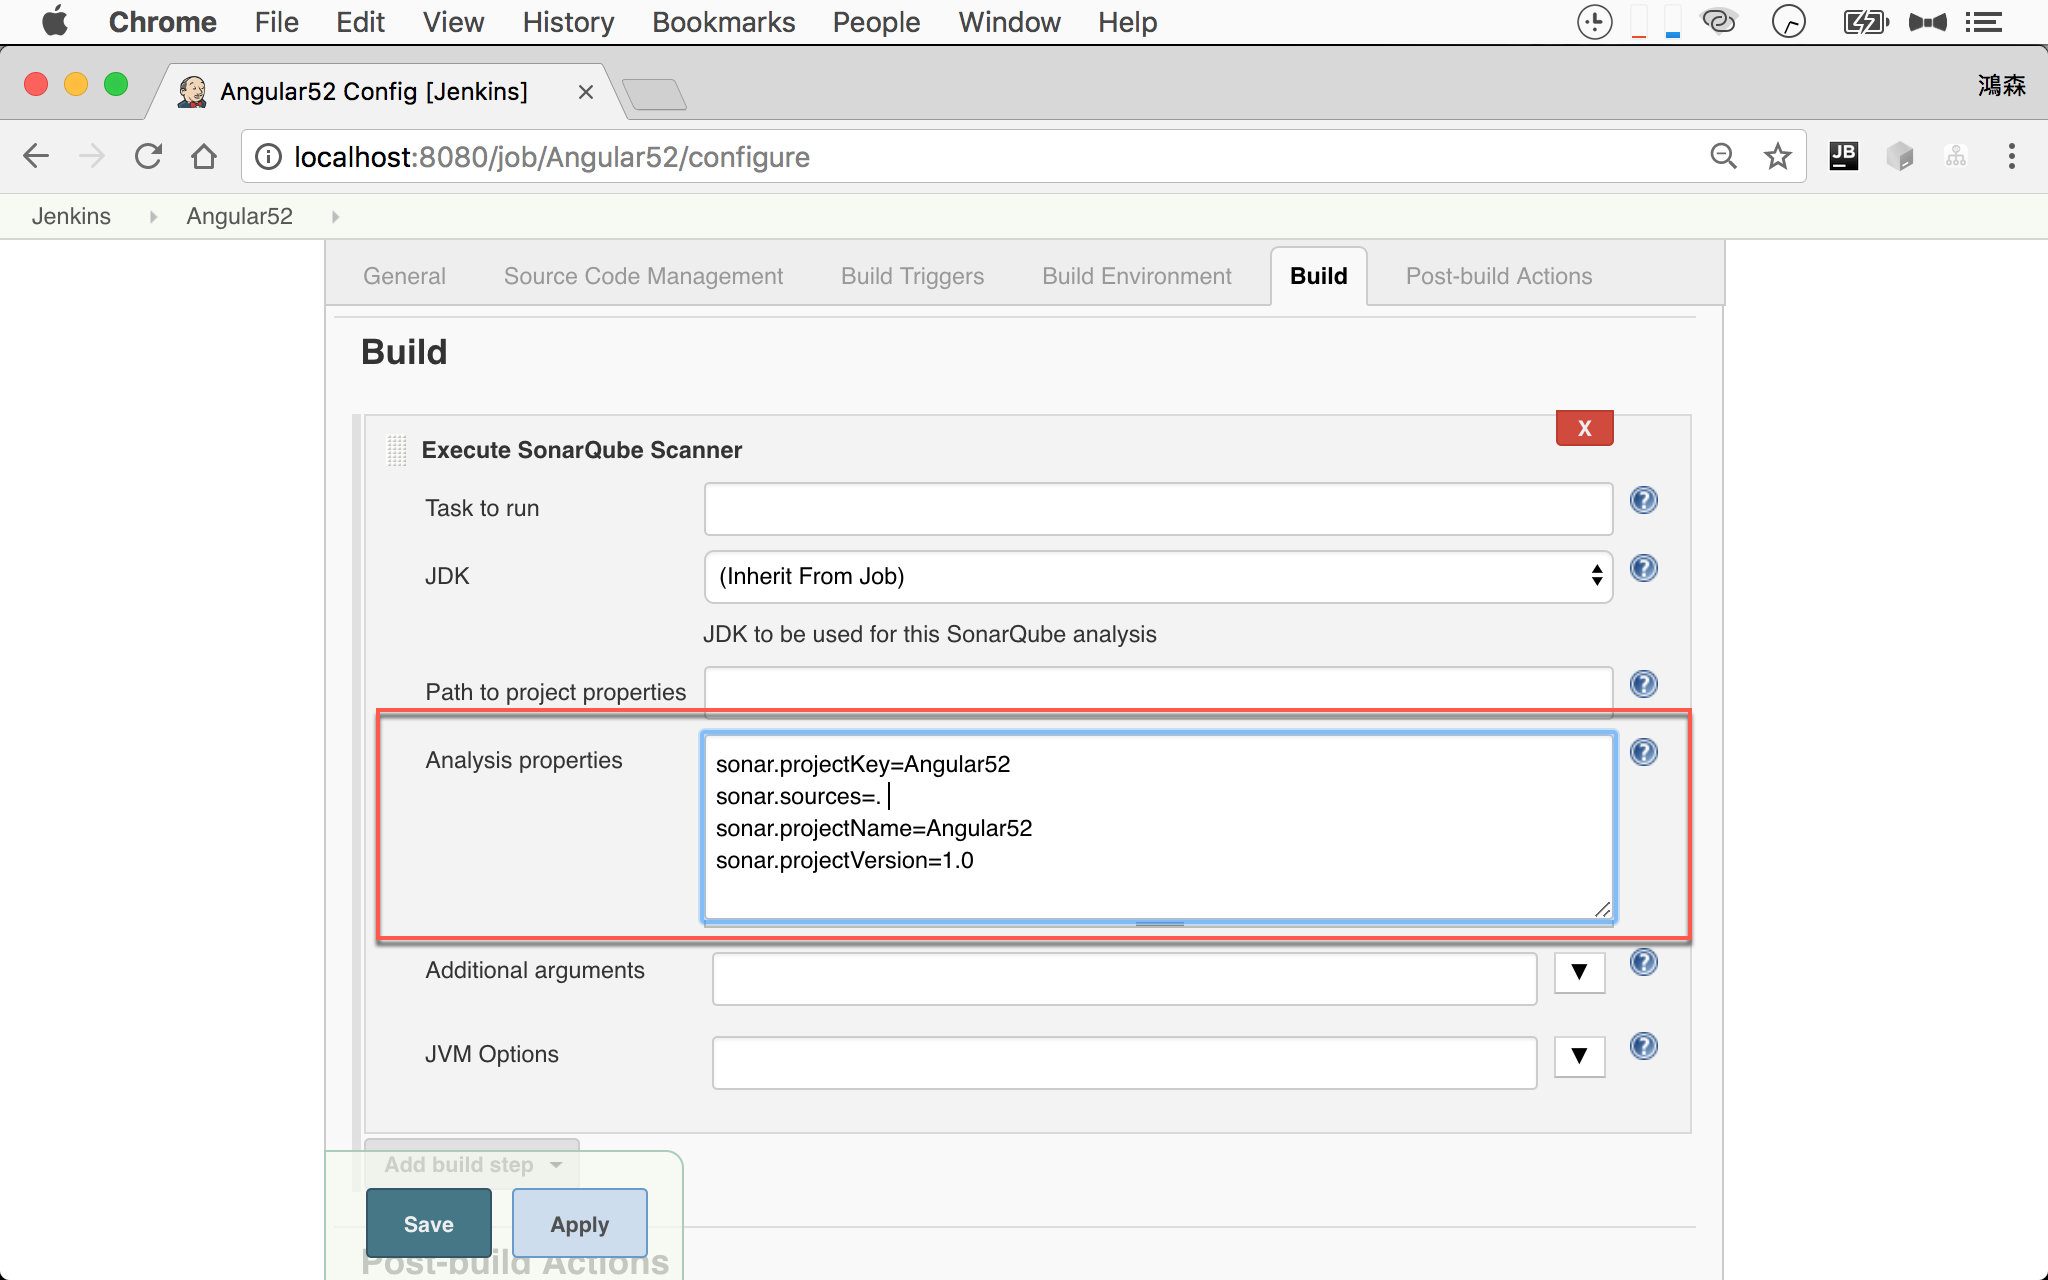
1 | sonar.projectKey=Angular52 |
在 Analysis properties 加上以上設定。
1 | ~/MyProject $ sonar-scanner -Dsonar.projectKey=Angular52 -Dsonar.sources=. -Dsonar.projectName=Angular52 -Dsonar.projectVersion=1.0 |
還記得之前曾經下過以上指令嗎?就是將這些 SonarQube property 設定在 Jenkins,改由 Jenkins 幫我們傳。
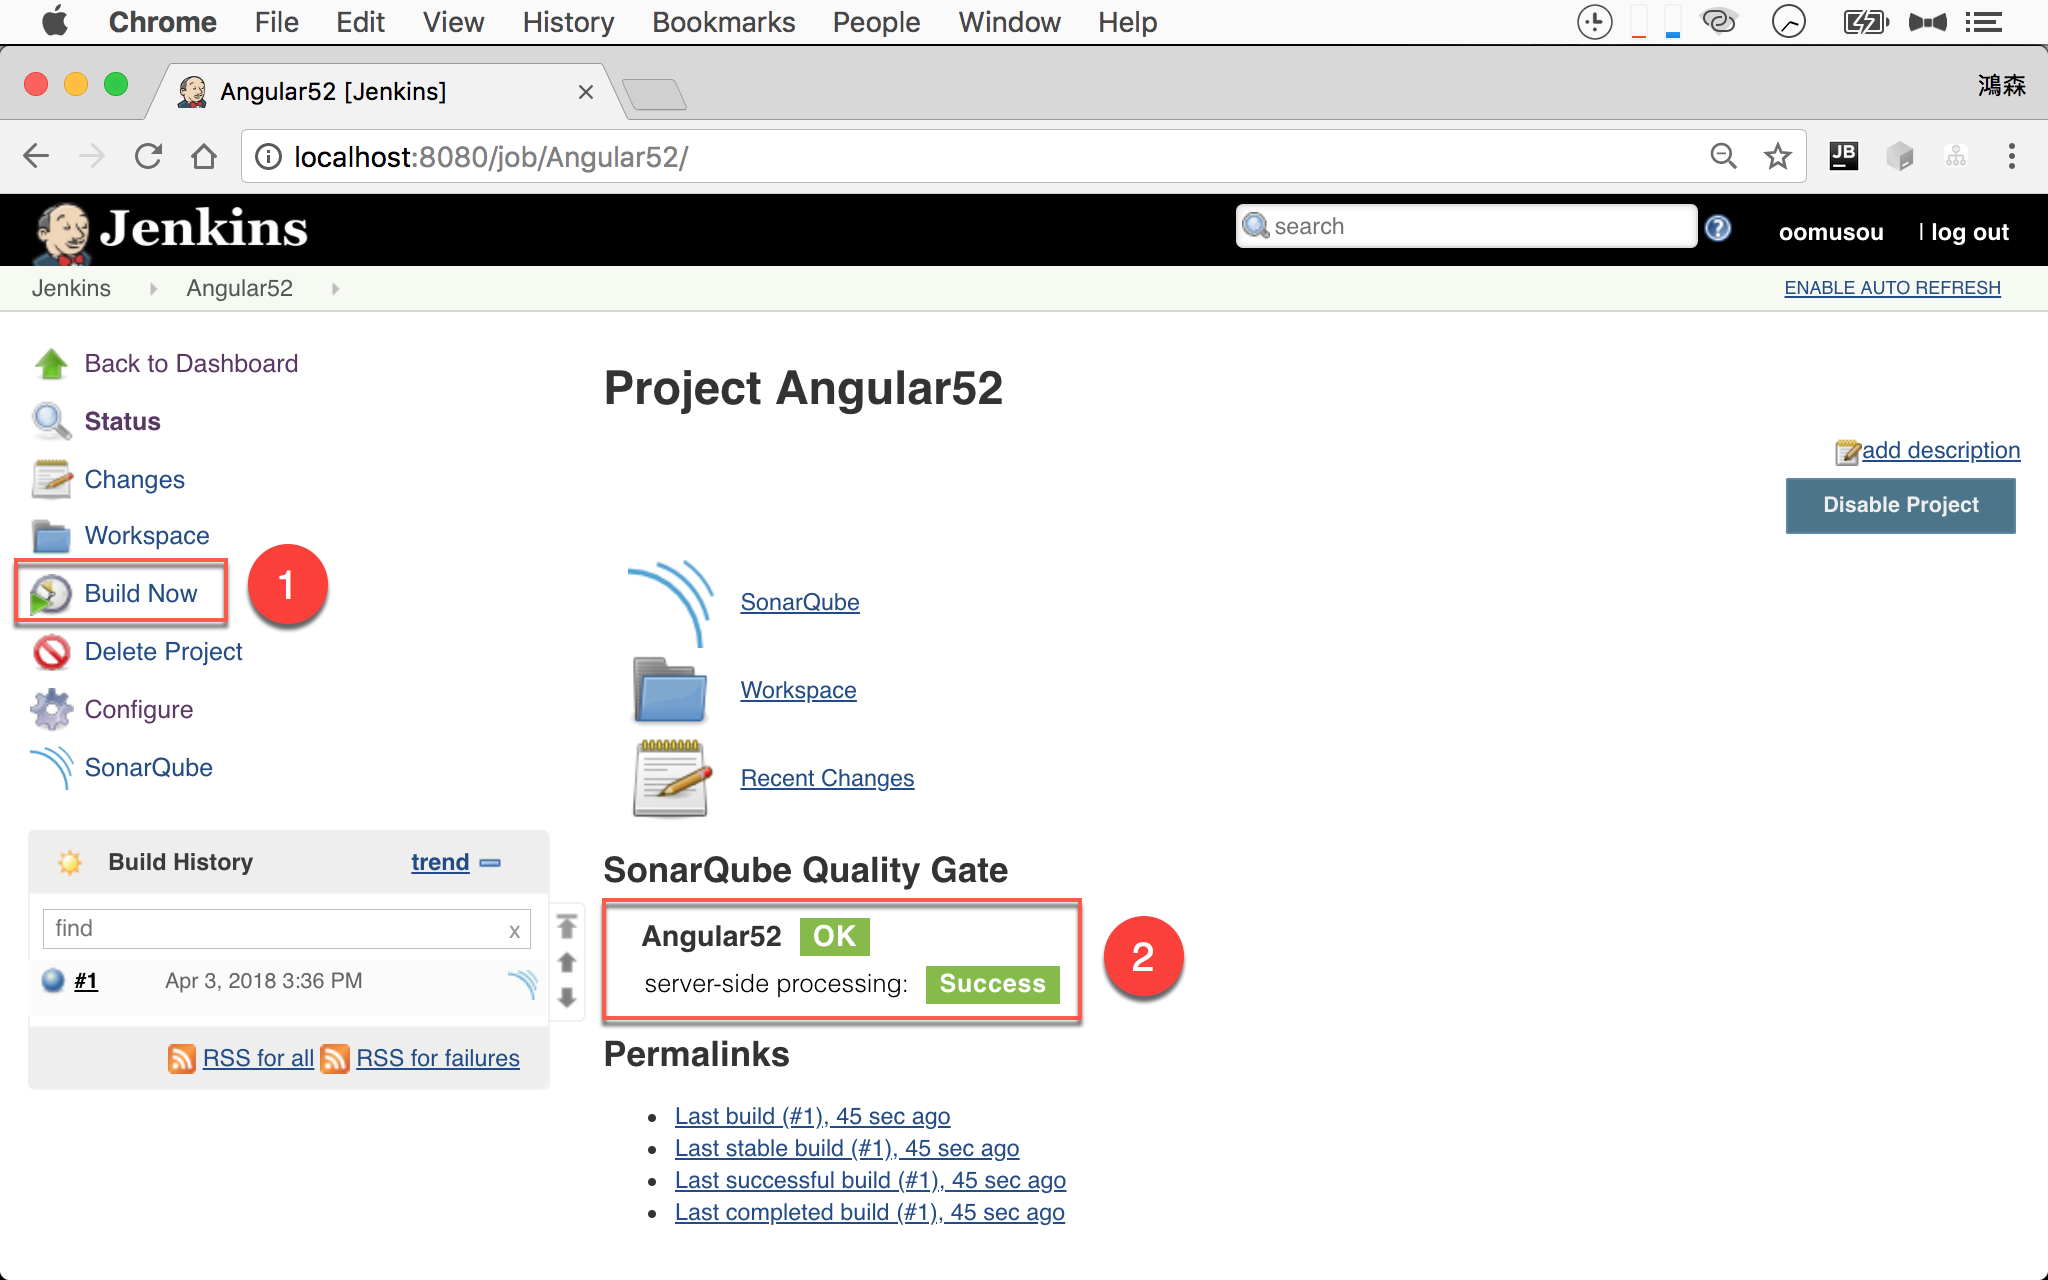
- 按左側
Build Now執行 Job - 執行成功後會出現
OK與Success。
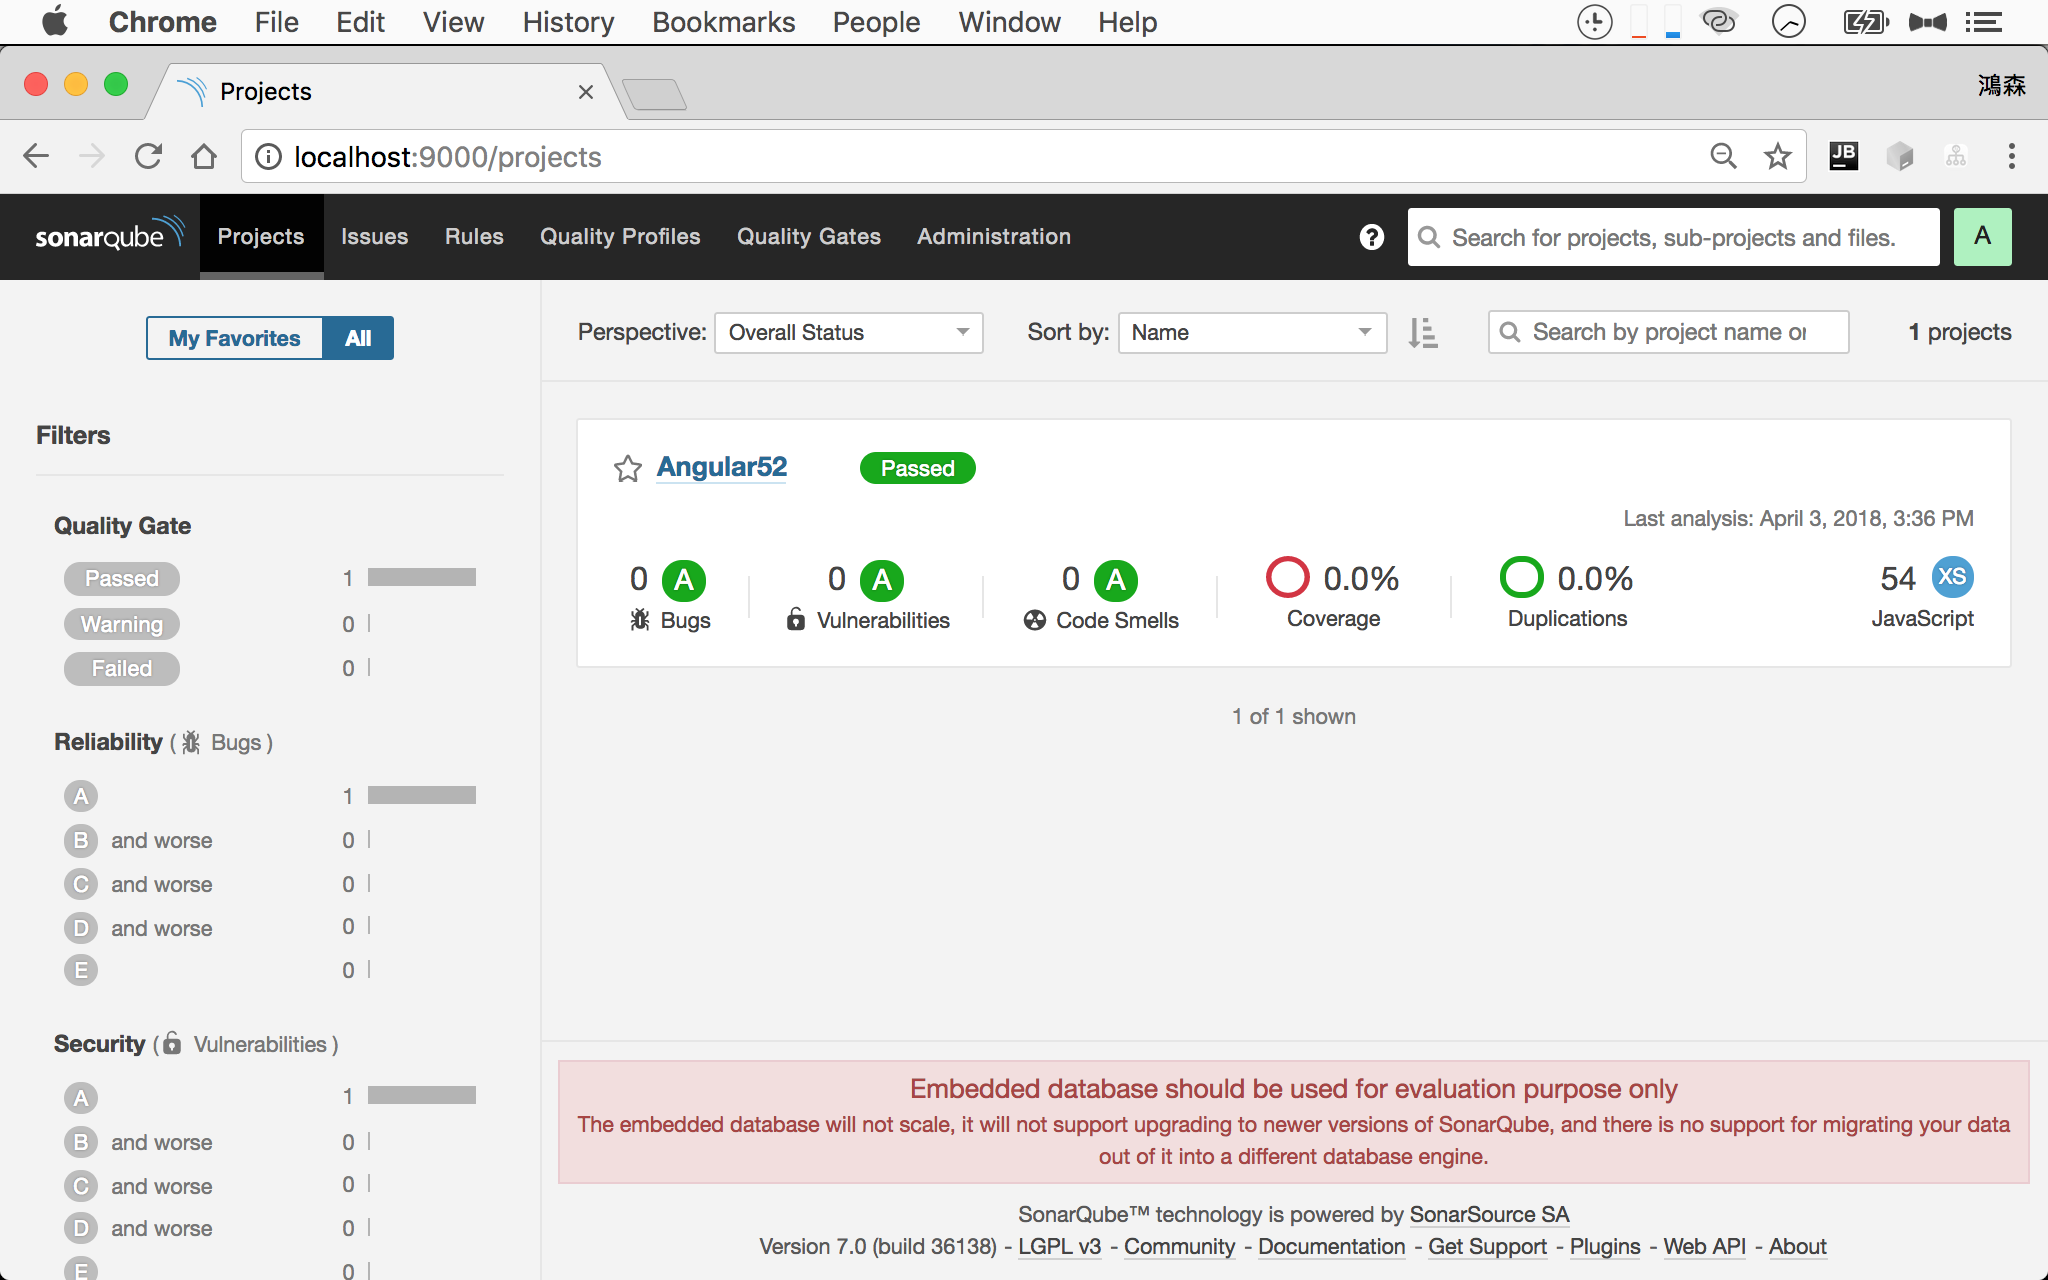
剛剛 Jenkins 執行的 Project 出現在 SonarQube 上。
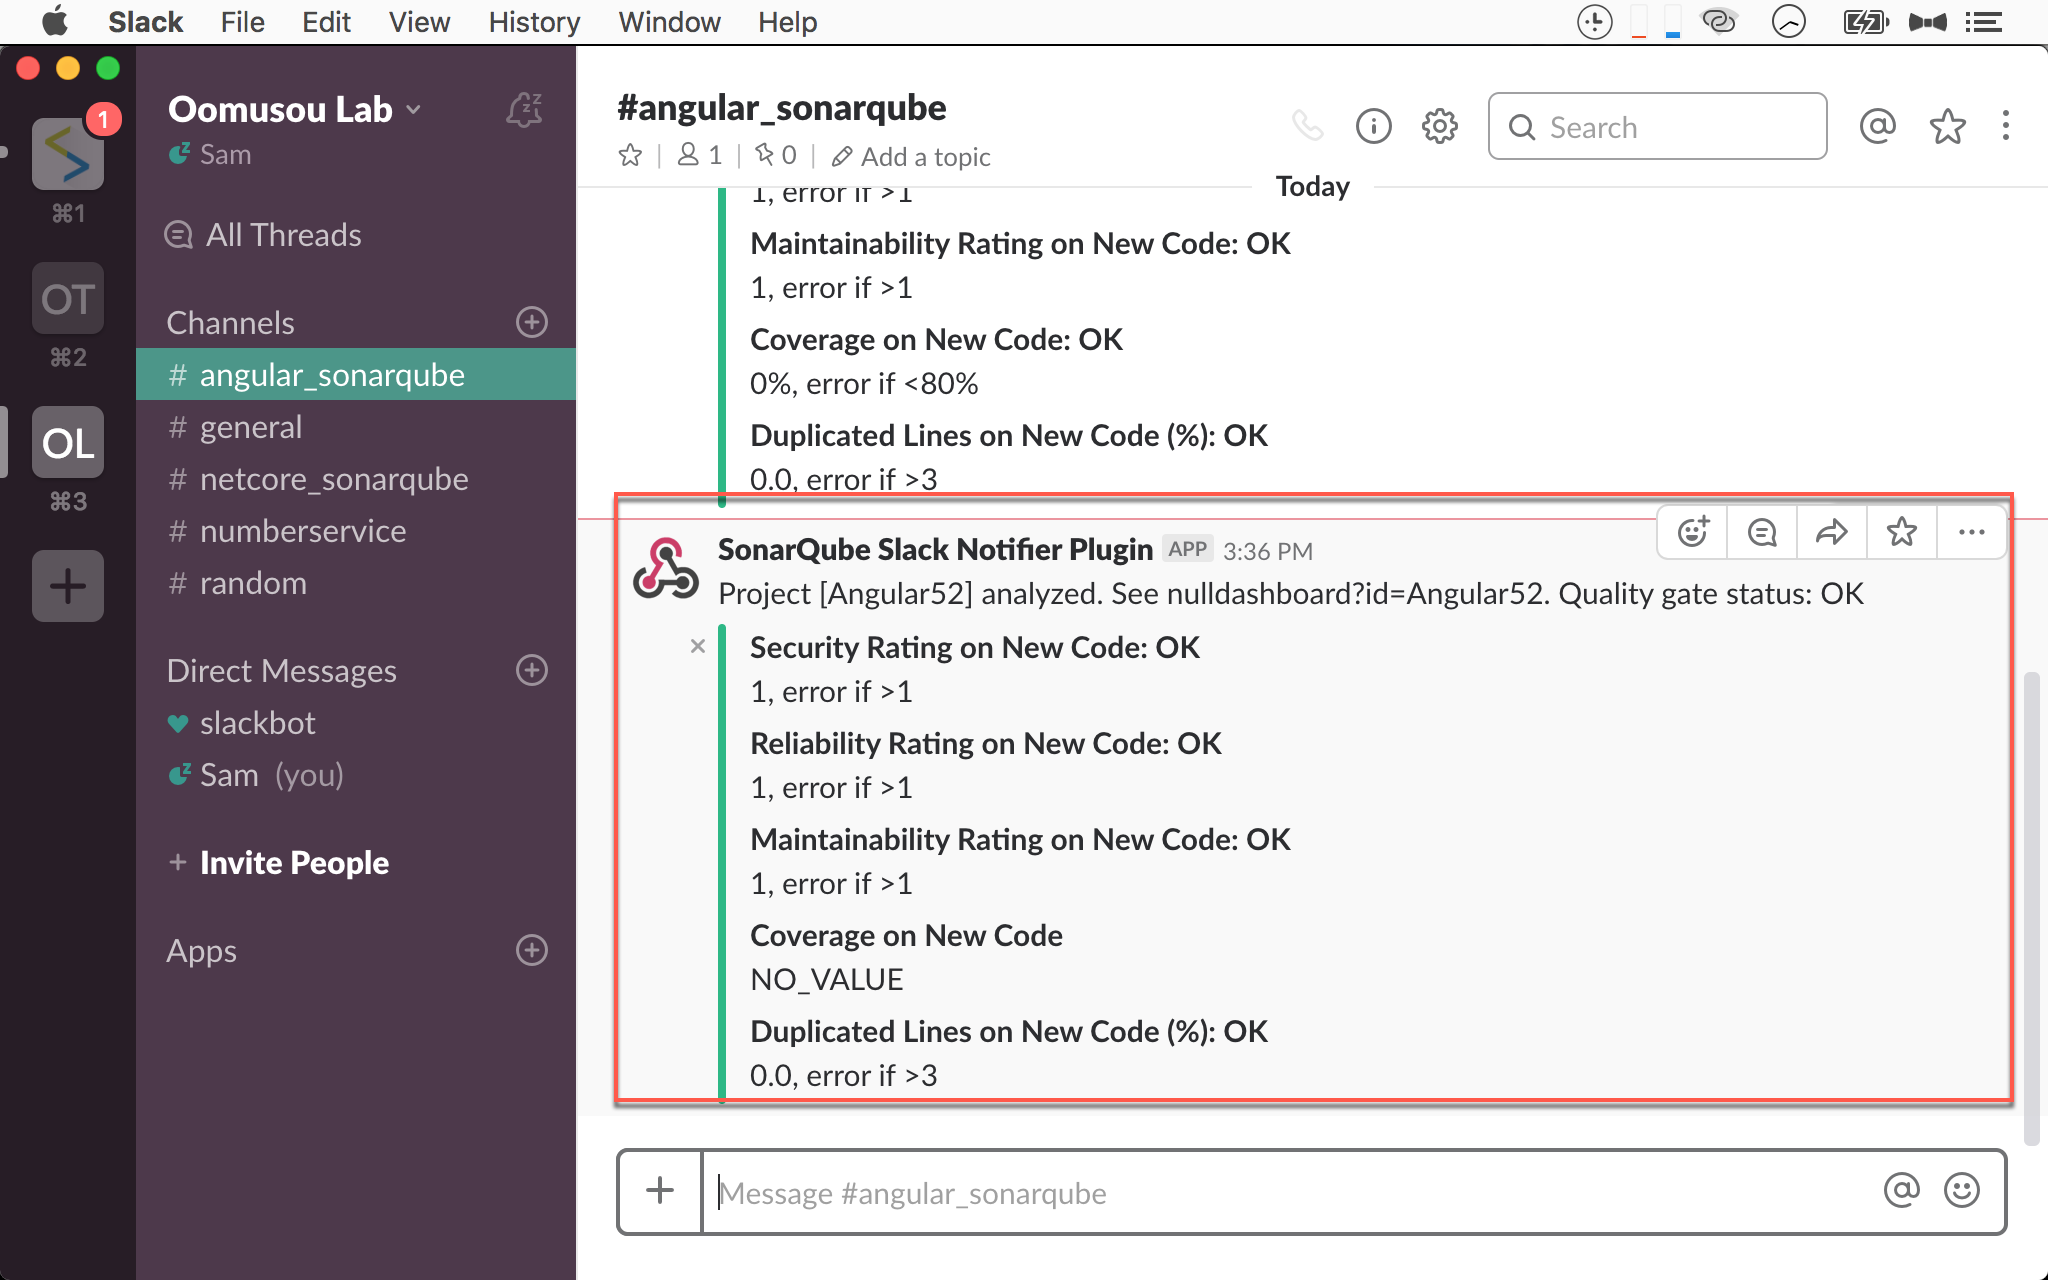
- Slack 也再次收到 SonarQube 檢查的結果
Conclusion
- SonarQube 已經內建 SonarTS,也可以用來檢查 TypeScript 與 Angular
- 就算不將 SonarQube 安裝在 server,安裝在本機也能有效的檢查 TypeScript 程式碼品質
- SonarQube 也能將檢查結果推送到 Slack
- 藉由 Jenkins 幫忙,我們就可以自動化執行 SonarQube
Sample Code
完整的範例可以在我的 GitHub 上找到
Reference
SonarQube, SonarQube Downloads
SonarQube, Analyzing with SonarQube Scanner
SonarQube, Analying with SonarQube Scanner for Jenkins
Jenkins, SonarQube Scanner
Antti Koivisto, CKS Sonar Slack Notifier Plugin