如何使用 SonarQube 檢查 .NET Core 專案 ? (Docker)
SonarQube 是一套 程式碼品質檢查工具,可以幫我們檢查 C# 的 bugs、 vulenrability、code smell 與 duplication。
本文使用 Docker Compose,並同時啟動 .NET Core 與 SonarQube 兩個 container,自動對 .NET 專案進行檢查。
Version
macOS High Sierra 10.13.6
Docker for Mac 18.06.0-ce-mac70 (26399)
.NET Core 2.1
SonarQube 7.1
SonarScanner 4.3.1.1372
Rider 2018.1.3
Dockerfile
1 | FROM microsoft/dotnet |
因為要在 .NET Core container 安裝 SonarScanner,所以要對 .NET Core 客製化 image。
第 1 行
1 | FROM microsoft/dotnet |
使用 FROM 設定所使用的基底 image。
使用 Microsoft 官方的 microsoft/dotnet image。
第 3 行
1 | ENV SCANNER_VERSION=4.3.1.1372 |
使用 ENV 設定 Dockerfile 的環境變數。
SCANNER_VERSION : 因為 SonarScanner 的下載路徑,會與版本有關,所以特別設定成變數。
SCANNER_HOME : 設定 SonarScanner 所安裝的目錄。
第 6 行
1 | WORKDIR /app |
設定 container 的工作目錄,也就是預設目錄都會在 /app 下。
第 8 行
1 | RUN apt-get update |
使用 RUN 執行 CLI 指令。
- 使用
wget下載 SonarScanner - 使用
unzip對 zip 解壓縮 SonarScanner會使用 Java 執行,需要安裝 Java Runtime
12 行
1 | RUN wget -q https://github.com/SonarSource/sonar-scanner-msbuild/releases/download/$SCANNER_VERSION/sonar-scanner-msbuild-$SCANNER_VERSION-netcoreapp2.0.zip -O /opt/sonar-scanner-msbuild.zip |
使用 wget 下載 SonarScanner 壓縮檔,並下載到 /opt 目錄下。
13 行
1 | RUN mkdir -p $SCANNER_HOME |
建立 /opt/scanner 目錄,將 SonarScanner 壓縮檔解壓縮放到 /opt/scanner 目錄下,解壓縮完刪除 SonarScanner 壓縮檔。
16 行
1 | RUN chmod 775 $SCANNER_HOME/ -R |
將 SonarScanner 目錄所有檔案賦予執行權力。
18 行
1 | COPY ./ ./ |
將目前 solution 下所有檔案複製到 container 內,也就是 /app 目錄下。
19 行
1 | ENTRYPOINT ["./scanner.sh"] |
最後會執行專案目錄下的 ./scanner.sh,負責執行 SonarScanner 檢查。
Docker-compose.yml
1 | version: "3" services: net-core: build: . container_name: MyCore volumes: - "${HOST_DIR}:/code/" networks: - netcore depends_on: - sonarqube sonarqube: image: sonarqube:latest container_name: MySonarQube ports: - 9000:9000 - 9002:9002 networks: netcore: ipv4_address: 172.16.238.10 networks: netcore: ipam: driver: default config: - subnet: 172.16.238.0/24 |
設定 .NET Core 與 SonarQube 兩個 container 同時啟動。
第 4 行
1 | net-core: build: . |
使用 build 將同目錄下的 Dockerfile build 成 image,也就是剛才的 Dockerfile。
第 6 行
1 | container_name: MyCore |
使用 container_name 設定 .NET Core 的 container 名稱。
第 7 行
1 | volumes: - "${HOST_DIR}:/code/" |
使用 volumes 設定 host 與 container 的共用目錄,: 左方為 host 目錄,右方為 container 目錄。
目的是能在 .NET Core container 內抓到 host 的 project。
第 9 行
1 | networks: - netcore |
使用 networks 設定 .NET Core 與 SonarQube 共用 netcore 內部網路。
11 行
1 | depends_on: - sonarqube |
.NET Core container 相依於 SonarQube container。
14 行
1 | sonarqube: image: sonarqube:latest |
使用 image 設定 container 所使用的 image。
16 行
1 | container_name: MySonarQube |
使用 container_name 設定 SonarQube 的 container 名稱。
17 行
1 | ports: - 9000:9000 - 9002:9002 |
使用 ports 設定 host 與 container 所 mapping 的 port,: 左側為 host port,右側為 container port。
為了能在 host 以瀏覽器連上 SonarQube,要將 host 的 9000 與 9002 兩個 port 給 host。
20 行
1 | networks: netcore: ipv4_address: 172.16.238.10 |
使用 network 設定使用 netcore 網路,並設定其 IP 為 172.16.238.10。
一般來說,我們不必為 container 設定固定 IP,只要使用 container 名稱就可彼此溝通,但稍後 SonarScanner 必須使用固定 IP 才能連上 SonarQube,所以在此特別要設定固定 IP
24 行
1 | networks: netcore: ipam: driver: default config: - subnet: 172.16.238.0/24 |
設定 netcore 網路。
.env
1 | HOST_DIR=~/Code/CSharp |
將 HOST_DIR 以環境變數設定,為 host 與 .NET Core container 所共享的目錄。
scanner.sh
1 | #! /bin/bash |
使用 SonarScanner 檢查 .NET Core 專案,scanner.sh 會放在專案根目錄。
第 2 行
1 | sleep 30 |
主要是要等 SonarQube 啟動完成,比較好的方式是使用 Health Check 明確得知 SonarQube 已經啟動完成。
這裡暫時先 sleep 30 秒,等 SonarQube 先啟動,.NET Core 才開始執行 SonarScanner。
這裡還有改善的空間,也可以自行調整 sleep 時間。
第 3 行
1 | dotnet /opt/scanner/SonarScanner.MSBuild.dll begin /k:core2 /n:Core2 /v:1.0 /d:sonar.login=admin /d:sonar.password=admin /d:sonar.host.url=http://172.16.238.10:9000 |
使用 dotnet 執行 SonarScanner.MSBuild.dll,一開始以 begin 開頭:
- /k : SonarQube 對專案的 key,內部將以此 key 作為辨別,必須唯一
- /n : 在 SonarQube 網頁上顯示的專案名稱
- /v : 在 SonarQube 網頁上顯示的版本編號
- /d:sonar.login : 指定 SonarQube 帳號
- /d:sonar.password : 指定 SonarQube 密碼
- /d:sonar.host.url : 指定 SonarQube server IP 與 port
第 4 行
1 | dotnet build |
使用 dotnet build 編譯專案。
Script 語言不用編譯,可以直接使用 SonarQube Scanner 就可以檢查,但 C# 需要編譯,因此必須 dotnet build
第 5 行
1 | dotnet /opt/scanner/SonarScanner.MSBuild.dll end /d:sonar.login=admin /d:sonar.password=admin |
最後需加上 end,scanner 正式將 dotnet build 檢查出的結果寫入 SonarQube project
- 仍必須指定 SonarQube 的帳號密碼
執行 SonarScanner
1 | SonarScanner $ docker-compose up --build |
啟動 .NET Core 與 SonarQube container,並且自動執行 SonarScanner。
- –build : 重新建立 .NET Core 自訂 image,若有任何修改,將重新包進 image,確保
docker-compose是最新的 image
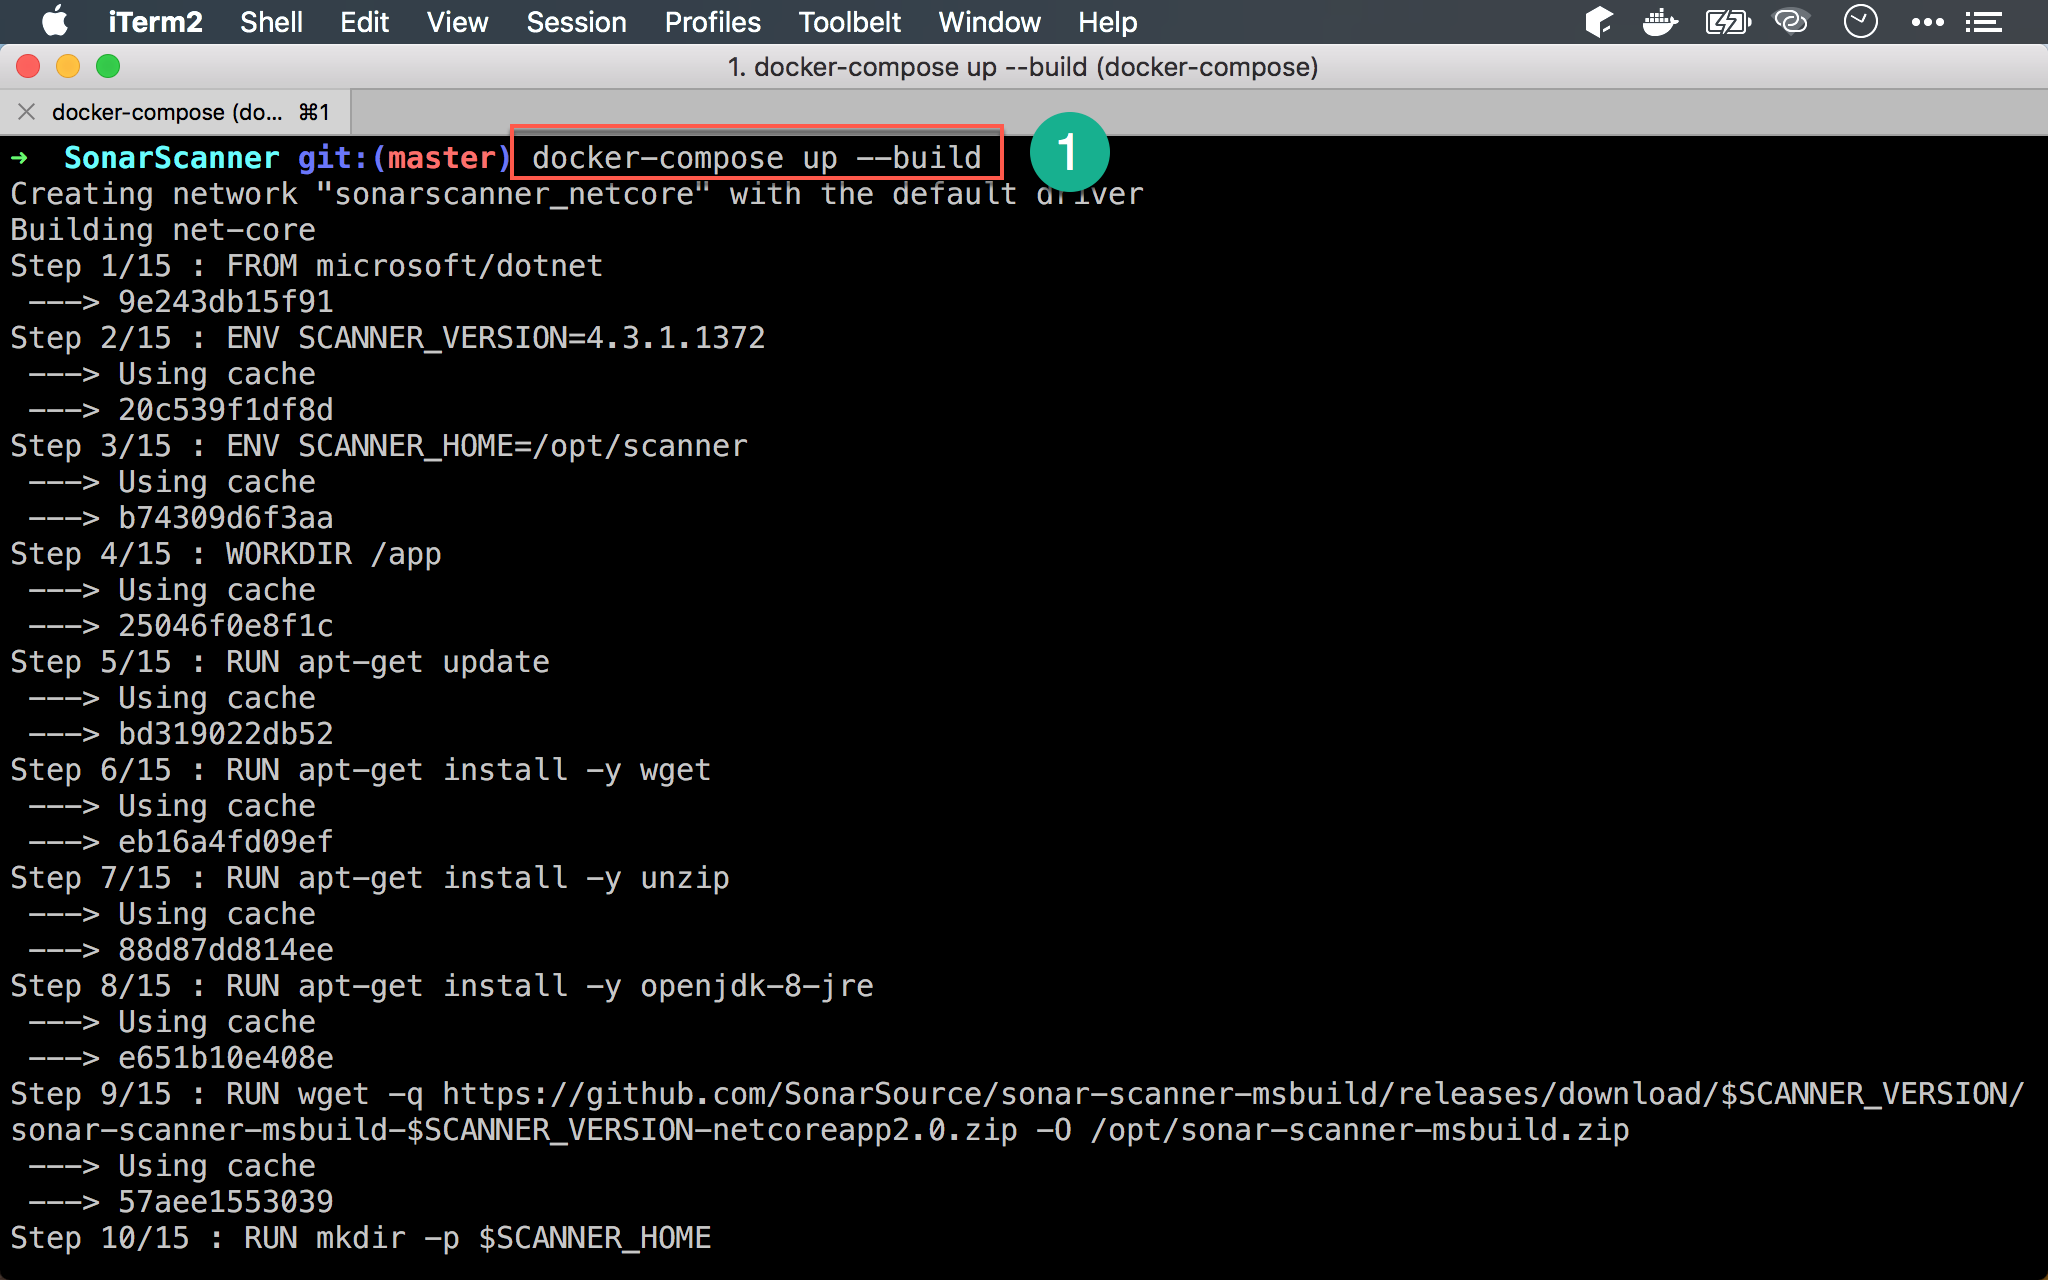
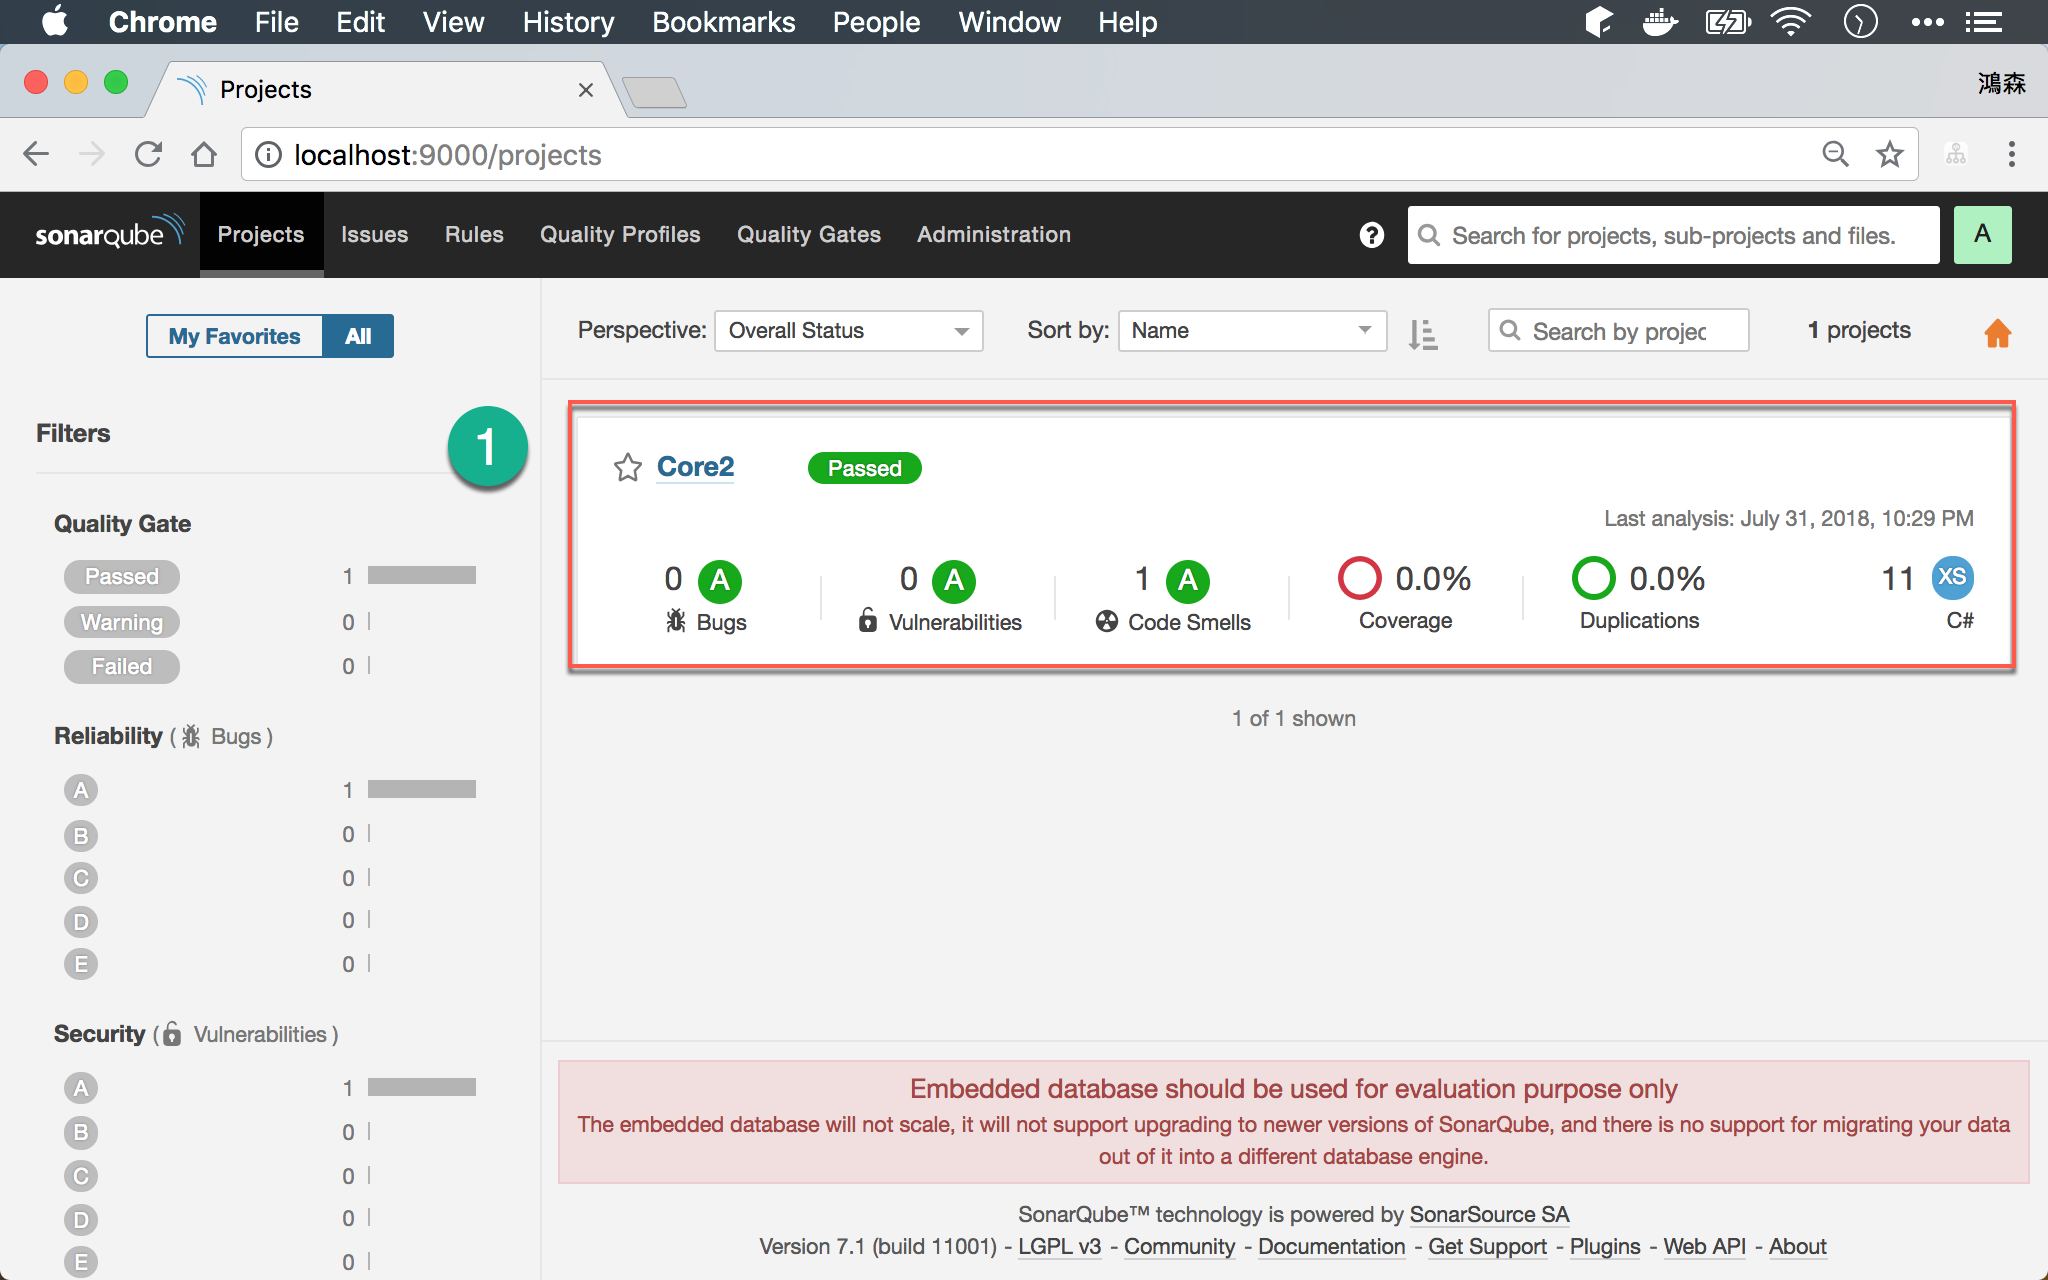
- 在 host 以
http://localhost:9000,將可看到 SonarQube 的檢查結果
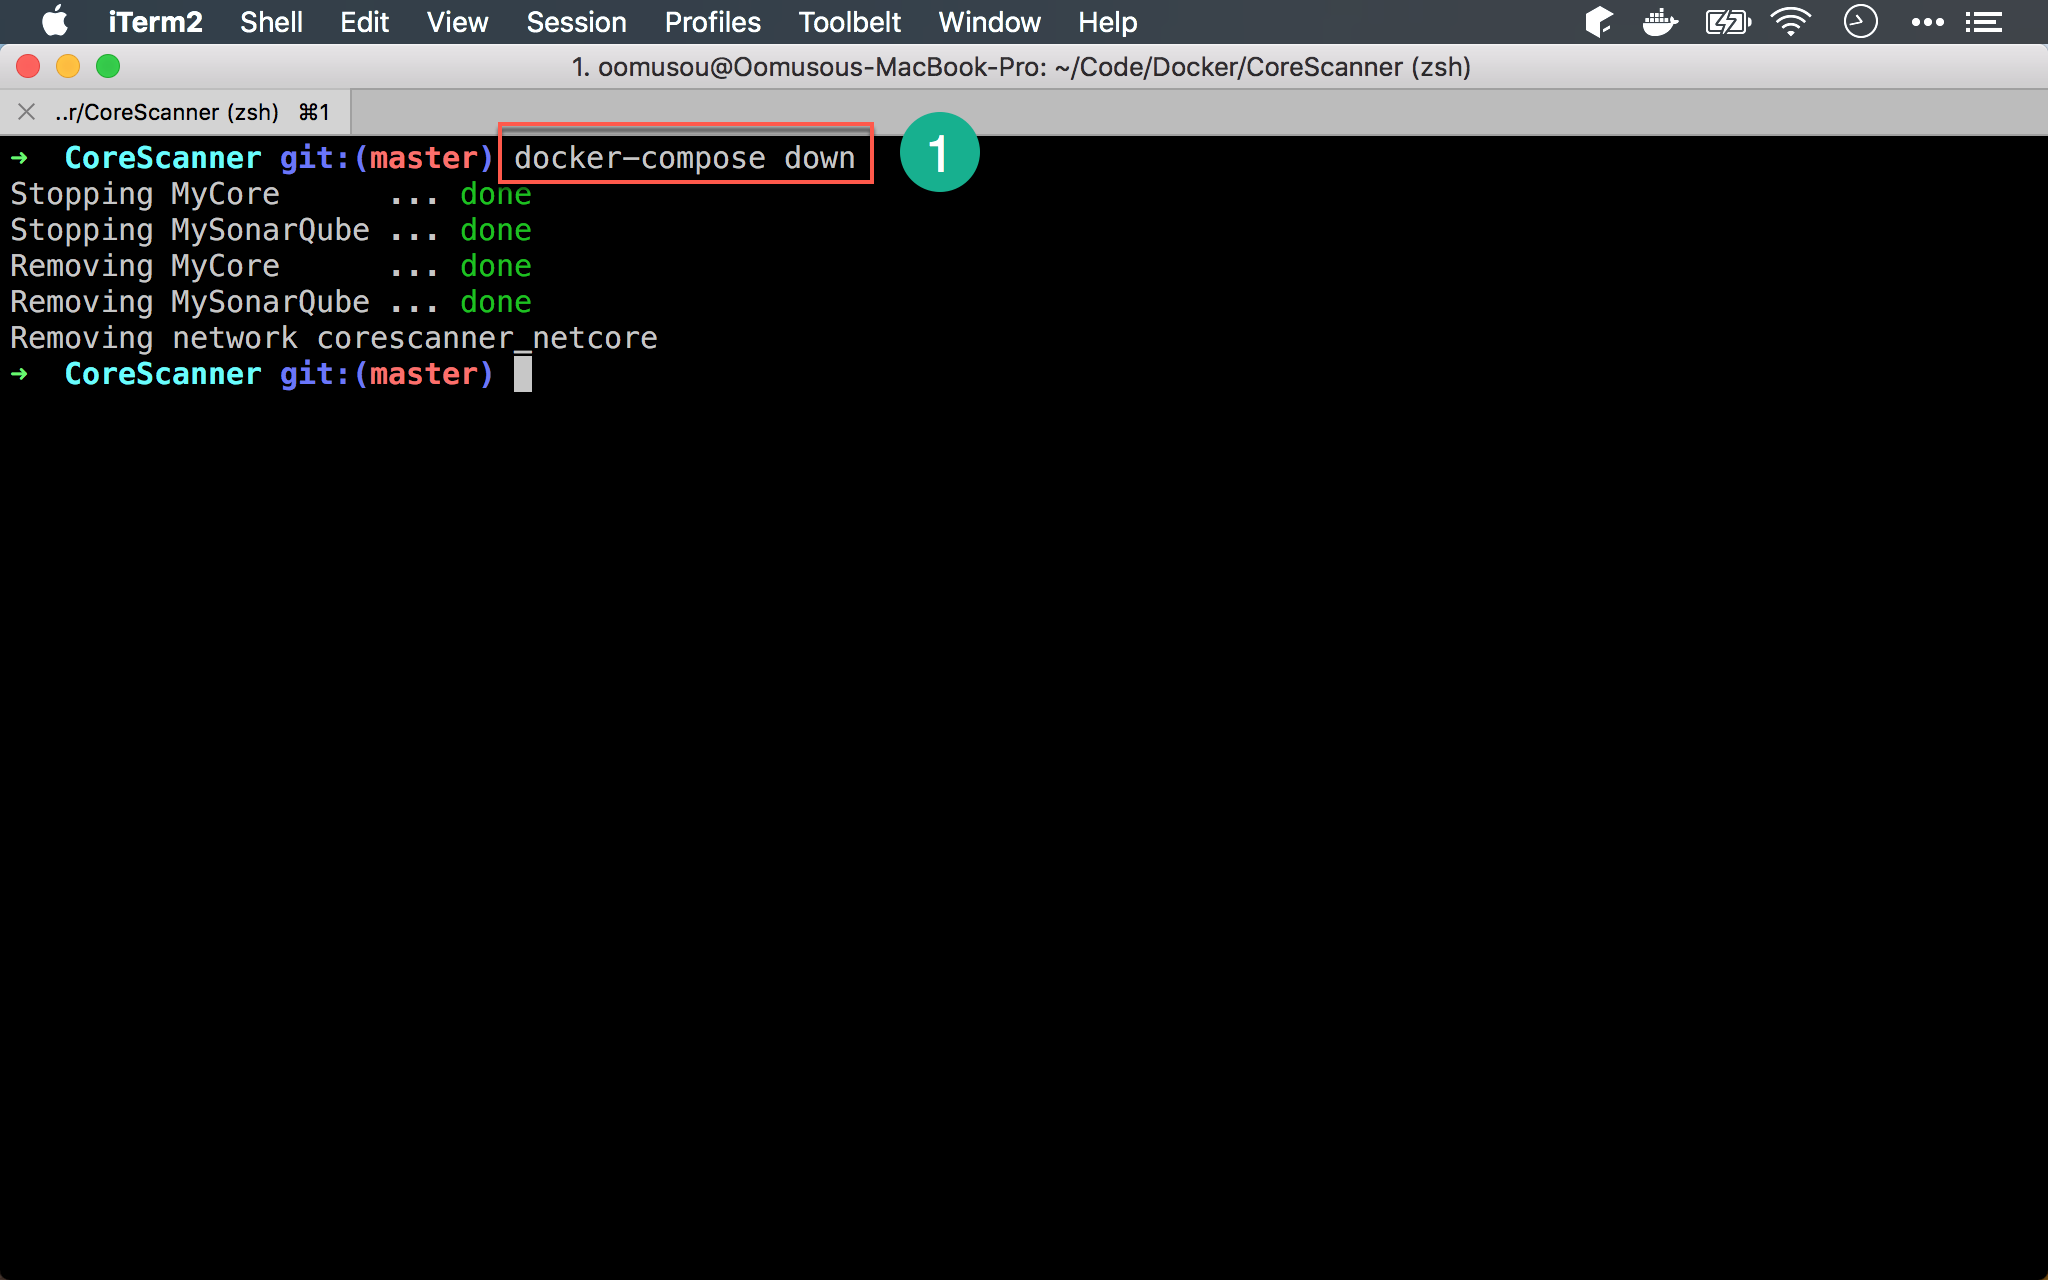
結束 Container
1 | $ docker-compose down |
Conclusion
- 由於 SonarScanner 已經被包在 Dockerfile 內,host 就不用再安裝 SonarScanner
- 沒有將 .NET Core 安裝在 SonarQube container 內,而是分別使用 .NET Core container 與 SonarQube container,符合 Microservice 精神
- 只要執行
docker-compose up --build,SonarScanner 就會自動啟動進行檢查
Sample Code
完整的範例可以在我的 GitHub 上找到