如何使用 .NET Core CLI 建立 Class Library ?
使用 .NET Core SDK 建立
Contents
除了 Console app 扮演 client 的角色,另外一個常見需求就是建立自己的 class library,我們可以使用 ng new classlib 建立 class library 型態專案。
Version
macOS High Sierra 10.13.3
.NET Core SDK 2.1.101
建立 Class Library 專案
1 | $ dotnet new classlib -o MyClassLib |
使用 dotnet new 建立 project。
- classlib : 建立 class library 類型專案
- -o :
ooutput,建立在MyClassLib目錄下
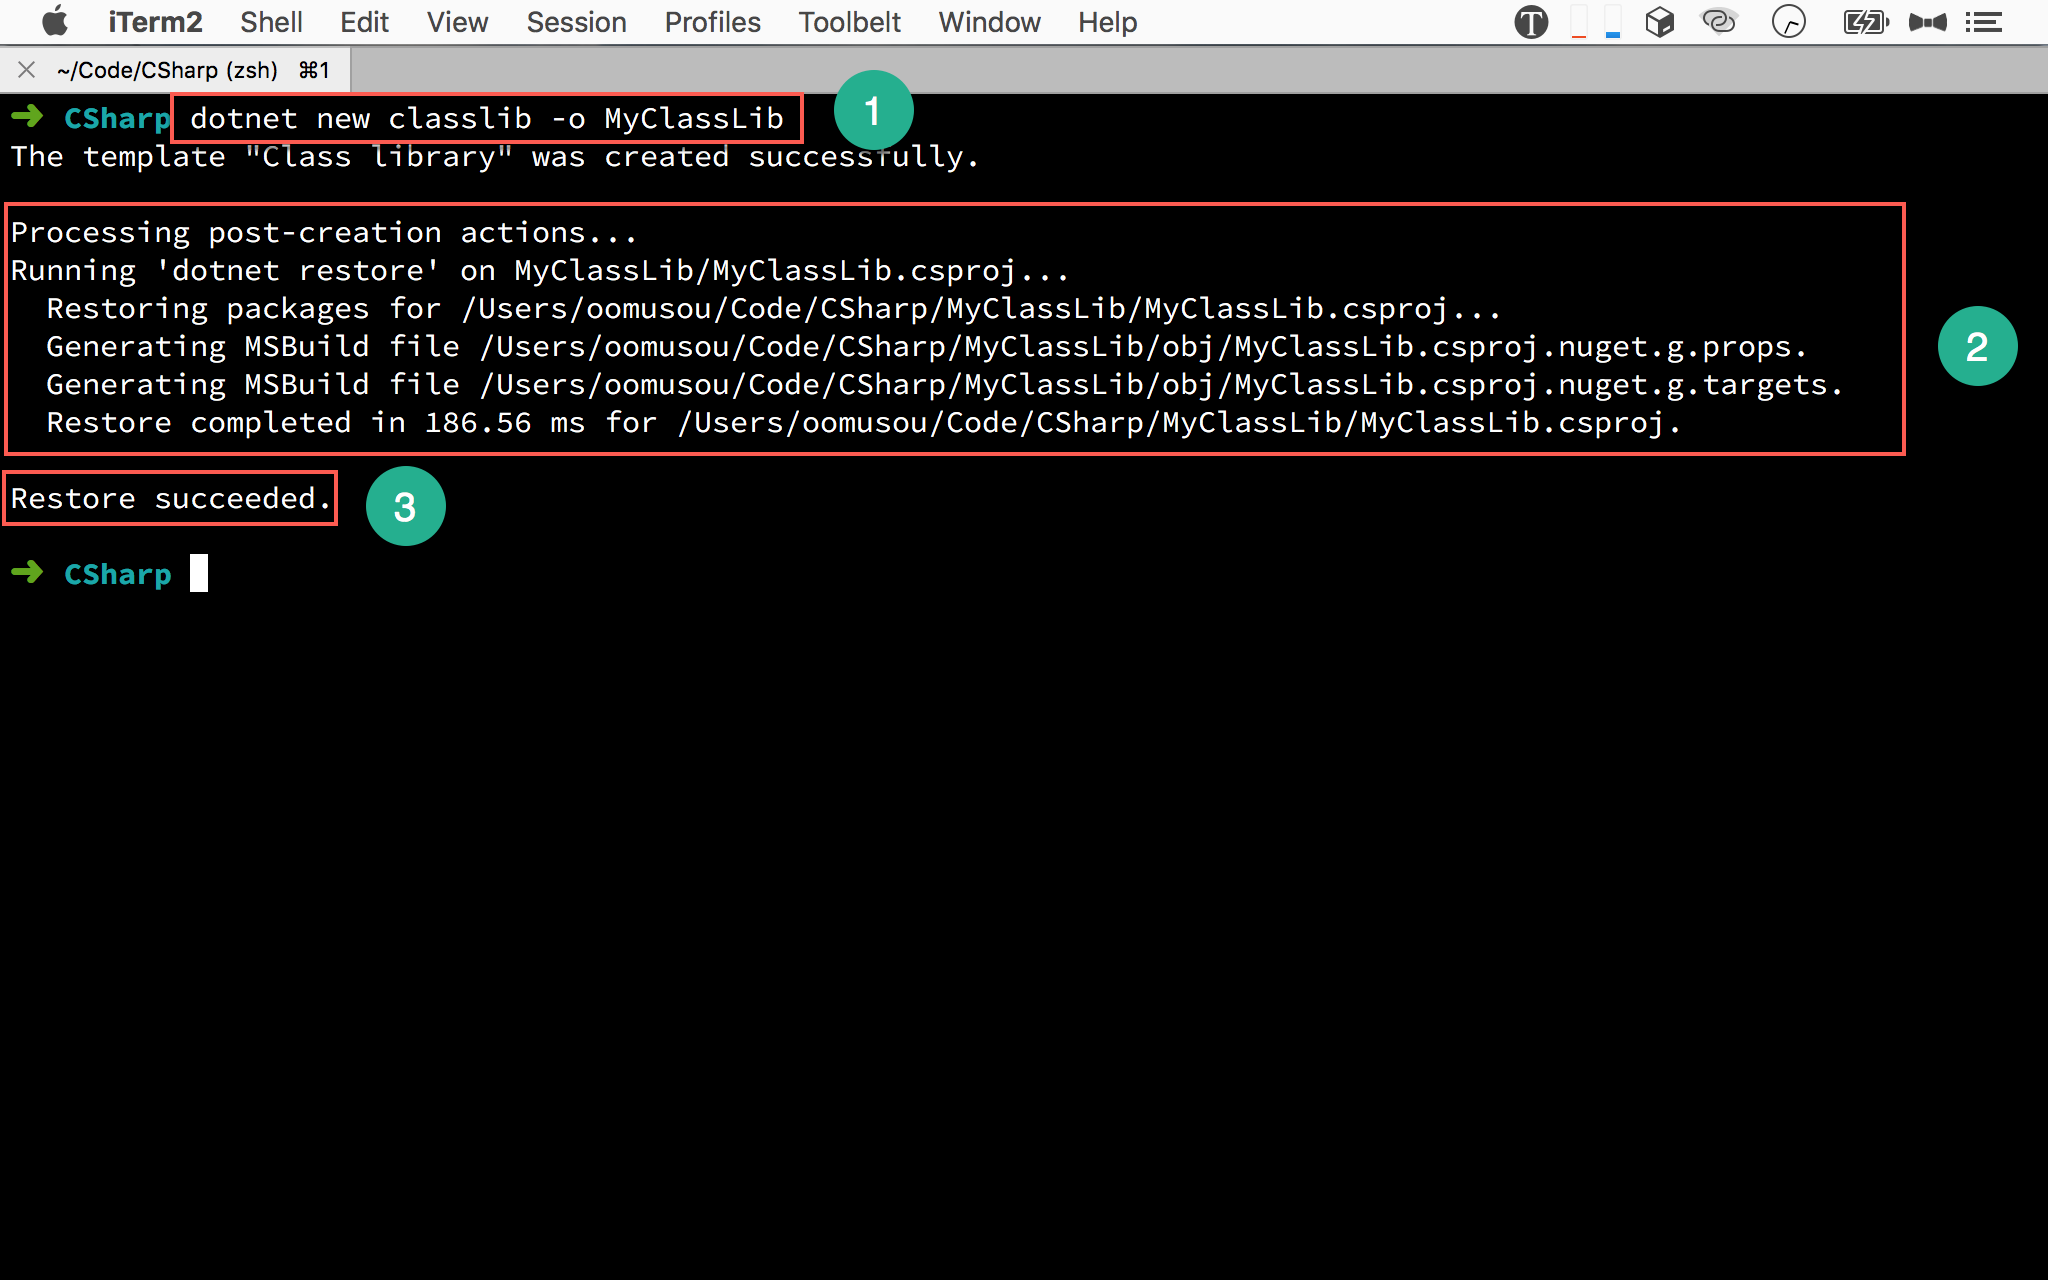
- 輸入
dotnet new classlib -o MyClasLib將 class library 類型專案建立在MyClassLib目錄下 - .NET Core SDK 開始建立專案所需的檔案
- 自動 restore dependency
使用 VS Code 開啟專案
1 | $ code MyClassLib |
使用 code 執行 VS Code,後面接開啟目錄名稱。
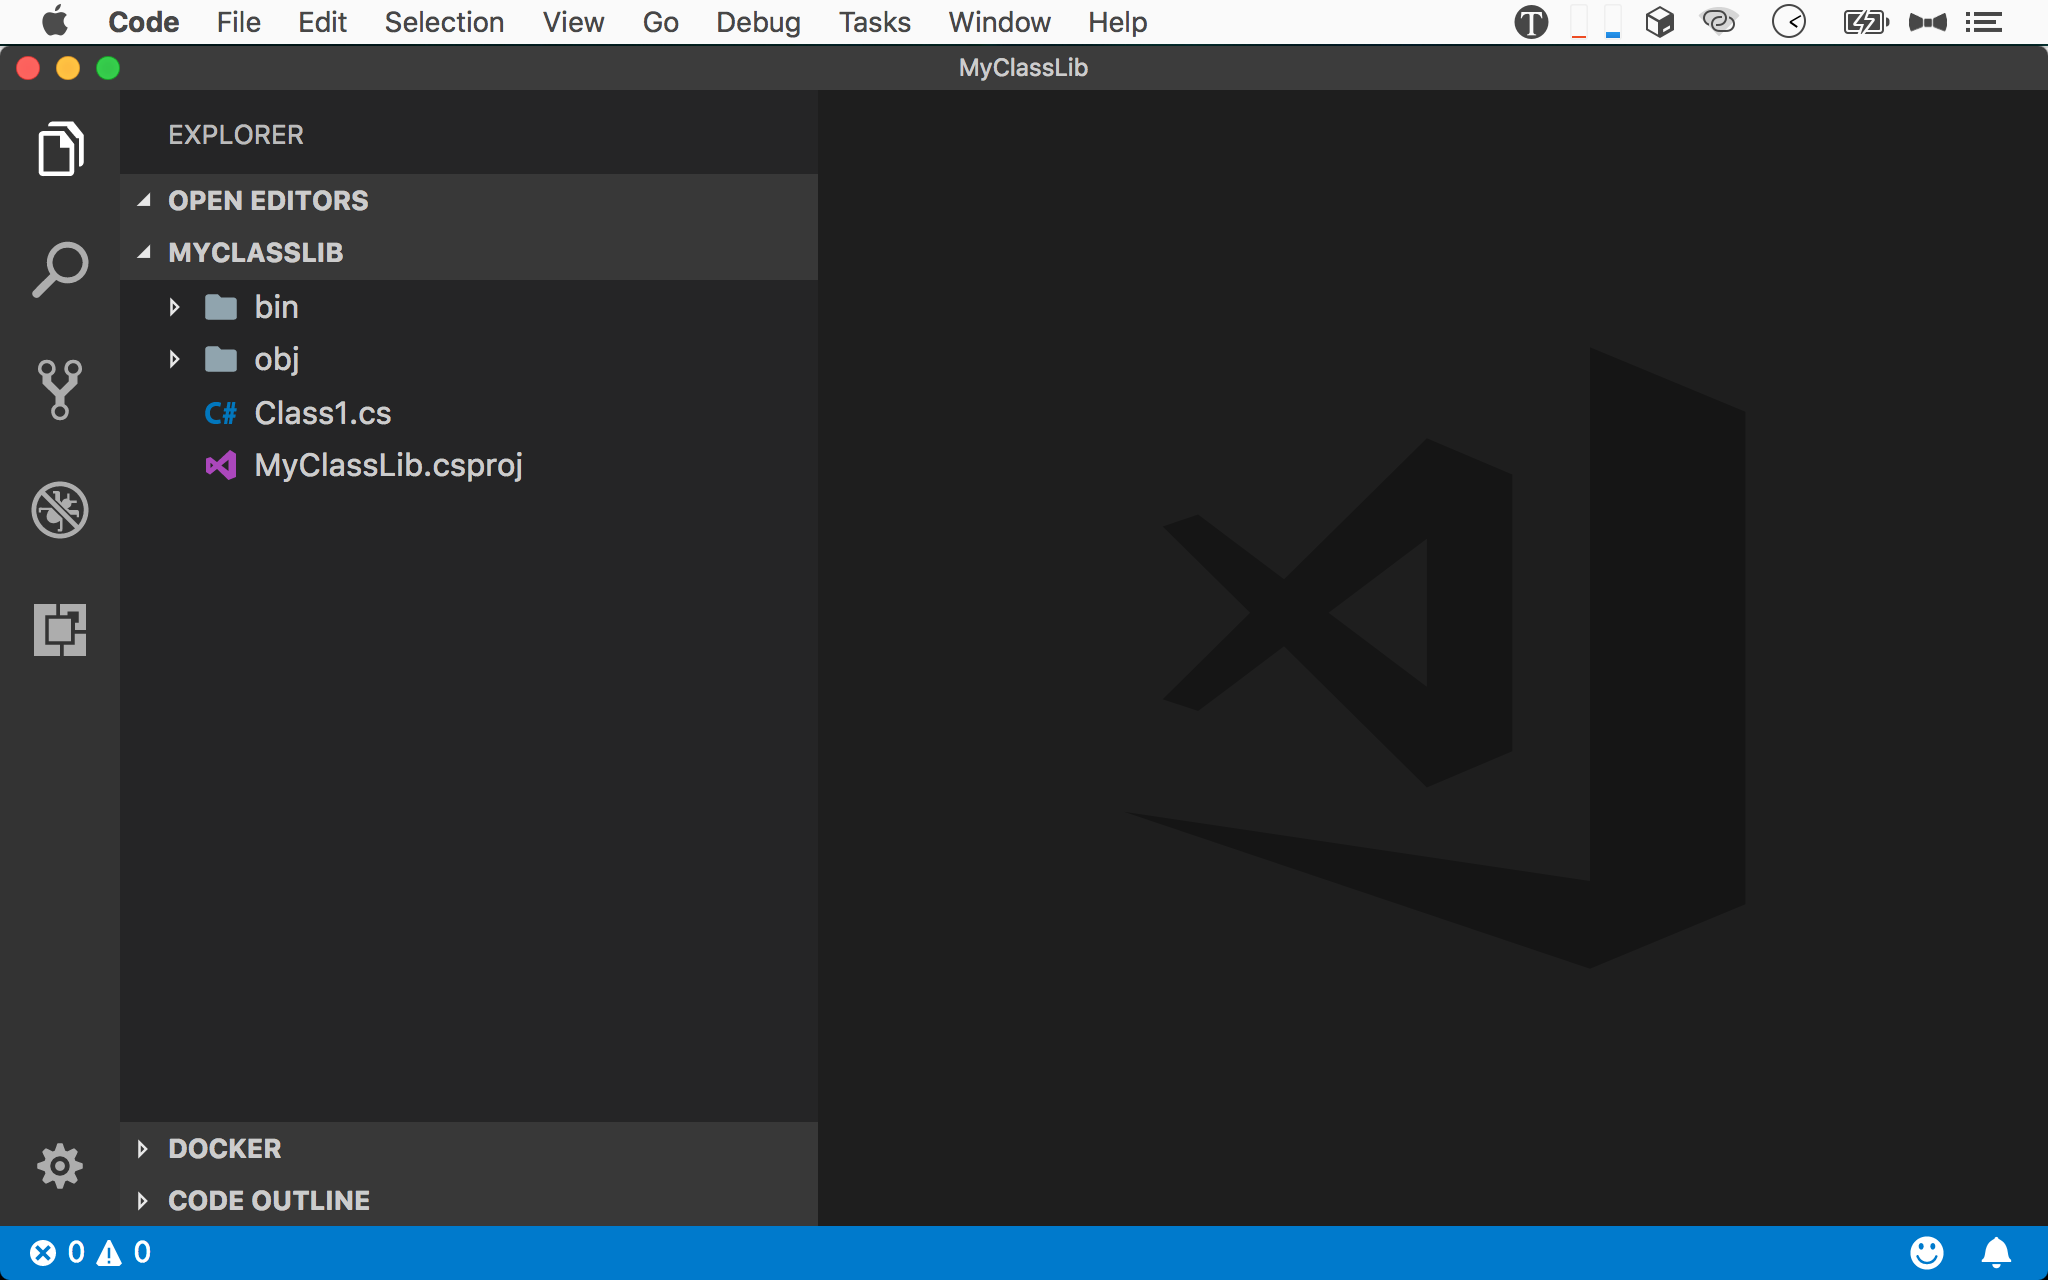
- 使用 VS Code 開啟
MyClassLib
編輯 CalculatorService.cs
CalculatorService.cs
1 | using System; |
建立 CalculatorService,並有一個 Sum()。

- 開啟
CalculatorService.cs - 建立
Sum()
編譯 Class Library
1 | ~/MyClassLib $ dotnet build -c Release |
使用 dotnet build 編譯專案。
- -c :
configuration,預設dotnet build是以Debug模式編譯,若要以Release編譯,需要配合-c參數
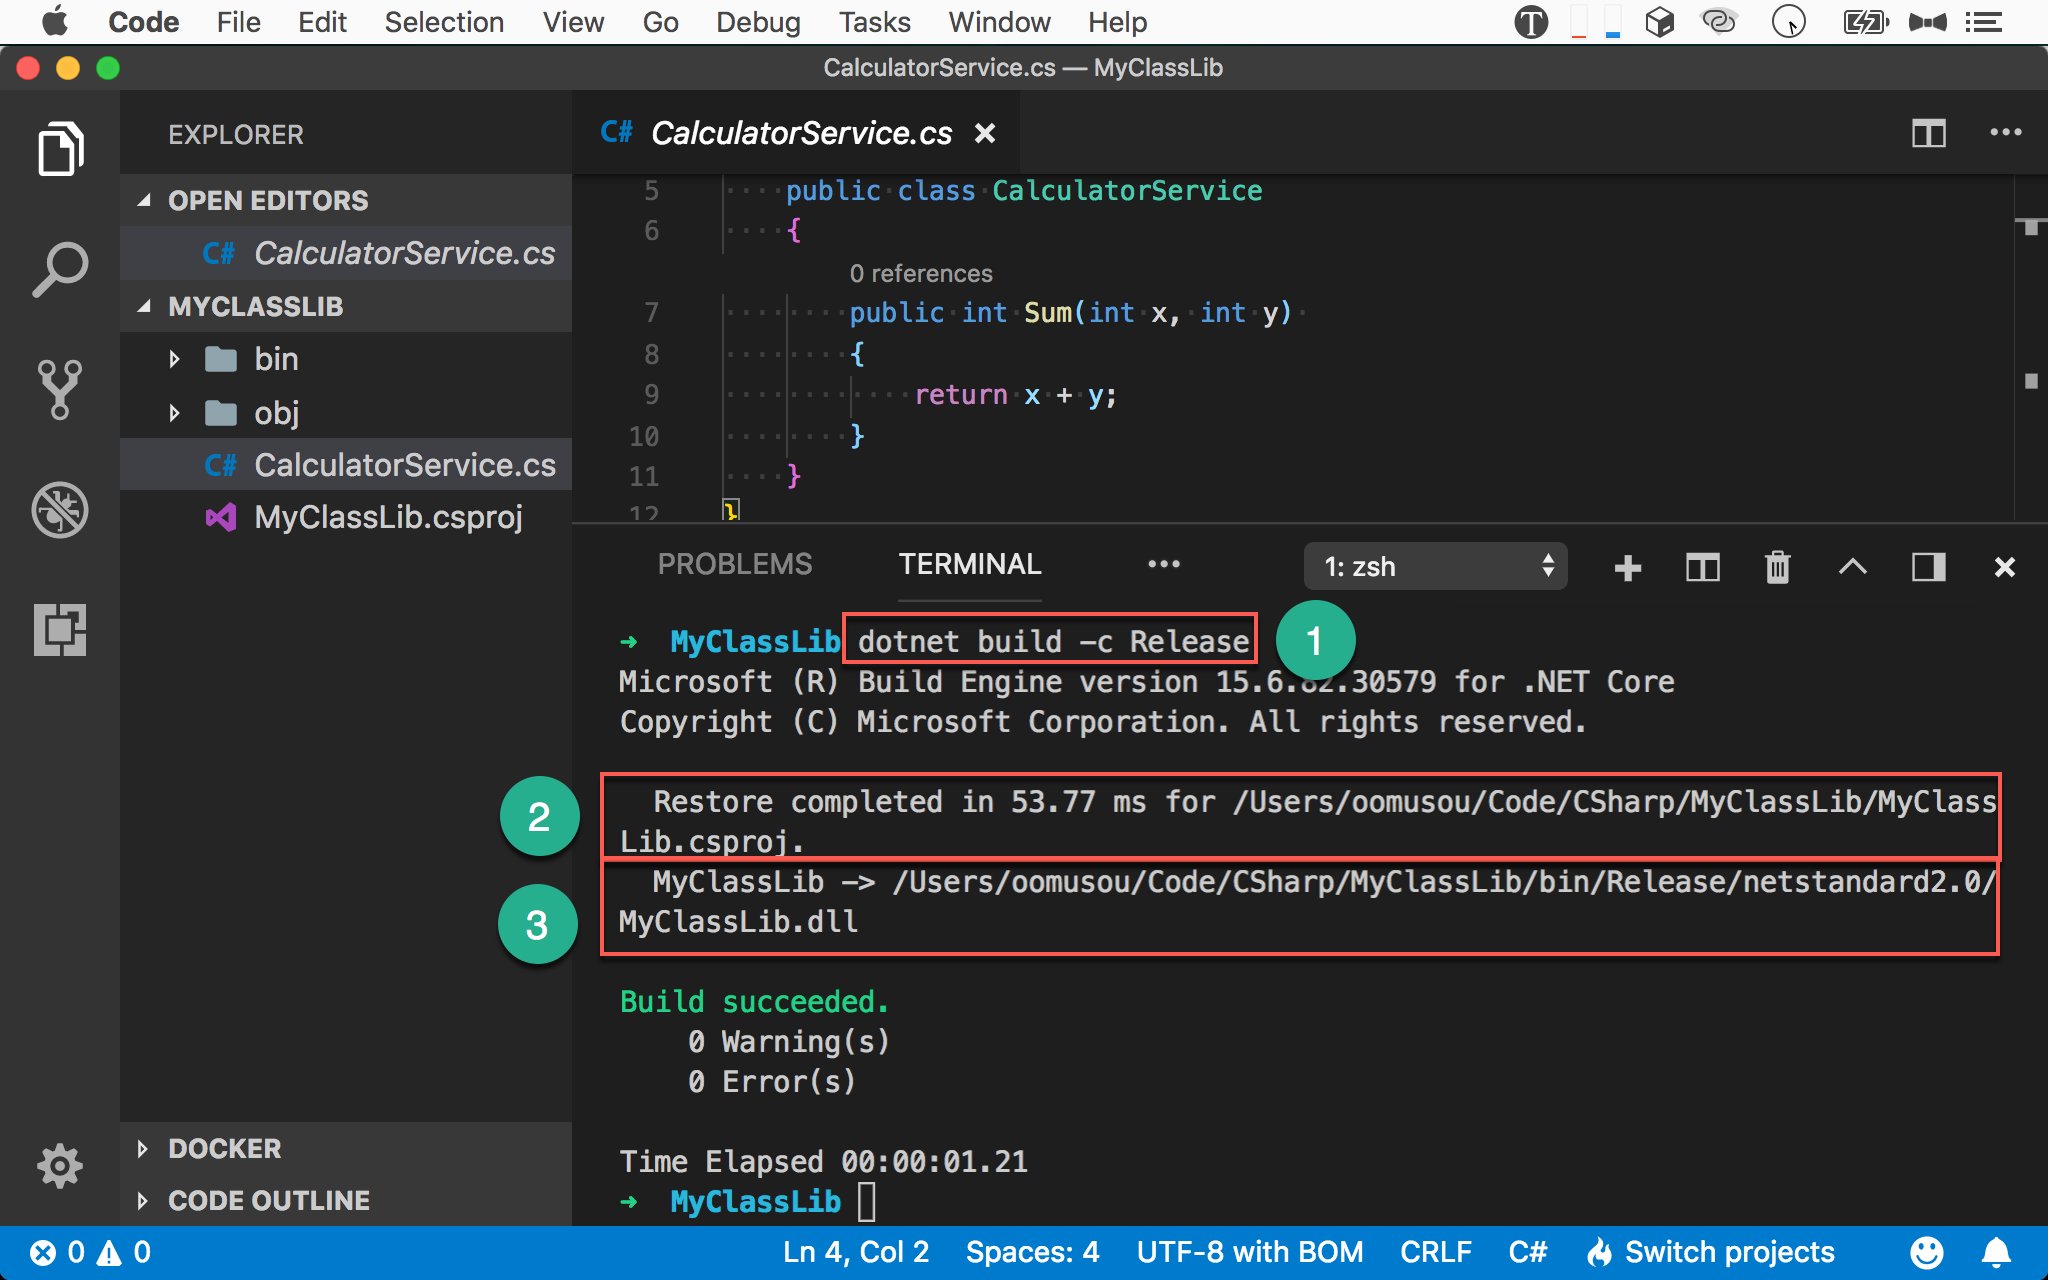
- 輸入
dotnet build -c Release以Release模式編譯 - 自動執行
dotnet restore - 最後 build 出
MyClassLib.dll
注意是 build 到
Release目錄
使用 MSBuild
1 | ~/MyClassLib $ dotnet msbuild /p:Configuration=Release |
使用 msbuild 編譯專案。
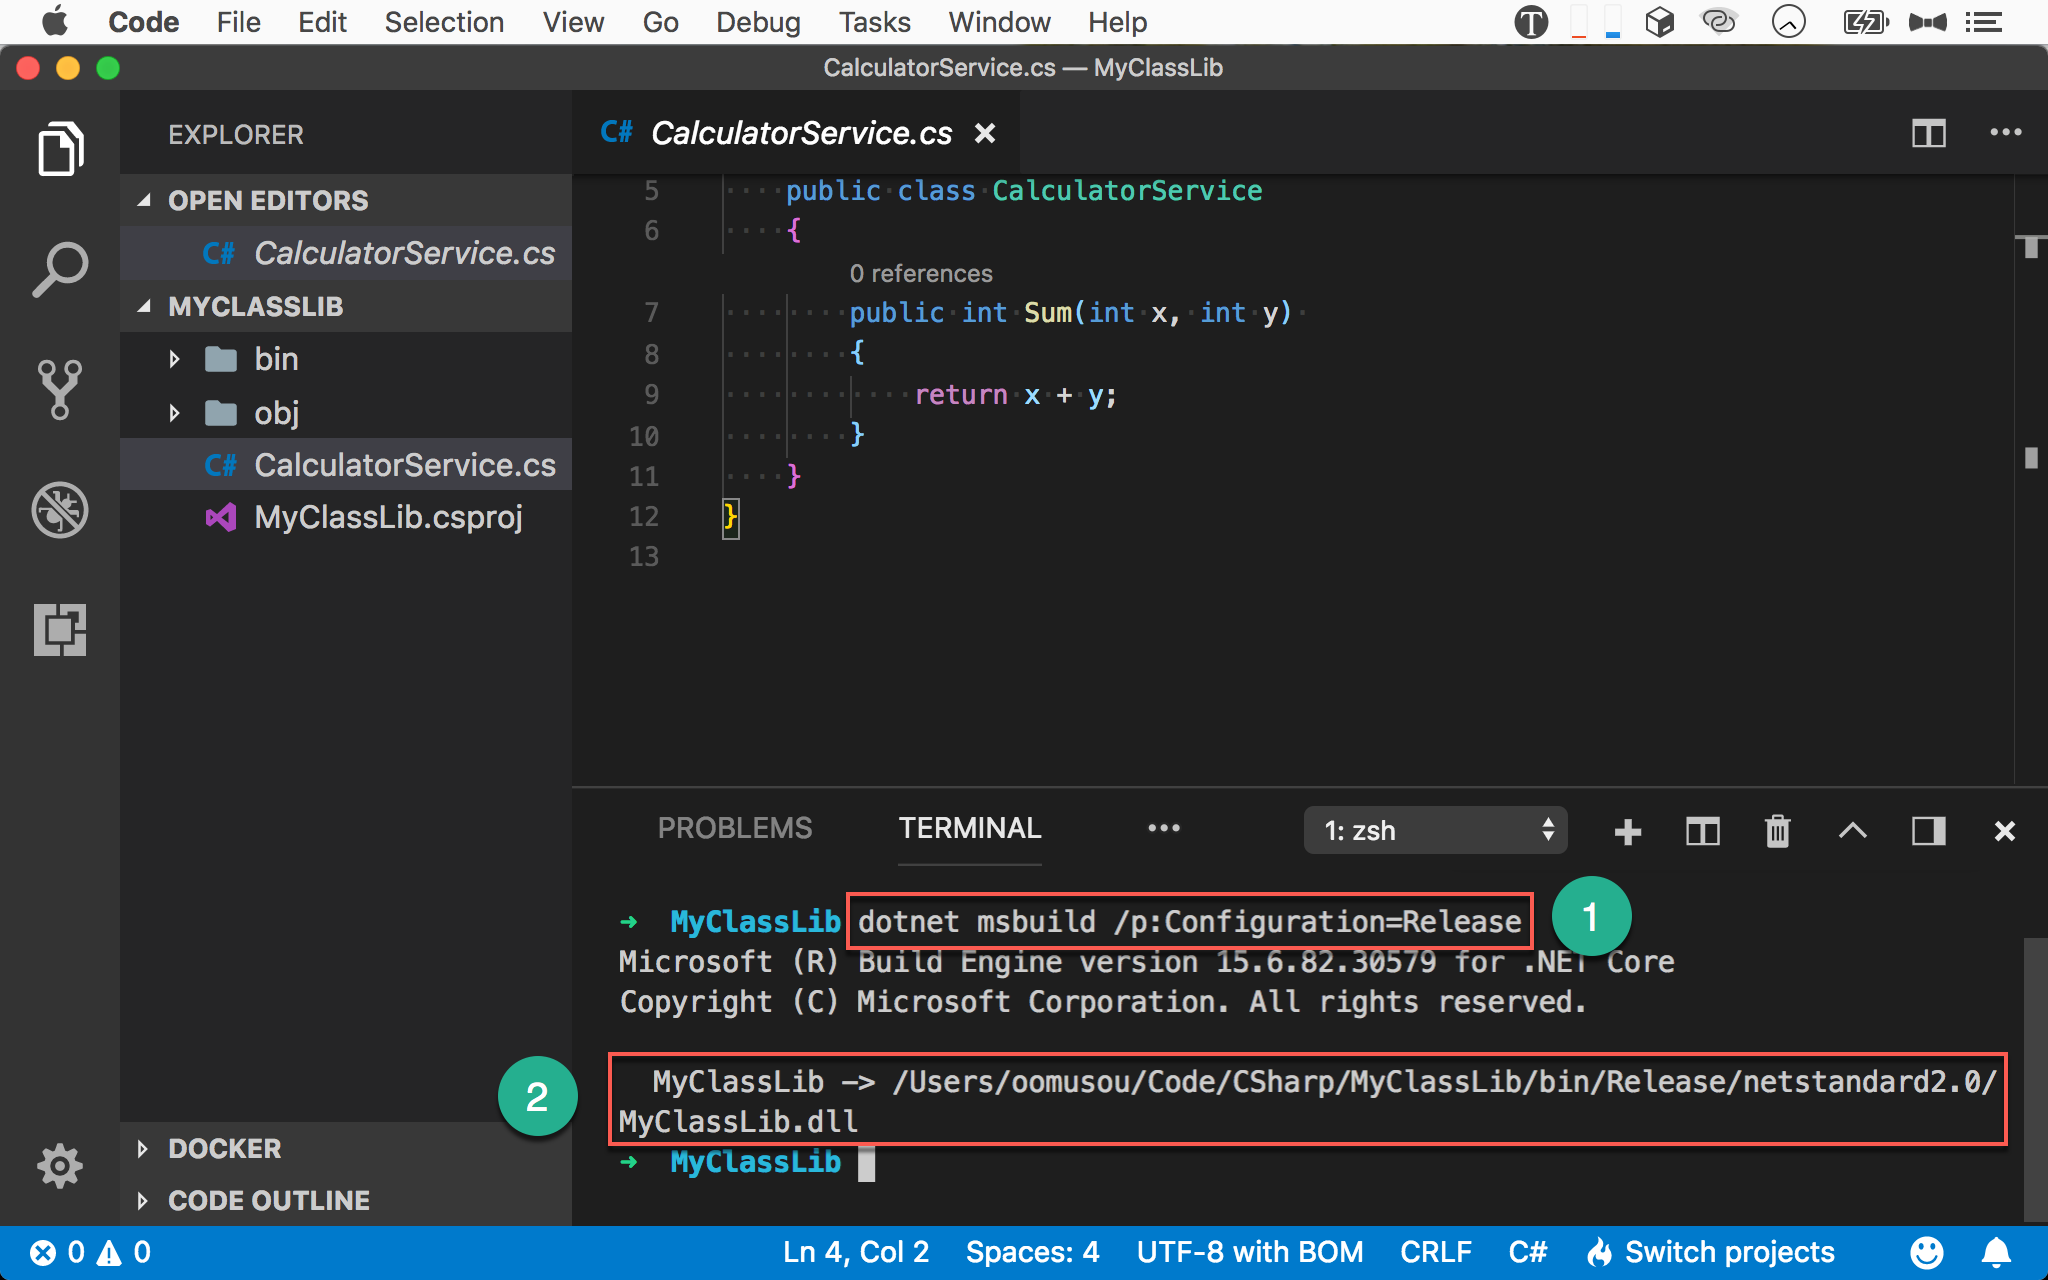
- 輸入
dotnet msbuild /p:Configuration=Release以Release模式編譯 - 最後 build 出
MyClassLib.dll
注意使用 MSBuild 時,並沒有執行
dotnet restore
建置 NuGet Package
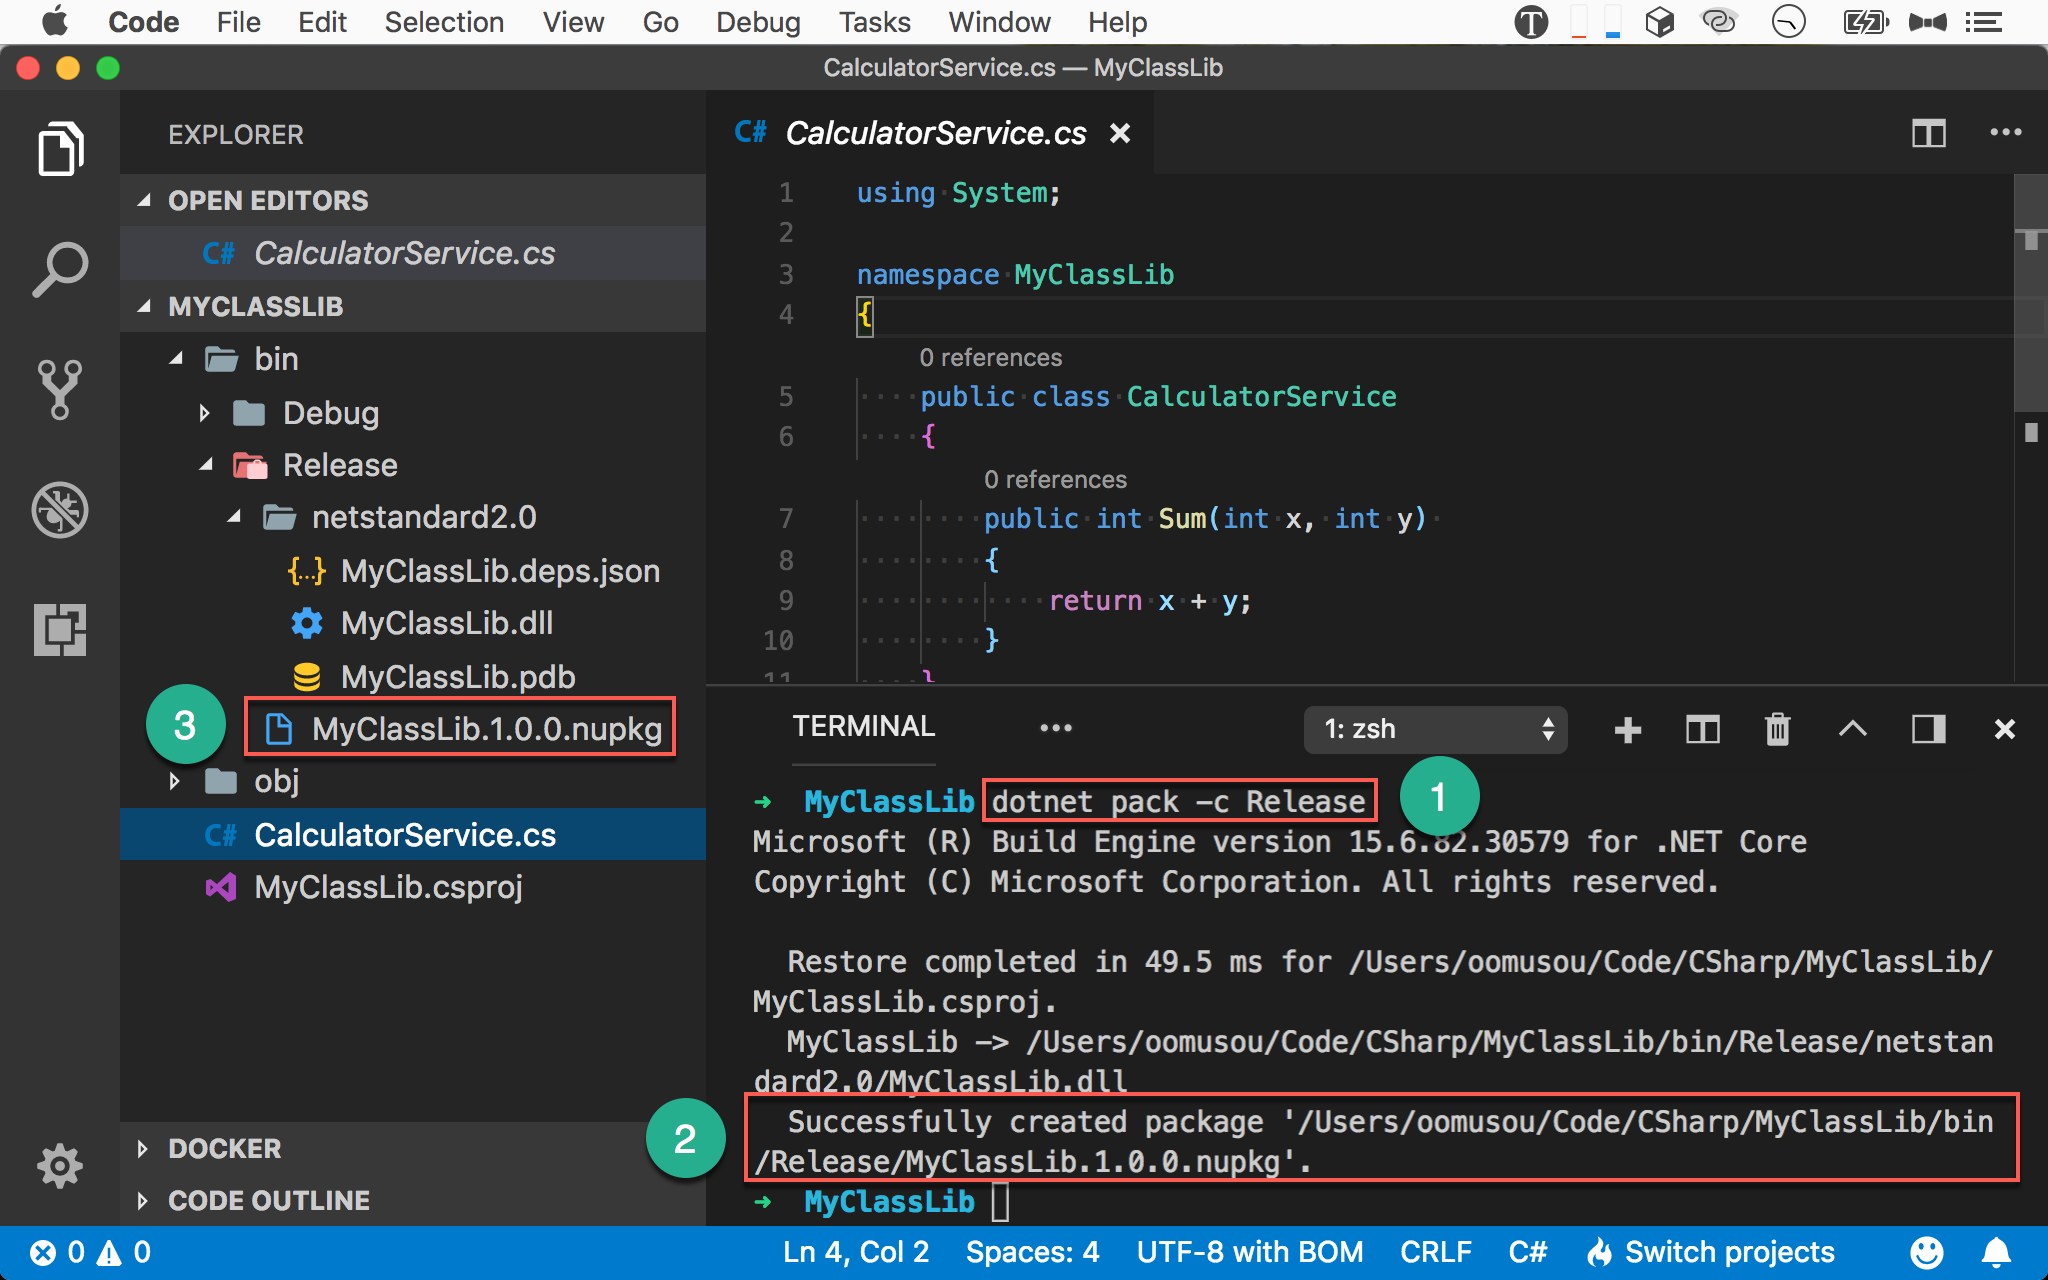
1 | ~/MyClassLib $ dotnet pack -c Release |
使用 dotnet pack 將 class library 打包成 Nuget package。
- -c :
configuration,預設dotnet pack是以Debug模式打包,若要以Release打包,需要配合-c參數
- 輸入
dotnet pack -c Release以Release模式打包 - 最後 build 出
MyClassLib.1.0.0.nupkg - 在
bin/Release/會看到MyClassLib.1.0.0.nupkg
發佈 Class Library
1 | ~/MyClassLib $ dotnet publish -c Release |
使用 dotnet publish 將編譯後的 dll 與其 dependency 整理到 publish 目錄,將來只要將此目錄 deploy 到 server 即可。
- -c :
configuration,預設dotnet publish是將Debug模式的 dll 整理至publish目錄,若要整理Release模式的的 dll,需要配合-c參數

- 輸入
dotnet msbuild /t:Publish /p:Configuration=Release以Release發佈 - 一樣發布
3個檔案
注意使用 MSBuild 時,並沒有執行
dotnet restore
Conclusion
- Class library 與 console app 的建置模式並沒有什麼差別,因為 console app 其實也是 dll
- 一樣可以使用 MSBuild 編譯與發佈 class library,但不會事先執行
dotnet restore